 by
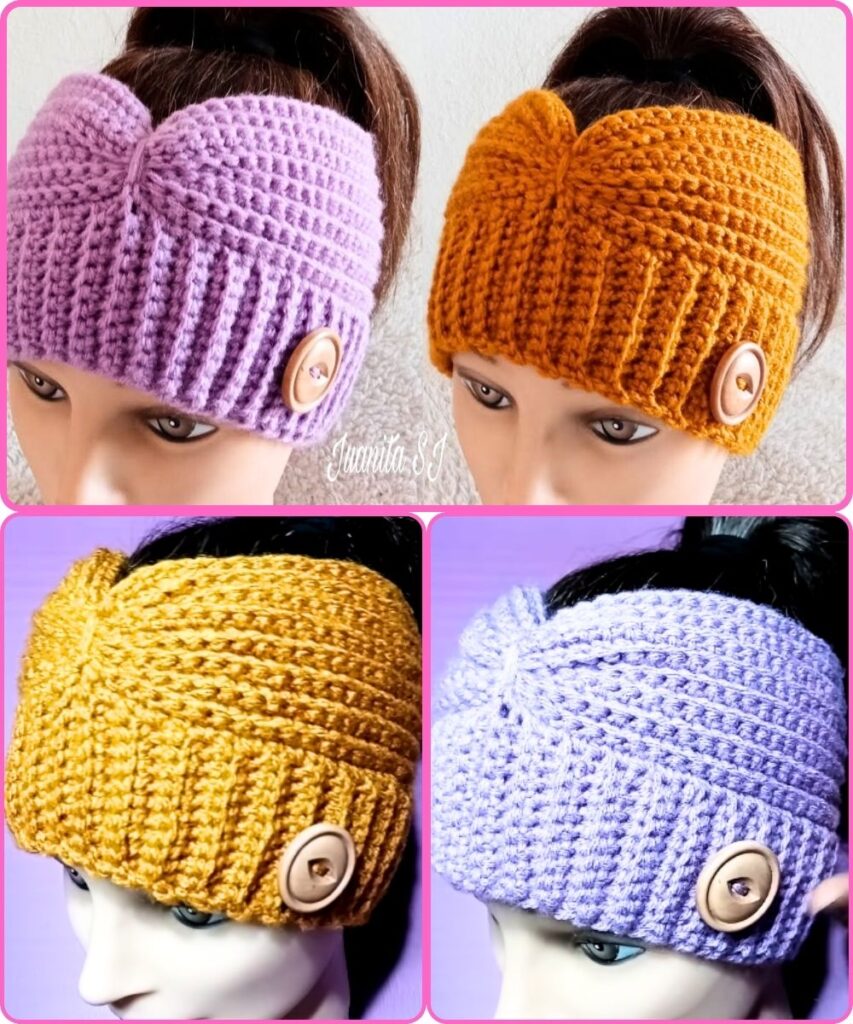
by Okay, this is an excellent and versatile request! We’ll cover two distinct crochet patterns here: a simple adjustable headband, and then a versatile ponytail hat, both designed to be customizable for “all sizes.”
Let’s break them down:
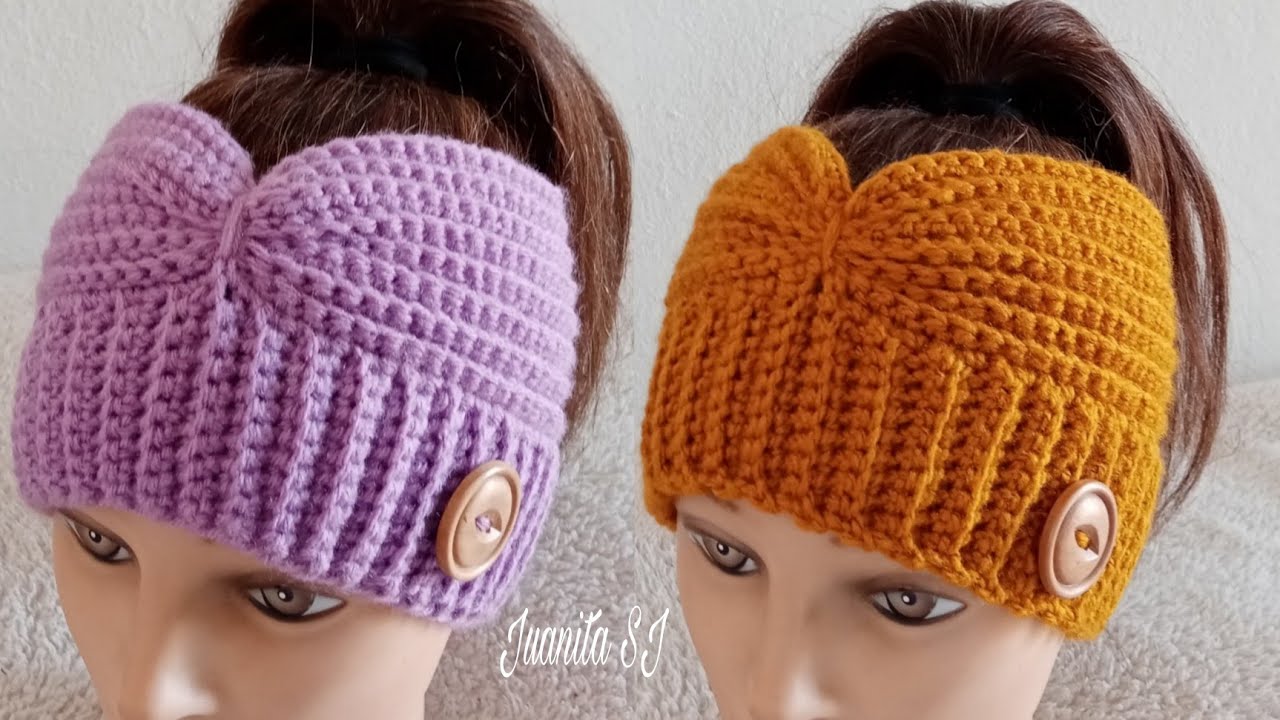
1. How to Make an Adjustable Crochet Headband (All Sizes)
This headband is worked flat and then seamed, making it very flexible for any head size.
Skill Level: Beginner
Finished Size: Customizable
Gauge: Not critical for this project, but aiming for consistent tension is good.
- For reference: Approx. 4 single crochet (sc) stitches per inch with recommended yarn and hook.
Materials:
- Yarn: Worsted weight (Aran/10-ply) cotton or acrylic yarn. (e.g., Lily Sugar’n Cream, Caron Simply Soft, Lion Brand Vanna’s Choice)
- Yardage: Approx. 30-80 yards, depending on size and width.
- Crochet Hook: US H/8 (5.0 mm) or size recommended for your yarn.
- Yarn Needle (Tapestry Needle): For weaving in ends and seaming.
- Scissors
- Measuring Tape: Essential for custom sizing!
Abbreviations (US Terms):
- ch: chain
- sc: single crochet
- sl st: slip stitch
- st(s): stitch(es)
- fo: fasten off
Pattern Notes:
- This headband is worked flat in rows to create a strip, then seamed into a loop.
- The turning chain (ch 1 at the beginning of each row) does not count as a stitch.
- The width of the headband is determined by your starting chain.
- The length of the headband is determined by the number of rows you crochet.
Instructions for Adjustable Headband:
Step 1: Determine Desired Headband Dimensions
The beauty of this pattern is its flexibility.
- Head Circumference: Measure the head you are making the headband for. A good rule of thumb is to make the headband about 2 inches (5 cm) shorter than the actual head circumference, as crochet fabric has some stretch.
- Approximate Head Circumferences:
- Baby (0-6 mo): 14-17″ (35.5-43 cm) -> Headband Length: 12-15″ (30.5-38 cm)
- Baby (6-12 mo): 16-19″ (40.5-48 cm) -> Headband Length: 14-17″ (35.5-43 cm)
- Toddler (1-3 yrs): 18-20″ (45.5-51 cm) -> Headband Length: 16-18″ (40.5-45.5 cm)
- Child (3-10 yrs): 19-21″ (48-53.5 cm) -> Headband Length: 17-19″ (43-48 cm)
- Teen/Adult Small: 20-22″ (51-56 cm) -> Headband Length: 18-20″ (45.5-51 cm)
- Adult Medium/Large: 22-24″ (56-61 cm) -> Headband Length: 20-22″ (51-56 cm)
- Approximate Head Circumferences:
- Desired Headband Width: How wide do you want the finished headband to be?
- Narrow: 1-1.5 inches (2.5-4 cm)
- Medium: 2-3 inches (5-7.5 cm)
- Wide: 3.5-5 inches (9-12.5 cm)
Step 2: Starting Chain (Sets Headband Width)
Chain an appropriate number of stitches to achieve your desired width. A good starting point is to aim for a chain that is roughly 0.5 inches (1.25 cm) more than your desired width, as the first row will slightly reduce the width.
- For approx. 1″ (2.5 cm) wide: Ch 5
- For approx. 2″ (5 cm) wide: Ch 9
- For approx. 3″ (7.5 cm) wide: Ch 13
- For approx. 4″ (10 cm) wide: Ch 17
- For approx. 5″ (12.5 cm) wide: Ch 21
- You can customize by chaining until your desired width is reached, remembering it will shrink slightly in height on the first row.
Step 3: Crocheting the Body of the Headband
We’ll use single crochet for a dense, sturdy fabric.
Row 1: Sc in the 2nd ch from the hook, sc in each remaining ch across. (You will have 1 sc less than your starting chain)
- Example: If you chained 9, you will have 8 sc.
Row 2: Ch 1 (does not count as a stitch), turn your work. Sc in each st across. (Same stitch count as Row 1)
Repeat Row 2 until your crocheted strip reaches the desired length determined in Step 1.
- Gently stretch the fabric as you measure to account for natural stretch.
Step 4: Fasten Off
Once your headband strip is the correct length:
- Cut the yarn, leaving a long tail (at least 12-18 inches / 30-45 cm) for seaming.
- Yarn over and pull the tail completely through the loop on your hook to secure.
Step 5: Seaming the Headband
- Fold your crocheted strip in half lengthwise, bringing the two short ends together.
- Thread the long yarn tail onto your yarn needle.
- Align the stitches of both ends carefully.
- Whip Stitch (Recommended for beginners): Insert your needle through both loops of a stitch on one end, then through both loops of the corresponding stitch on the other end. Pull through. Repeat, working from one side of the headband to the other.
- Securely weave in any remaining loose ends into the fabric using your yarn needle. Trim excess yarn.
Headband Customization & Tips:
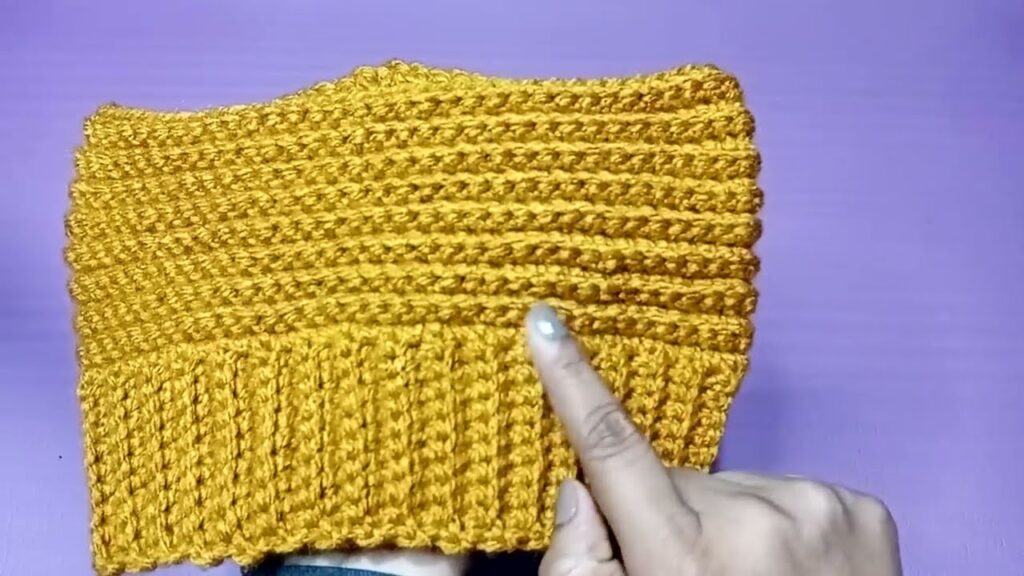
- Ribbed Look: For a stretchy, ribbed headband, work all rows (after the first) in single crochet in the back loop only (sc BLO).
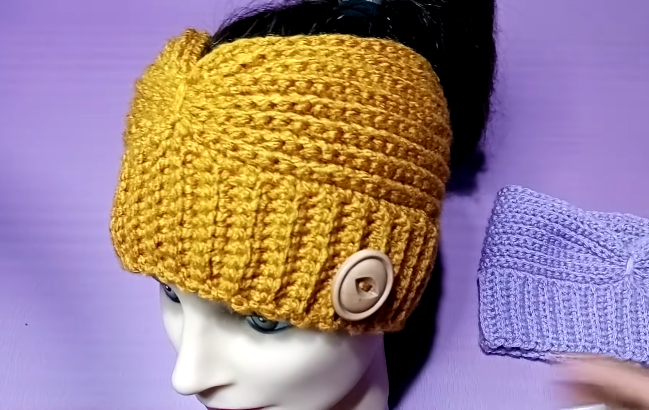
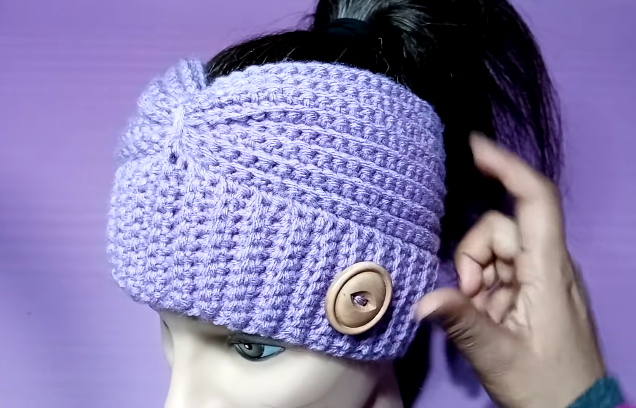
- Twisted Headband: Instead of a simple seam, create a twist! After crocheting your strip, overlap the two ends in the center (like making an “X”). Fold the bottom arm of the “X” up and the top arm down, so the four layers/corners of the “X” are aligned. Carefully seam all four layers together through the center. This creates a stylish twist at the front.
- Different Stitches: Try half double crochet (hdc) or double crochet (dc) for a faster or lacier fabric. Adjust your starting chain accordingly as these stitches are taller.
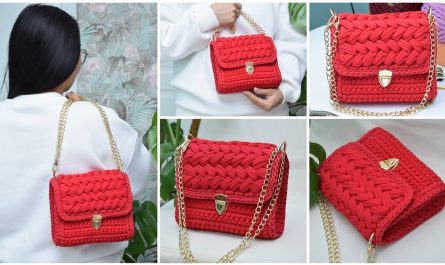
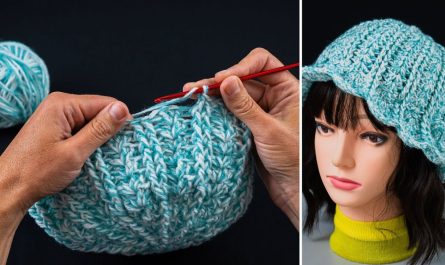
2. How to Make a Crochet Ponytail Hat (All Sizes)
This pattern is worked in the round, starting from the top. It features an opening at the crown for a ponytail or bun.
Skill Level: Intermediate Beginner (Requires working in the round, increasing, and basic shaping)
Finished Size: Customizable
Gauge: This is critical for a good fit!
- For Hat Body: 6 dc = 2 inches (5 cm); 3 dc rows = 2 inches (5 cm)
- Check your gauge before starting the main hat! Make a swatch: Chain 12, dc in 3rd ch from hook and across. Ch 2, turn, dc across for 4 rows. Measure. Adjust hook size if needed (larger hook for fewer stitches per inch, smaller for more).
Materials:
- Yarn: Worsted weight (Aran/10-ply) acrylic or wool blend. (e.g., Caron Simply Soft, Lion Brand Vanna’s Choice, Red Heart Super Saver)
- Yardage: Approx. 150-250 yards, depending on size.
- Crochet Hook: US H/8 (5.0 mm)
- Yarn Needle (Tapestry Needle): For weaving in ends.
- Scissors
- Stitch Marker: Highly recommended for working in the round.
Abbreviations (US Terms):
- ch: chain
- sl st: slip stitch
- sc: single crochet
- hdc: half double crochet
- dc: double crochet
- inc: increase (e.g., “2 dc in next st” for a dc increase)
- st(s): stitch(es)
- sk: skip
- fo: fasten off
- [ ]: repeat instructions in brackets
- ( ): total stitch count for the round
Hat Sizing Chart (Approximate):
| Size | Head Circumference | Hat Circumference (Approx.) | Hat Height (Crown to Brim) |
| Baby (0-6 mo) | 14-17″ (35.5-43 cm) | 12-14″ (30.5-35.5 cm) | 5.5-6″ (14-15 cm) |
| Baby (6-12 mo) | 16-19″ (40.5-48 cm) | 14-16″ (35.5-40.5 cm) | 6.5-7″ (16.5-18 cm) |
| Toddler (1-3 yrs) | 18-20″ (45.5-51 cm) | 16-18″ (40.5-45.5 cm) | 7-7.5″ (18-19 cm) |
| Child (3-10 yrs) | 19-21″ (48-53.5 cm) | 17-19″ (43-48 cm) | 7.5-8″ (19-20.5 cm) |
| Teen/Adult Small | 20-22″ (51-56 cm) | 18-20″ (45.5-51 cm) | 8.5-9″ (21.5-23 cm) |
| Adult Medium/Large | 22-24″ (56-61 cm) | 20-22″ (51-56 cm) | 9-10″ (23-25.5 cm) |
Export to Sheets
Note: Hat circumference should be 1-2 inches smaller than head circumference for a snug fit. Hat height depends on how much slouch you want.
Pattern Notes:
- This hat is worked in continuous rounds, so use a stitch marker to mark the first stitch of each round. Do not join with a slip stitch unless indicated.
- The chain 2 at the beginning of rounds does not count as a stitch.
- The “top opening” is created by starting with a chain circle instead of a magic ring, or by skipping a final “increase” round.
Instructions for Crochet Ponytail Hat:
Part 1: Creating the Top Opening & Crown
The size of your top opening determines how large a ponytail/bun it can accommodate. A larger starting chain creates a larger hole.
- For a smaller opening (for thinner ponytails): Start with Ch 12. Sl st to first ch to form a ring.
- For a medium opening (standard ponytail/bun): Start with Ch 15. Sl st to first ch to form a ring.
- For a larger opening (thick bun/messy bun): Start with Ch 18-20. Sl st to first ch to form a ring.
Round 1: Ch 2 (does not count as a st). Work 18 (or 24, or 30 for larger openings) dc stitches into the ring. Do not join. Place stitch marker in the first dc. (18/24/30 dc)
- This will be the base of your crown increases.
Round 2: [2 dc in next st, dc in next st] repeat around. (27/36/45 dc)
- Move stitch marker up to the first stitch of the new round.
Round 3: [2 dc in next st, dc in next 2 sts] repeat around. (36/48/60 dc)
Round 4: [2 dc in next st, dc in next 3 sts] repeat around. (45/60/75 dc)
Continue Increasing Rounds until your hat’s diameter (from edge to edge, laid flat) reaches the desired measurement for the crown of your chosen size (see chart below). Each increasing round will add 9 (for 18-dc base) or 12 (for 24-dc base) or 15 (for 30-dc base) stitches.
| Size | Desired Crown Diameter |
| Baby (0-6 mo) | 4-4.5″ (10-11.5 cm) |
| Baby (6-12 mo) | 4.5-5″ (11.5-12.5 cm) |
| Toddler (1-3 yrs) | 5-5.5″ (12.5-14 cm) |
| Child (3-10 yrs) | 5.5-6″ (14-15 cm) |
| Teen/Adult Small | 6-6.5″ (15-16.5 cm) |
| Adult M/L | 6.5-7″ (16.5-18 cm) |
Export to Sheets
- To calculate your current diameter: Divide your current stitch count by your gauge (e.g., 60 stitches / 3 dc per inch = 10 inches circumference, then 10 / pi (3.14) = ~3.18 inch diameter). It’s easier to just lay flat and measure.
When you reach the desired diameter, stop increasing. Make a note of your total stitch count at this point. This is your target circumference for the main body of the hat.

Part 2: Body of the Hat
Now we’ll work straight down without increasing, which will form the sides of the hat.
Next Rounds (Main Body): Work 1 dc in each st around. Continue in continuous rounds, moving your stitch marker up with each round.
Continue working these rounds until your hat reaches the desired height from the top opening to the point where you want the brim to begin (refer to the Hat Sizing Chart for guidance on total height, then subtract about 1 inch / 2.5 cm for the brim).
- Try the hat on if possible to get the perfect height.
Part 3: The Brim (Optional but Recommended)
The brim helps the hat sit securely. You can make it ribbed or simply add a few rows of single crochet.
For a simple, sturdy brim:
Next Round: Sl st to the first st of the current round to join. Ch 1 (does not count as a st). Sc in each st around. Join with sl st to first sc.
- This will draw the brim in slightly for a snugger fit.
Repeat this last round 1-3 more times for a sturdier brim.
Alternatively, for a ribbed brim (more stretch):
Next Round: Sl st to the first st of the current round to join. Ch 1 (does not count as a st). Sc in the back loop only (BLO) of each st around. Join with sl st to first sc. Repeat this last round 1-3 more times for a ribbed brim.
Part 4: Finishing
- After completing the brim, cut your yarn, leaving a tail about 6 inches (15 cm) long.
- Yarn over and pull the tail completely through the loop on your hook to fasten off.
- Thread the tail onto your yarn needle and weave it securely into the inside of the hat. Weave in any other loose ends from your starting chain.
Ponytail Hat Customization & Tips:
- Height Adjustment: Make more “Body” rounds for a slouchier hat, fewer for a skullcap style.
- Stitch Pattern: You can substitute the double crochet body with half double crochet for a denser fabric, or even a textured stitch pattern (like grit stitch or lemon peel stitch) once your increase section is complete. Just ensure your stitch count remains consistent for the body.
- Ribbed Crown Opening: If you prefer a more defined, stretchy opening for the ponytail, you can make the first few rounds of the hat in back loop only stitches, or add a round of front post/back post double crochet (fpdc/bpdc) around the opening.
- Messy Bun Hat vs. Ponytail Hat: The core difference is often just the size of the top opening. A larger opening accommodates a fuller bun.
- Yarn Choice: Cotton or acrylic are great for year-round wear. Wool or wool blends are ideal for warmer winter hats.
You now have detailed instructions for two versatile crochet accessories! Happy crocheting!
Watch video: