 by
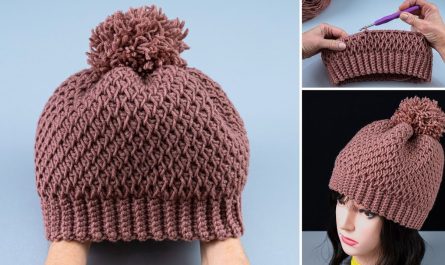
by You want to make a “very easy and quick” crochet baby sweater. This usually means a pattern that is:
- Top-down: You start at the neck and work your way down, often with minimal or no seaming. This is quicker than making separate pieces and then sewing them together.
- Simple stitches: Uses basic stitches like single crochet (sc), half double crochet (hdc), or double crochet (dc).
- Minimal shaping: Relies on increases in specific areas (the yoke) to create the sweater shape, rather than complex stitch patterns or intricate decreases.
- One-piece construction (often): Many easy baby sweaters are worked in one piece, avoiding the need for multiple seams.
Here’s a detailed guide on how to make a very easy and quick crochet baby sweater, focusing on a top-down, mostly seamless design:
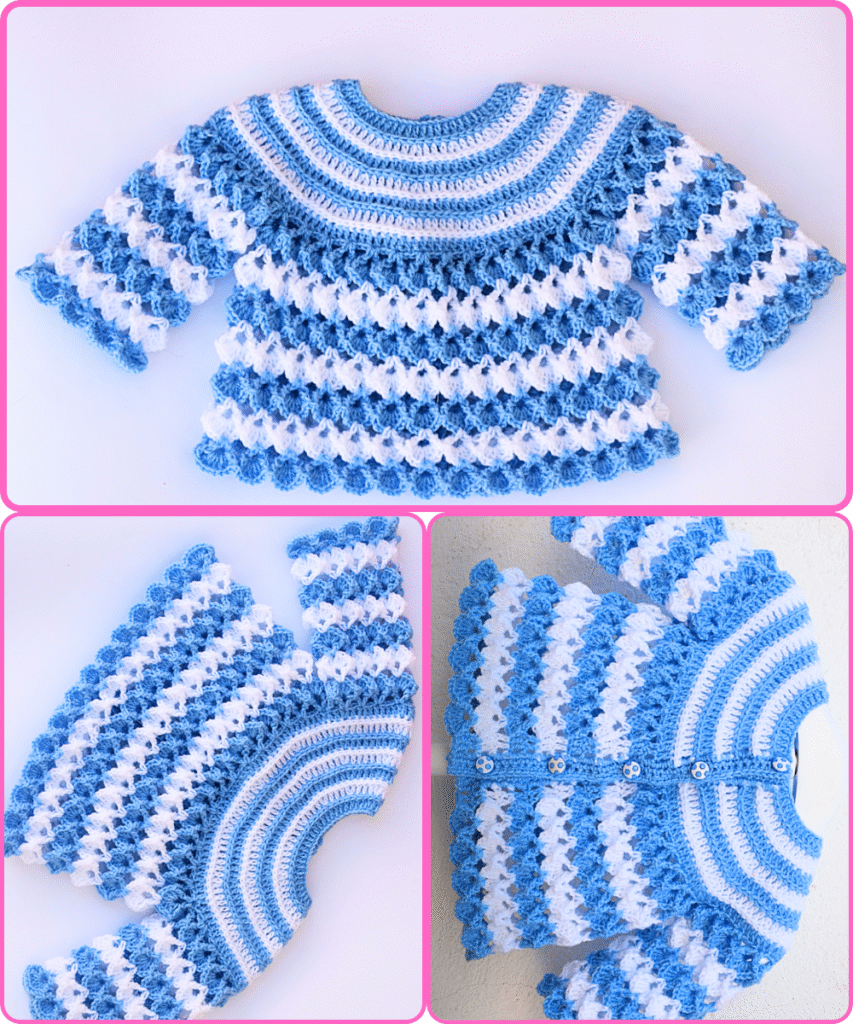
How to Make a Very Easy and Quick Crochet Baby Sweater (Top-Down, Beginner-Friendly)
This guide will focus on a top-down raglan style baby sweater, which is generally considered one of the easiest and quickest ways to crochet a garment. Raglan means the increases for the shoulders run diagonally from the neck.
Key Concept: The Yoke The “yoke” is the upper part of the sweater that includes the neck, shoulders, and upper chest. In a top-down raglan, you’ll start with a chain for the neck, and then increase stitches in specific “corner” points to create the widening shape of the shoulders and chest.
1. Essential Materials
- Yarn:
- Baby-friendly yarn: Look for soft, washable yarn, ideally labelled “baby yarn” or “DK (double knitting)” or “light worsted” weight. Cotton, acrylic, or a blend are good choices.
- Amount: For a newborn to 6-month size, you’ll likely need 200-300 yards (1-2 balls of typical DK yarn). Check the pattern for specific yardage if you find one.
- Crochet Hook:
- Choose a hook size recommended for your yarn. A 4.0mm (G/6) or 4.5mm (7) hook is common for DK weight baby yarn. A slightly larger hook can make a looser, drapier fabric, which can be nice for baby clothes.
- Stitch Markers (4-6): Absolutely essential for marking your increase points in the yoke.
- Tapestry Needle: For weaving in ends.
- Scissors: For cutting yarn.
- Measuring Tape: To check your gauge and the sweater’s size.
2. Basic Crochet Stitches You’ll Need
- Ch (Chain): Yarn over, pull through loop on hook.
- Sl St (Slip Stitch): Insert hook, yarn over, pull through stitch and loop on hook.
- Sc (Single Crochet): Insert hook, yarn over, pull up a loop (2 loops on hook), yarn over, pull through both loops.
- Hdc (Half Double Crochet): Yarn over, insert hook, yarn over, pull up a loop (3 loops on hook), yarn over, pull through all three loops.
- Dc (Double Crochet): Yarn over, insert hook, yarn over, pull up a loop (3 loops on hook), yarn over, pull through 2 loops, yarn over, pull through remaining 2 loops.
Choosing your main stitch: For a quick and easy sweater, Half Double Crochet (hdc) is a great choice. It works up faster than single crochet but creates a denser fabric than double crochet, offering a good balance of speed and warmth.
3. Gauge (Crucial for Sizing!)
Even for a “very easy” sweater, checking your gauge is important, especially for baby clothes where fit matters.
- Make a swatch: Chain about 15-20 stitches. Work about 10-15 rows in the stitch you plan to use (e.g., hdc).
- Measure: Measure a 4×4 inch (10×10 cm) square of your swatch.
- Adjust: If you have more stitches or rows than the pattern suggests for that measurement, use a larger hook. If you have fewer, use a smaller hook.
Since we’re doing a simplified guide, if you skip gauge, be prepared that your finished sweater might not be the exact size listed, but it will still be a sweater!
4. General Pattern Structure (Top-Down Raglan)
This method involves dividing your initial chain (the neck) into sections for the back, two sleeves, and the front. You’ll then increase at the “corners” to form the raglan shaping.
Typical Division (Example for a Newborn-3 months size): A common starting point for a newborn-sized sweater is around 40-50 stitches for the initial chain. Let’s use an example with a total of 44 chain stitches to illustrate the division:
- Back: 8 stitches
- Sleeve 1: 8 stitches
- Front: 12 stitches
- Sleeve 2: 8 stitches
- Back (remaining): 8 stitches (Total: 8 + 8 + 12 + 8 + 8 = 44)
You’ll place stitch markers at the corners where the sections meet.
5. Step-by-Step Instructions (Using Half Double Crochet – HDC)
Size: Newborn – 3 Months (Approximate) Adjust hook size and initial chain count for other sizes. This is a template.
A. The Yoke (Top of the Sweater)
- Ch (Chain): Ch 44. (This is your starting chain for the neck opening.)
- Tip: Chain loosely or use a hook one size larger for the starting chain so the neck edge isn’t too tight.
- Row 1: Hdc in the 3rd ch from the hook (the 2 skipped chains count as 1 hdc). Hdc in the next 7 chains. (This is your first back section).
[Hdc in next chain, Ch 2, Hdc in same chain]– This is your first raglan increase corner. Place a stitch marker in the Ch-2 space.- Hdc in the next 8 chains. (This is your first sleeve section).
[Hdc in next chain, Ch 2, Hdc in same chain]– Second raglan increase corner. Place a stitch marker in the Ch-2 space.- Hdc in the next 12 chains. (This is your front section).
[Hdc in next chain, Ch 2, Hdc in same chain]– Third raglan increase corner. Place a stitch marker in the Ch-2 space.- Hdc in the next 8 chains. (This is your second sleeve section).
[Hdc in next chain, Ch 2, Hdc in same chain]– Fourth raglan increase corner. Place a stitch marker in the Ch-2 space.- Hdc in the last 7 chains. (This is the second back section).
- Ch 2, turn. (Counts as first hdc of next row).
- You should now have 4 raglan increase corners marked.
- Row 2 (and subsequent Yoke Rows):
- Hdc in each hdc until you reach the first Ch-2 space (your first stitch marker).
[Hdc in Ch-2 space, Ch 2, Hdc in same Ch-2 space]– This is your increase for the corner. Move the stitch marker to the new Ch-2 space.- Repeat
[Hdc in Ch-2 space, Ch 2, Hdc in same Ch-2 space]and move marker at each of the remaining 3 corners. - Hdc in each remaining hdc until the end of the row.
- Ch 2, turn.
- Each of these rows will add 8 stitches to your total count (2 at each of the 4 corners).
- Continue Yoke Rows: Repeat Row 2 until the yoke (from the neck edge to the bottom of the armhole) is approximately 4-5 inches (10-12.5 cm) for a newborn size. Hold it up to a baby’s chest or a baby garment to check the fit.
- For 0-3 months, you might do 6-8 total yoke rows.
- For 3-6 months, you might do 8-10 total yoke rows.
B. Separating for Body and Sleeves
This is where the magic happens and your sweater takes shape!
- Next Round (Joining): Ch 2. Hdc in each hdc until you reach the first Ch-2 space.
- Hdc in the Ch-2 space (of the first corner).
- Skip all stitches for the first sleeve (this means skipping the stitches between your first and second stitch markers).
- Hdc in the Ch-2 space (of the second corner).
- Hdc in each hdc across the front section until you reach the third Ch-2 space.
- Hdc in the Ch-2 space (of the third corner).
- Skip all stitches for the second sleeve (between the third and fourth stitch markers).
- Hdc in the Ch-2 space (of the fourth corner).
- Hdc in each remaining hdc across the back section.
- Join with a Sl St to the top of the beginning Ch 2. (This closes the circle for the body and creates the armholes!)
C. The Body of the Sweater
- Body Rounds: Ch 2. Hdc in each hdc around the entire body. Join with a Sl St to the top of the beginning Ch 2.
- Repeat this round until the body of the sweater reaches the desired length. For a newborn, typically 5-7 inches (12.5-18 cm) from the armpit down.
- Bottom Ribbing (Optional but Recommended for Neatness):
- Ch 1. Work a round of sc in the back loop only (BLO) around the bottom edge for a simple ribbed look. Join with Sl St.
- Alternatively, you can do a simple round of Sl St for a clean edge.
- Fasten off.
D. The Sleeves
You’ll attach yarn to the armhole and work in rounds.
- Attach Yarn: Join yarn with a Sl St in the center of one of the armpits (where you skipped stitches).
- Sleeve Round 1: Ch 2. Hdc evenly around the armhole opening. (Aim for a comfortable fit, not too tight or too loose). Join with Sl St to top of beginning Ch 2.
- Tip: Try to work 2 hdc into the chain space you made when separating, and then 1 hdc into each hdc around the rest of the armhole.
- Sleeve Rounds (Length): Ch 2. Hdc in each hdc around. Join with Sl St.
- Repeat this round until the sleeve reaches the desired length. For a newborn, typically 5-7 inches (12.5-18 cm) from the armpit down to the wrist.
- Optional Decreases: If you want the sleeves to taper slightly, you can do an
hdc2tog(hdc together) evenly spaced once every few rounds. For a very easy pattern, simply working straight is fine.
- Cuff Ribbing (Optional):
- Ch 1. Work a round of sc in the back loop only (BLO) around the wrist edge. Join with Sl St.
- Fasten off.
- Repeat for the second sleeve.
6. Finishing Touches
- Weave in all ends: Use your tapestry needle to securely weave in all yarn tails. Take your time to hide them neatly within the stitches.
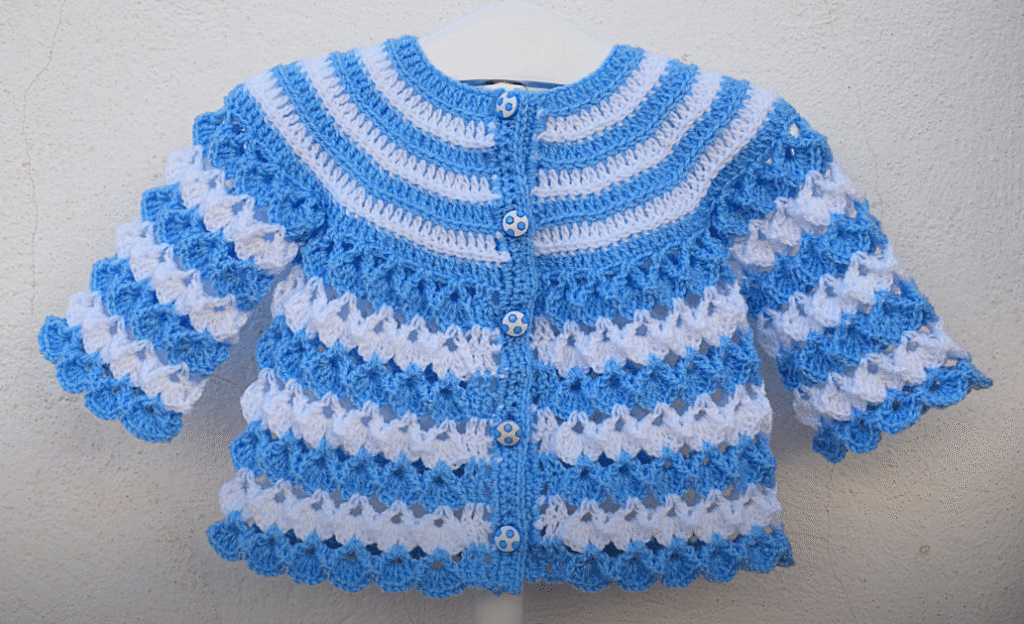
- Add buttons/ties (if making a cardigan): If you desire an opening for a cardigan, you would have worked the yoke in rows (back and forth) rather than joining, and then added button bands. For a simple pullover, no buttons are needed!
Tips for “Very Easy and Quick”
- Use a thicker yarn: Bulky or super bulky yarn will make the sweater work up much faster, though it might result in a less delicate look.
- Simpler stitches: Stick to basic stitches like hdc or dc.
- One-piece construction: Avoid patterns that require multiple pieces to be sewn together if speed is your priority. Top-down raglans are perfect for this.
- Embrace imperfections: It’s handmade! Small variations are part of its charm. Don’t strive for absolute perfection on your first few attempts.
- Watch videos: If you’re a visual learner, search YouTube for “easy crochet baby sweater top down” or “crochet raglan baby sweater tutorial.” Seeing it in action can clarify things quickly.
Enjoy crocheting your adorable and quick baby sweater!
Watch video: