 by
by Sure! 🧶 Here’s a detailed step-by-step guide on how to make a crochet perfect cylinder bag with a honeycomb pattern — including materials, stitches, construction, and finishing details.
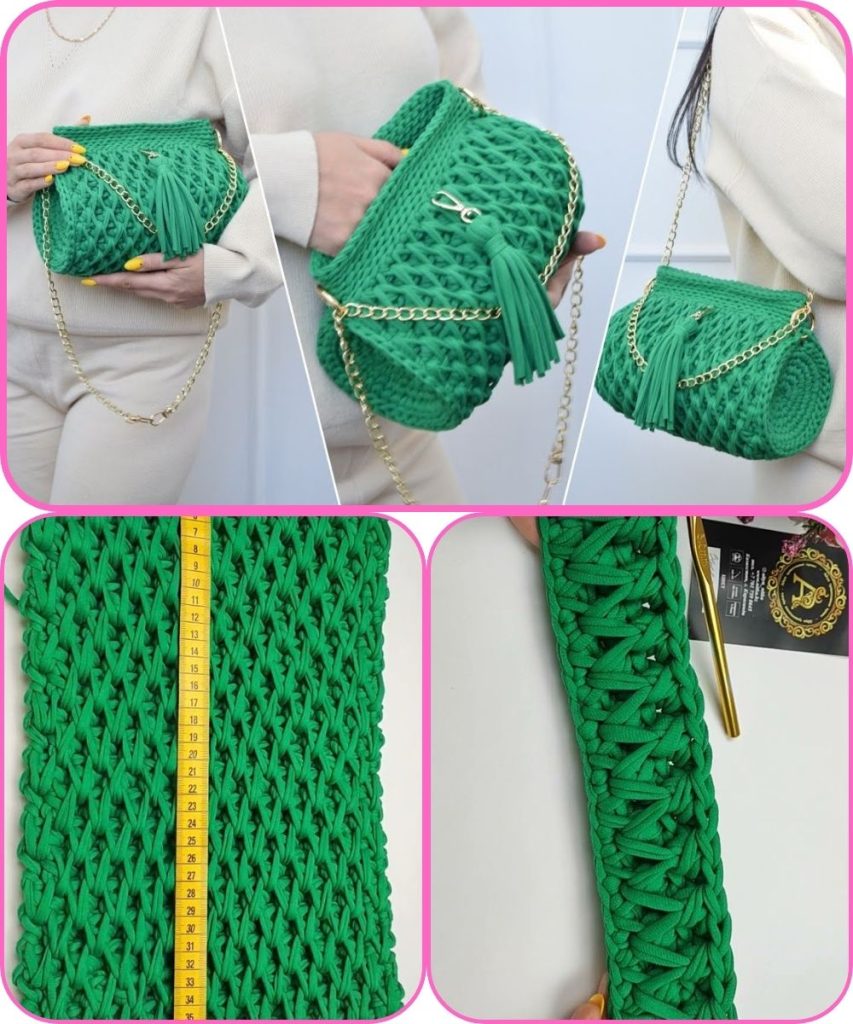
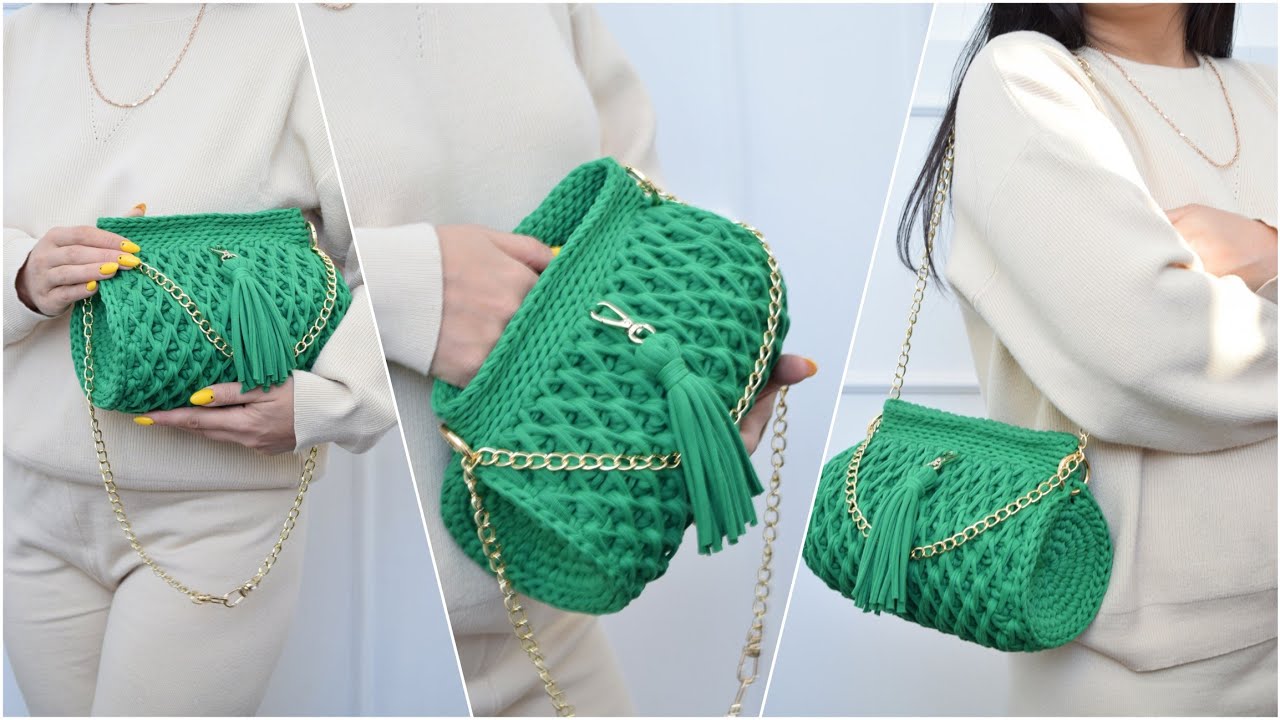
🧺 Crochet Perfect Cylinder Bag with a Honeycomb Pattern
🧵 Materials
- Yarn: Medium weight (Category 4) cotton or polyester blend (2–3 skeins, depending on size).
Cotton yarn gives structure; polyester adds shine and durability. - Hook: 3.5 mm or 4 mm (adjust based on yarn thickness).
- Stitch markers
- Yarn needle
- Scissors
- Bag lining fabric (optional)
- Magnetic snap or drawstring (optional for closure)
- Bag strap or D-rings and hooks (for an adjustable strap)
🪡 Stitches & Abbreviations
| Abbreviation | Stitch Name |
|---|---|
| ch | chain |
| sl st | slip stitch |
| sc | single crochet |
| dc | double crochet |
| fpdc | front post double crochet |
| bpdc | back post double crochet |
| st(s) | stitch(es) |

🧩 Step 1: Make the Base (Cylinder Bottom)
- Start with a magic ring.
- Round 1: Ch 2 (counts as first dc), make 11 dc in ring. Sl st to top of ch 2. (12 sts)
- Round 2: Ch 2, 2 dc in each st around. Join. (24 sts)
- Round 3: Ch 2, 1 dc in next st, 2 dc in next st around. Join. (36 sts)
- Round 4: Ch 2, 1 dc in next 2 sts, 2 dc in next st around. Join. (48 sts)
- Continue increasing in this pattern (1 dc in next 3 sts, 2 dc in next, etc.) until your base reaches the desired diameter — usually 6–8 inches for a handbag.
💡 Tip: Keep the base flat by gently adjusting the number of increases if it starts curling or waving.
🧩 Step 2: Build the Cylinder Body
- Once your base is ready, stop increasing.
- Round 1 (set-up round): Ch 2, fpdc around next st, bpdc around next to create ribbed texture. Join.
This creates a slight edge for the bag bottom. - Now begin the honeycomb pattern.
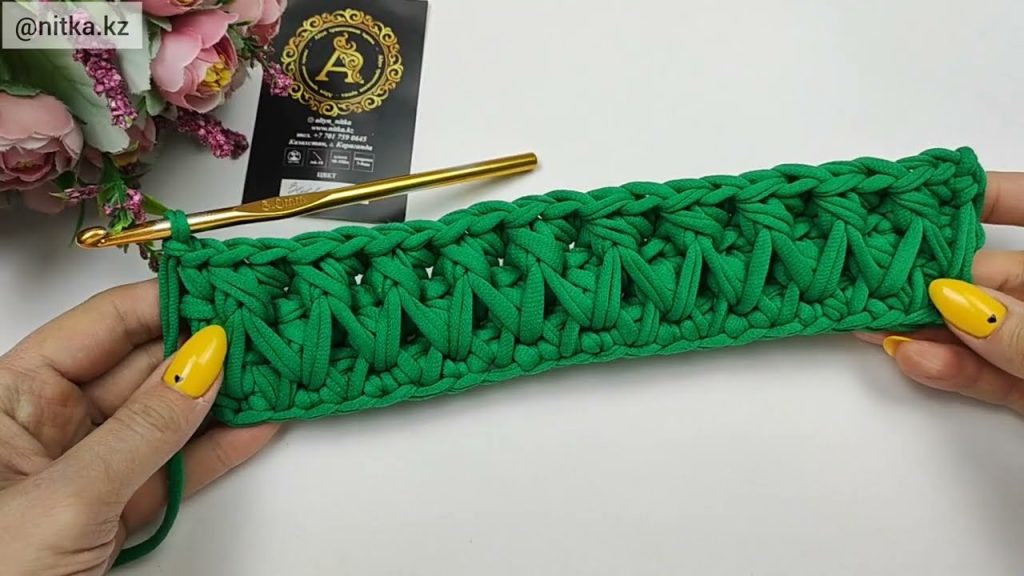
🍯 Step 3: Crochet the Honeycomb Pattern
The Honeycomb Stitch Pattern (in rounds)
The honeycomb texture is made using crossed double crochet stitches in alternating rows.
Pattern repeat (multiple of 4 stitches):
Round 1 (Base of pattern):
Ch 2, skip 1 st, dc in next st, dc in skipped st (crossed dc); repeat around. Join.
Round 2:
Ch 2, skip next st, dc in next st, dc in skipped st (crossed dc); repeat around. Join.
Round 3–10 (or as tall as you want):
Repeat Rounds 1 and 2, alternating each round to maintain the honeycomb weave look.
✨ For a chunkier honeycomb effect: Use front post and back post double crochets alternated every few rounds.

🧩 Step 4: Top Edge
- When the bag reaches your desired height (usually 8–10 inches):
- Round 1: Ch 1, sc around evenly.
- Round 2: Optional decorative edge (like crab stitch or reverse sc).
- Join and fasten off.
🎒 Step 5: Add the Strap
Option 1: Crochet Strap
- Make a long chain (about 100–120 cm).
- Work 3–4 rows of sc back and forth for width.
- Sew each end securely to the bag sides.
Option 2: Attach Metal Rings
- Crochet small tabs: ch 8, sc in each ch for 3–4 rows, fold around a D-ring, and sew to bag.
- Attach a removable strap or chain.
✂️ Step 6: Finishing Touches
- Weave in all ends securely.
- Optional: Sew a fabric lining to the inside for added strength.
- Add a drawstring, zipper, or magnetic snap closure.
- Block lightly to shape the cylinder perfectly.
🎨 Optional Design Variations
- Colorwork: Alternate two colors every few rounds for a two-tone honeycomb.
- Gradient yarns: Give a beehive ombré effect.
- Mini version: Use smaller yarn (Category 3) for a makeup pouch.
✅ Quick Summary
| Step | Task | Notes |
|---|---|---|
| 1 | Crochet circular base | Increase evenly |
| 2 | Build side walls | Use ribbed round |
| 3 | Make honeycomb pattern | Crossed dc stitches |
| 4 | Add top edge | Single crochet border |
| 5 | Attach strap | Crochet or hardware |
| 6 | Finish | Lining, closure, block |
Would you like me to include a written pattern chart or diagram (like ASCII-style or visual crochet symbols)? That would make it easier to follow the honeycomb section precisely.
Watch tutorial: