 by
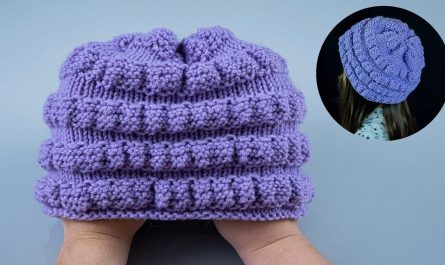
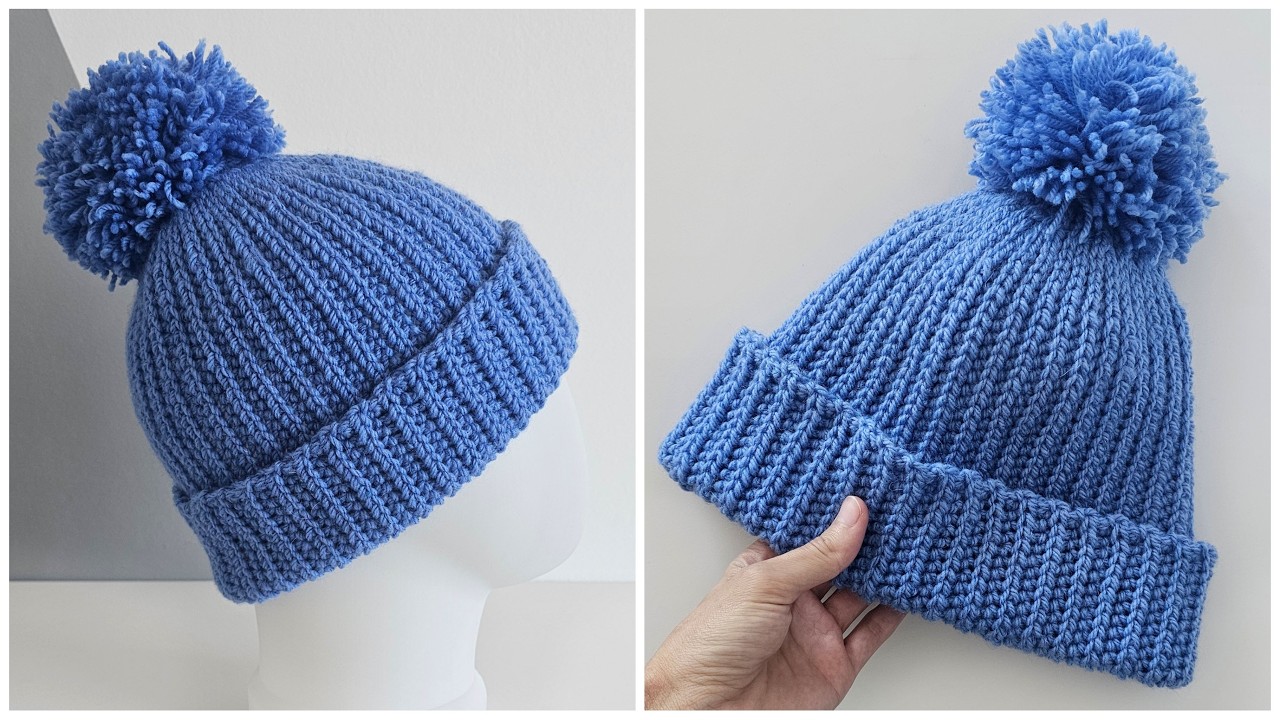
by Sure! Here’s a detailed, step-by-step guide for making an easy and beautiful crochet hat — perfect for beginners and customizable for any yarn or size.
🧶 How to Crochet an Easy and Beautiful Hat (Step-by-Step Tutorial)
🌸 Materials Needed:
- Yarn: Medium weight (Category 4) acrylic or wool yarn (about 100g for an adult hat)
- Crochet hook: Size 5mm (H/8) or 5.5mm (I/9) — depending on your yarn
- Tapestry needle (for weaving in ends)
- Scissors
- Measuring tape (optional)
🧵 Step 1: Make the Magic Ring (or Start with a Chain)
You can start your hat from the top down (crown to brim), which is easiest for beginners.
- Make a magic ring (adjustable loop), or
- Chain 4 and join with a slip stitch to form a small ring.
🌼 Step 2: Round 1 — Form the Crown Center
- Chain 2 (counts as your first half double crochet or double crochet — you can choose which stitch you prefer).
- Make 11 more double crochets into the ring (for a total of 12 dc).
- Pull the ring tight and join with a slip stitch to the top of the chain-2.
👉 Tip: You can use half double crochet (hdc) for a tighter texture or double crochet (dc) for a looser, drapier hat.
🌸 Step 3: Round 2 — Increase the Crown
- Chain 2.
- Make 2 dc in each stitch around (24 dc total).
- Join with a slip stitch to the top of the chain-2.
This forms a flat circle — the crown of your hat.
🌻 Step 4: Round 3 — Continue Increasing
- Chain 2.
- (1 dc in next stitch, 2 dc in next stitch) — repeat around.
- Join with a slip stitch (36 dc total).
🌼 Step 5: Round 4 — Increase for Size
- Chain 2.
- (1 dc in next 2 stitches, 2 dc in next) — repeat around.
- Join with a slip stitch (48 dc total).
Continue increasing this way until the circle’s diameter is approximately:
- 6″ (15 cm) for adult size
- 5″ (12.5 cm) for teen size
- 4.5″ (11.5 cm) for child size
You can check size using a standard crochet hat size chart.
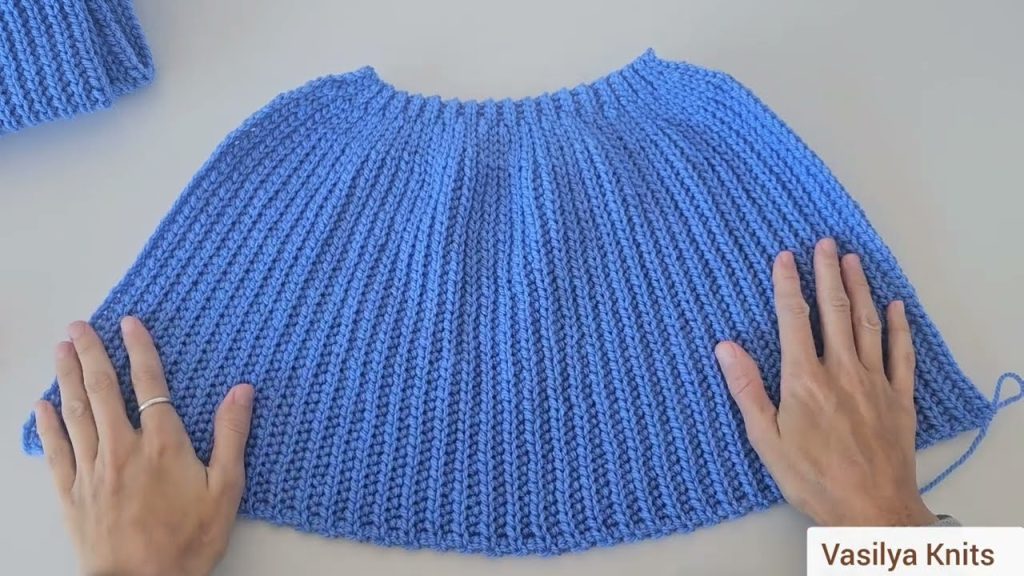
🌸 Step 6: Work Even (No Increases)
Once your crown is the correct size:
- Chain 2.
- Make 1 dc in each stitch around.
- Join with a slip stitch at the end of each round.
- Repeat for 10–12 rounds (or until the hat reaches desired height).
This forms the body of your hat.
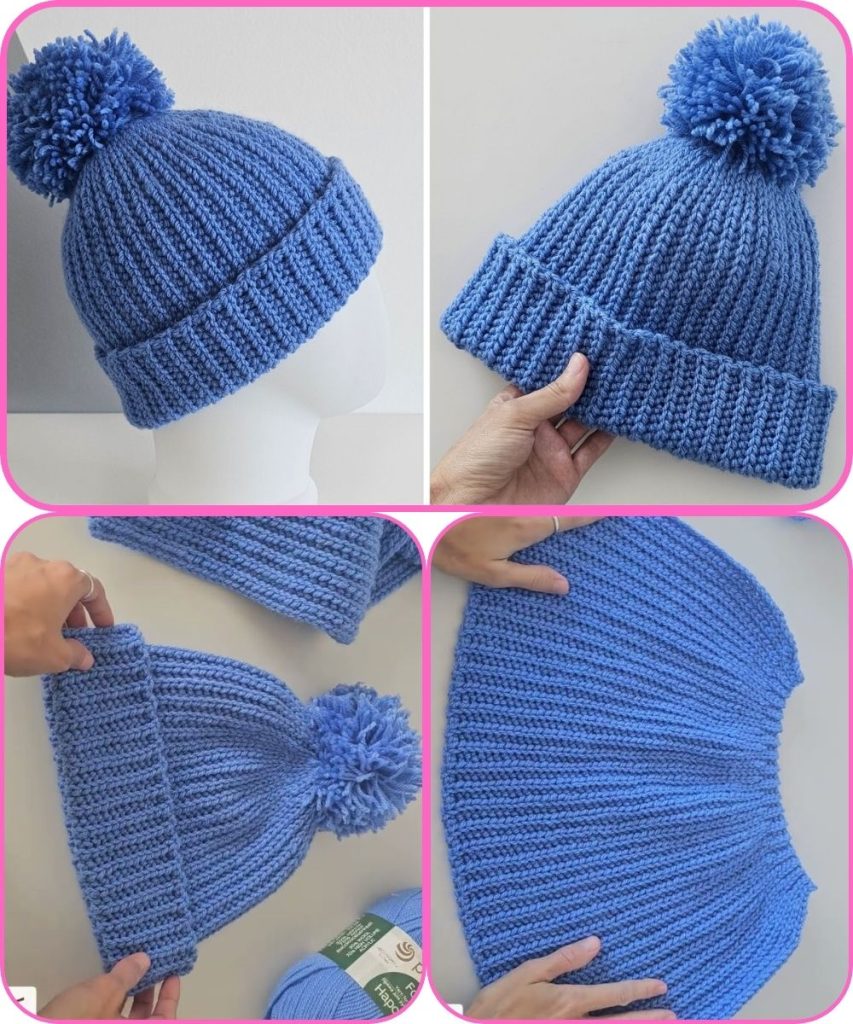
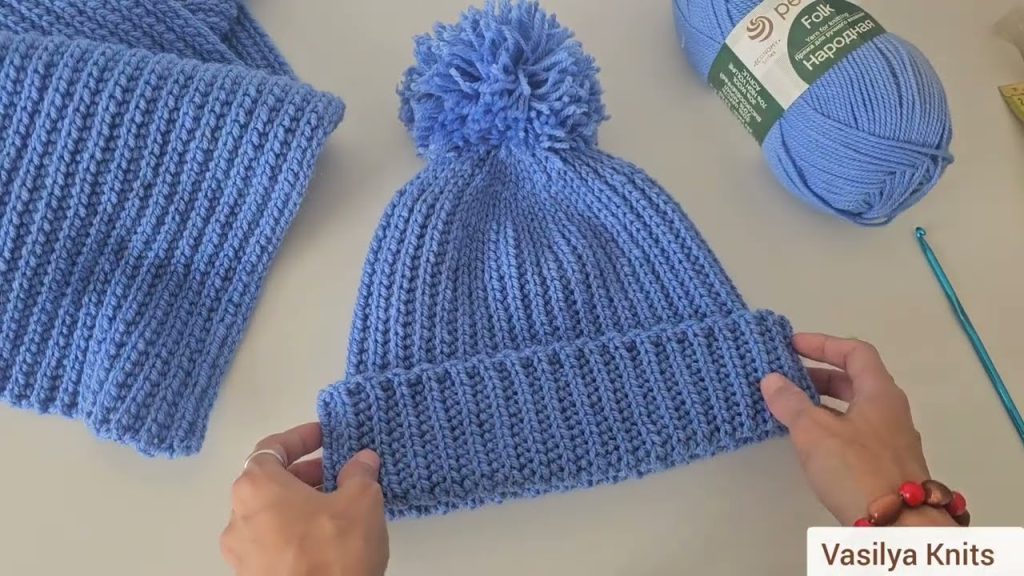
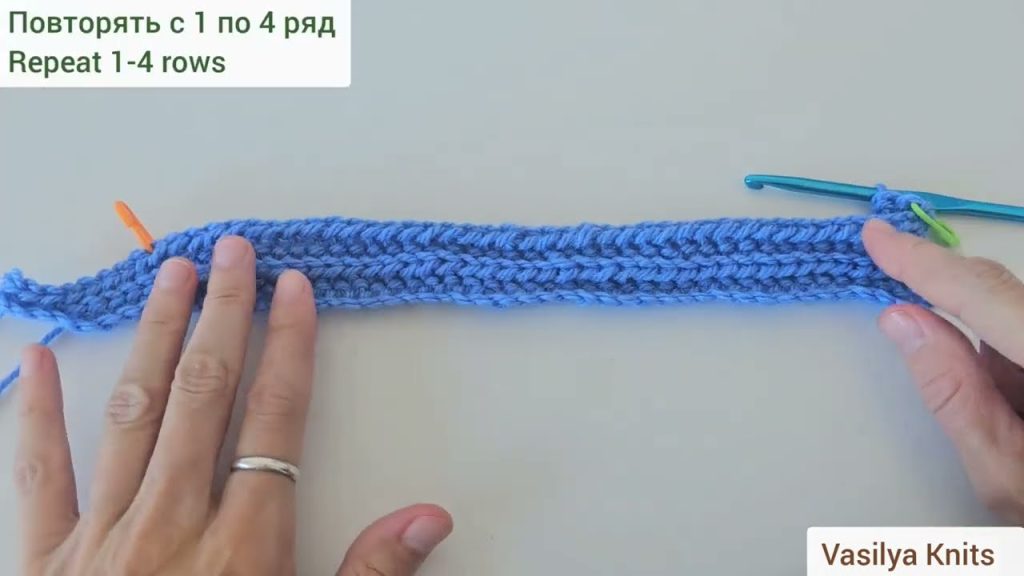
🌷 Step 7: Create the Brim (Optional)
To finish the edge nicely:
- Switch to half double crochet (hdc) or single crochet (sc) for 2–3 rounds.
- You can alternate colors or use a ribbed effect by working front post/back post double crochet (fpdc/bpdc) stitches for texture.
🌼 Step 8: Finishing
- Fasten off and weave in all ends using a tapestry needle.
- Optionally, add a pom-pom or button at the top.
- Try it on and admire your new handmade hat!
🎨 Optional Customizations:
- Use striped yarn or change colors every few rounds.
- Add a flower, applique, or faux fur pom-pom for decoration.
- Try different stitches for the body (e.g., puff stitch, shell stitch, or front post ribbing).
💡 Size Adjustments:
To adjust the hat for different ages/sizes:
- Crown Diameter:
- Baby: 4″
- Child: 5″
- Teen/Adult: 6–6.5″
- Hat Height (before brim):
- Baby: 6″
- Child: 7″
- Adult: 8–9″
🧵 Example Pattern Summary (Adult Size)
Round 1: 12 dc in magic ring, join (12)
Round 2: 2 dc in each st, join (24)
Round 3: *1 dc in next, 2 dc in next*, repeat around (36)
Round 4: *1 dc in next 2, 2 dc in next*, repeat (48)
Rounds 5–12: 1 dc in each st around, join (48)
Rounds 13–15: 1 hdc or sc in each st around for brim, join
Finish off, weave ends.
Would you like me to format this into a YouTube-style tutorial script or a written pattern (PDF-style) layout for download or sharing?
Watch tutorial: