 by
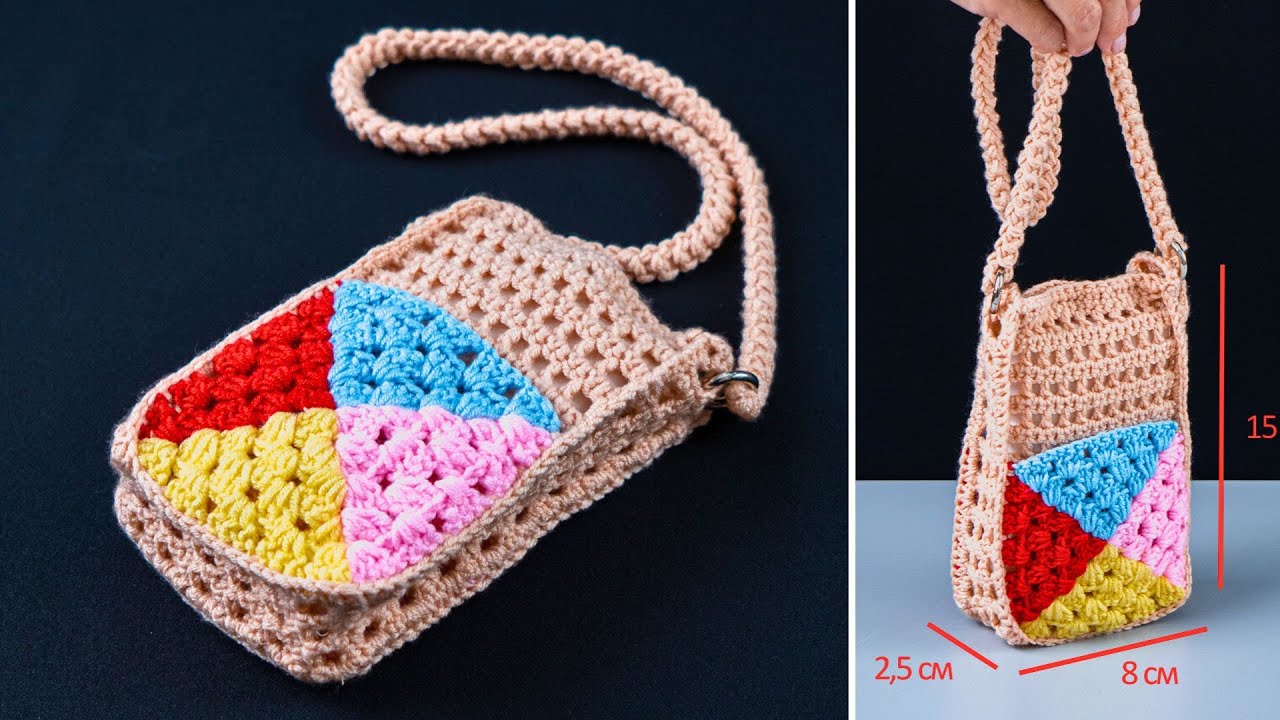
by Here’s a detailed, beginner-friendly guide on how to make an easy crochet granny square phone bag. This project is perfect for beginners because it uses basic crochet stitches and simple construction.
How to Make an Easy Crochet Granny Square Phone Bag – Step by Step
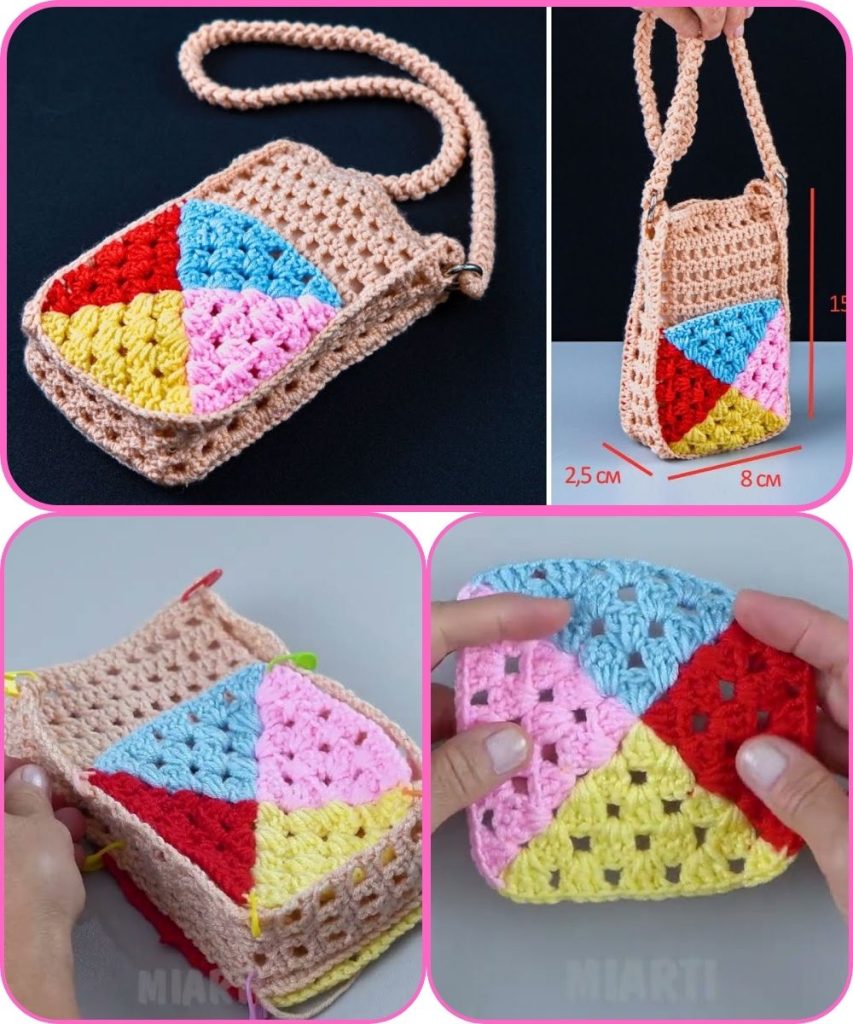
A granny square phone bag is stylish, functional, and beginner-friendly. Using colorful yarns and simple stitches, you can make a compact bag perfect for carrying your phone, keys, and small essentials.
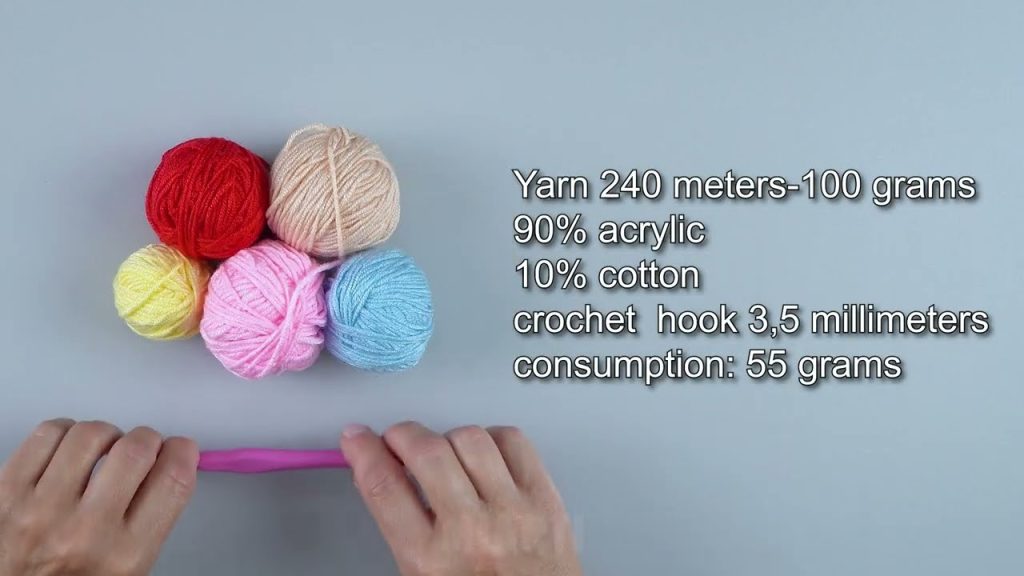
Materials Needed
- Yarn: Medium-weight cotton or acrylic yarn in 2–3 colors
- Crochet Hook: 4–5 mm (check yarn label)
- Scissors
- Yarn Needle for weaving in ends
- Optional: Button, snap, or Velcro for closure
Basic Crochet Stitches Used
- Chain (ch) – for foundation
- Slip Stitch (sl st) – to join rounds
- Single Crochet (sc) – for sturdy edges
- Double Crochet (dc) – main stitch for granny squares
- Cluster Stitch: 3 dc together (common in granny squares)
All stitches are beginner-friendly.
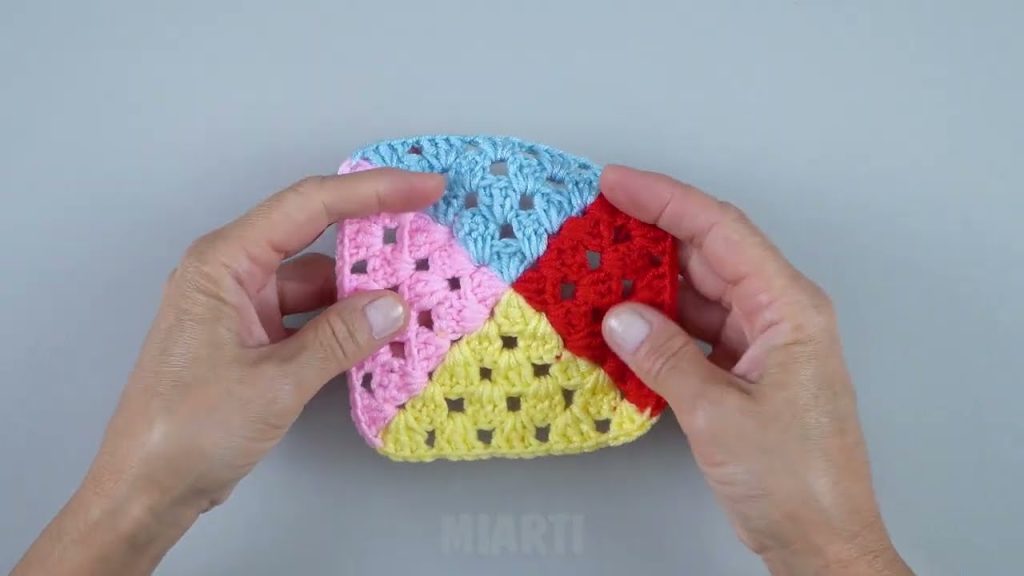
Step 1: Crochet Granny Squares
- Start with a magic ring or chain 4 and join to form a ring.
- Round 1: Chain 3 (counts as first dc), 2 dc into ring, chain 1, repeat 3 more times (total 4 clusters), join with sl st.
- Round 2: Slip stitch into first chain-1 space, chain 3, 2 dc in same space, chain 1, 3 dc in next chain-1 space, chain 1, repeat around, join with sl st.
- Round 3: Repeat the same pattern in each chain-1 corner space until the square reaches desired size for your phone bag (usually 10–12 cm per square).
Make 2 granny squares of the same size: one for the front and one for the back.
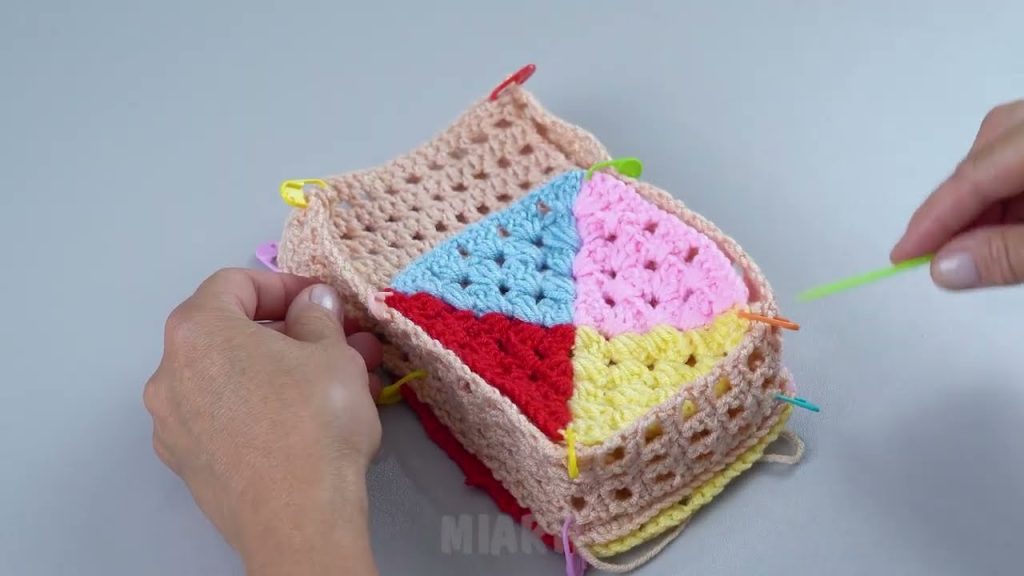
Step 2: Join the Squares
- Place squares together with wrong sides facing inward.
- Use single crochet or slip stitch to join three sides, leaving the top open for the bag.
- Keep stitches tight for durability.
Step 3: Create the Bag Edge
- Single crochet evenly around the top edge for a clean finish.
- Optional: Add a few rounds of sc or hdc for reinforcement.
Step 4: Make the Strap
- Decide the desired strap length.
- Chain enough stitches for the strap length.
- Attach the chain to the opposite side of the bag using single crochet.
- Work one round of sc along the chain for sturdiness.
Alternative: Make two straps for a mini crossbody style.
Step 5: Add Closure (Optional)
- Button: Sew a button on the front and make a chain loop on the top flap.
- Snap: Attach a snap for convenience.
- Velcro: Sew a small Velcro piece to keep the bag closed.
Step 6: Finish the Bag
- Fasten off the yarn and weave in all loose ends.
- Optional: Decorate with tassels, beads, or small crochet flowers for a cute touch.
Tips for Beginners
- Use cotton yarn for a sturdy bag that holds its shape.
- Keep even tension for uniform squares and a neat bag.
- Count stitches carefully when joining squares to avoid gaps.
- Start with 2–3 colors for a fun, classic granny square look.
Why This Bag Is Perfect for Beginners
- Uses basic stitches only
- Quick to make (2 granny squares + assembly)
- Stylish and customizable
- Functional for carrying phone and small essentials
Final Thoughts
A crochet granny square phone bag is easy, fun, and rewarding for beginners. With just a few granny squares, some simple joining, and a strap, you can create a practical and colorful accessory. Once you’re comfortable, you can experiment with larger granny squares, multiple colors, or decorative accents.
I can also make for you:
- A step-by-step diagram with exact stitch counts for a standard phone bag
- A mini tutorial for a crossbody granny square bag
- Tips for color combinations and decorative options
Watch tutorial: