 by
by Absolutely! I can give you a step-by-step, detailed guide on making an easy crochet granny square pouch. I’ll include the materials, instructions, and tips for beginners. Let’s dive in.
Materials Needed
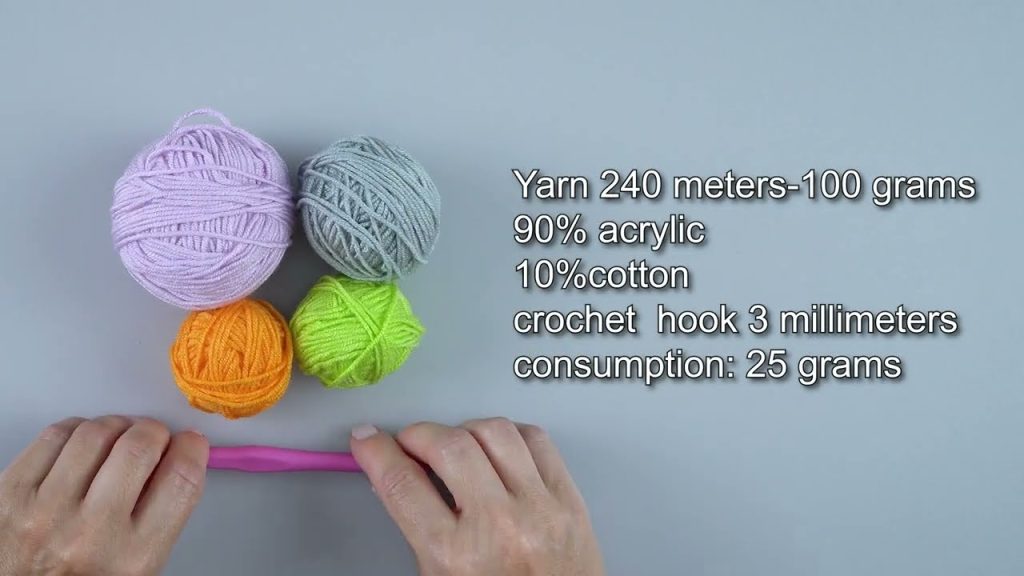
- Yarn – Any medium-weight (worsted weight, #4) yarn. You can use cotton for sturdiness or acrylic for softness.
- Crochet Hook – Size H/8 (5 mm) is standard for worsted weight yarn.
- Yarn Needle – For sewing pieces together and weaving in ends.
- Scissors
- Zipper or Button (optional) – For closing the pouch.
- Lining Fabric (optional) – For a sturdier pouch.
Step 1: Make the Granny Squares
A granny square is the basic building block of your pouch.
Instructions for a simple granny square:
- Magic Ring (or chain 4 and join with slip stitch to form a ring).
- Round 1: Chain 3 (counts as first double crochet), then make 2 double crochets into the ring, chain 2, make 3 double crochets in the ring. Repeat 2 more times. Chain 2 and join with slip stitch to the top of the first chain-3.
- You should have 4 clusters of 3 double crochets separated by chain-2 corners.
- Round 2: Slip stitch to a corner space, chain 3, make 2 double crochets in the corner, chain 2, make 3 double crochets in the same corner space.
- For the sides, make 3 double crochets in each space between corners.
- Repeat for all 4 corners, ending with chain 2 in the last corner, join with slip stitch.
- Round 3: Repeat round 2, adding 3 double crochets in each side space and 3 double crochets + chain 2 + 3 double crochets in each corner.
- Finish: Fasten off and weave in ends.
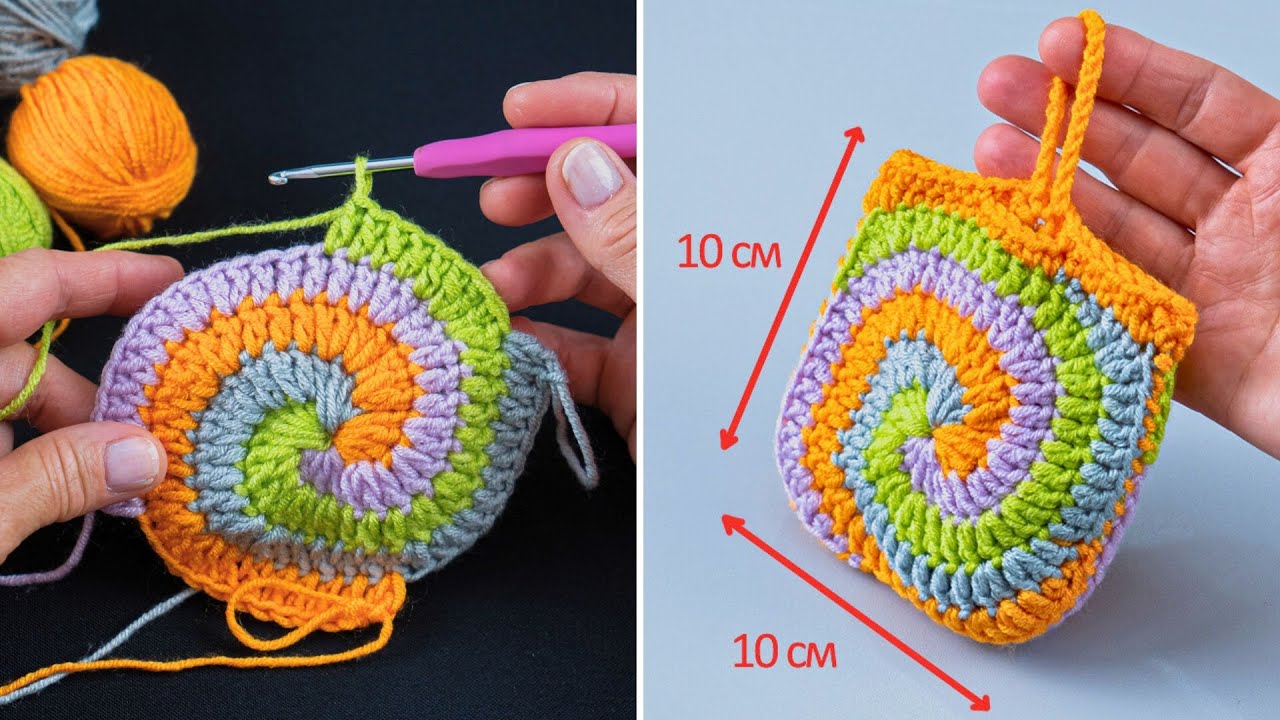
💡 Tip: Make 2-4 squares depending on the pouch size you want. For a small pouch, 2 squares (front and back) are enough.
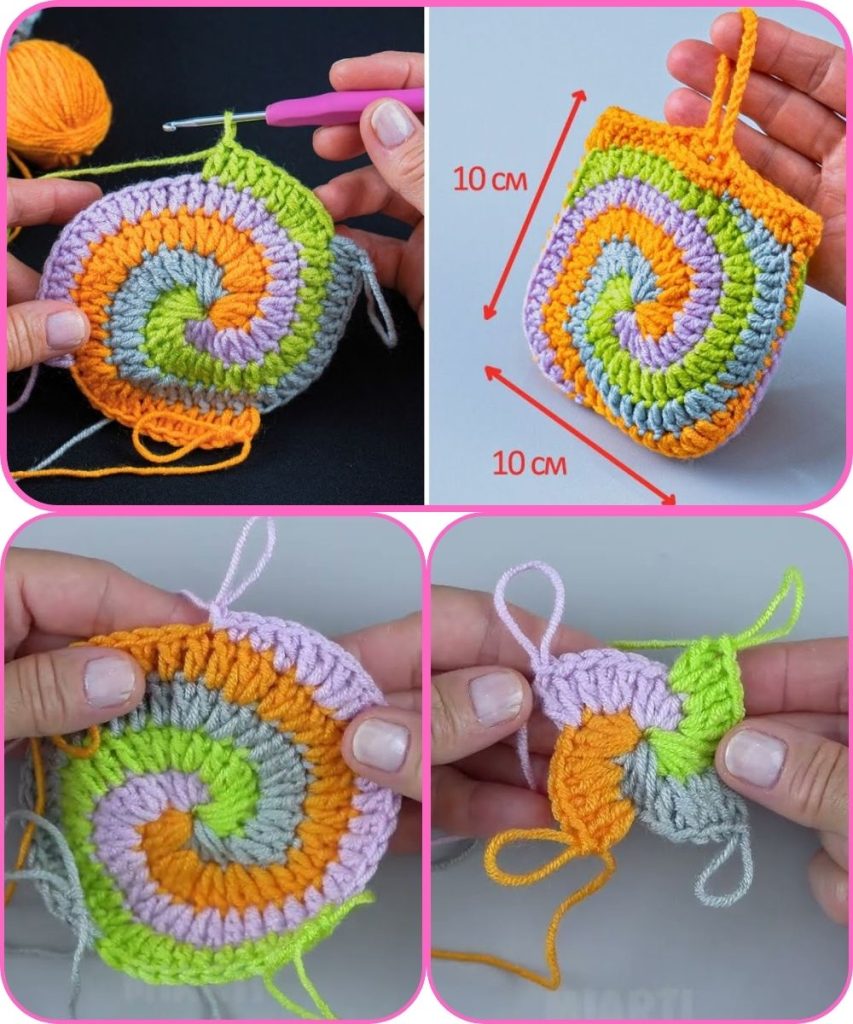
Step 2: Assemble the Pouch
- Align the squares – Place the squares together with the right sides facing out.
- Join the sides: Use a slip stitch or single crochet to join the edges. Leave the top open.
- If you want a flat bottom, fold the squares slightly and join the bottom edges as well.
- Add lining (optional): Cut fabric slightly smaller than your pouch, sew it inside, and hand stitch to the crochet edges.

Step 3: Add Closure
- Zipper: Sew the zipper at the top using a needle and thread.
- Button: Add a flap by folding the top over and sewing a buttonhole or loop.
Step 4: Finishing Touches
- Weave in all remaining yarn ends using the yarn needle.
- Block the pouch gently to shape it.
Optional Decorations
- Add a small tassel or pom-pom to the zipper pull.
- Use different colored yarn for a fun, patchwork look.
- Crochet a small handle or strap to make it a mini bag.
Summary
- Crochet 2–4 granny squares.
- Join squares together to form a pouch.
- Add lining (optional).
- Attach a zipper or button.
- Add decorations.
If you want, I can make a super simple diagram showing exactly how to join the granny squares and make the pouch, which makes it much easier to visualize, especially if you’re a beginner.
Watch tutorial: