 by
by Absolutely! Here’s a detailed step-by-step guide on how to make a very big and easy crochet bag, perfect for beginners who want a large, functional, and stylish tote!
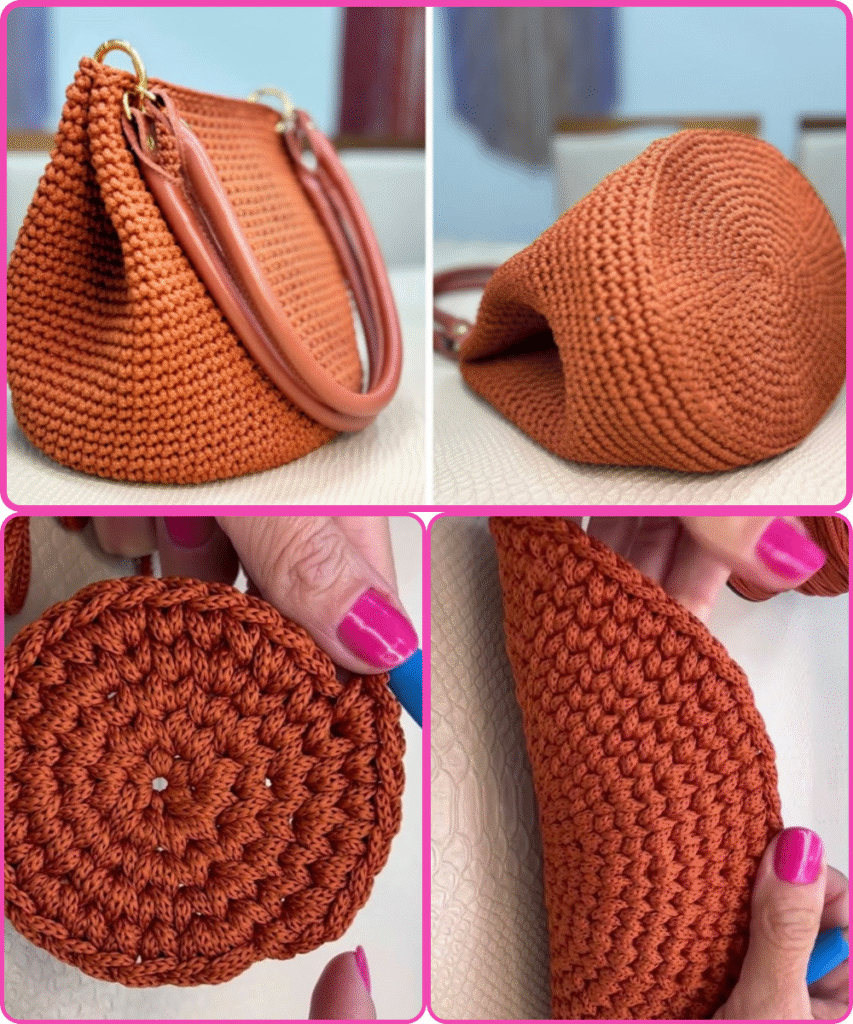
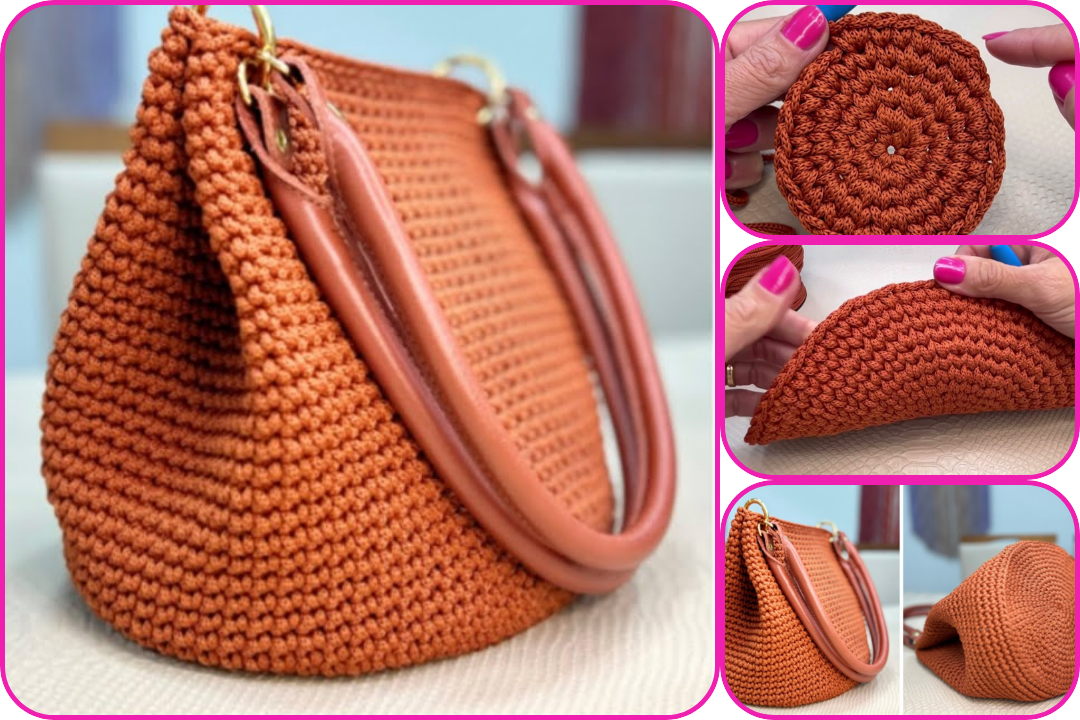
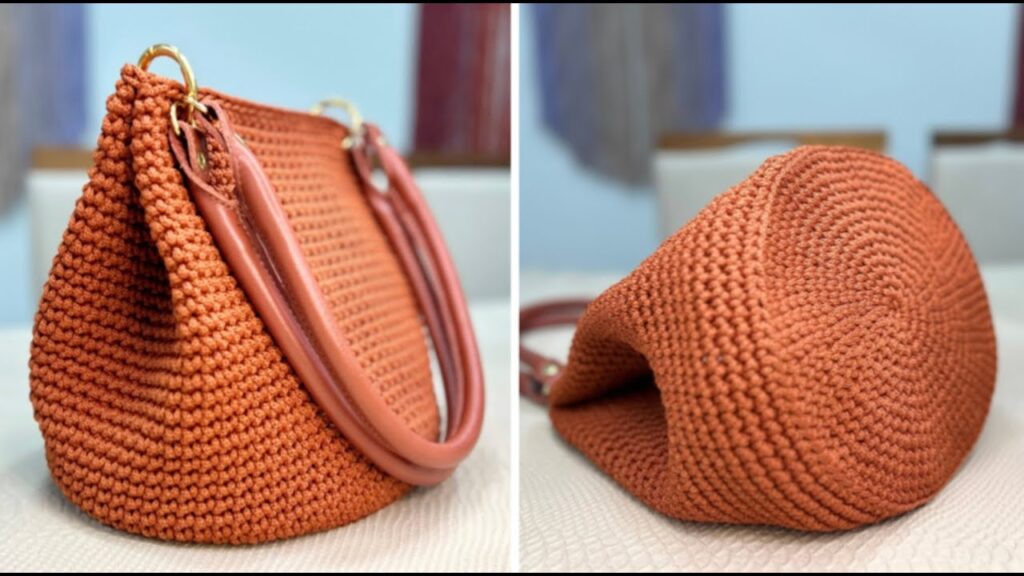
🧶 How to Make a CROCHET BAG – Very Big & Easy to Make!
🧺 Description:
This is a large, sturdy, and stylish crochet tote bag that’s perfect for groceries, beach days, or everyday use. This pattern is beginner-friendly, with simple stitches and minimal shaping. You’ll crochet in rounds and work mostly in single or half-double crochet, depending on the style you prefer.
🧵 Materials Needed:
- Yarn: Super Bulky (Category 6) or Bulky (Category 5) cotton/acrylic yarn – approx. 500–800g
- Tip: Use cotton for durability and strength.
- Hook: 8mm (L-11) or 9mm (M/N-13) crochet hook
- Scissors
- Yarn needle for weaving in ends
- Stitch markers (optional)
🧶 Abbreviations (US Terms):
- ch – chain
- sc – single crochet
- hdc – half double crochet
- sl st – slip stitch
- st(s) – stitch(es)
- rnd – round
📝 Instructions:
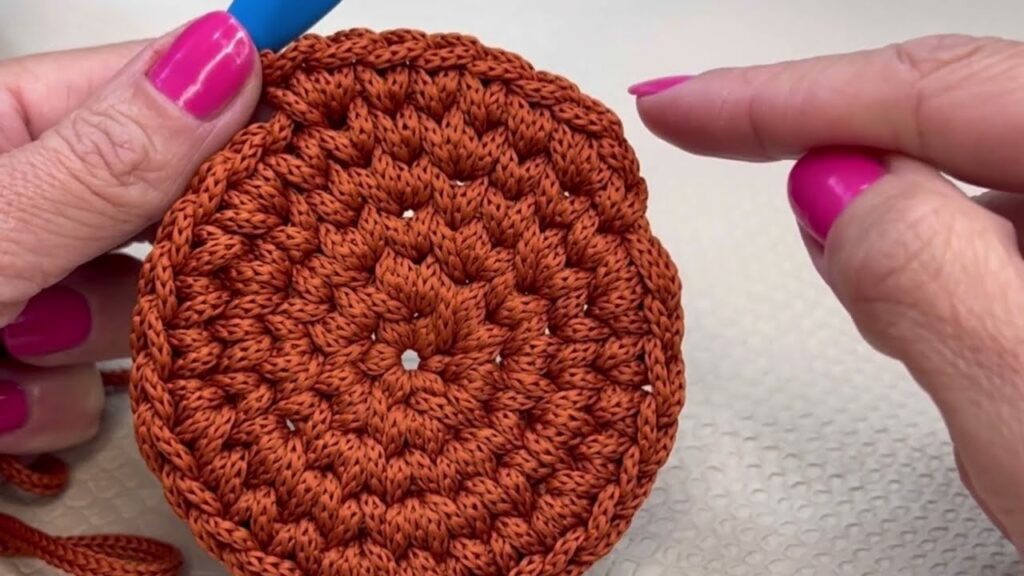
✅ Step 1: Create the Base (Oval Bottom)
- Ch 25 (this will be the length of the base; you can adjust for a longer or shorter bag).
- Rnd 1: Starting in 2nd ch from hook, sc in each st across. At the end, add 3 sc in the last stitch to turn the corner.
- Work on the other side of the chain: sc in each ch across. In the last st, add 2 sc, and sl st to the first st. (This forms an oval.)
- Rnd 2-6: Continue working in sc, increasing at the curves by adding 2 sc in the stitches at the ends (to keep the oval shape flat). The base should get larger with each round. 🧠 Tip: Stop increasing when your base is the size you want (around 15–18 inches long).
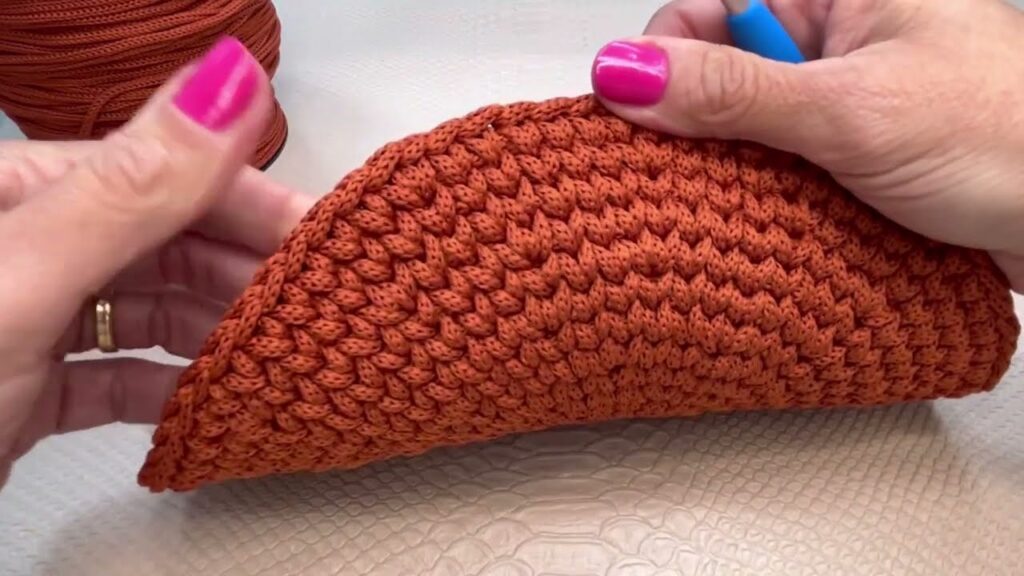
✅ Step 2: Build the Body (No More Increasing)
- Rnd 7 onward: Work 1 sc in each st around with no increases. This will build up the sides of your bag. 🪄 For a slightly looser and faster pattern, switch to hdc for the body.
- Continue this for 20–30 rounds, or until the bag is the height you want (e.g., 12–16 inches tall).
✅ Step 3: Create the Handles
- Choose where to place the handles (about 6–8 inches apart, centered on each side).
- On next round:
- Sc to where you want the handle to start.
- Ch 15–20 (this is your handle length).
- Skip 10–15 stitches (depends on how wide you want the handle opening), then sc into the next stitch.
- Repeat for the other side.
- Next round: Sc into each st, and sc into each chain across the handle chains. 🔁 Repeat 1-2 more rounds over the handle sections to make them stronger and more secure.
✅ Step 4: Finishing
- When your bag is the desired size:
- Sl st to join, cut the yarn, and weave in all ends using a yarn needle.
- Optional: Add a fabric lining for stability, or sew on a button or snap closure.
🎨 Customization Ideas:
- Add color changes or stripes.
- Crochet a pocket separately and sew it inside or outside.
- Use T-shirt yarn for a stretchier, chunkier look.
- Add a baseboard or insert for extra strength.
🧺 Estimated Time:
- Beginners: 4–6 hours
- Intermediate: 2–3 hours
🧵 Summary:
This big crochet bag is easy to make, even if you’re new to crochet! With basic stitches, simple construction, and fun customization options, you can create a stylish, functional tote in just a few hours. It’s perfect for markets, groceries, travel, or beach days.
Watch video: