 by
by Absolutely! Let’s make a detailed, step-by-step guide for creating a “You Can’t Buy It Anywhere!” Marshmallow Handbag using leftover yarn. This project is perfect for using up yarn scraps and making a cute, soft, puffy accessory. I’ll cover materials, preparation, pattern ideas, and assembly tips.
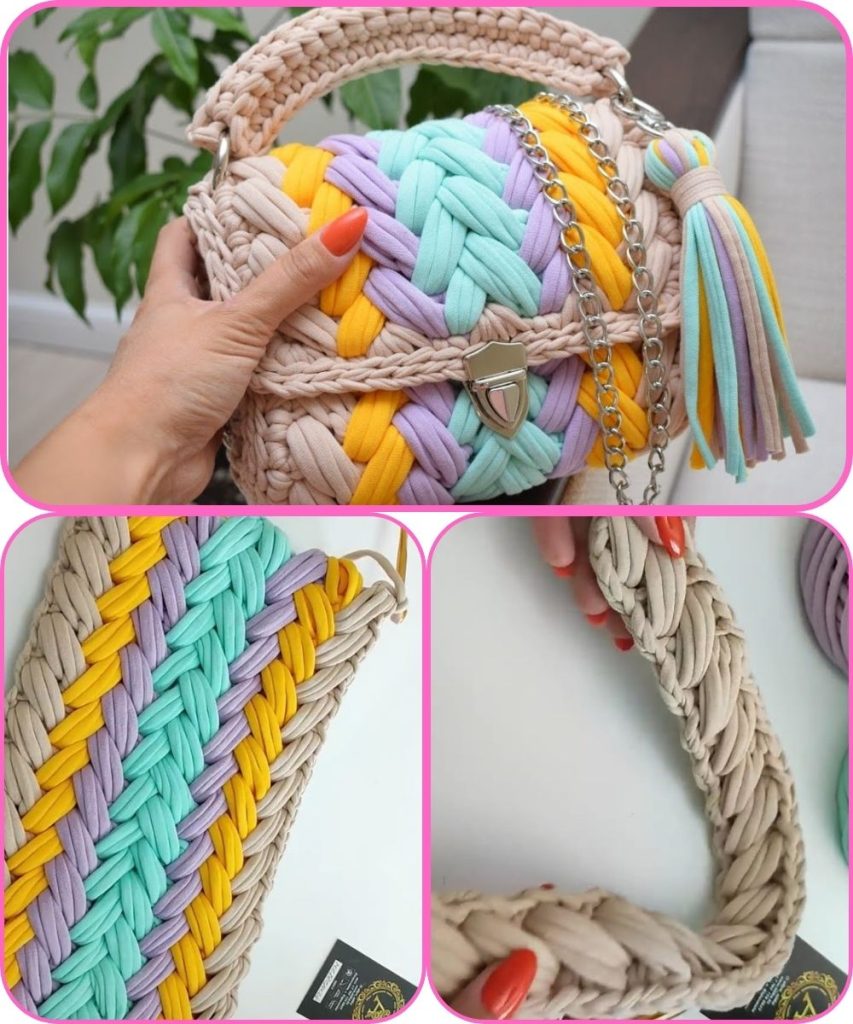
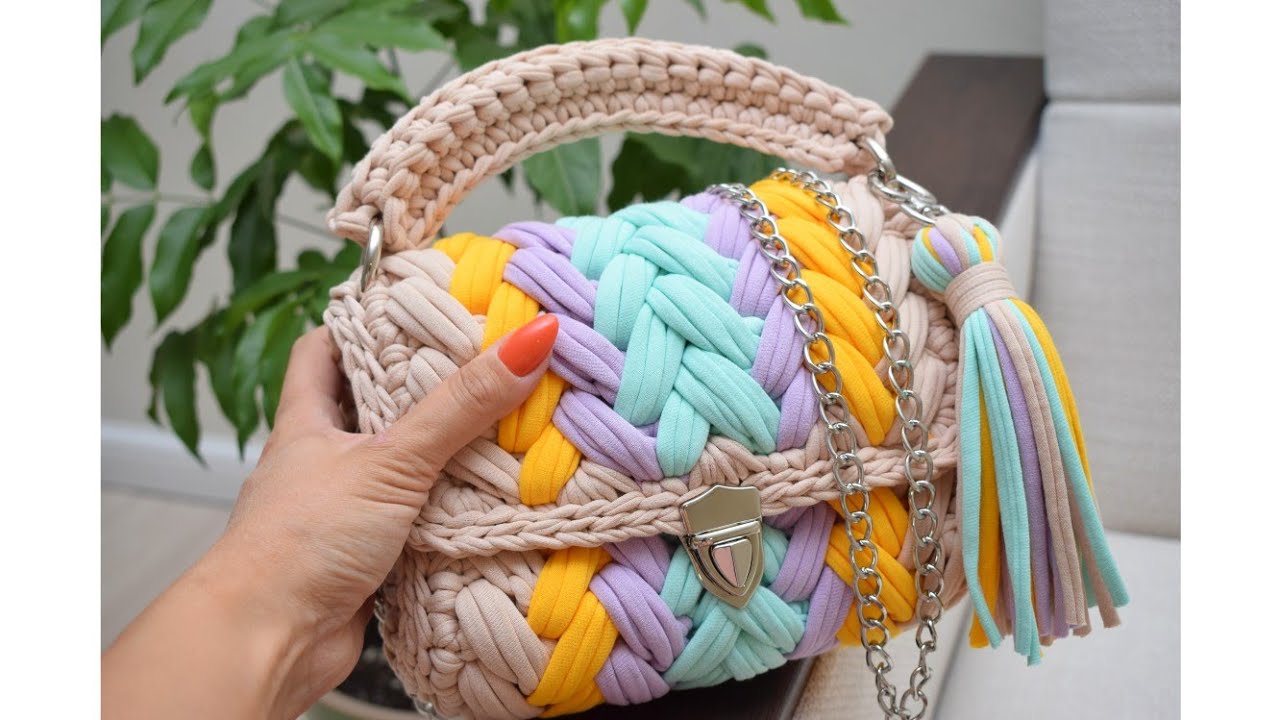
Marshmallow Handbag from Yarn Remnants
Materials Needed
- Yarn scraps/remnants: Choose soft, medium-weight yarns (like acrylic, cotton, or blends). Multiple colors make it fun and playful.
- Crochet hook: Use a size suitable for your yarn (usually 4mm–6mm for medium yarn).
- Scissors
- Tapestry needle for sewing pieces together
- Stuffing (optional): For extra puffiness in “marshmallow” segments
- Stitch markers (optional) to keep track of rounds
- Bag lining (optional): Fabric scraps for durability
Step 1: Decide the Shape and Size
A marshmallow handbag typically has a rectangular or slightly rounded shape, with puffy segments resembling marshmallows.
- Example size: 20 cm x 15 cm (8” x 6”)
- Number of “marshmallow segments”: 6–8 across the width for a chunky, squishy look
Step 2: Make the “Marshmallow Puff” Units
These are the basic building blocks. You can make them as crochet puffs or bobbles.
Method: Puff Stitch
- Chain 3 (counts as first stitch).
- Yarn over, insert hook into next stitch, yarn over, pull through (3 loops on hook).
- Yarn over, pull through 2 loops (2 loops remain on hook).
- Repeat step 2 two more times in the same stitch (4 loops on hook).
- Yarn over, pull through all loops.
- Chain 1 to close puff.
💡 Make rows of puffs, enough to cover the handbag front and back.
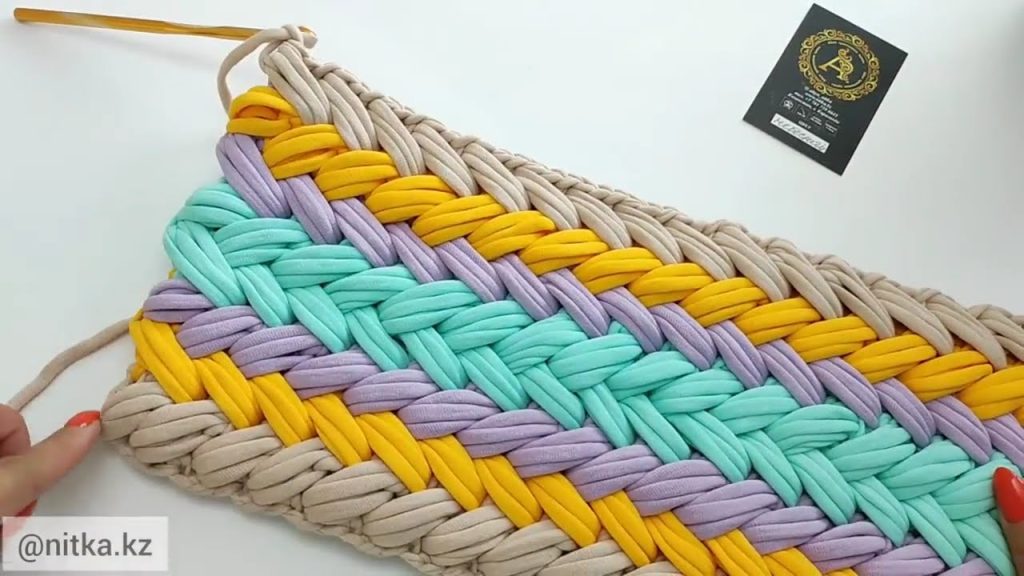
Step 3: Crochet the Base
Once you have your puff rows:
- Chain the width of the bag.
- Work in rows alternating regular stitches (like single crochet) with puff stitches.
- Create a front panel and a back panel. Each panel should match in size and puff arrangement.
Step 4: Assemble the Bag
- Lay front and back panels together, puff sides facing out.
- Using a tapestry needle and yarn, sew the sides and bottom with a whip stitch or slip stitch.
- If desired, line the bag with fabric for durability. Sew or glue it inside.
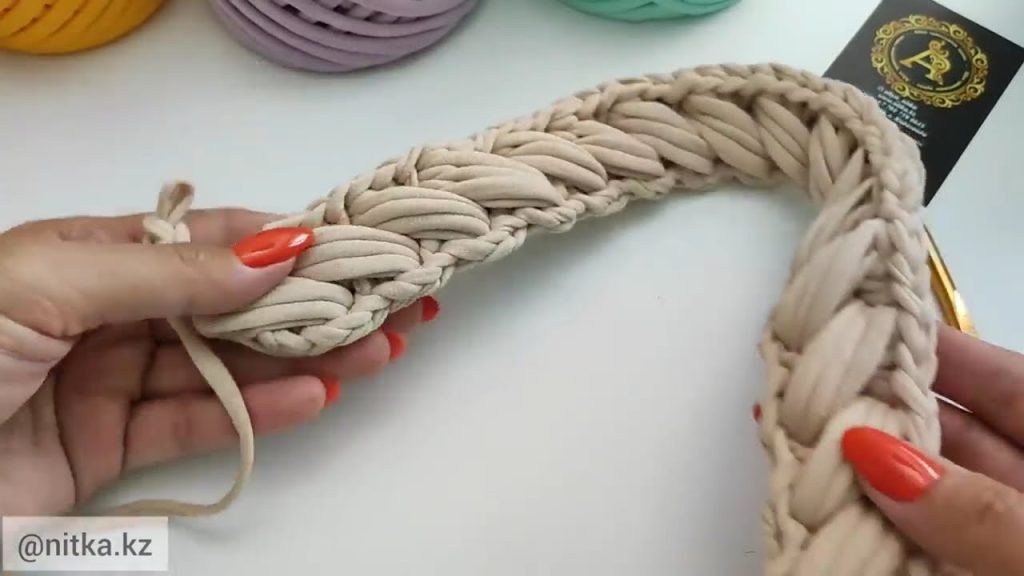
Step 5: Add Straps
- Short strap: Chain desired length and attach ends to sides.
- Long crossbody strap: Chain a longer length; reinforce by crocheting around the chain for extra thickness.
- You can also crochet a puff strap for continuity with the bag design.
Step 6: Optional Embellishments
- Add buttons, beads, or pom-poms to enhance the playful “marshmallow” look.
- Use different yarn colors to make a rainbow puff effect.
- Attach a zipper or button closure if needed.
Tips for a Perfect Marshmallow Handbag
- Use soft, fluffy yarn to enhance puffiness.
- Stuff puffs lightly for extra squish.
- Mix colors to make the bag look unique and whimsical.
- Keep tension loose for puffs, tight for base stitches for stability.
Result
You’ll end up with a unique, soft, squishy marshmallow handbag that no one can buy in stores, made entirely from leftover yarn. It’s eco-friendly, customizable, and perfect for showing off your crochet skills!
If you want, I can draw a simple diagram showing the puff layout and bag construction, which makes it super easy to follow. It’ll look like a real pattern guide.
Watch tutorial: