 by
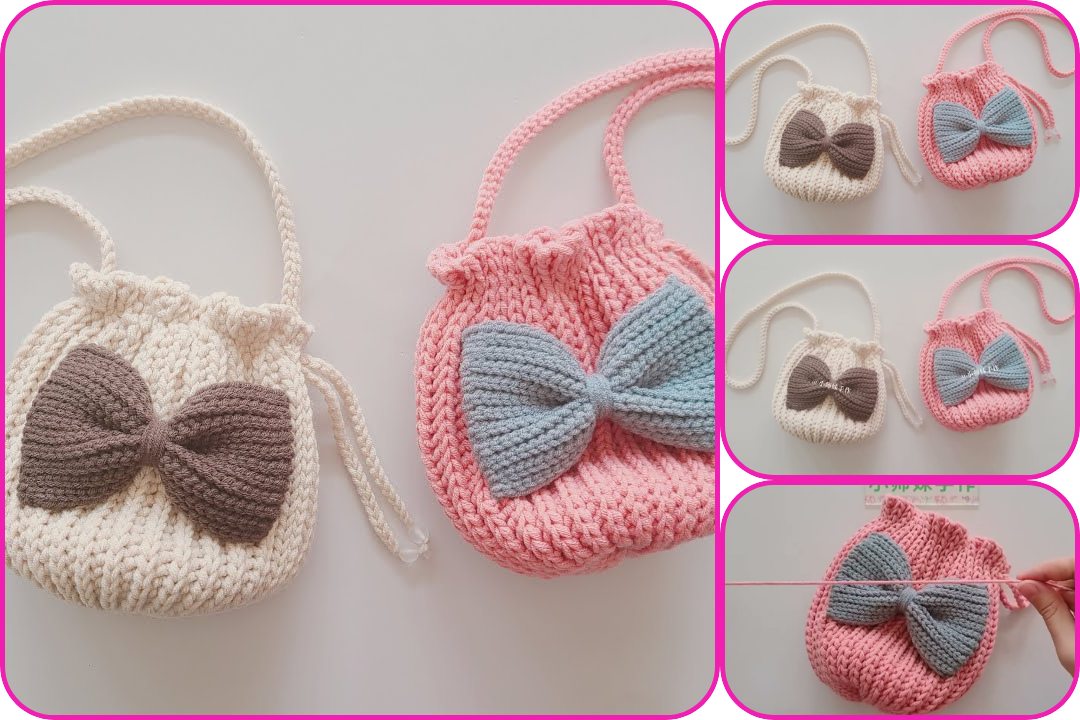
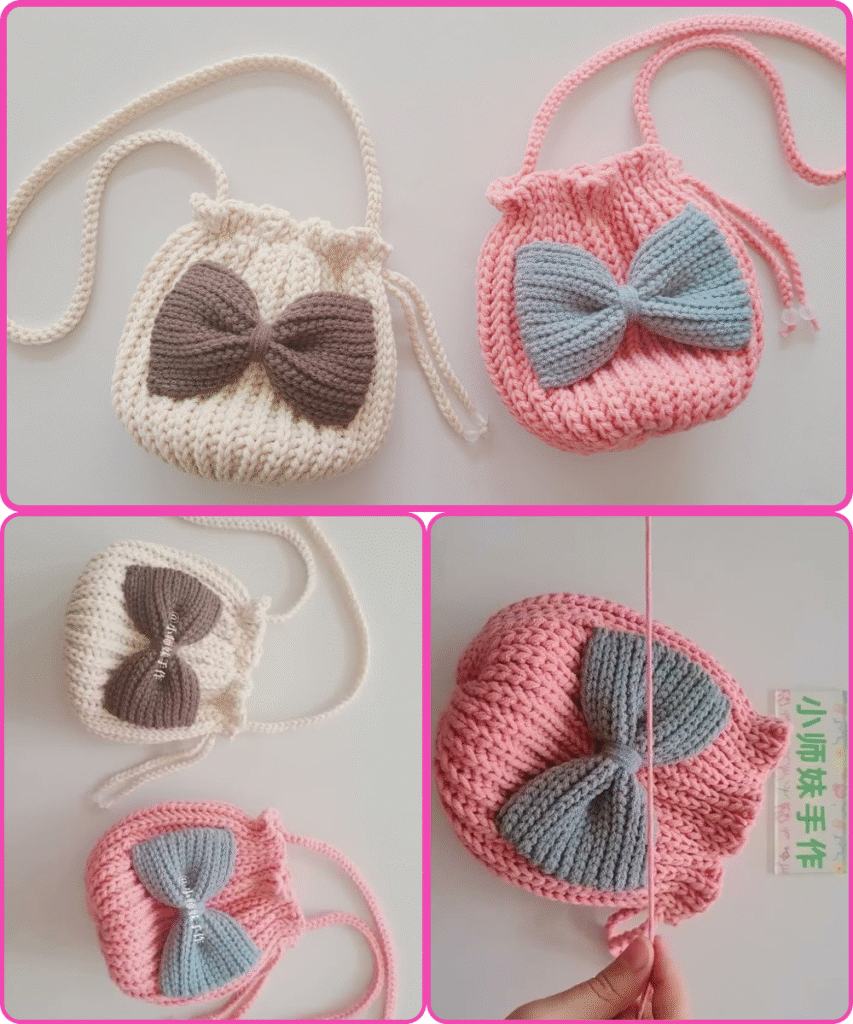
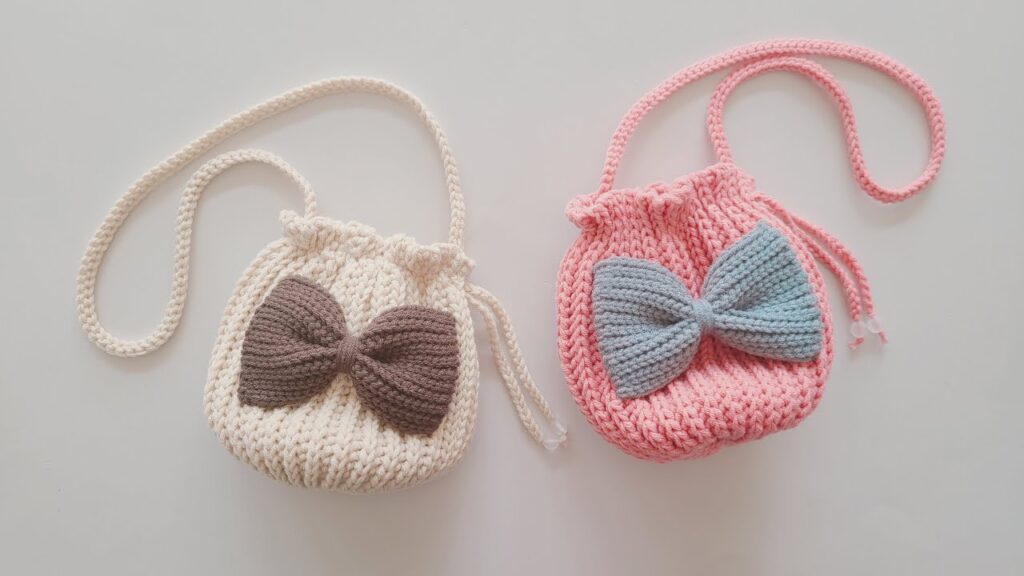
by Here’s a detailed guide on how to make a “Little Bit Chubby, Very Cute Crochet Drawstring Crossbody Bag” with a threaded body and a simple bow. This tutorial is beginner-friendly but also satisfying for intermediate crocheters who enjoy playful and functional designs.
🧶 Project Overview
- Bag Style: Chubby, rounded drawstring crossbody bag
- Features: Threaded (ribbed or textured) body, adjustable drawstring, cute bow
- Skill Level: Advanced beginner to intermediate
- Techniques Used: Crochet in the round, single crochet, half double crochet, slip stitch, chain, basic shaping
- Estimated Size: ~6-8 inches tall and wide (can vary)
✨ Materials
| Item | Description |
|---|---|
| Yarn | Medium weight cotton yarn (e.g. Worsted/Aran #4) |
| Hook | 3.5mm–4.5mm (depending on your yarn and tension) |
| Stitch markers | Optional, for marking rounds |
| Yarn needle | For weaving in ends |
| Scissors | To cut yarn |
| Lining (optional) | Fabric for lining the bag |
| Cord/String | For drawstring (can be crocheted or ready-made) |
| D-ring or strap | Optional: for detachable crossbody strap |
🪡 Pattern Breakdown
1. Base (Flat Circle)
This forms the bottom of your chubby bag.
plaintextCopyEditRound 1: Magic ring, 6 sc in ring. (6)
Round 2: 2 sc in each stitch around. (12)
Round 3: *1 sc, inc* repeat around. (18)
Round 4: *2 sc, inc* repeat around. (24)
Continue increasing evenly until desired base diameter (e.g., 60-72 stitches)
2. Body (Threaded or Ribbed Texture)
Use Back Loop Only (BLO) or Front Post/Back Post to create a ribbed effect.
plaintextCopyEditRound X: 1 sc in each stitch around (no more increasing). This forms the wall.
Repeat in the round with BLO sc or hdc for texture.
Continue until the body height is about 6-7 inches.
Tip: If you want a really “chubby” look, increase the height-to-width ratio only slightly—let it puff!

3. Drawstring Channel
plaintextCopyEditRound X+1: *Ch 2, skip 1, sc in next* repeat around to make holes for the drawstring.
Round X+2: Sc in each stitch and chain space around to reinforce.
4. The Drawstring
Option 1: Crochet a long chain (e.g., ch 90–120) and slip stitch back for sturdiness.
Option 2: Use a cotton cord or decorative rope.
- Weave the string through the holes made in the channel.
- Add a cute crochet bow or tie a simple ribbon bow.
5. Strap (Crossbody)
Crochet Option:
plaintextCopyEditCh 150–200 (depending on desired length), sc or hdc across to thicken.
Attach each end to opposite sides of the bag (you can crochet them in or sew).
Alternative: Use a ready-made strap with hooks or D-rings.
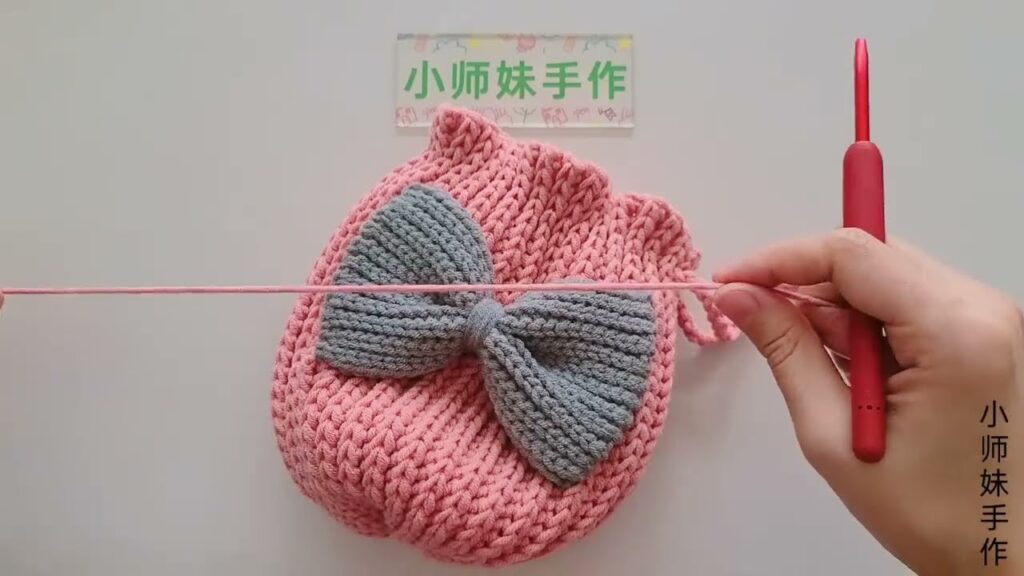
🎀 Crochet Bow (Optional Add-on)
Here’s a simple mini bow:
plaintextCopyEditCh 15
Row 1: Sc in 2nd ch from hook and across (14)
Row 2-4: Sc across (14)
Fasten off and cinch center with yarn.
Wrap yarn tightly around middle to form bow shape.
Sew onto bag or attach as a charm.
🧺 Finishing Touches
- Weave in all ends neatly.
- Optionally line the inside with fabric for durability.
- Add a tag, charm, or decorative pin.
🎨 Design Ideas
- Use multicolor yarn for a playful look.
- Add fluffy pom-poms to the drawstring ends.
- Experiment with different textures (bobbles, puff stitches).
- Try animal ears or embroidery to personalize it.
Watch video: