 by
by Of course! Here’s a detailed, beginner-friendly tutorial-style write-up you can use for a blog post, pattern introduction, or handmade gift guide. It’s warm, encouraging, and easy to follow—even for first-time crocheters.

How to Make Everyone Wants Such a Gift
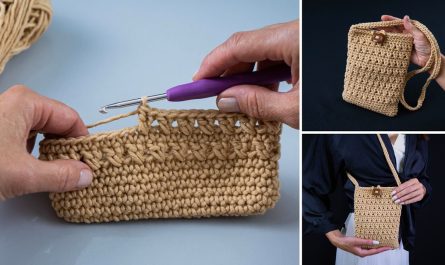
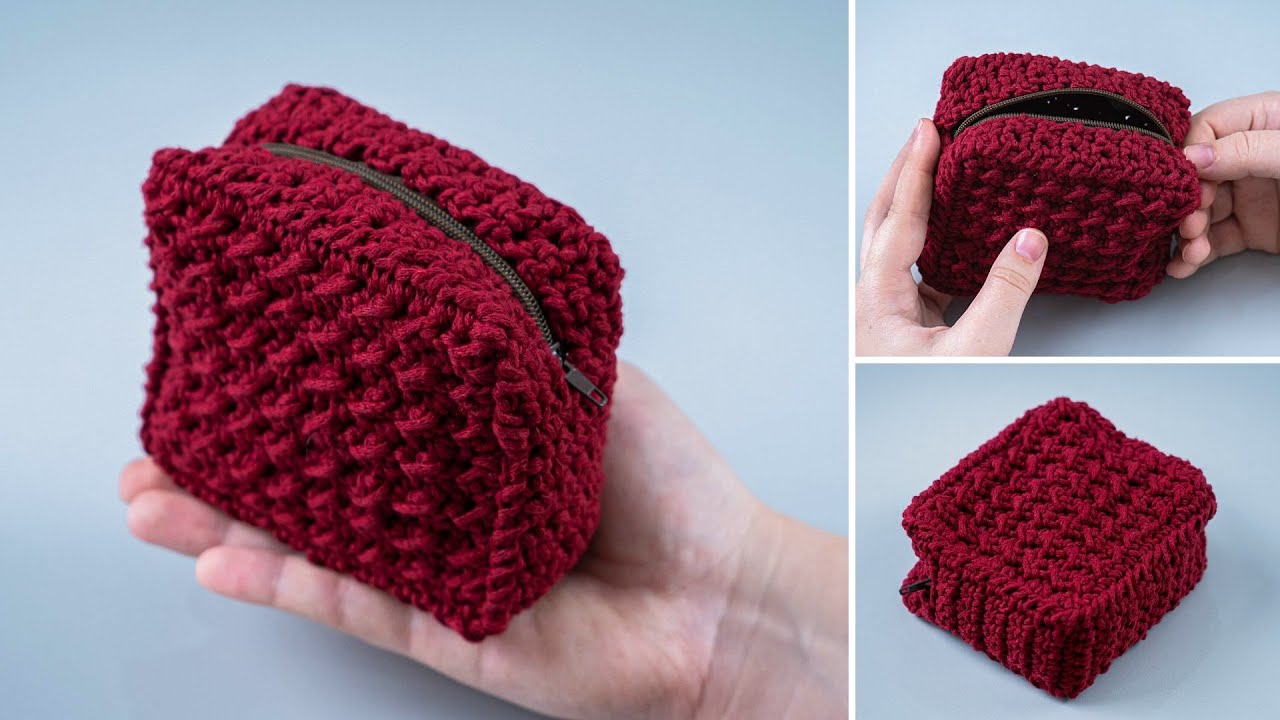
A Beginner-Friendly Tutorial for a Crochet Purse / Wallet
Handmade gifts always feel more special—but a crochet purse or wallet takes it to the next level. It’s practical, stylish, and surprisingly easy to make. Even if you’re a beginner, this project is totally within reach and guaranteed to impress. Once people see it, trust me—everyone will want one!
Let’s walk through the process step by step.
Why This Crochet Purse Is Perfect for Beginners
- Uses simple stitches
- Made from basic shapes (mostly rectangles)
- No complicated counting or shaping
- Easy to customize in size, color, and style
- Works up quickly—perfect for gifts
Materials You’ll Need
Yarn
- Medium-weight yarn (worsted / category 4)
Cotton yarn is ideal for wallets and purses because it’s sturdy and holds shape well.
Tools
- Crochet hook (4–5 mm / US G–H)
- Yarn needle
- Scissors
Optional Extras
- Button or snap closure
- Zipper (for a wallet-style finish)
- Fabric lining (optional but professional-looking)
- Small magnetic clasp
Crochet Skill Level
✔ Beginner
✔ No advanced techniques required
Basic Stitches Used
You only need a few easy stitches:
- Chain (ch)
- Single crochet (sc)
- Slip stitch (sl st)
- Double crochet (dc) (optional, for texture)
If you know how to chain and single crochet, you’re ready!
Step 1: Decide Your Size
Before starting, decide what you want to make:
- Wallet – small, flat, fits in a handbag
- Mini purse – holds phone, keys, cards
- Clutch – slightly larger, great for gifts
👉 Tip: A simple rectangle works for all of them!
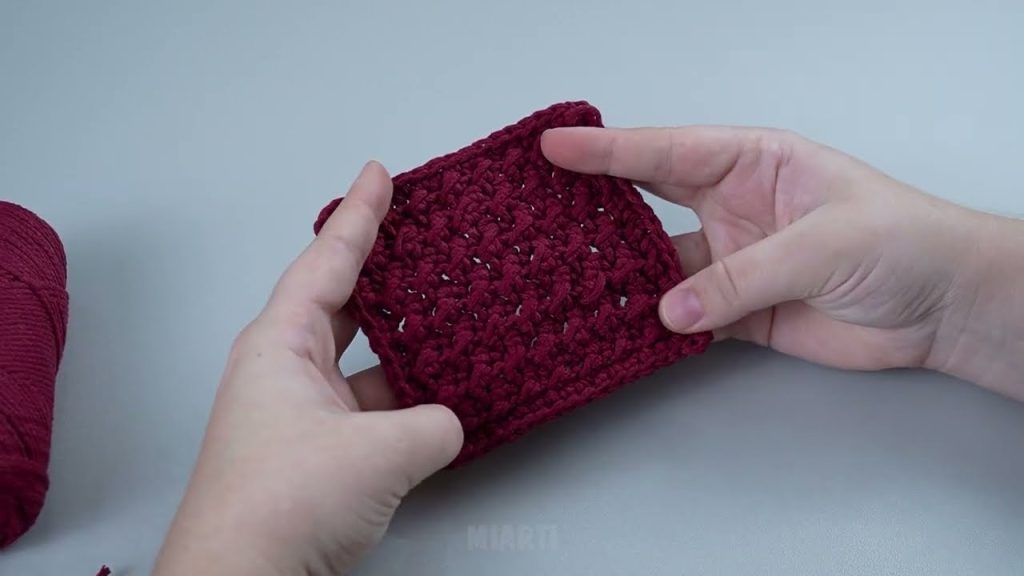
Step 2: Crochet the Main Rectangle
- Chain 25–35 stitches
(This determines the width.) - Single crochet into the second chain from the hook
- Continue single crochet across
- Chain 1, turn
- Repeat rows until the rectangle is:
- About 15–18 cm tall for a wallet
- About 20–25 cm tall for a purse
This rectangle will be folded to create the pouch.
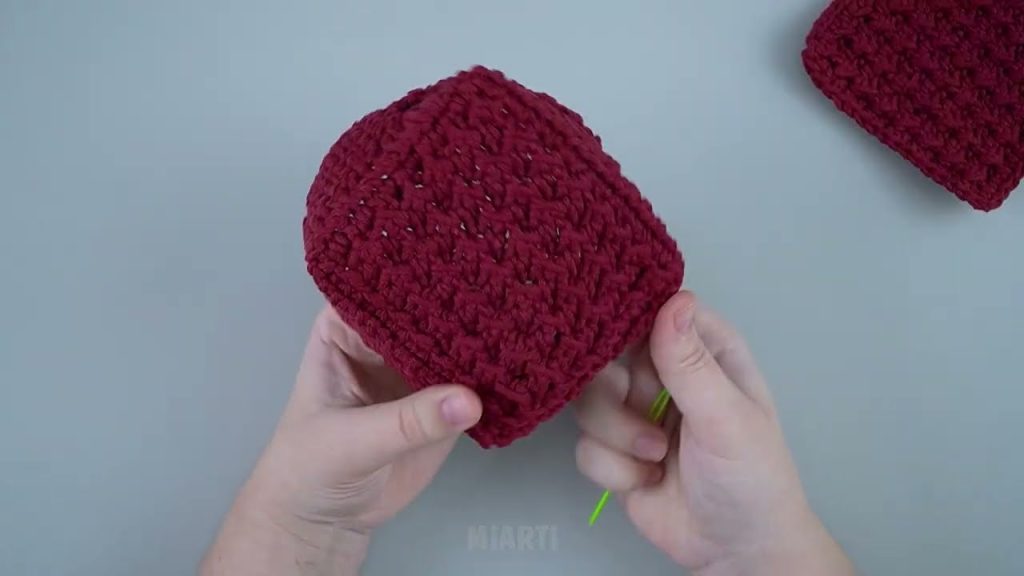
Step 3: Fold and Shape the Purse
- Fold the rectangle:
- Bottom half becomes the pouch
- Top flap folds over the front
- Use single crochet or slip stitch to sew the sides together
- Turn right side out
You now have the basic purse shape!
Step 4: Create the Flap (Optional)
To make it extra stylish:
- Crochet a few rows on the top edge
- Add rounded corners by placing 2–3 stitches in one space
- Finish with a neat border of single crochet
This step gives the purse a polished, boutique-style look.
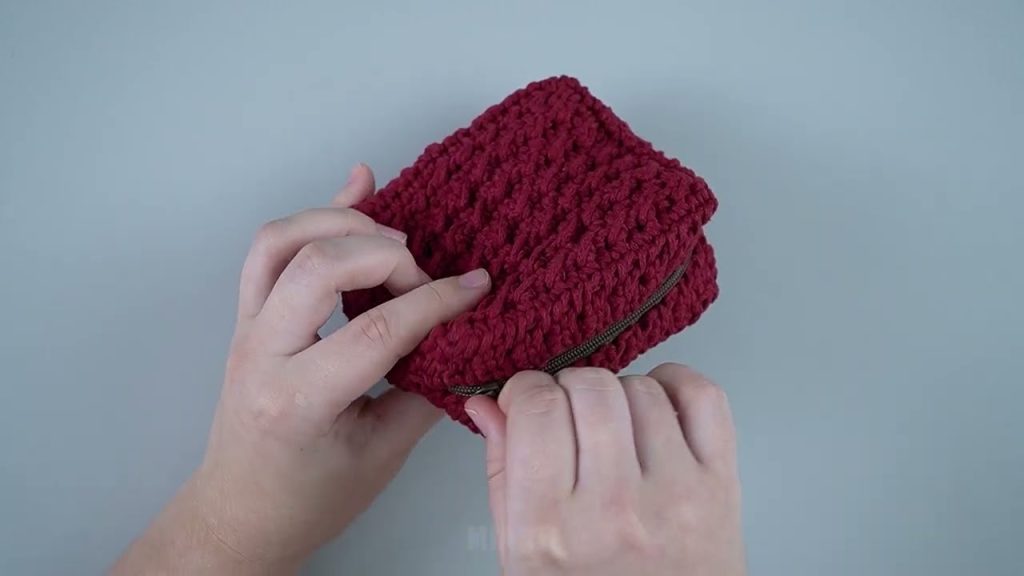
Step 5: Add a Closure
Choose what works best for you:
- Button and loop (easiest)
- Magnetic snap
- Zipper (great for wallets)
For beginners, a button is perfect:
- Sew the button onto the front
- Chain 6–8 stitches on the flap
- Slip stitch to form a loop
Step 6: Optional Strap or Wristlet
Turn your wallet into a purse:
- Chain desired length (30–100 chains)
- Single crochet back across
- Attach securely to both sides
For a wristlet, chain about 20–25 stitches.
Step 7: Finishing Touches
- Weave in all loose ends
- Add a lining for durability (optional)
- Decorate with:
- Tassels
- Crochet flowers
- Color stripes
- Embroidery
These small details make it look store-bought—or better.
Beginner Tips for Best Results
- Use tight stitches for durability
- Choose light or solid colors to see stitches clearly
- Count rows for symmetry
- Block lightly if needed for shape
Why Everyone Loves This Gift
- Handmade with care ❤️
- Useful and stylish
- Customizable for any age or style
- One-of-a-kind—no two are ever the same
Final Thoughts
This crochet purse or wallet proves that beginner projects don’t have to look basic. With just a few stitches and some creativity, you can make a gift people genuinely love—and ask you to make again.
If you’d like, I can:
- Turn this into a printable pattern
- Create a YouTube tutorial script
- Adjust it for kids, teens, or adults
- Add measurements and stitch counts
- Write an SEO-optimized blog version
Watch tutorial: