 by
by Here’s a detailed, step-by-step tutorial on how to crochet a trifold wallet—perfect for beginners who want a stylish and functional handmade accessory.
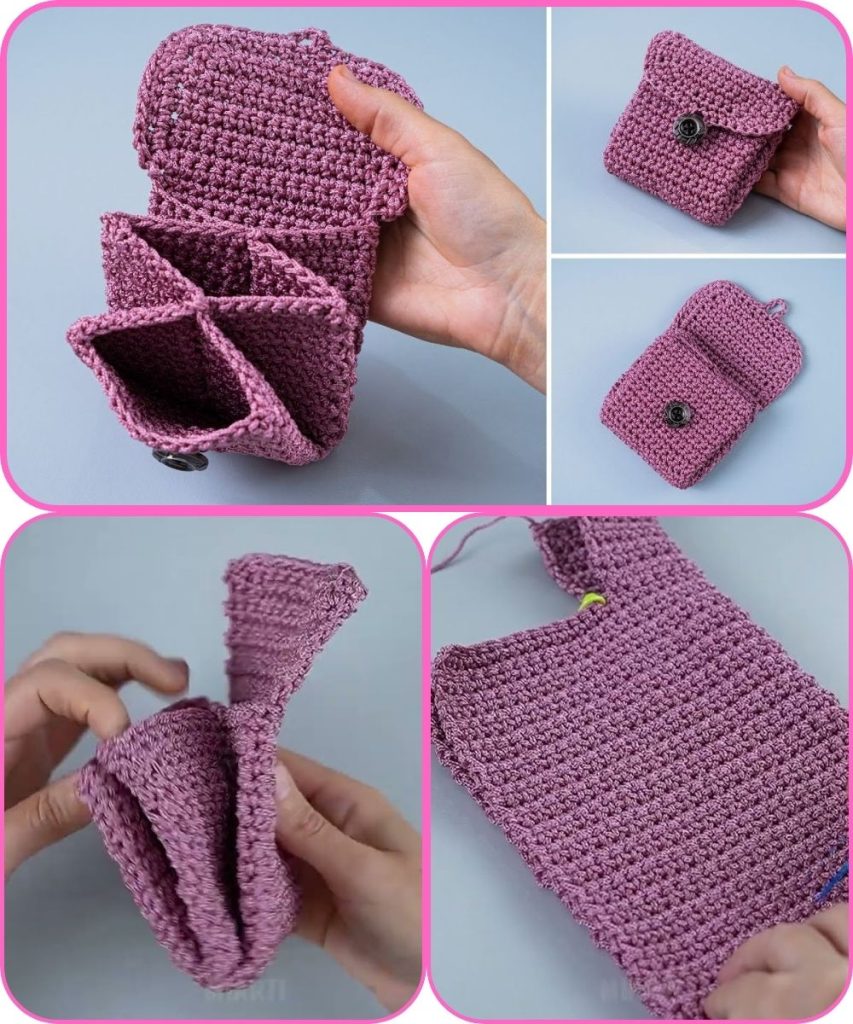
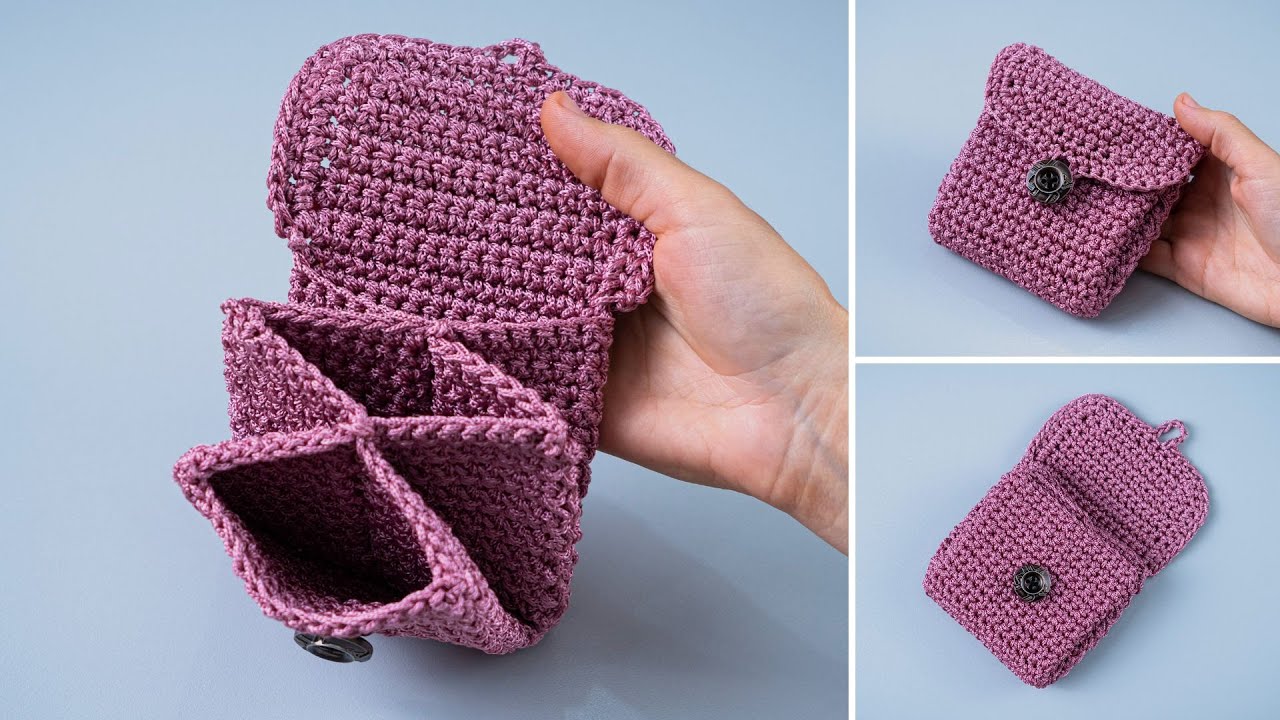
How to Crochet a Trifold Wallet – Step-by-Step Tutorial
A crochet trifold wallet is a practical and chic accessory that you can make with just basic stitches. It’s perfect for beginners because it’s small, portable, and allows you to practice simple crochet techniques while creating something useful.
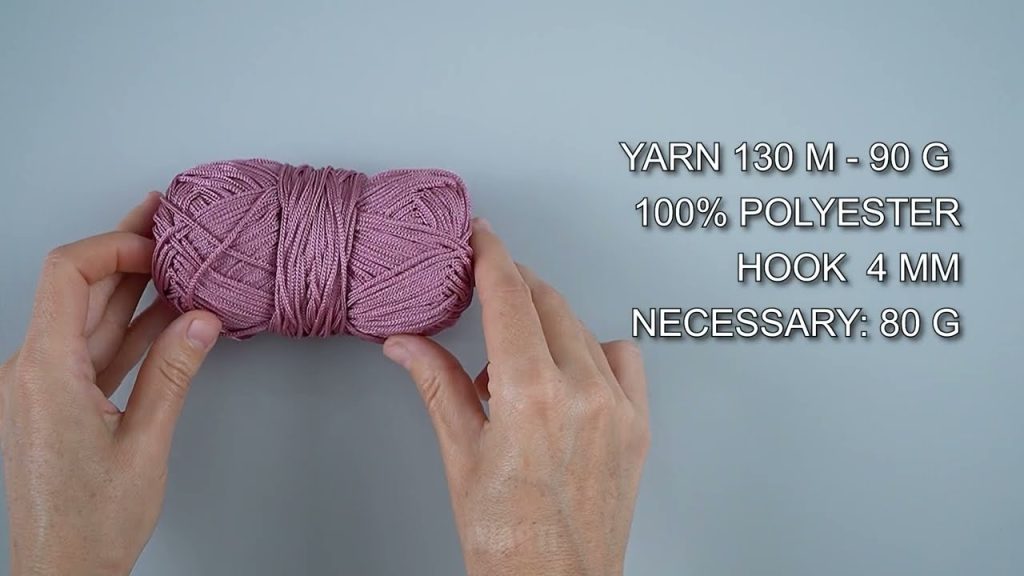
Materials Needed
- Yarn: Medium-weight cotton or acrylic yarn (strong and durable)
- Crochet Hook: 4 mm – 4.5 mm
- Scissors
- Yarn Needle: For sewing parts together and weaving in ends
- Button or Snap (optional): For closure
- Stitch Marker (optional)
Basic Crochet Stitches Used
- Chain (ch) – foundation stitch
- Single Crochet (sc) – tight and durable fabric
- Half Double Crochet (hdc) – optional for height and texture
- Slip Stitch (sl st) – to join rounds or edges
Step 1: Crochet the Main Wallet Rectangle
- Chain 36 stitches (or adjust for desired wallet width).
- Single crochet in the second chain from the hook.
- Continue single crocheting across the row.
- Chain 1 and turn.
- Repeat single crochet for 24–28 rows to form the main rectangle.
Tip: This rectangle will become the body of the wallet, which will be folded into three sections.
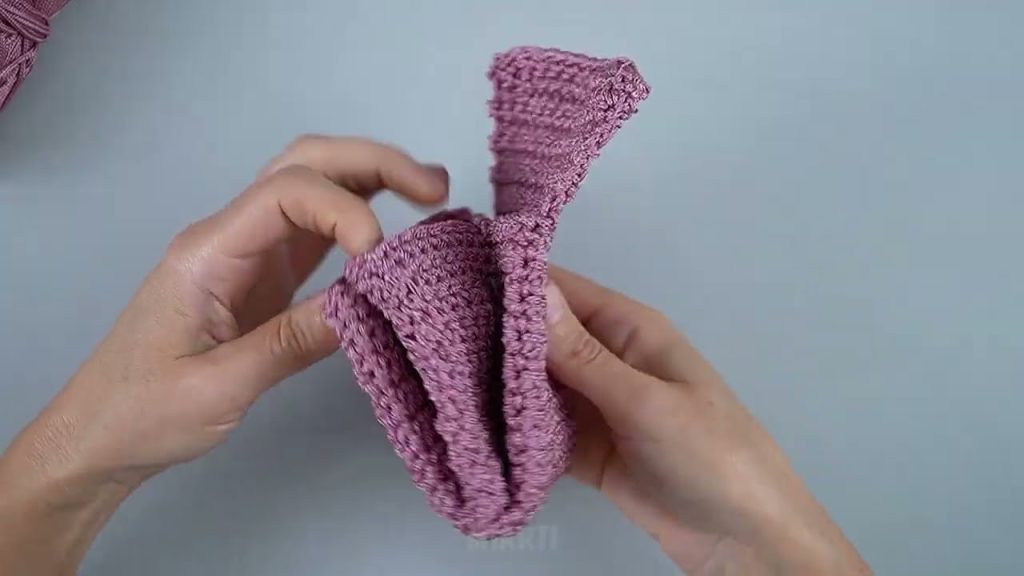
Step 2: Divide the Wallet Into Sections
- Fold the rectangle into thirds to plan the trifold sections.
- Each section will be roughly equal in size.
- Use a stitch marker to mark the folds if needed.
Step 3: Create Card Slots (Optional)
- Decide how many card slots you want in one section (usually 2–3).
- Chain 12–15 stitches for the first slot.
- Single crochet across the chain.
- Attach it to the section with single crochet along the bottom edge.
- Repeat for additional slots.
These card slots add functionality and organization to your wallet.
Step 4: Add Coin Pocket (Optional)
- Choose one section for a small coin pocket.
- Chain 12 stitches.
- Single crochet back across the chain.
- Crochet 2–3 rows for the pocket height.
- Attach the pocket to the section using single crochet along the sides and bottom.
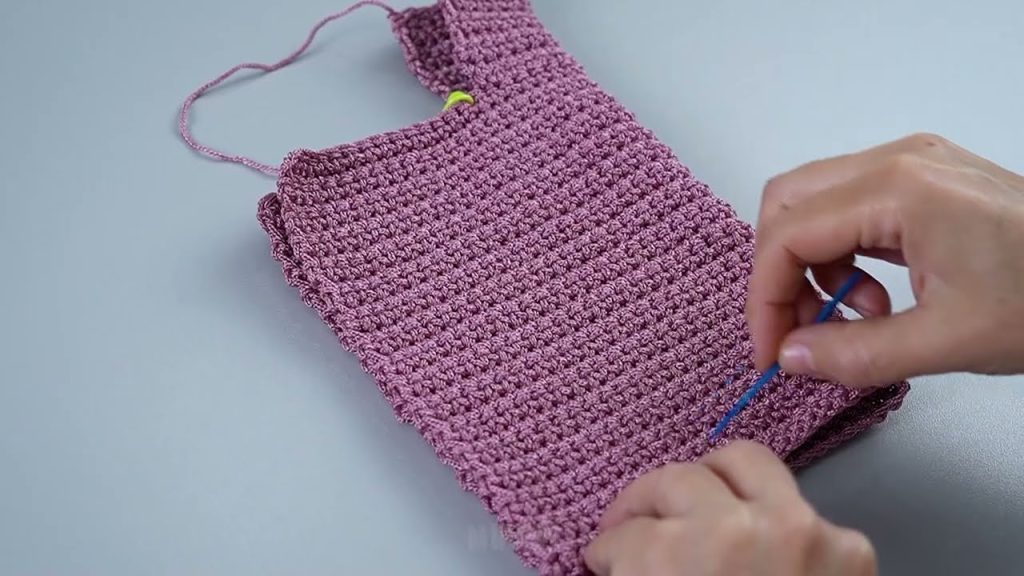
Step 5: Crochet the Wallet Edges
- Work a single crochet border around the entire rectangle.
- Crochet evenly around all sides, including pockets and card slots.
- This gives the wallet a neat, finished look.
Step 6: Add a Closure
- Button closure: Sew a button on one side and make a small loop with chain stitches on the opposite side.
- Snap closure: Attach a small snap for easy opening and closing.
Step 7: Fold the Wallet
- Fold the rectangle into three sections along the marks.
- Ensure that card slots and coin pockets line up neatly inside.
Step 8: Finish the Wallet
- Weave in all loose ends with a yarn needle.
- Press lightly if needed (do not iron if using acrylic yarn).
- Optional: Add decorative stitches or color stripes for a unique look.
Tips for Beginners
- Keep stitches tight to make the wallet sturdy.
- Use cotton yarn for durability and minimal stretching.
- Count rows carefully when creating card slots to keep everything even.
- Experiment with colors to make each wallet unique.
Final Thoughts
Crocheting a trifold wallet is a simple, beginner-friendly project that results in a practical and stylish accessory. Once you master this basic wallet, you can experiment with additional pockets, patterns, or textures to create custom designs for yourself or as gifts.
If you want, I can also:
- Create a crochet diagram with measurements for a trifold wallet
- Write a beginner-friendly version with stitch counts for each part
- Suggest color patterns and decorative ideas
Watch tutorial: