 by
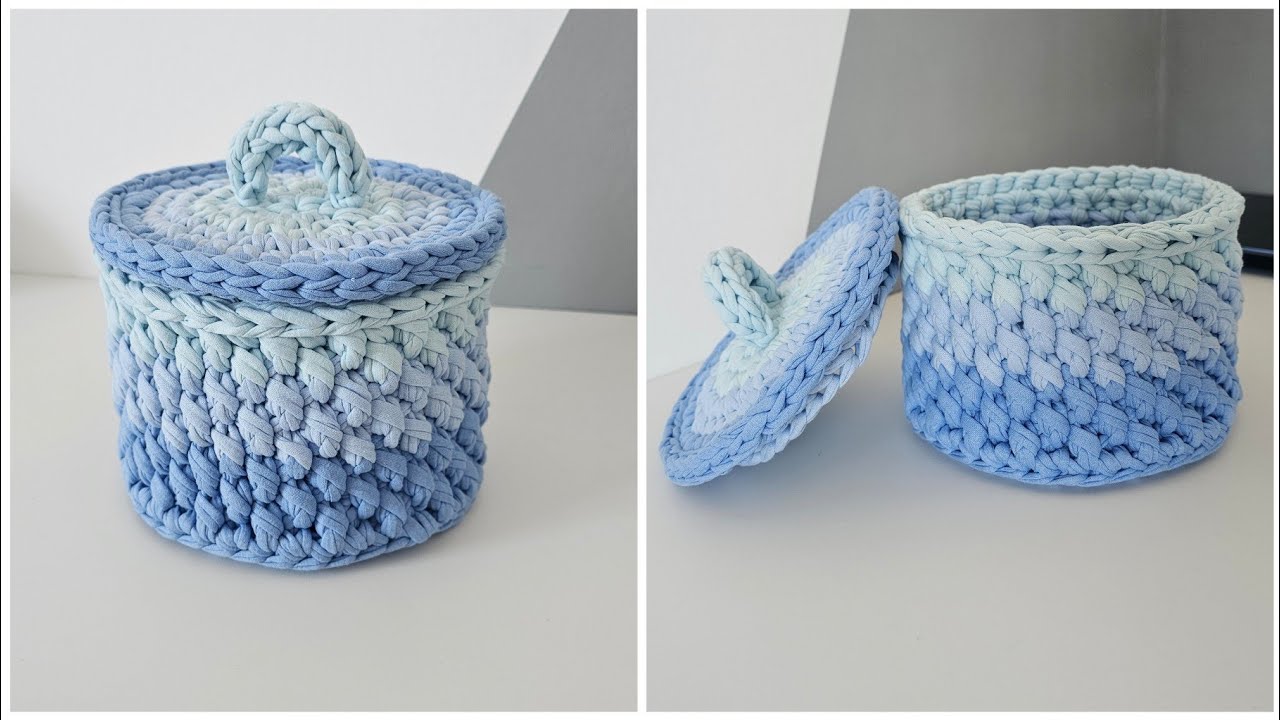
by Sure! 🧺 Here’s a detailed, step-by-step guide on how to make a basket of knitted yarn with a lid — perfect for decorative storage or gifts. I’ll include materials, techniques, and tips for structure and shaping.
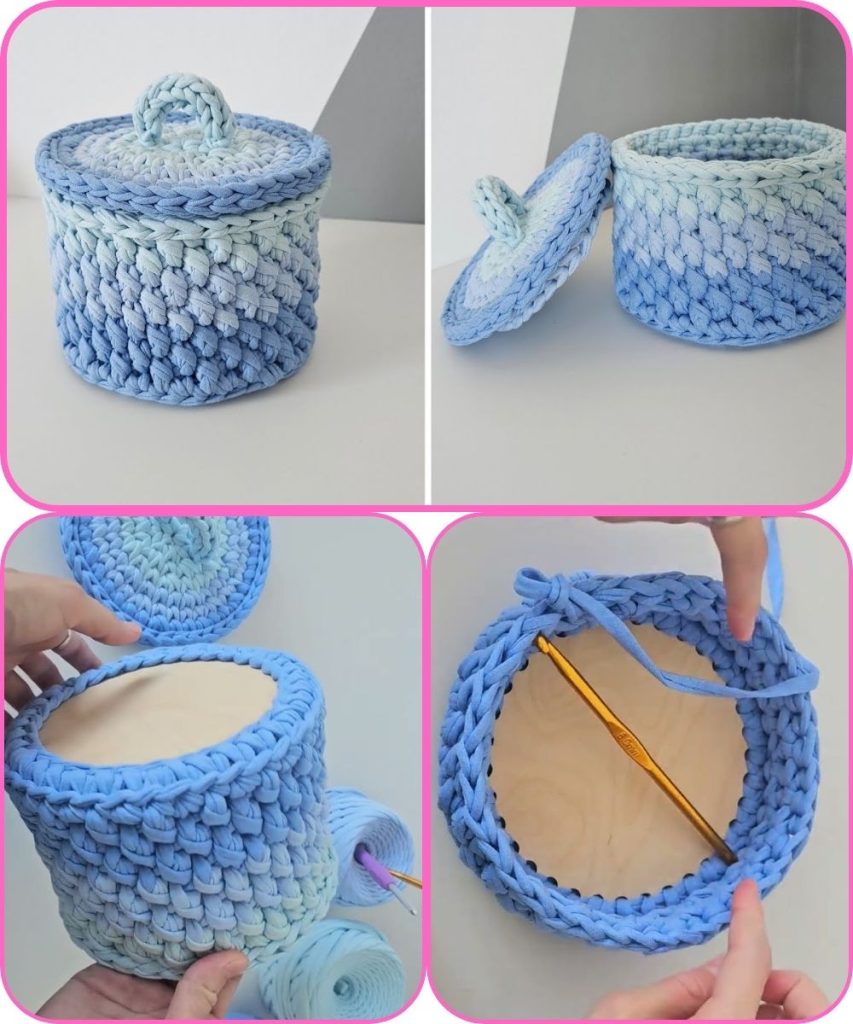
🧶 How to Make a Knitted Yarn Basket with a Lid
🪡 Overview
This project creates a sturdy, decorative basket made from knitted yarn, complete with a matching lid. The basket can be functional for holding craft supplies, small items, or decor. We’ll use a sturdy yarn and some reinforcement for structure.
🧰 Materials Needed
| Item | Details |
|---|---|
| Yarn | Super bulky cotton, jute, or T-shirt yarn (sturdy and thick). 2–3 skeins depending on size. |
| Knitting Needles | Circular or double-pointed needles, size 8–10 mm (US 11–15). |
| Stiffener (optional) | Plastic canvas, rope, or cord to reinforce shape. |
| Tapestry Needle | For sewing seams and weaving in ends. |
| Stitch Markers | Helpful for marking rounds. |
| Scissors | For cutting yarn. |
| Measuring Tape | To check dimensions. |

🧵 Step 1: Choose the Basket Size
Decide your basket’s diameter and height.
For example:
- Small: 6” wide × 4” tall
- Medium: 10” wide × 6” tall
- Large: 14” wide × 8” tall
This will determine how many stitches you cast on and how many rounds to knit.
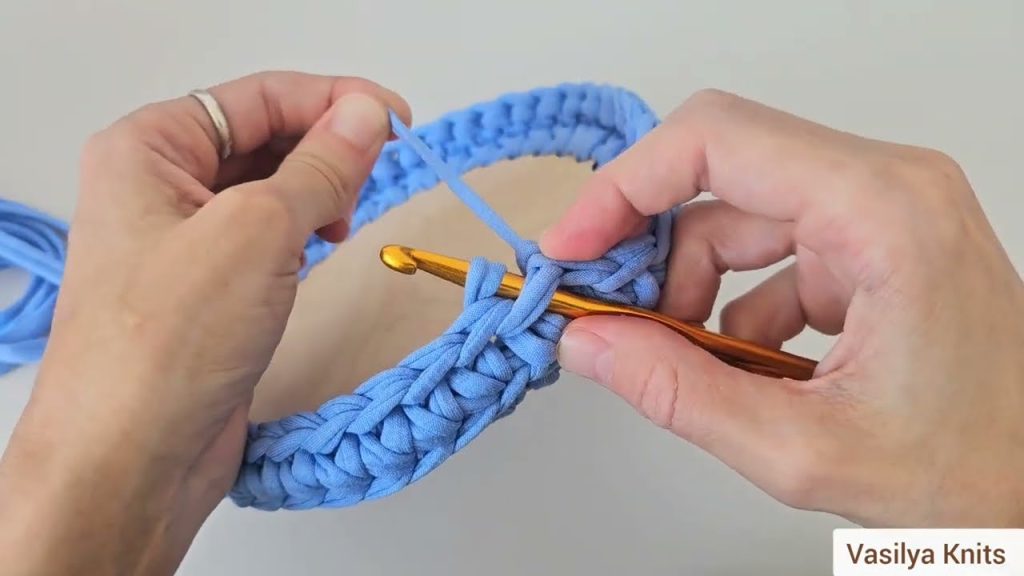
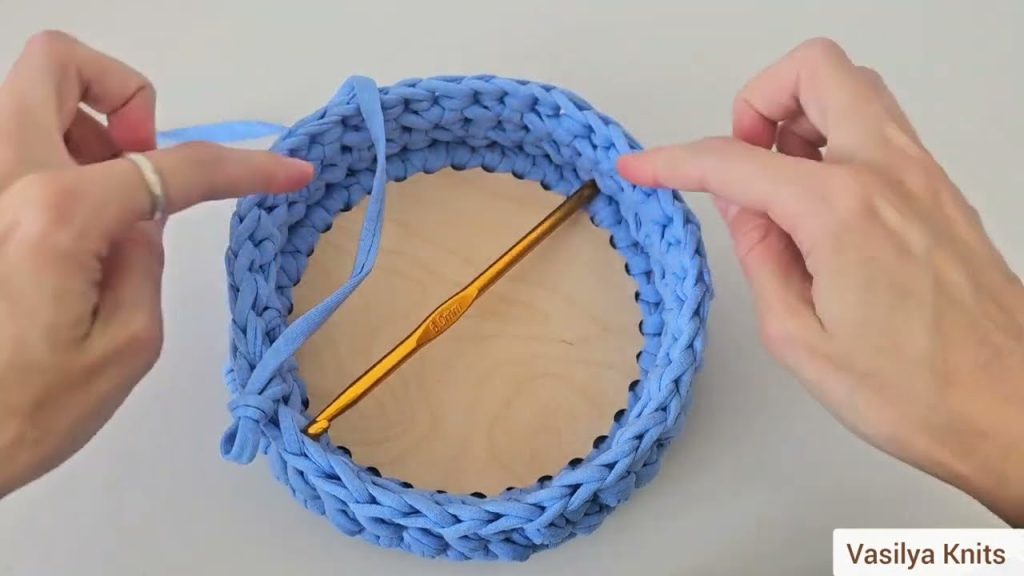
🧶 Step 2: Knit the Base (Bottom Circle)
- Cast on 6 stitches using the magic loop or double-pointed needles.
- Round 1: Knit all stitches.
- Round 2: Kfb (knit front and back) in each stitch around → 12 stitches.
- Round 3: Knit.
- Round 4: K1, Kfb repeat around → 18 stitches.
- Continue increasing evenly every other round until your circle reaches your desired base diameter.
- Example: 10” base ≈ 60–72 stitches (depends on yarn gauge).
- Place a stitch marker to mark the beginning of the round.
💡 Tip: To keep it flat, alternate increase rounds and plain knit rounds.
🧶 Step 3: Knit the Basket Sides
- Stop increasing. Continue knitting around without increases to build height.
- Knit in stockinette stitch (knit all rounds if working in the round).
- To make the sides more structured, consider:
- Holding two strands of yarn together, or
- Inserting a cord or rope inside the stitches as you go.
- Knit until the basket reaches your desired height.
Example:
- For a 6” tall basket: about 25–30 rounds (depends on yarn and gauge).
Optional design ideas:
- Add ribbing (K2, P2) for texture.
- Use color changes or stripes for decoration.
🧶 Step 4: Bind Off and Reinforce
- Bind off loosely so the edge doesn’t curl.
- You can insert a plastic canvas circle at the base and sides if you want the basket stiffer.
- Weave in all yarn ends securely with a tapestry needle.
🧶 Step 5: Make the Lid
- Knit another flat circle using the same base method (Step 2), matching the basket’s diameter.
- Once the circle is the same size as the basket opening:
- Knit 3–4 more rounds without increases to form the lid rim that will sit over the basket.
- Bind off loosely.
Optional handle:
- Knit or crochet a small I-cord (5–6 stitches wide, 3–4 inches long).
- Sew it securely to the lid center as a handle.
🧶 Step 6: Finishing Touches
- Block the basket lightly (steam or damp cloth) to smooth edges.
- Shape it by hand while it’s drying.
- If using soft yarn, insert a cardboard or plastic insert at the bottom for sturdiness.
- Decorate with buttons, tags, or embroidery.
✨ Optional Variations
- Crocheted Edges: Crochet a slip stitch or crab stitch along the top edge for structure.
- Two-Tone Basket: Use one color for the base and another for the sides or lid.
- Fabric Lining: Add a fabric insert for a clean interior finish.
🧺 Example Dimensions
| Basket Size | Base Diameter | Height | Yarn Used |
|---|---|---|---|
| Small | 6 in | 4 in | ~100 g |
| Medium | 10 in | 6 in | ~200–250 g |
| Large | 14 in | 8 in | ~350–400 g |
Watch tutorial: