 by
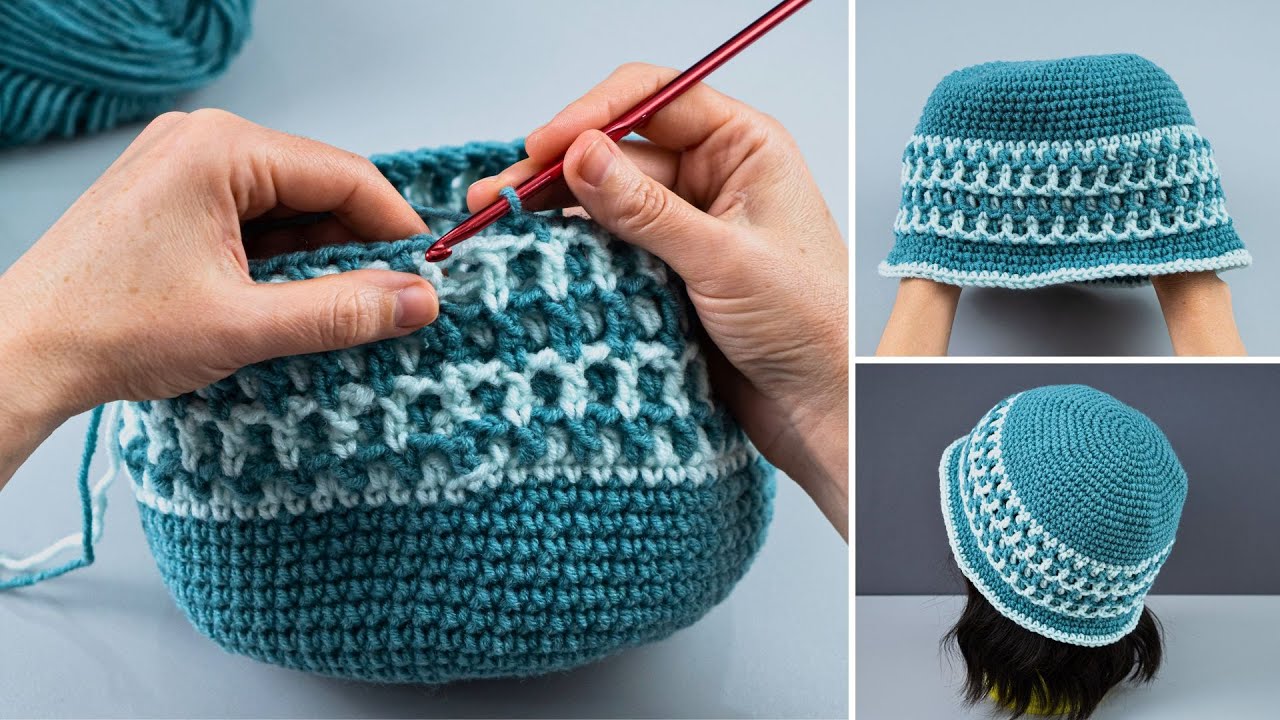
by Absolutely! Here’s a detailed step-by-step guide on how to crochet an amazing bucket hat — quick and easy! 🌸
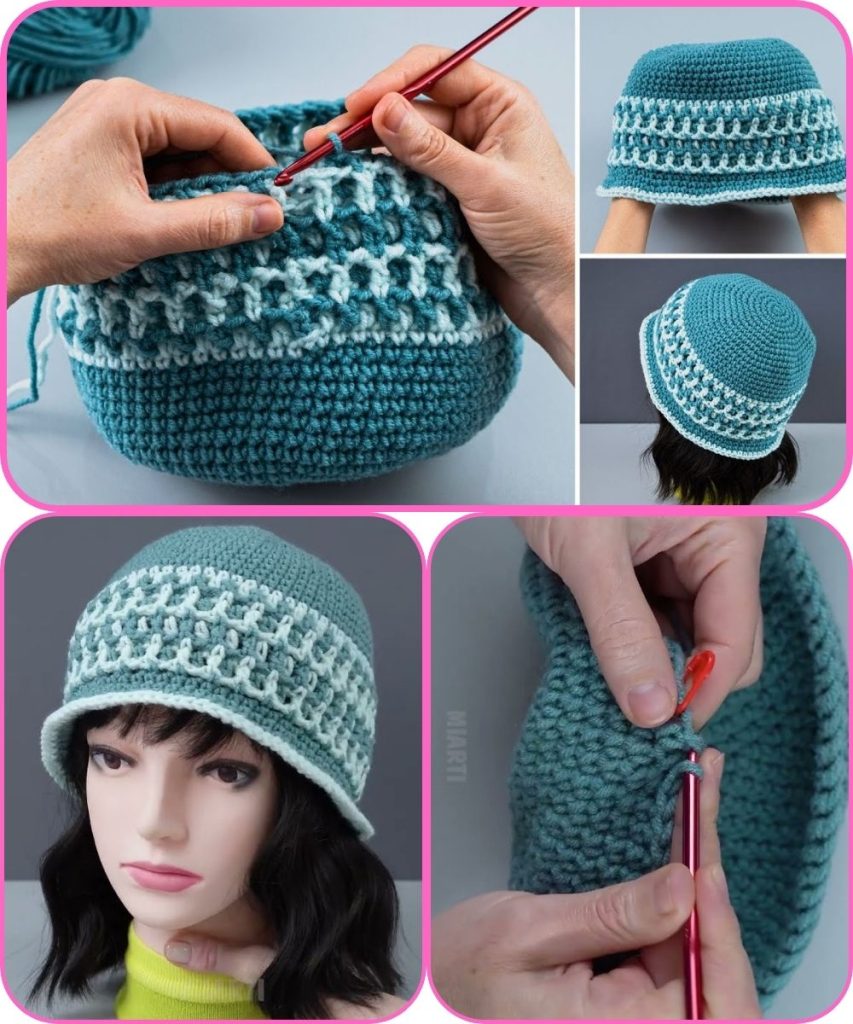
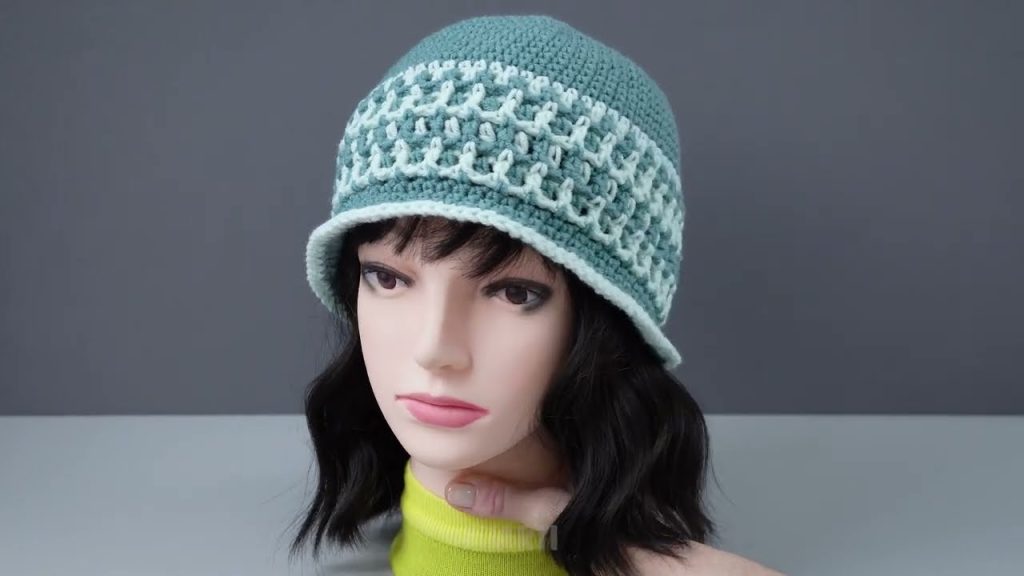
🧶 How to Crochet an Amazing Bucket Hat (Quick & Easy!)
🧵 Skill Level
Beginner to Intermediate — perfect if you already know basic crochet stitches.
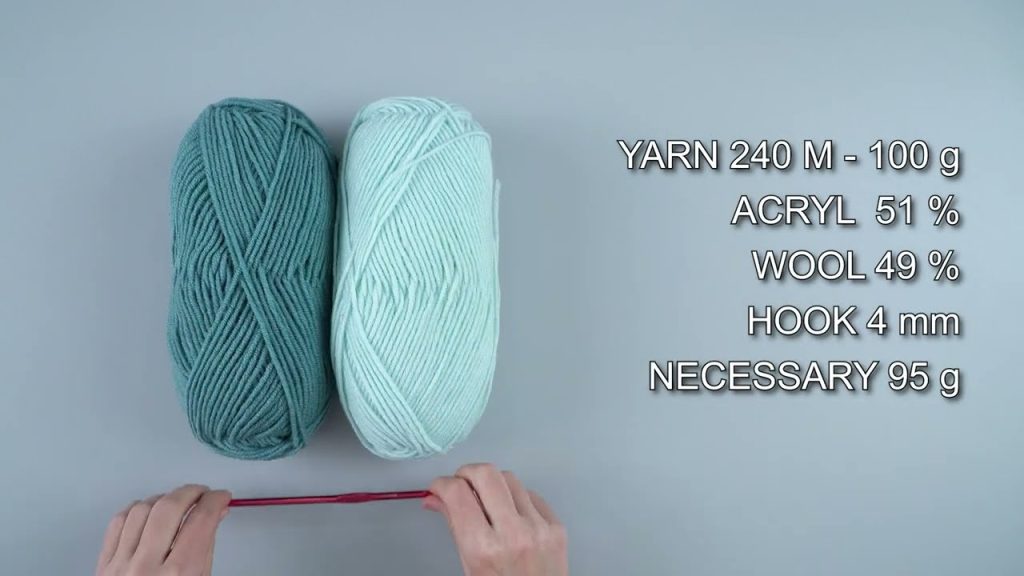
🧰 Materials You’ll Need
| Item | Description / Recommendation |
|---|---|
| Yarn | 100–150g of medium weight (category 4) cotton or acrylic yarn. Cotton holds shape better. |
| Hook | 4mm (G/6) or 5mm (H/8) crochet hook — check your yarn label for best fit. |
| Tapestry Needle | For weaving in ends. |
| Scissors | For cutting yarn. |
| Stitch Marker (optional) | Helps track rounds. |
Optional: Use two colors for a trendy two-tone hat!
🪡 Basic Stitches You’ll Use
- ch = chain
- sl st = slip stitch
- sc = single crochet
- hdc = half double crochet
- dc = double crochet
- inc = increase (2 stitches in the same stitch)
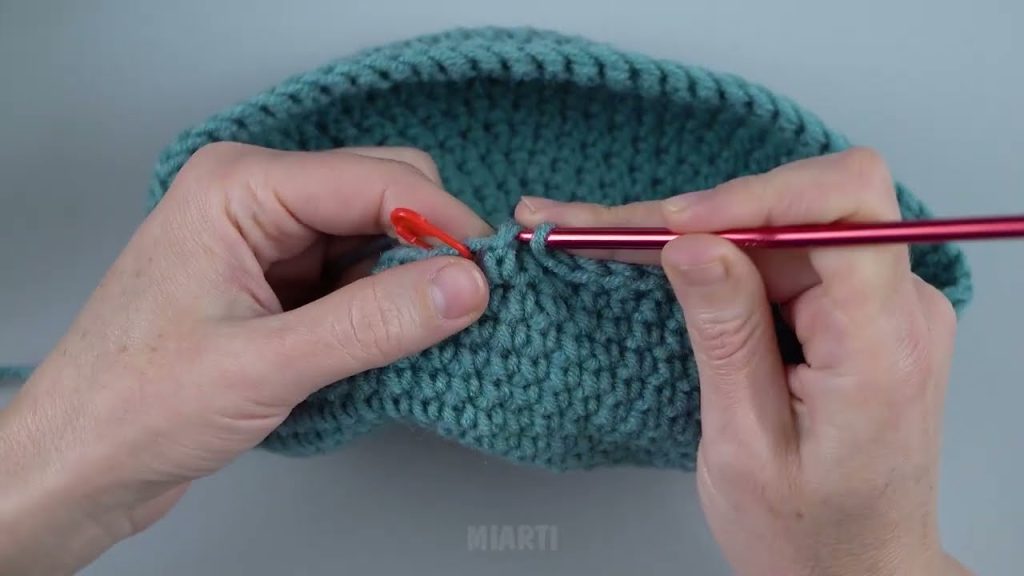
🧢 Step-by-Step Instructions
1️⃣ Make the Crown (Top of Hat)
This is the circular top that forms the base of your hat.
- Start with a magic ring.
- Round 1: ch 2 (counts as first dc), 11 dc into ring, join with sl st to top of ch-2. (12 dc)
- Round 2: ch 2, 2 dc in each st around, join. (24 dc)
- Round 3: ch 2, (1 dc in next st, 2 dc in next) repeat around, join. (36 dc)
- Round 4: ch 2, (1 dc in next 2 sts, 2 dc in next) repeat around, join. (48 dc)
- Continue increasing evenly in this pattern (adding one more dc between increases each round) until your circle measures about:
- 6–6.5 inches (15–16.5 cm) across for an adult size.
👉 Tip: The circle’s size determines how the hat fits. Stop increasing when the diameter equals:
- Crown diameter = Head circumference ÷ 3.14 (π)
2️⃣ Make the Body (Sides of Hat)
Once your crown is the right size, you’ll stop increasing to build the sides.
- Round 1: ch 2, dc in each stitch around, join.
- Repeat this for 8–10 rounds (or until the hat sides measure about 3.5–4 inches / 9–10 cm).
- You can switch colors halfway for a stylish band.
👉 Optional Variation: For a snug fit, use hdc instead of dc on the sides.
3️⃣ Make the Brim
This is where your bucket hat gets its flare!
- Round 1: (2 dc in next st, 1 dc in next 2 sts) repeat around, join.
- Round 2: (2 dc in next st, 1 dc in next 3 sts) repeat around, join.
- Continue increasing every round (spreading out your increases evenly) until the brim reaches your desired width — usually 2–3 inches (5–7.5 cm).
- For a firmer brim, switch to hdc or sc on the last round.
👉 Optional: For an extra stiff brim, lightly steam-block or use starch spray.
4️⃣ Finishing Touches
- Fasten off your yarn and weave in all loose ends using your tapestry needle.
- Gently shape your hat with your hands.
- Optionally, block it for a smoother, more professional look.
✨ Customization Ideas
- 🌈 Color Blocking: Change yarn color every few rows.
- 🐚 Add Trim: Use a contrasting color for the brim edge.
- 🌼 Appliqués: Sew on crochet flowers, smiley faces, or patches.
- 🧵 Texture: Try puff or bobble stitches for a playful design.
🕓 Time Required
- Beginner: 3–4 hours
- Intermediate: 1.5–2 hours
💡 Tips for Success
- Keep your tension even — too tight makes the hat stiff, too loose makes it floppy.
- Measure as you go to make sure it fits your head comfortably.
- Cotton yarn gives better structure for sunny-day bucket hats, while acrylic feels softer for cozy styles.
Watch tutorial: