 by
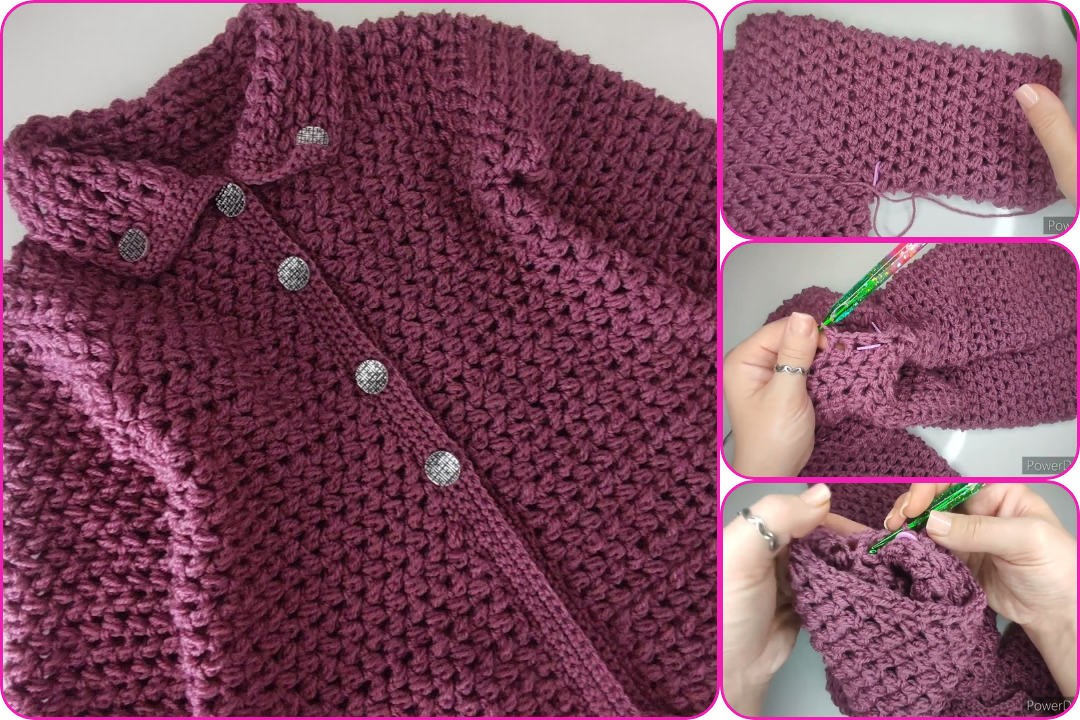
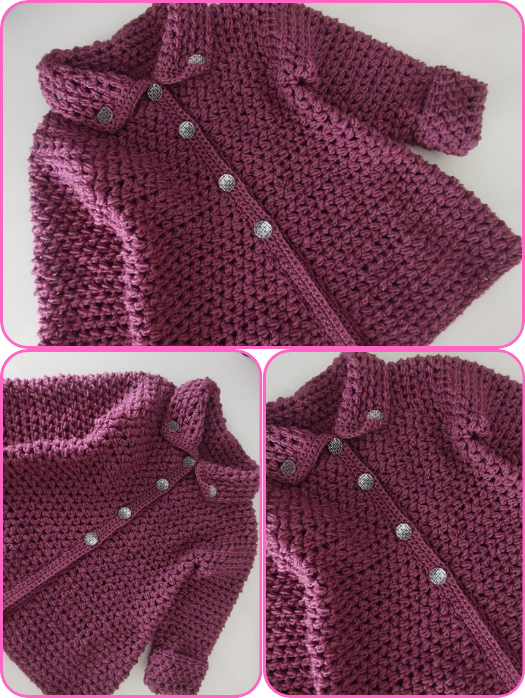
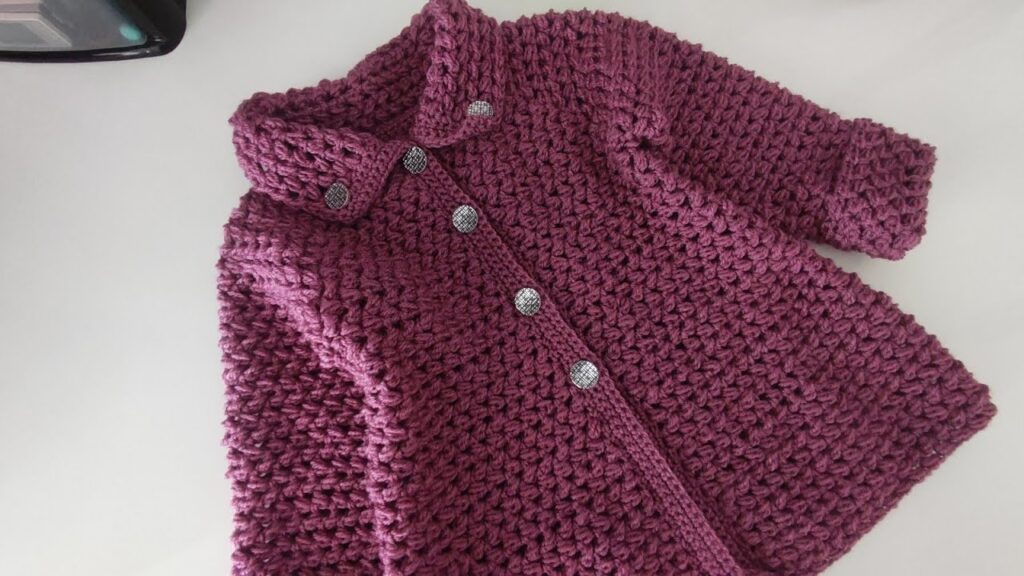
by Creating a beaded crochet cardigan combines the delicate art of crochet with the elegance of beadwork. This is a beautiful and rewarding project that requires intermediate to advanced crochet skills, attention to detail, and some planning.
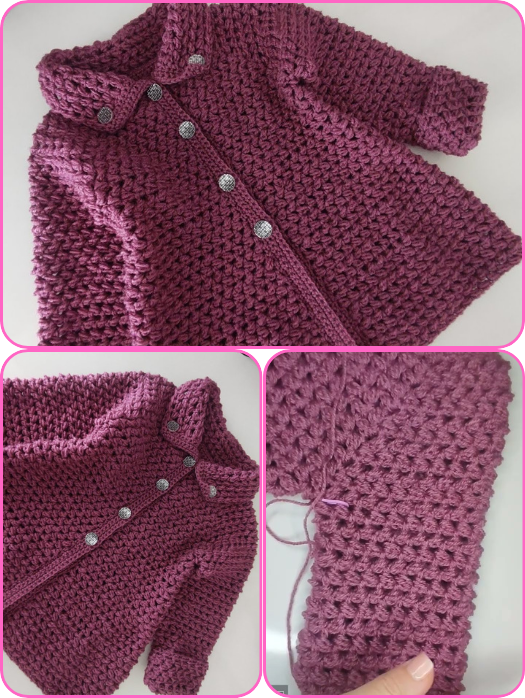
🧵 How to Crochet a Beaded Cardigan – Step-by-Step Guide
🧶 Materials Needed:
- Yarn – Lightweight yarn (cotton, bamboo, or wool blend) for better drape.
- Beads – Small beads with large enough holes for your yarn/thread.
- Size 6/0 or 8/0 seed beads work well.
- Crochet Hook – Size recommended for your yarn (usually 2.5mm–4mm).
- Tapestry Needle – For weaving in ends.
- Beading Needle or small steel crochet hook (0.75–1.0mm).
- Threader (optional) – Makes adding beads to yarn easier.
- Scissors
- Measuring Tape
- Buttons or closure (optional)
✨ Step 1: Choose a Pattern or Design
You can either follow a pre-made pattern (there are many available on Etsy, Ravelry, or Pinterest) or freestyle using standard cardigan construction techniques:
- Top-down raglan
- Bottom-up
- Granny square assembly
For beginners, a basic boxy cardigan with minimal shaping is a good starting point.
✨ Step 2: Swatch and Test Beading
Bead Preloading:
- String beads onto your yarn before you start crocheting.
- Use a beading needle or threader.
- Push them down the yarn as you go, bringing one bead up at a time.
Swatch Test:
Make a small swatch with beads to see how they sit in your stitches and how your yarn behaves. This lets you adjust:
- Bead placement (every few stitches or rows)
- Tension and hook size
✨ Step 3: Crochet the Pieces
A. Back Panel
- Chain the width needed for your desired size.
- Work in double crochet (dc), half double crochet (hdc), or your chosen stitch.
- Add beads at intervals:
- Pull a bead up before completing a stitch.
- For example, insert the hook, yarn over, bring loop up, slide bead close to stitch, complete the stitch.
B. Front Panels (Left & Right)
- Repeat as per back panel, adjusting width.
- Add bead designs symmetrically.
- Leave neckline shaping space.
C. Sleeves
- Chain for sleeve cuff or start from armhole and work down.
- Beads can be worked along the sleeve line or cuff.
✨ Step 4: Assembly
- Use a tapestry needle and yarn to sew shoulder seams.
- Sew sleeves to body.
- Sew side seams and underarm sleeves.
- Weave in all ends.
✨ Step 5: Edging and Finishing Touches
Neckline, Bottom Hem, and Cuffs:
- Add a few rows of single crochet or shell edging.
- Include beads in edging rows for extra flair.
Optional:
- Add button band or tie-front.
- Sew buttons and make loops.
💡 Design Tips:
- Use beads sparingly to prevent cardigan from becoming too heavy.
- Try placing beads along:
- Edges
- Yoke
- Cuffs
- Floral or geometric patterns
- Choose beads that complement yarn color.
🧷 Bead Placement Techniques:
- Pre-strung method – best for fine yarns and light beads.
- Hook-placed beads – place bead using a tiny hook as you go (slower but more precise).
📏 Basic Sizing Estimate (Adult Women):
| Size | Bust (inches) | Chain Length (approx) |
|---|---|---|
| S | 34–36 | 90–100 chains |
| M | 38–40 | 100–110 chains |
| L | 42–44 | 110–120 chains |
Always measure yourself and make a gauge swatch.
🧶 Suggested Stitches for Beaded Cardigans:
- V-stitch (creates airy texture, great for bead spacing)
- Shell stitch
- Mesh or lace stitches
- Granny-style stitches with beaded centers
📚 Resources for Patterns:
- Ravelry.com
- Etsy
- Lovecrafts
- Pinterest for visual ideas
Watch video: