 by
by That sounds like such a cozy and stylish project! 🧶✨
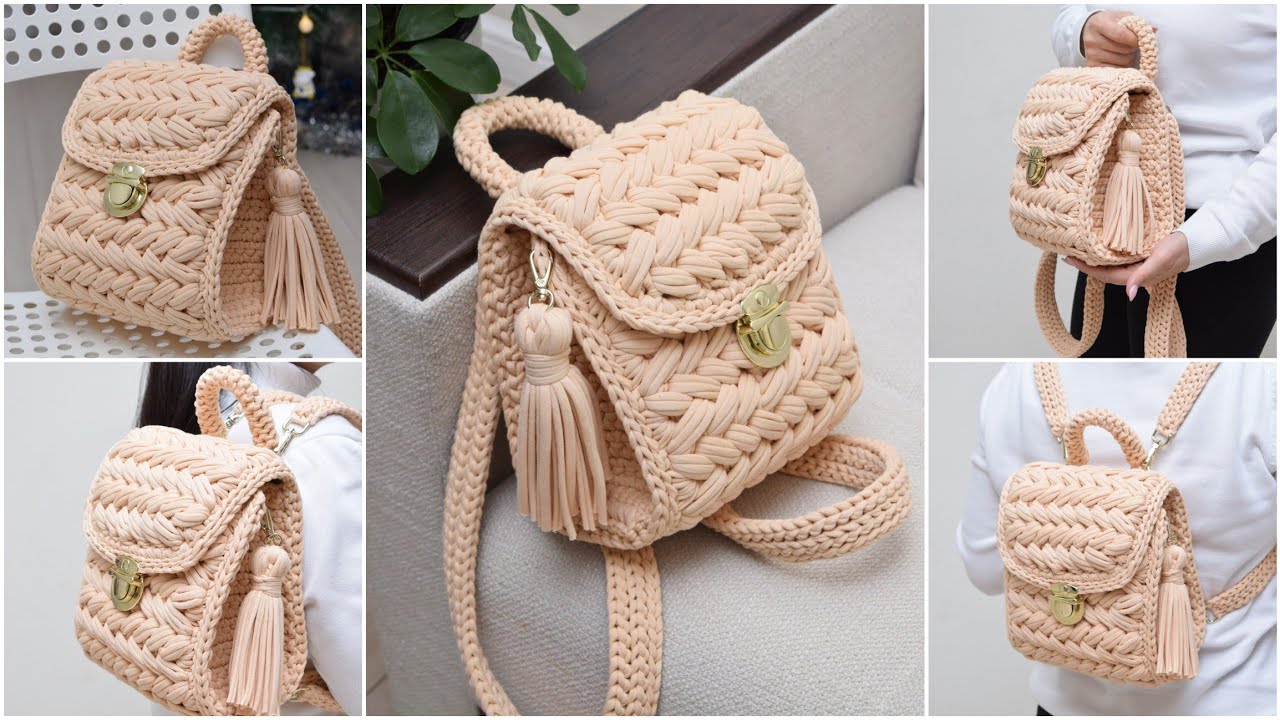
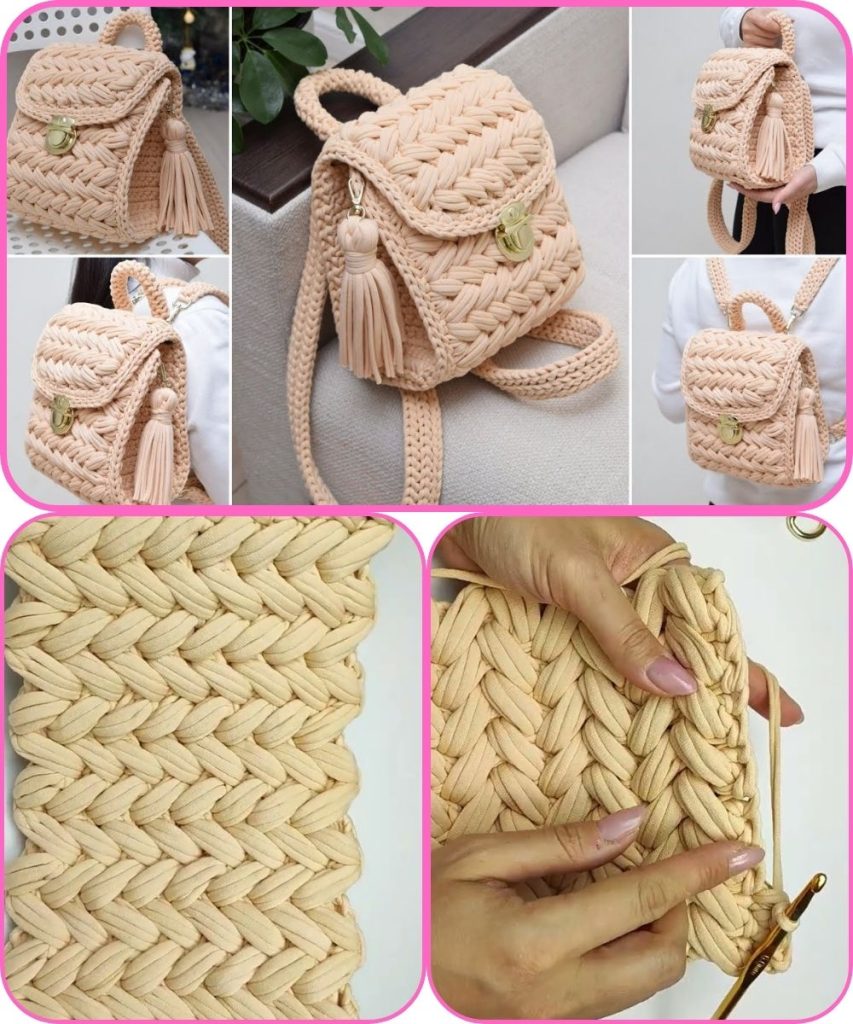
Let’s go through how to make an amazing crocheted backpack using the “marshmallow” (puff) stitch pattern — complete with materials, step-by-step instructions, and customization ideas.
🧵 Overview
The marshmallow (puff) crochet backpack is a soft, textured bag that combines practicality and cuteness. The puff stitch gives it a plush, 3D texture reminiscent of marshmallows — perfect for casual wear or gifting.
🪡 Materials Needed
| Item | Details |
|---|---|
| Yarn | 4–5 skeins of worsted weight cotton or acrylic yarn (size 4). Cotton holds shape better. Choose 2 colors if you want contrast for straps or borders. |
| Crochet Hook | 4.0 mm (G/6) or 4.5 mm depending on your yarn thickness. |
| Lining Fabric (optional) | Sturdy cotton or canvas fabric to line the inside for durability. |
| Zipper or Drawstring | One 12–14 inch zipper OR thick cord for drawstring closure. |
| Scissors & Yarn Needle | For cutting and weaving ends. |
| Stitch Markers | Useful for marking rounds. |
| D-rings or Buckles (optional) | For adjustable straps. |
💡 Puff (Marshmallow) Stitch Refresher
The puff stitch is what gives your backpack that “marshmallow” look.
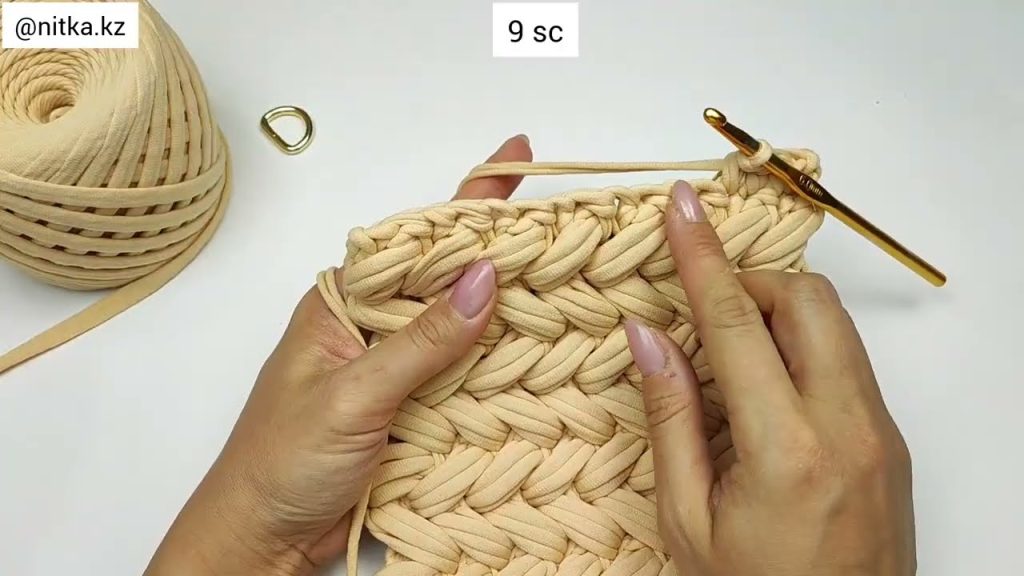
To make one puff stitch:
- Yarn over (YO), insert hook into stitch, YO, pull up a loop (3 loops on hook).
- Repeat YO, insert, pull up 3–5 more times (for a thick puff, do it 5 times).
- YO and pull through all loops on the hook.
- Chain 1 to close.
Pro tip: Keep your tension loose — puff stitches look fluffier that way!
🧶 Step-by-Step Pattern
1. Base (Bottom of the Backpack)
- Foundation: Chain 41.
- Round 1: Work 1 DC (double crochet) in the 3rd chain from hook, continue DC across (39 DCs).
When you reach the end, work 3 DCs in the last chain to round the corner. - Continue: DC on the opposite side of the foundation chain, adding 3 DCs on the other end.
- Repeat: Continue in the round to create an oval base, increasing at the ends until it measures about 10″ x 6″ (25 x 15 cm).
- Slip stitch to join and chain 1.
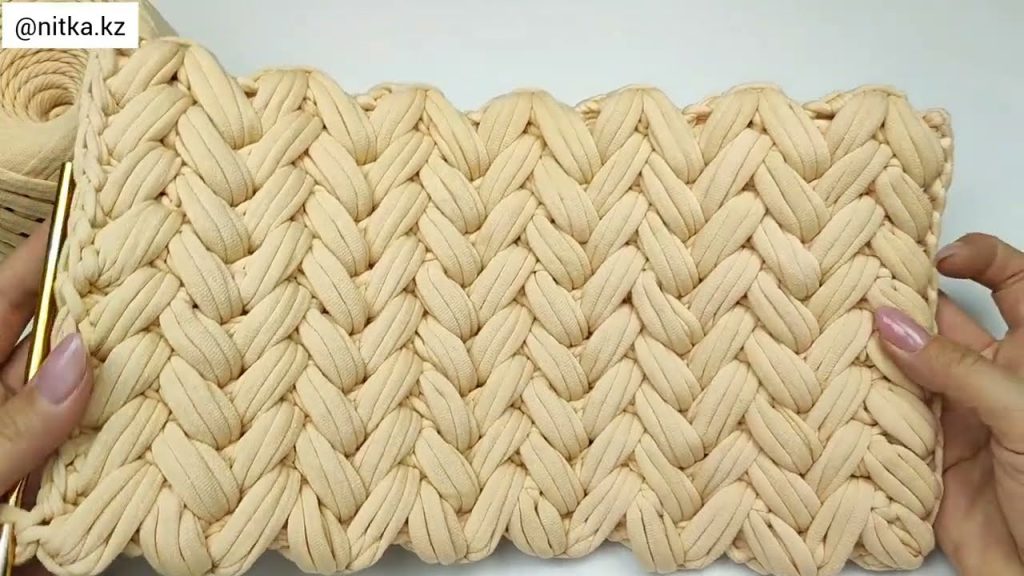
2. Body (Using Marshmallow/Puff Pattern)
Switch to puff stitch.
Round 1: 1 puff stitch in next stitch, chain 1, skip next stitch. Repeat around.
Join with slip stitch.
Round 2–20 (or until desired height):
- Work 1 puff in each chain-1 space from previous round, chain 1 after each puff.
- Keep the tension consistent for a uniform marshmallow look.
Optional: Change colors every 3–4 rows for a striped marshmallow effect 🍬
3. Top Edge & Closure
When the body is complete:
- Work 2 rounds of single crochet (SC) evenly around the top to strengthen the edge.
- For a drawstring closure:
- In the final SC round, chain 1, skip 1 stitch, SC in next — this creates holes for your drawstring.
- Thread your cord through the holes.
- For a zipper closure:
- Sew the zipper by hand or machine to the top edge (line the inside first for neatness).
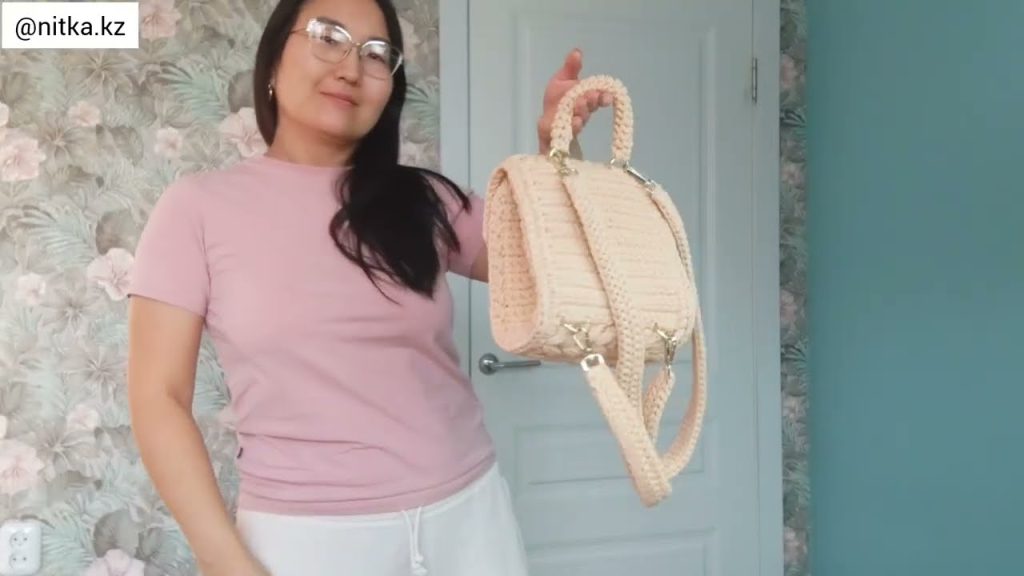
4. Straps
Make 2 long straps (adjustable if you like).
Simple strap pattern:
- Chain 100 (or desired length).
- Work 1 row of half double crochet (HDC) across.
- Optional: add a second row for a thicker strap.
Attach straps evenly to the back bottom corners and the top (use D-rings or sew securely).
5. Lining (Optional but Recommended)
- Cut fabric slightly smaller than your bag’s dimensions.
- Sew it into a simple pouch shape and slip it inside.
- Hand-sew or machine-sew along the top edge beneath the zipper/drawstring round.
6. Finishing Touches
✅ Weave in all yarn ends neatly.
✅ Add a tassel, charm, or leather tag for a boutique look.
✅ Lightly steam-block the puff stitches to even them out.
🌈 Customization Ideas
- Color combos: Cream & blush, denim blue & white, lavender & mint.
- Gradient yarn: Makes the marshmallow texture pop.
- Add a front pocket: Make a mini rectangle with puff stitches and sew it on.
- Mini version: Use thinner yarn (DK weight) for a cute small backpack.
🧺 Care Instructions
- Hand wash in cool water, lay flat to dry.
- Do not iron directly on puffs.
- Store stuffed with tissue paper to keep shape.
Would you like me to include a written pattern chart (stitch symbols) or a visual diagram of the puff pattern section next? That can make it easier to follow if you prefer a visual guide.
Watch tutorial: