 by
by Here is a clear, beginner-friendly, detailed guide you can use as an article, blog post, or tutorial.
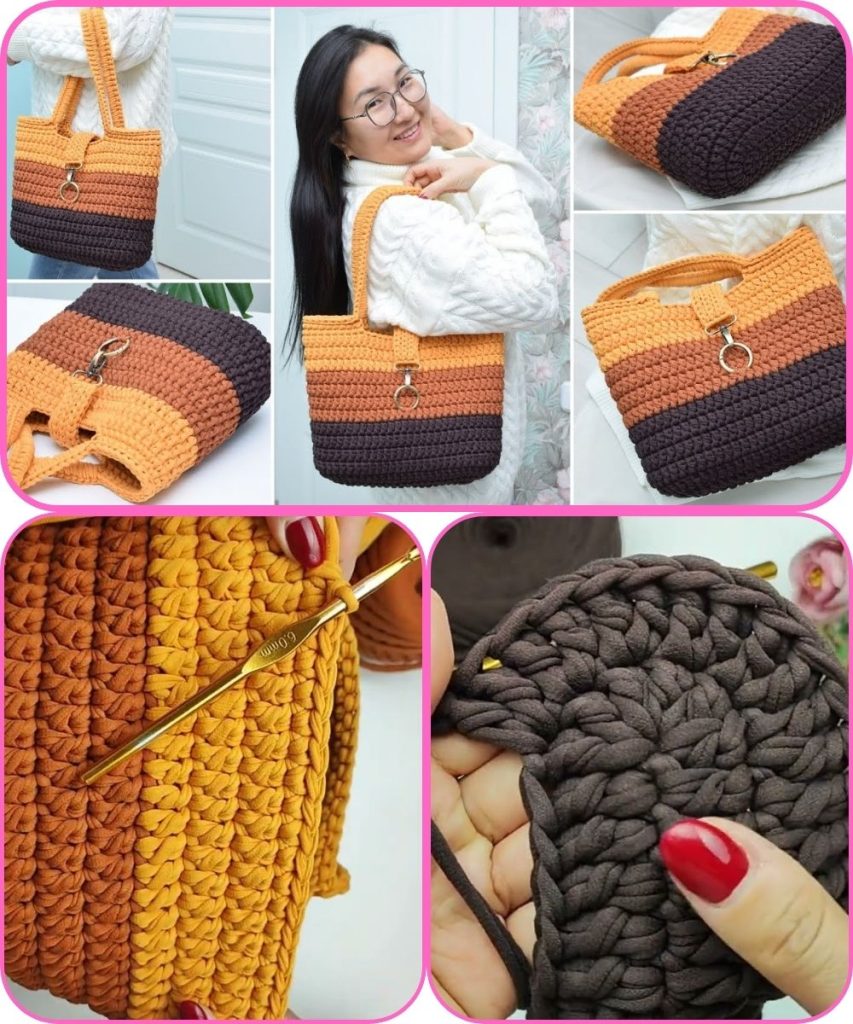
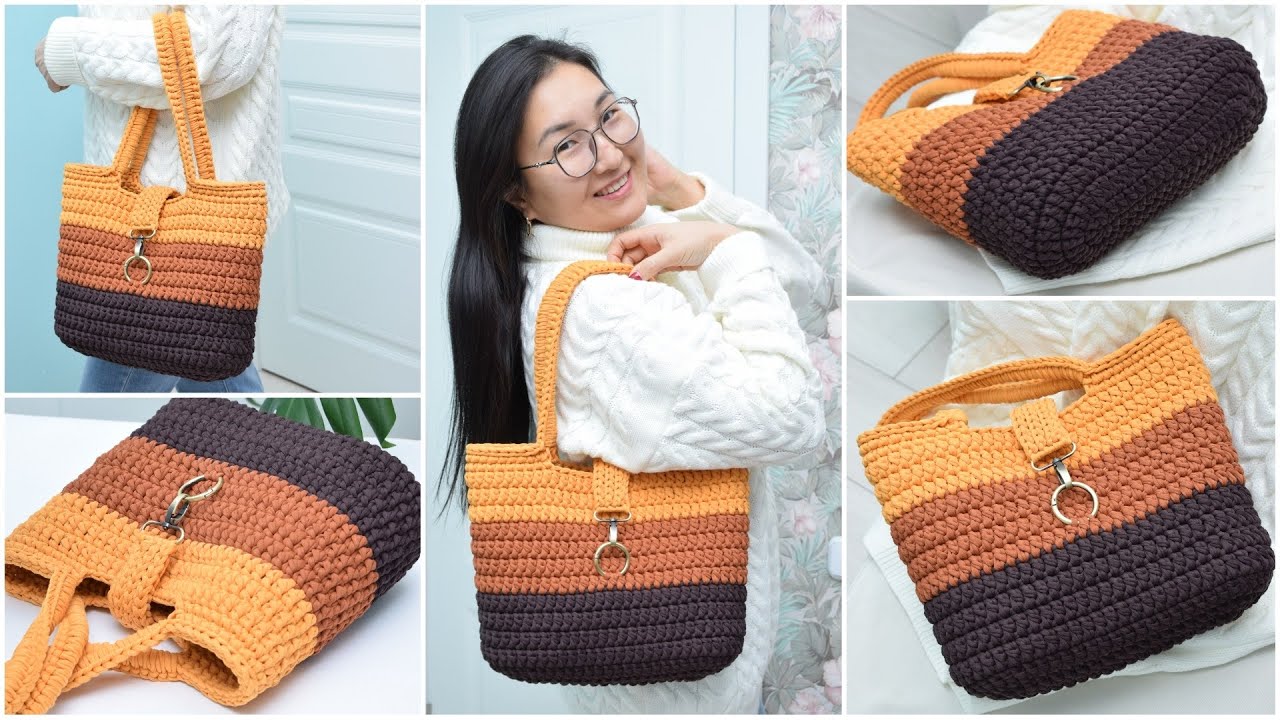
How to Make a Simple Crochet Bag for Beginners
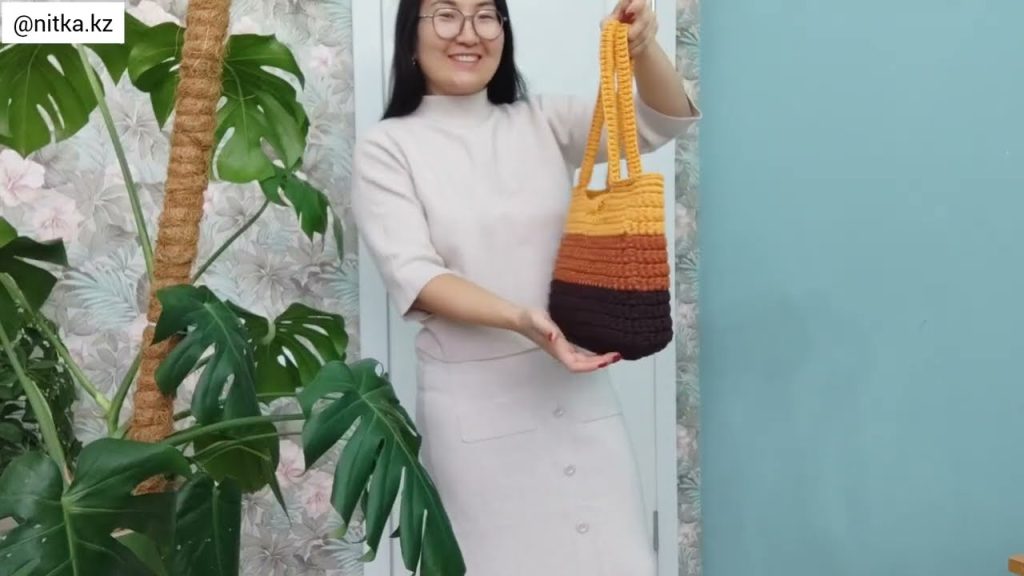
A Large Bag You Can Make With Your Own Hands in About 3 Hours
Crocheting your own bag is a fun and rewarding project, even if you are a complete beginner. This simple crochet bag is large, practical, and can be finished in about 3 hours using basic stitches. No complicated patterns are required, and you can customize the size and color to match your style.
Materials You Will Need
Before you start, gather the following supplies:
- Yarn: Medium-weight yarn (Category 4). Cotton yarn is best for bags because it is strong and holds its shape well.
You will need about 200–250 grams. - Crochet Hook: 5 mm or 6 mm hook
- Scissors
- Yarn Needle: For weaving in ends
- Stitch Marker (optional): Helpful for beginners
Basic Crochet Stitches Used
This project uses very simple stitches, perfect for beginners:
- Chain (ch)
- Single Crochet (sc)
- Slip Stitch (sl st)
If you know how to chain and make single crochet stitches, you can make this bag.
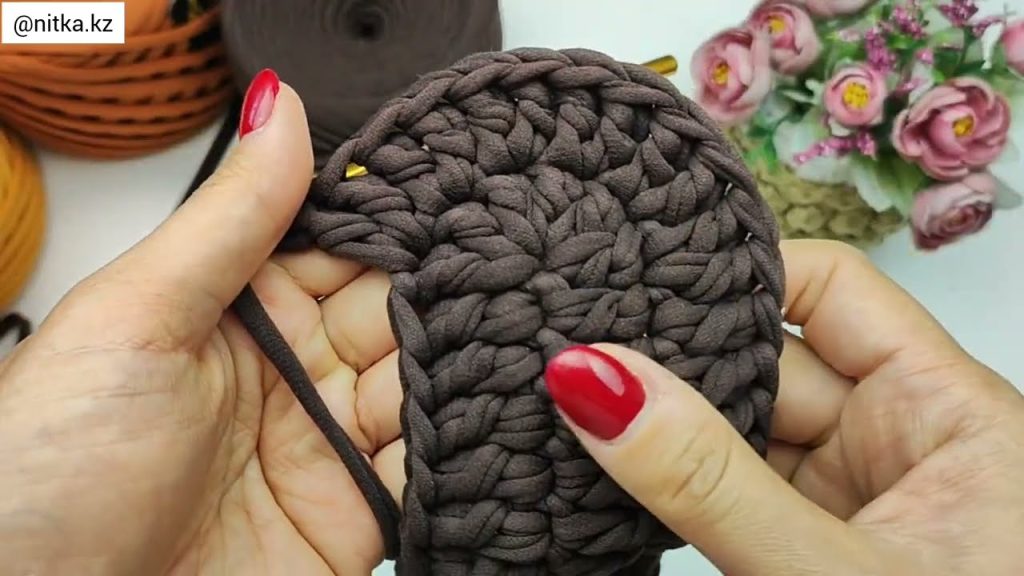
Step 1: Make the Base of the Bag
- Start by making a chain of 31 stitches.
This will determine the width of your bag. - Insert your hook into the second chain from the hook.
- Make single crochet stitches in each chain across.
- When you reach the end, chain 1 and turn.
Repeat this row until your base measures about 25–30 cm (10–12 inches) long.
This rectangular base gives the bag strength and structure.
Step 2: Crochet Around the Base
- Do not turn your work.
- Start crocheting single crochet stitches evenly around the entire base.
- Place 3 single crochets in each corner to keep the edges smooth.
- Join the round with a slip stitch.
This step turns the flat base into the foundation for the bag’s sides.
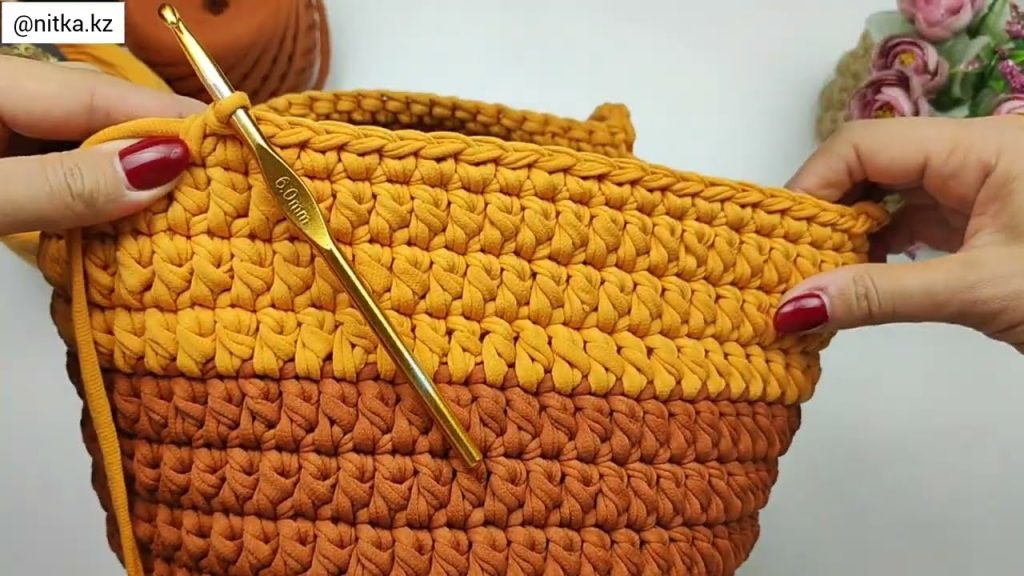
Step 3: Build the Sides of the Bag
- Chain 1, then make single crochet stitches in each stitch around.
- Join each round with a slip stitch.
- Continue crocheting in rounds without increasing.
Keep working until the bag reaches your desired height.
For a large bag, aim for 30–35 cm (12–14 inches).
This part goes quickly and creates a sturdy, spacious bag.
Step 4: Create the Handles
- Decide where you want the handles (usually opposite sides).
- When you reach the handle area:
- Chain 15–20 stitches
- Skip the same number of stitches below
- Continue single crochet
- Repeat for the second handle.
- On the next round, single crochet into each chain to strengthen the handles.
You can make shorter or longer handles depending on whether you want a hand bag or shoulder bag.
Step 5: Finish the Bag
- Crochet one final round of single crochet for a neat edge.
- Cut the yarn and pull through to fasten off.
- Use a yarn needle to weave in all loose ends.
Your simple crochet bag is now complete!
Tips for Beginners
- Use light-colored yarn so you can see your stitches clearly.
- Don’t crochet too tightly—loose stitches make the bag look better.
- If your bag curls, try using a larger hook size.
- Add a lining later if you want extra strength.
Final Result
In about 3 hours, you’ll have a large, handmade crochet bag that’s perfect for shopping, school, or everyday use. This project is ideal for beginners and a great way to practice basic crochet skills while creating something useful and stylish.
Happy crocheting! 🧶
Watch tutorial: