 by
by Absolutely! Here’s a detailed guide for creating a “How to Make a Crochet Net Bag” video tutorial for beginners, including structure, content, and crochet pattern ideas. I’ll break it down step by step so it’s very beginner-friendly.
Video Outline & Script Details
1. Introduction (30–60 seconds)
- Start by introducing yourself:
“Hi, I’m [Your Name], and today I’ll show you how to make a simple crochet net bag—perfect for shopping, beach trips, or as an eco-friendly alternative to plastic bags!” - Mention the skill level:
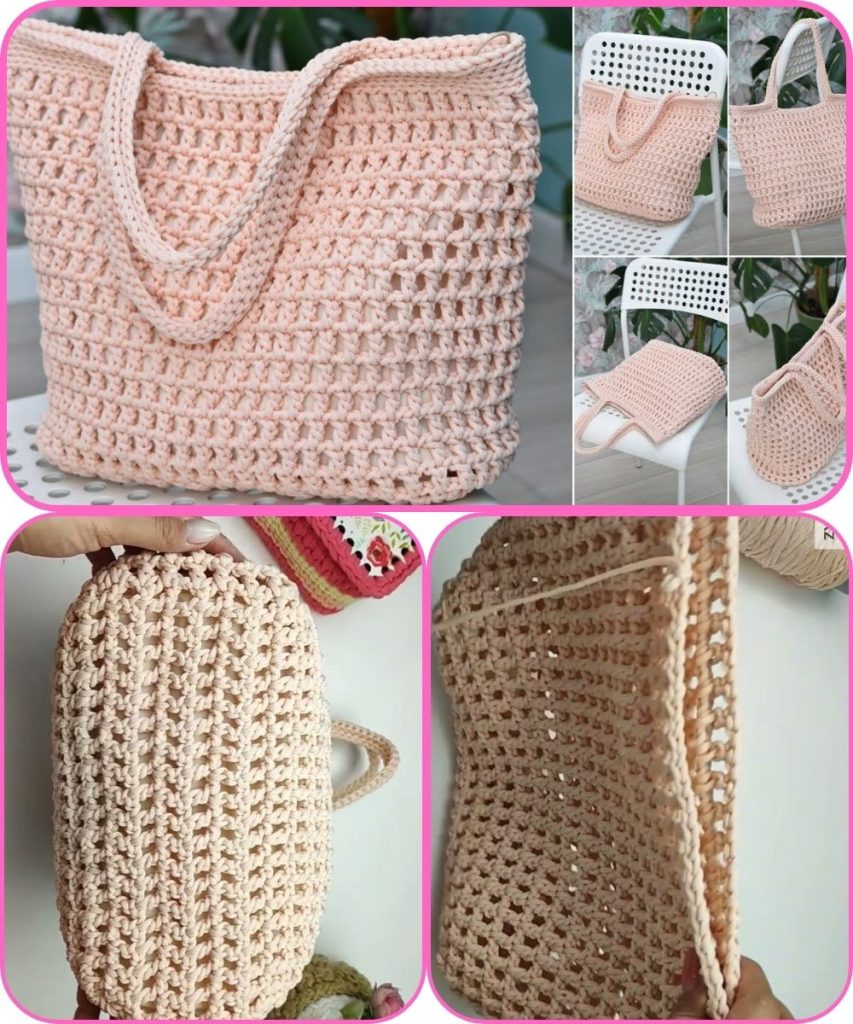
“This tutorial is perfect for beginners who know basic crochet stitches.” - Show the finished bag so viewers can see what they’re making.
2. Materials Needed (30–60 seconds)
- Yarn: Medium-weight cotton or acrylic yarn (about 150–200g)
- Crochet hook: Size recommended on yarn label (usually 4–5mm)
- Scissors
- Measuring tape or ruler
- Optional: stitch marker
Tip: Cotton yarn is preferred because it’s strong and holds shape well.
3. Basic Stitches to Know (1–2 minutes)
Briefly demonstrate the basic stitches used in the pattern:
- Chain stitch (ch)
- Slip stitch (sl st)
- Single crochet (sc)
- Double crochet (dc) – optional depending on pattern
Tip for beginners: Show close-up shots of your hands and hook so viewers can clearly see the technique.
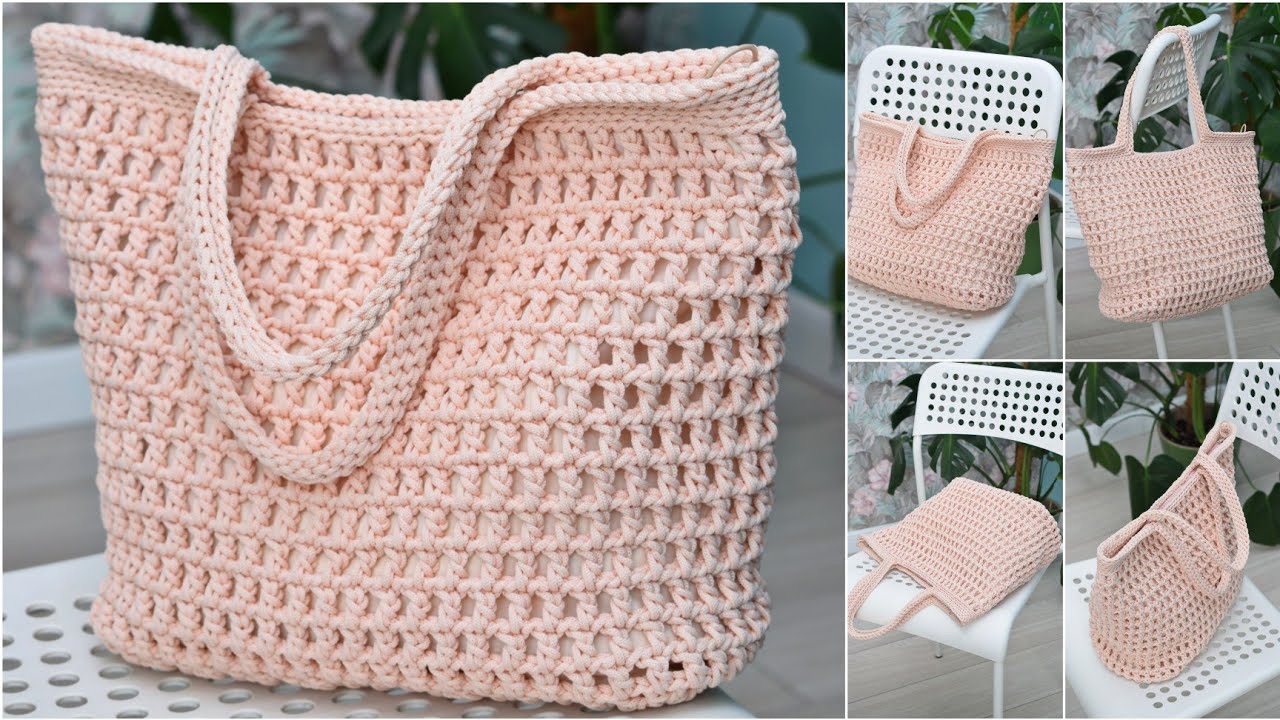
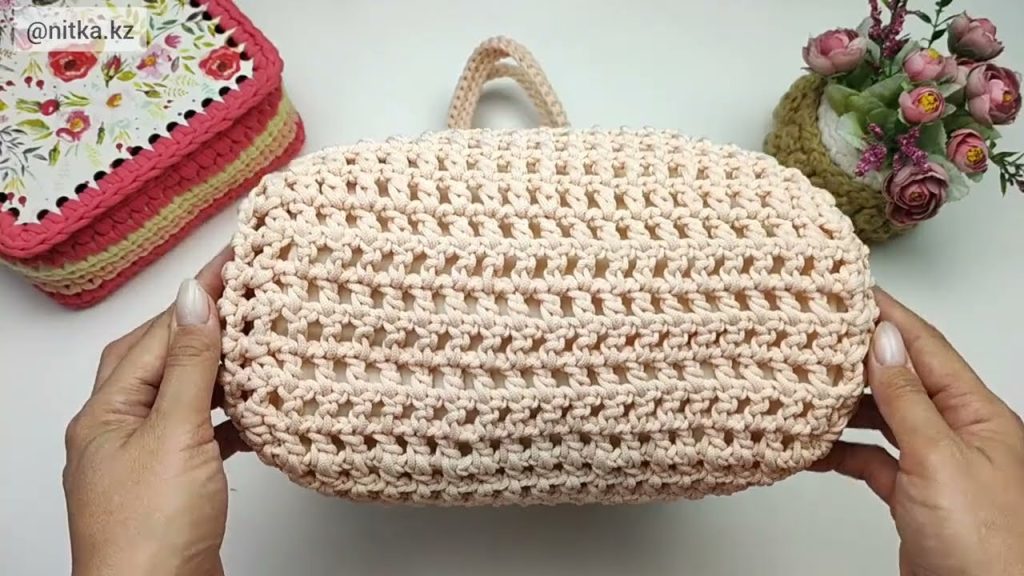
4. Step-by-Step Crochet Net Bag Pattern
Step 1: Start with the Base
- Chain 30 (or desired width of the bag base).
- Work a row of single crochets (sc) across.
- Repeat rows until the base is square or rectangular (depending on your preference).
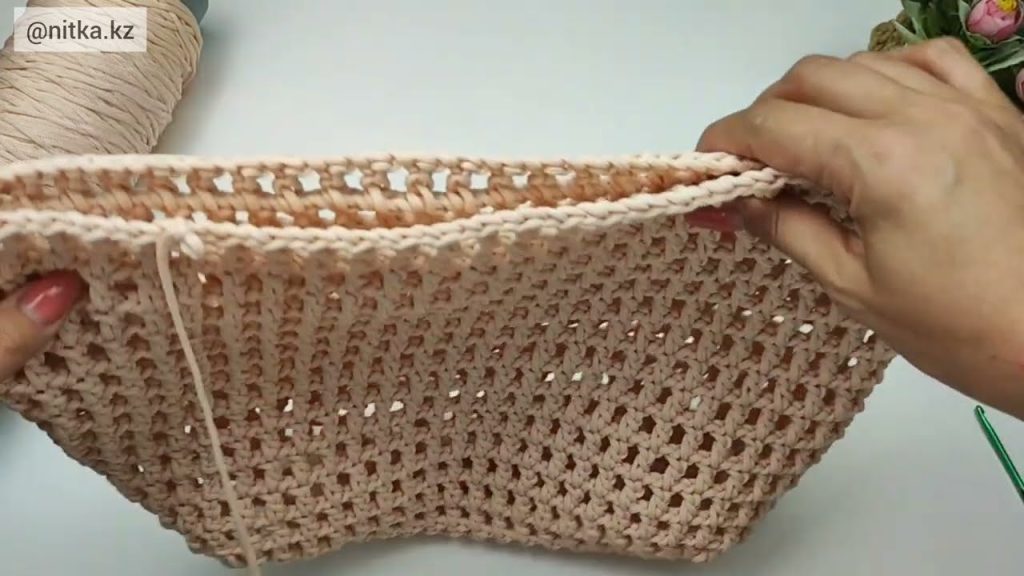
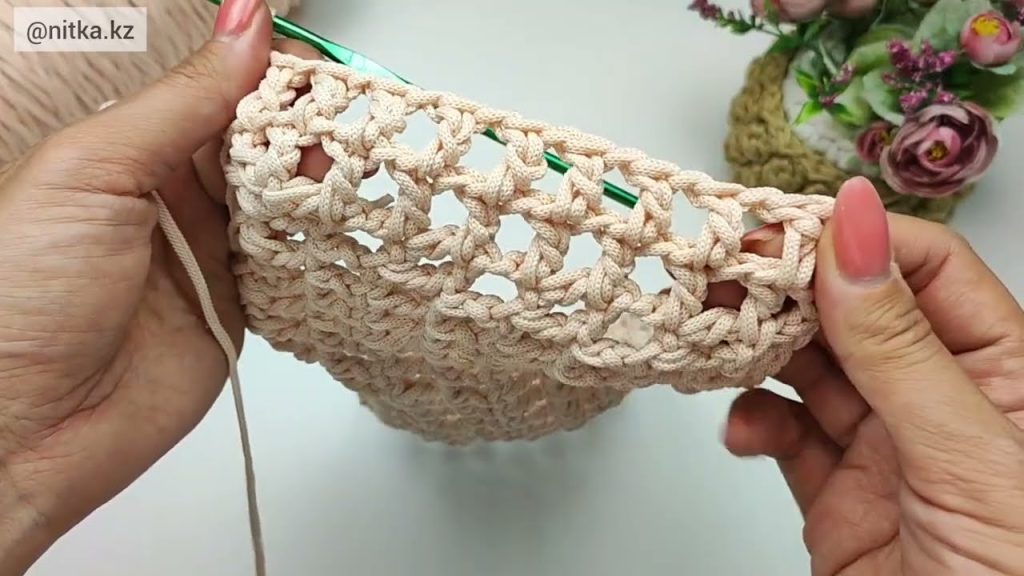
Step 2: Start the Netting
- Switch to double crochet (dc) for the mesh.
- Chain 3 (counts as first dc), skip 1 stitch, double crochet in the next stitch.
- Chain 1, skip 1 stitch, dc in the next stitch. Repeat across the row.
- Turn your work.
- Repeat this pattern for each row to create a netting effect.
Step 3: Shape the Bag
- Continue the mesh pattern until the bag reaches desired height (usually 12–15 inches).
- Optional: Add a border of single crochet at the top for a neat finish.
Step 4: Make the Handles
- Attach yarn at the top corners of the bag.
- Chain 60 (or desired length for handles).
- Attach the chain to the opposite side using a slip stitch.
- Repeat for the other handle.
- Reinforce handles with a row of single crochet for strength.
5. Finishing Touches (30–60 seconds)
- Weave in all loose ends with a yarn needle.
- Optionally, stretch your bag gently to open up the netting for the best shape.
6. Tips & Tricks
- Use cotton yarn for strength.
- Adjust the chain length for larger or smaller bags.
- Make sure the netting is even to prevent stretching.
- Wash and block the bag if using natural fibers for a perfect shape.
7. Outro
- Show the finished bag holding some items to demonstrate durability.
- Invite viewers to like, subscribe, and comment.
- “Thanks for watching! Don’t forget to share your crochet net bag creations with me.”
Additional Video Tips for Beginners
- Camera Angles: Use close-up shots for stitches and wide shots for showing progress.
- Text Overlays: Display stitch counts and steps on screen for easier following.
- Pacing: Go slow for beginners and repeat tricky steps.
- Background Music: Soft, upbeat music makes the video more engaging.
If you want, I can also write an exact written crochet pattern with stitch counts and rows ready for beginners that you can use directly in the video.
Watch tutorial: