 by
by Absolutely! Here’s a detailed beginner-friendly guide on how to make stylish and modern crochet bags, including the tools you’ll need, basic techniques, and a step-by-step tutorial for a simple yet fashionable bag. This guide is ideal for those just starting but eager to create trendy, functional pieces.
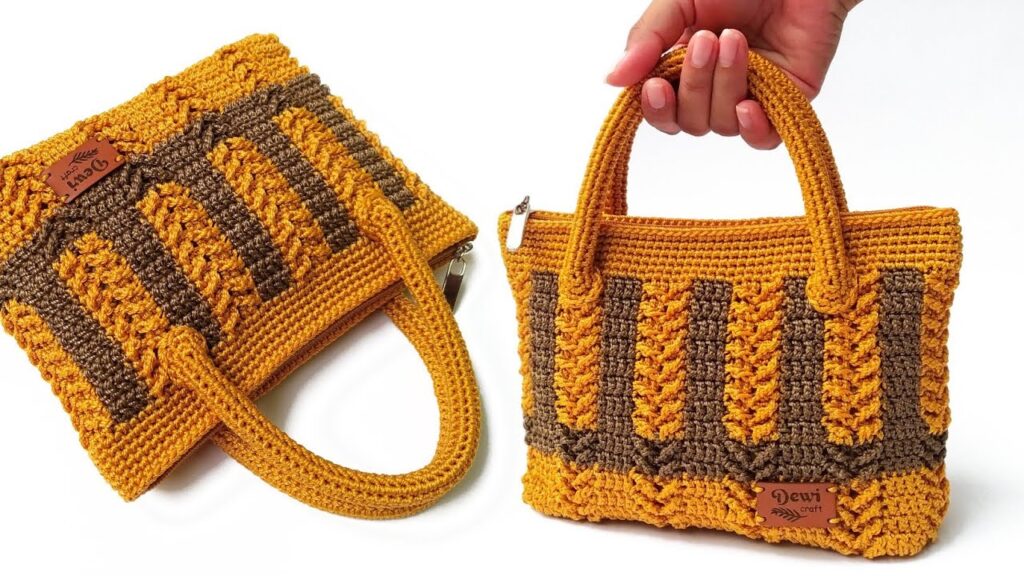
🧶 How to Make Stylish and Modern Crochet Bags – Easy for Beginners
🧰 What You’ll Need
Materials:
- Cotton yarn (medium weight / worsted weight is best for bags)
- Crochet hook (size H/5.0mm or I/5.5mm is a good starting point)
- Scissors
- Tapestry needle (for weaving in ends)
- Stitch markers (optional but helpful)
- Magnetic snap or zipper (optional for closure)
- Lining fabric (optional for extra durability)
Recommended Yarn Types:
- 100% Cotton yarn – durable, holds shape well
- T-shirt yarn – chunky and trendy, perfect for modern totes
🧵 Basic Crochet Stitches to Know
If you’re new to crochet, start by learning these simple stitches:
| Stitch | Abbreviation | Description |
|---|---|---|
| Chain | ch | Foundation stitch for most patterns |
| Slip Stitch | sl st | Used to join rounds or finish rows |
| Single Crochet | sc | Tight and sturdy stitch – great for bags |
| Half Double Crochet | hdc | Slightly taller than single crochet |
| Double Crochet | dc | Great for a looser texture or accents |
👜 Step-by-Step: Crochet a Simple Modern Tote Bag
✅ Step 1: Start with the Base
Pattern: Rectangular base using single crochet.
textCopyEdit1. Chain 31 (or desired width of your bag).
2. Row 1: Sc in the second ch from hook, sc across. Turn.
3. Row 2–10 (or more for bigger base): Ch 1, sc across. Turn.
➡️ You now have the bottom of your bag. The size can be adjusted by adding more rows or starting with a longer chain.
✅ Step 2: Build the Body
Technique: Work in the round around the base.
textCopyEdit1. Begin single crocheting around all four sides of the rectangle.
2. Place a stitch marker at the beginning of the round.
3. Continue working in a spiral (no joining rows) using single crochet.
4. Keep going until your bag is the height you want (usually 8–12 inches).
➡️ You can alternate rows of single crochet and half double crochet for texture. Try color blocking by switching yarn colors every few inches.
✅ Step 3: Add Handles
Option 1: Simple Crochet Handles
textCopyEdit1. Once your bag is tall enough, mark two points on each side where handles should start.
2. Ch 30–50 (depending on desired length) and skip that number of stitches.
3. Attach chain with sc on the other side.
4. Sc across the next row to reinforce the handles.
Option 2: Use Wooden or Leather Handles
- Sew them on with a tapestry needle and strong thread or yarn.
- This adds a professional, modern touch.
✅ Step 4: Finishing Touches
- Weave in ends with a tapestry needle.
- Add a closure: magnetic snap, button loop, or zipper.
- Optional: Sew in a fabric lining for strength and style.
- Decorate: add tassels, pom-poms, or a small label.
💡 Tips for Beginners
- Start with light-colored yarn to better see your stitches.
- Count your stitches each row to stay consistent.
- Use a stitch marker to mark the beginning of your rounds.
- Watch video tutorials for visual guidance (search YouTube for beginner crochet bag tutorials).
👜 Popular Crochet Bag Styles You Can Try Later
- Bucket Bag: Tall and narrow with a drawstring top.
- Granny Square Bag: Made from colorful granny squares joined together.
- Mesh Market Bag: Lightweight, breathable, perfect for groceries.
- Clutch or Wristlet: Compact and stylish with minimal stitching.
📌 Simple Pattern Example (Crochet Tote)
textCopyEditBase:
Ch 31
Row 1: sc in 2nd ch from hook, sc across (30 sc)
Rows 2–10: ch 1, sc across, turn

Body:
Round 1: sc around the base, placing 3 sc in each corner
Rounds 2–35: sc in each st around (or until desired height)

Handles:
Mark 8 sts on each side
Ch 40, skip 8 sts, rejoin with sc
Repeat for other side, then sc one full round to reinforce

Finish:
Fasten off, weave in ends, add lining or snap if desired.
Watch video: