 by
by Sure! Here’s a detailed step-by-step guide on how to make a crochet crossbody bag with a herringbone pattern, including materials, stitch explanations, and finishing instructions.
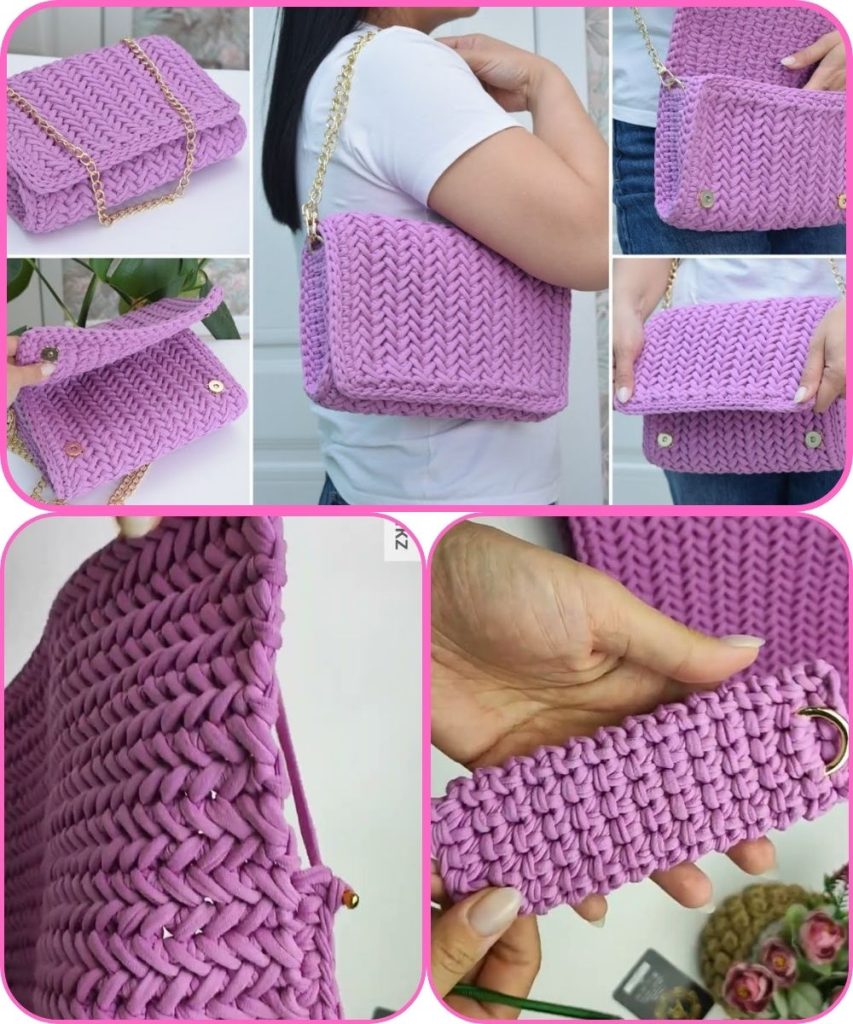
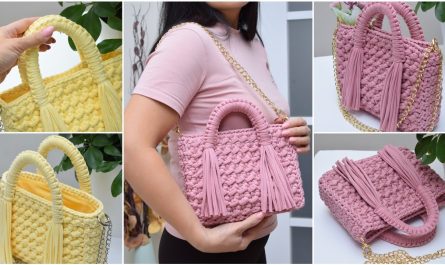
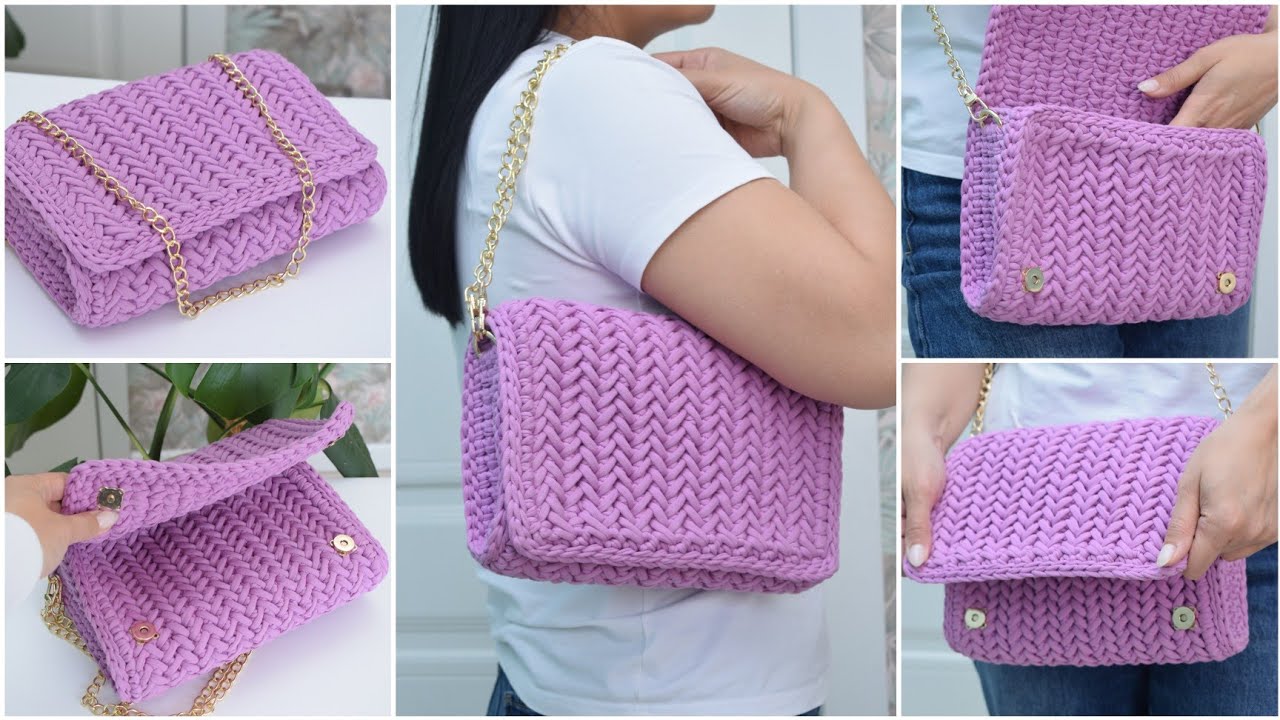
🧶 Crochet Crossbody Bag with Herringbone Pattern
Skill Level:
Intermediate (basic crochet skills and some experience with textured stitches)
✳️ Materials Needed
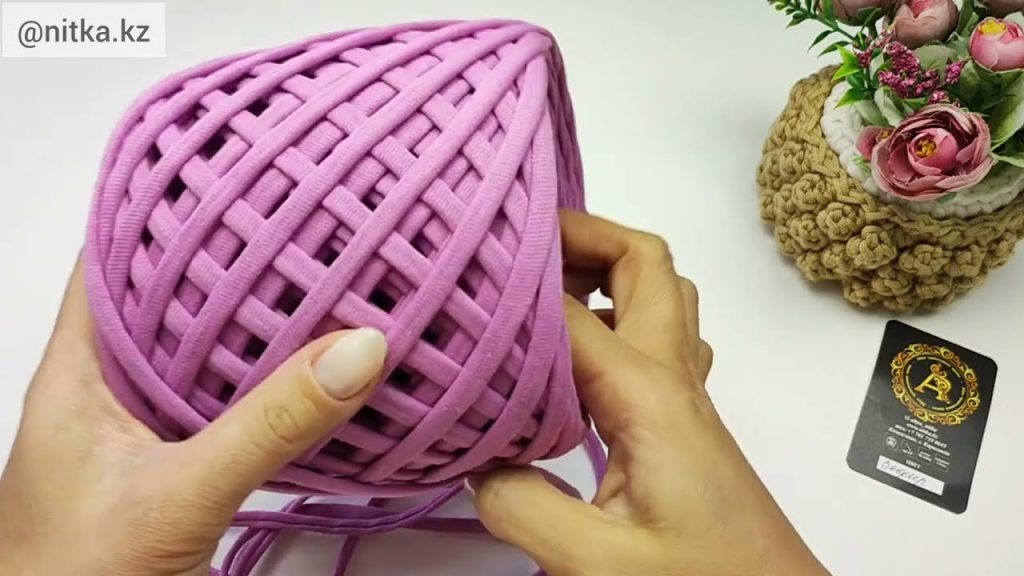
- Yarn: Worsted weight cotton yarn (approx. 200–250g or 2 skeins)
– Cotton gives the bag structure and durability.
– Choose two colors if you want a contrast strap or edging. - Crochet Hook: 5.0 mm (H/8)
- Tapestry Needle: For weaving in ends
- Scissors
- Magnetic Snap or Zipper (optional): For closure
- Fabric lining (optional): Adds extra strength
- Leather Strap or Crochet Strap Materials: Depending on your style
🪡 Gauge
16 herringbone half double crochet stitches = 4” (10 cm)
Adjust your hook size if needed.
🧩 Abbreviations (US Terms)
| Abbreviation | Meaning |
|---|---|
| ch | chain |
| st | stitch |
| sl st | slip stitch |
| sc | single crochet |
| hdc | half double crochet |
| hbhdc | herringbone half double crochet |
| sk | skip |
| rep | repeat |
| RS | right side |
| WS | wrong side |
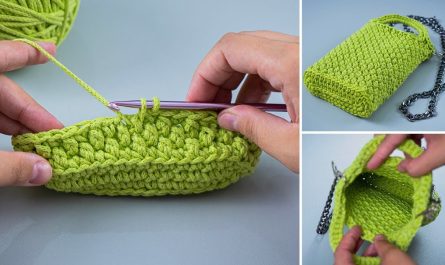
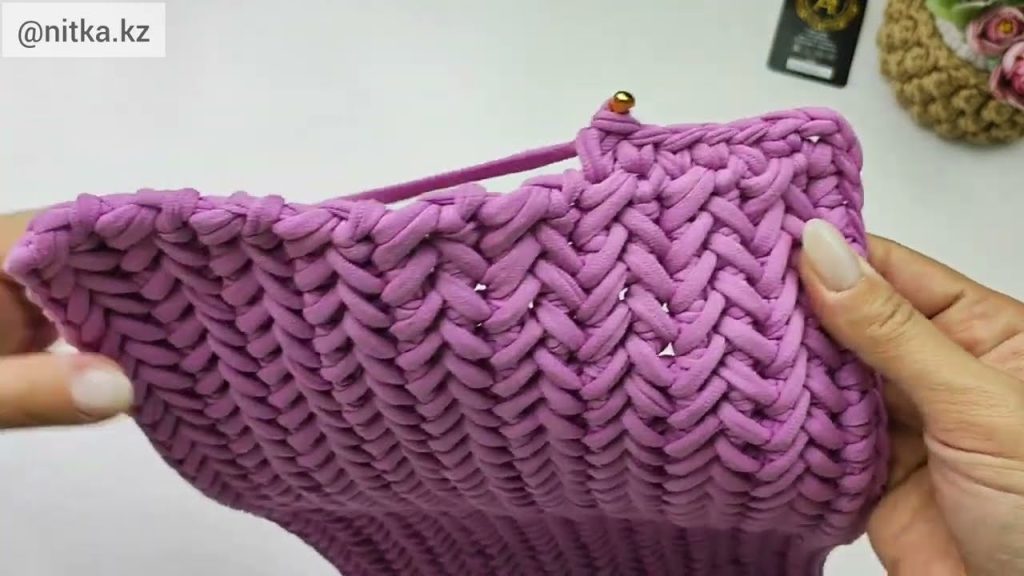
✨ Special Stitch: Herringbone Half Double Crochet (HBHDC)
- Yarn over, insert hook into next stitch.
- Yarn over and pull through the stitch and the first loop on your hook (2 loops left).
- Yarn over and pull through both loops.
✅ Creates a slanted, woven “herringbone” texture.
🧺 Instructions
1. Base of the Bag
- Foundation Chain:
Ch 41 (adjust for desired width — this will be approx. 10–11 inches wide). - Row 1:
HBHDC in 3rd ch from hook and across (39 sts).
Ch 2, turn. - Row 2–20 (or until desired height):
HBHDC in each st across.
Ch 2, turn.
(You can make it taller for a larger bag.) - Fasten off and leave a long tail for sewing.
✅ You now have the front panel.
- Repeat for the back panel.
2. Side and Bottom Panel
- Foundation Chain:
Ch 7 (for bag depth — adjust for preference). - Row 1:
HBHDC in 3rd ch from hook and across.
Ch 2, turn. - Continue Rows:
Work until the strip equals the outer edge length of your bag panels (measure around three sides — bottom, left, right). - Fasten off.
3. Assembly
- Place the front and back panels with the right sides facing out.
- Align the side/bottom strip around the edge.
- Use slip stitches or whip stitch to join all edges evenly.
- Turn the bag right side out.
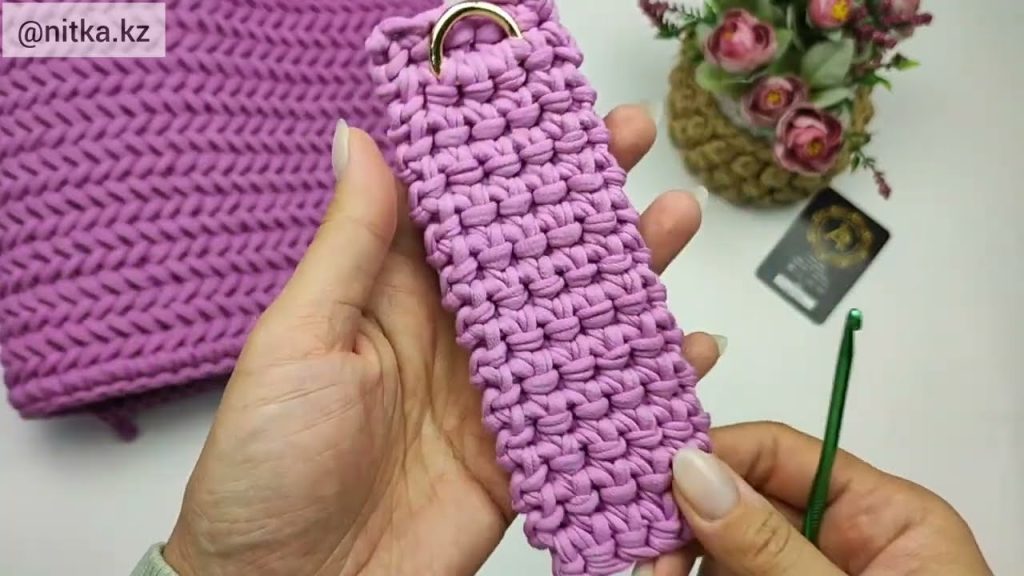
4. Strap Options
(a) Crochet Strap:
- Ch 7 (or your preferred width).
- Work HBHDC in each ch across.
- Continue in rows until the strap is your desired length (typically 45–50 inches for a crossbody).
- Attach each end of the strap to the bag sides securely.
(b) Leather Strap:
Use rivets, rings, or D-hooks to attach a pre-made strap.
5. Edging (Optional but Neat!)
- Work one round of sc evenly around the top edge of the bag.
- You can also add a crab stitch (reverse sc) border for a sturdy, decorative finish.
6. Closure (Optional)
- Sew in a magnetic snap or zipper at the top center.
- If you prefer, crochet a simple flap:
- Attach yarn to back panel top center.
- Ch 2, work HBHDC rows across for 5–6 rows.
- Add a buttonhole row, and sew a button on the front.
7. (Optional) Fabric Lining
Cut a piece of fabric the same size as your bag interior, sew it into a pouch shape, and hand-stitch it inside for a clean finish.
🎨 Customization Ideas
- Color Blocking: Use one color for front and another for back.
- Stripes: Change yarn color every 2 rows.
- Tassel or Fringe: Add a decorative tassel to the side.
- Button Flap: Add a simple flap for extra charm.
✅ Tips for Success
- Keep your tension even — herringbone stitches can tighten up.
- Use stitch markers on corners while seaming.
- Block your panels lightly for straight edges before joining.
Would you like me to format this into a printable PDF pattern layout (with materials list, step-by-step photos, and chart-style pattern)? I can create it for you.
Watch tutorial: