 by
by Here’s a detailed, beginner-friendly guide you can use for a blog post, school project, or craft tutorial:
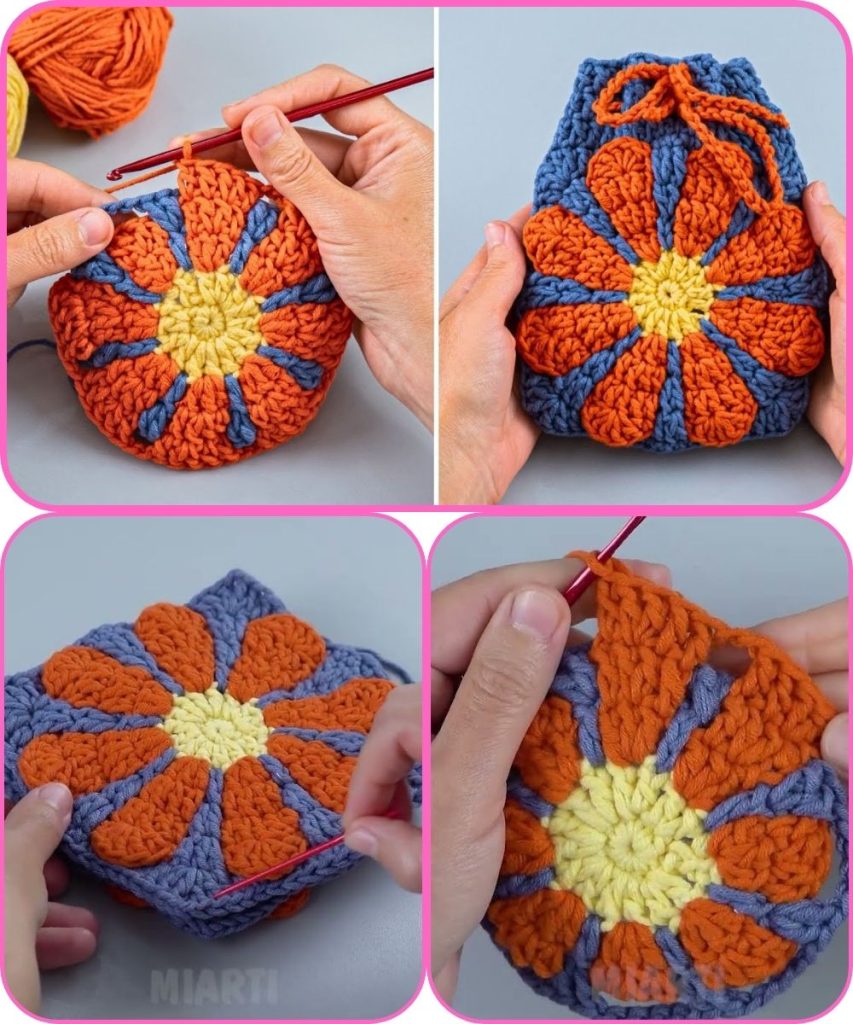
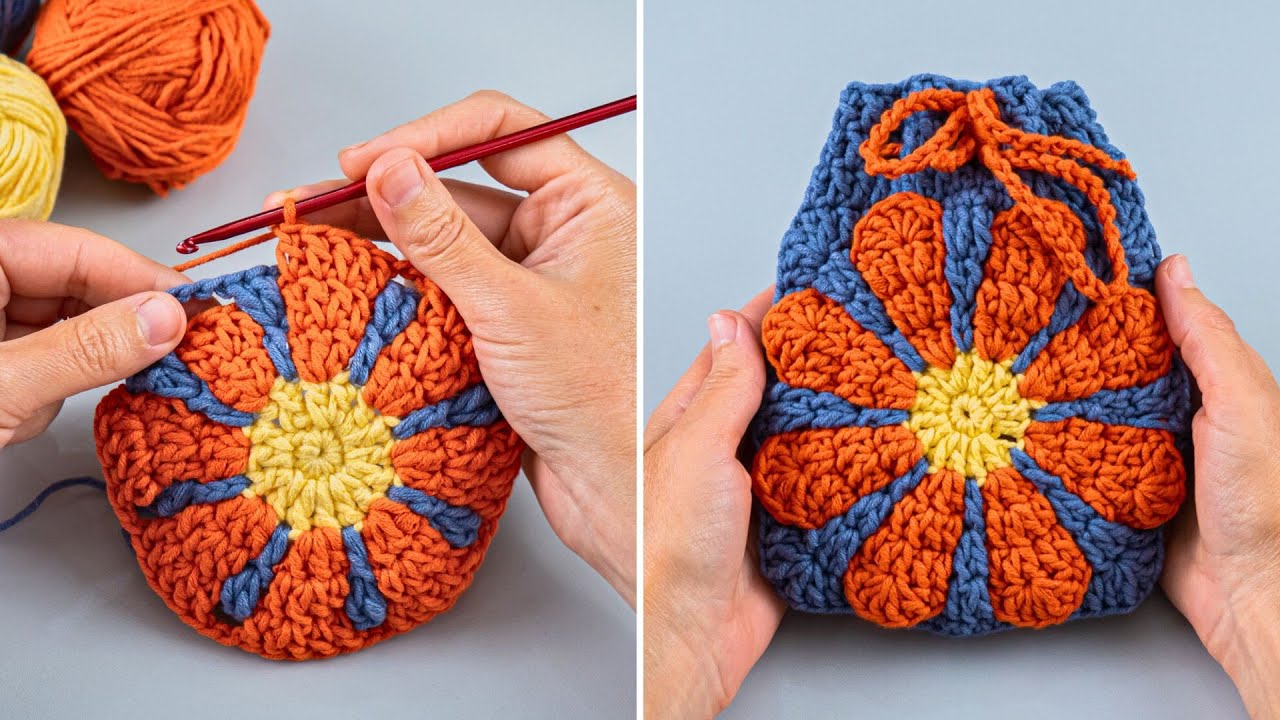
How to Make an Easy Crochet Granny Square Pouch 🧶
A crochet granny square pouch is a simple, stylish, and fun project—perfect for beginners and experienced crocheters alike. This pouch can be used to store coins, makeup, stationery, or small accessories. With just a few basic stitches and some yarn, you can create a beautiful handmade pouch in no time!
Materials Needed
- 🧶 Yarn (cotton or acrylic works well; medium weight yarn is best)
- 🪝 Crochet hook (size recommended on your yarn label, usually 4–5 mm)
- ✂️ Scissors
- 🧵 Yarn needle
- 🔒 Button or zipper (optional, for closure)
- 📏 Measuring tape (optional)
Basic Crochet Skills Required
Before starting, it helps to know:
- Slip knot
- Chain stitch (ch)
- Slip stitch (sl st)
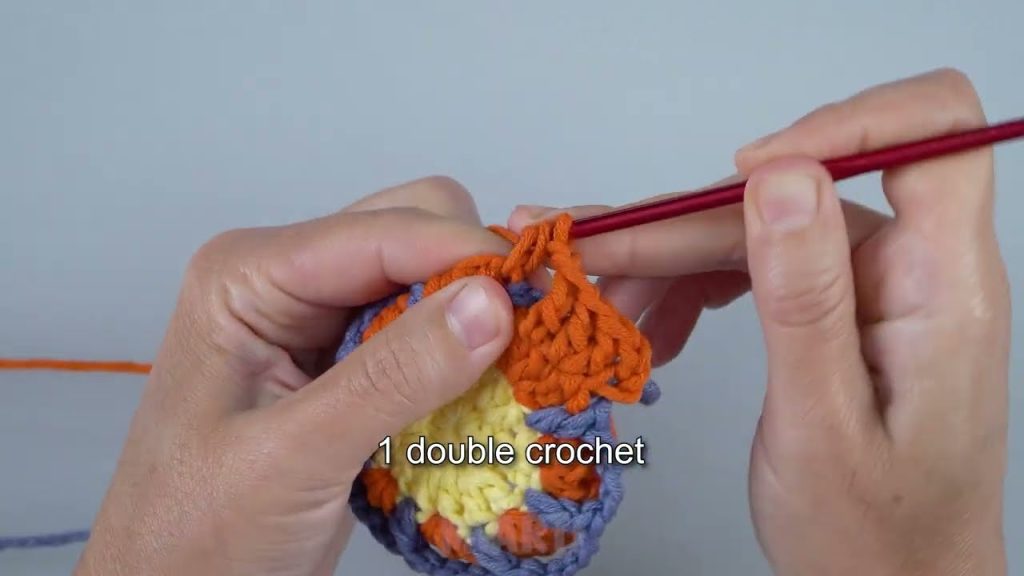
- Double crochet (dc)
- Magic ring or chain ring
These are common beginner stitches, making this project easy to follow.
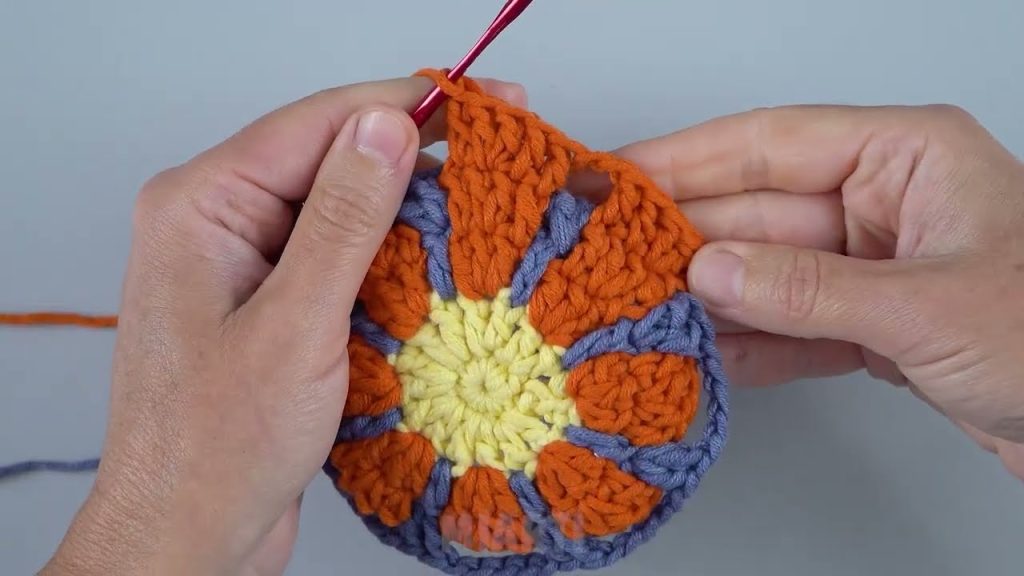
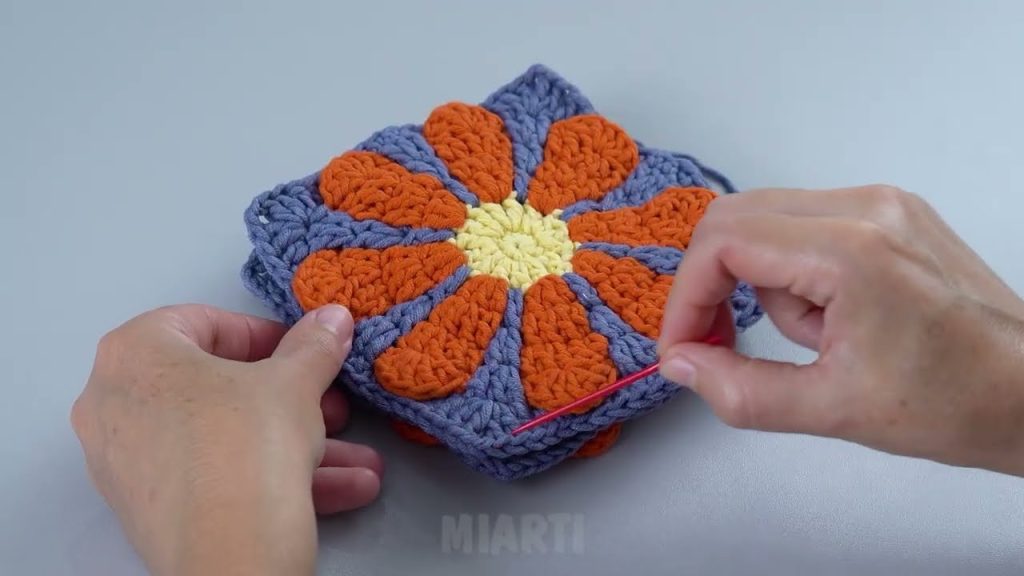
Step 1: Make the Granny Squares
- Start with a magic ring (or chain 4 and join with a slip stitch).
- Crochet your first granny square round using clusters of double crochet stitches, separated by chain spaces.
- Continue adding rounds until your square reaches the desired size (usually 8–10 cm per square).
- Make two identical granny squares for the front and back of the pouch.
- Fasten off and weave in loose ends.
💡 Tip: You can use one color or change colors each round for a more colorful design.
Step 2: Assemble the Pouch
- Place the two granny squares right sides facing out.
- Use a slip stitch or single crochet to join three sides together, leaving the top open.
- Make sure your stitches are neat and even along the edges.
Step 3: Add a Closure (Optional)
- Button closure: Sew a button on one side and create a small chain loop on the other.
- Zipper closure: Sew a zipper carefully along the top opening using a needle and thread.
- Drawstring: Crochet a small chain and weave it through the top stitches.
Step 4: Finishing Touches
- Weave in all remaining yarn ends.
- Lightly shape the pouch with your hands.
- Add decorations like tassels, beads, or embroidery if you like.
Why You’ll Love This Project ❤️
- Beginner-friendly and quick to make
- Great for using leftover yarn
- Customizable in size, color, and style
- Makes a thoughtful handmade gift
Making a crochet granny square pouch is a relaxing and rewarding project that lets you practice basic crochet skills while creating something useful and beautiful. Grab your hook and yarn, and enjoy crafting your own unique pouch! 🧶✨
If you want, I can also:
- Simplify this for kids/beginners
- Turn it into a short school assignment
- Add pictures descriptions or diagrams
- Write it in a blog or YouTube tutorial style
Watch tutorial: