 by
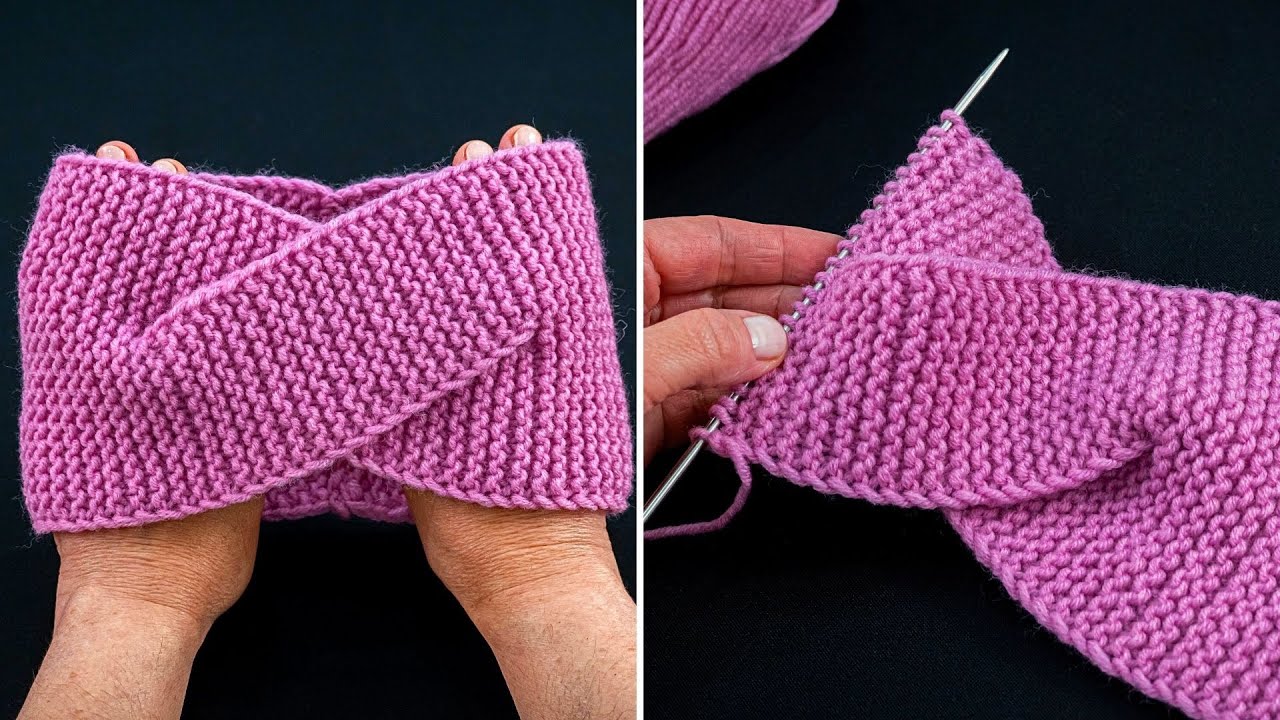
by Absolutely! Let’s break this down step by step. I’ll make it super simple, so even a complete beginner can follow. This headband will be soft, stretchy, and cozy, perfect for chilly days or just as a cute accessory.
Materials Needed
- Yarn: Medium-weight (worsted) yarn. Choose any color you like. Acrylic or wool blends are easiest for beginners.
- Knitting needles: Size 8–10 US (5–6 mm) straight needles.
- Scissors
- Tapestry needle (for weaving in ends)
Optional: stitch markers to help keep track, but not necessary.
Step 1: Cast On
- Decide how wide you want your headband. A good width is 3–4 inches (7–10 cm).
- Using your yarn and needles, cast on 12–20 stitches (more stitches = wider headband).
- Keep your tension loose, so the headband isn’t too tight.
Step 2: Knit the Body
We’ll make this super simple using Garter Stitch (knit every row).
- Knit every stitch in every row.
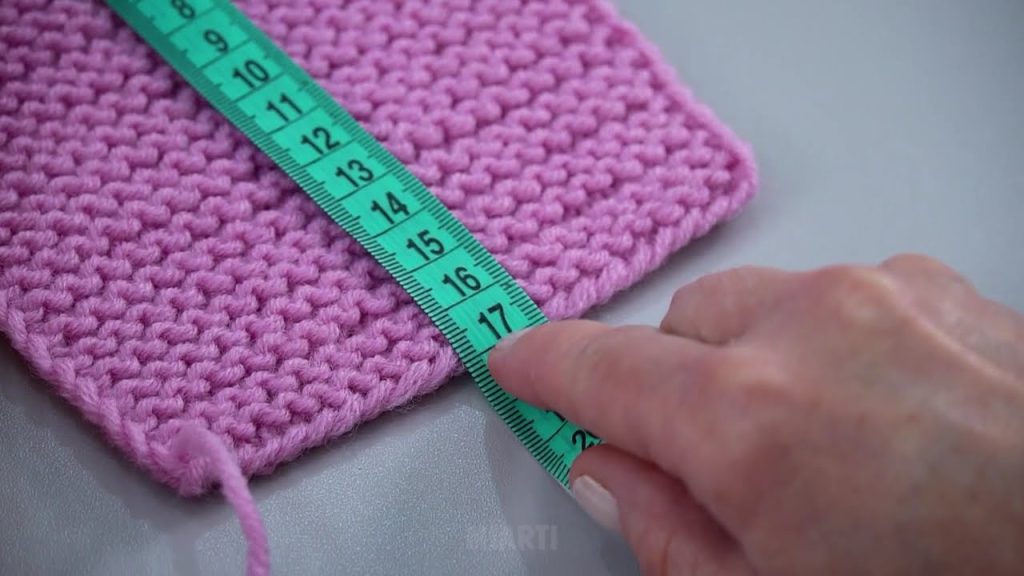
- Repeat until the headband is long enough to fit around your head comfortably.
- Measure it around your head or aim for 18–20 inches (45–50 cm) in length.
Tip: Don’t stretch too much while measuring; you want it to fit snugly but comfortably.
Step 3: Bind Off
- Once you reach your desired length, bind off all stitches loosely.
- Cut the yarn, leaving a 6-inch tail.
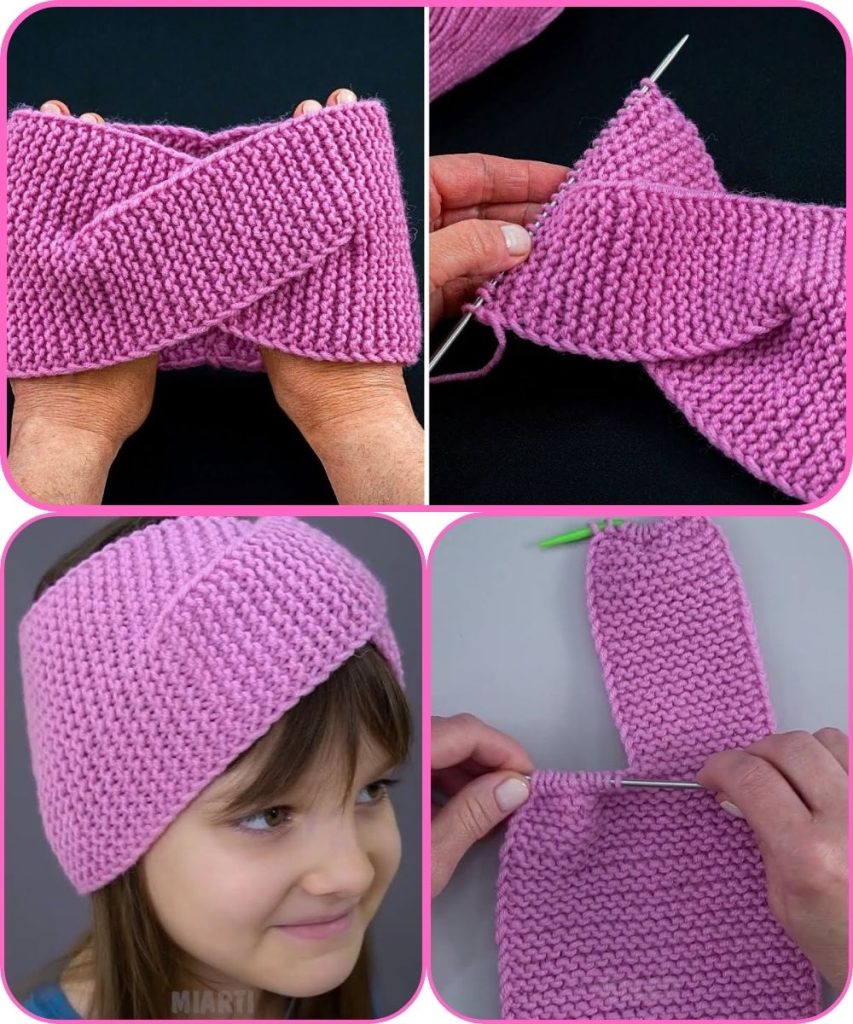
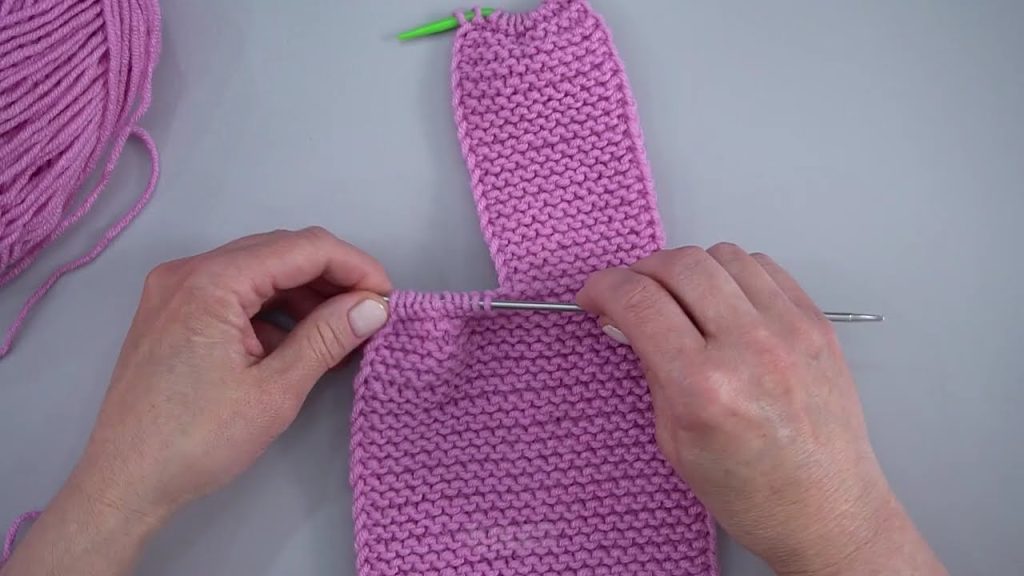
Step 4: Join the Ends
- Use the tapestry needle to sew the short ends together.
- You can use a simple whip stitch or the mattress stitch for a cleaner look.
- Make sure the seam is not too bulky—it will be against your head.
Step 5: Weave in Ends
- Thread the yarn tail onto the tapestry needle.
- Weave it through the stitches along the inside of the headband to secure it.
- Trim any extra yarn.
Step 6: Optional Styling
- Twist the band before sewing the ends for a knotted front style.
- Add a bow or flower for a cute decoration.
Tips for Beginners
- Keep your stitches looser than usual; tight stitches make the headband too stiff.
- Use bright-colored yarn; it’s easier to see your stitches.
- If you mess up a row, don’t panic—just unravel it and try again.
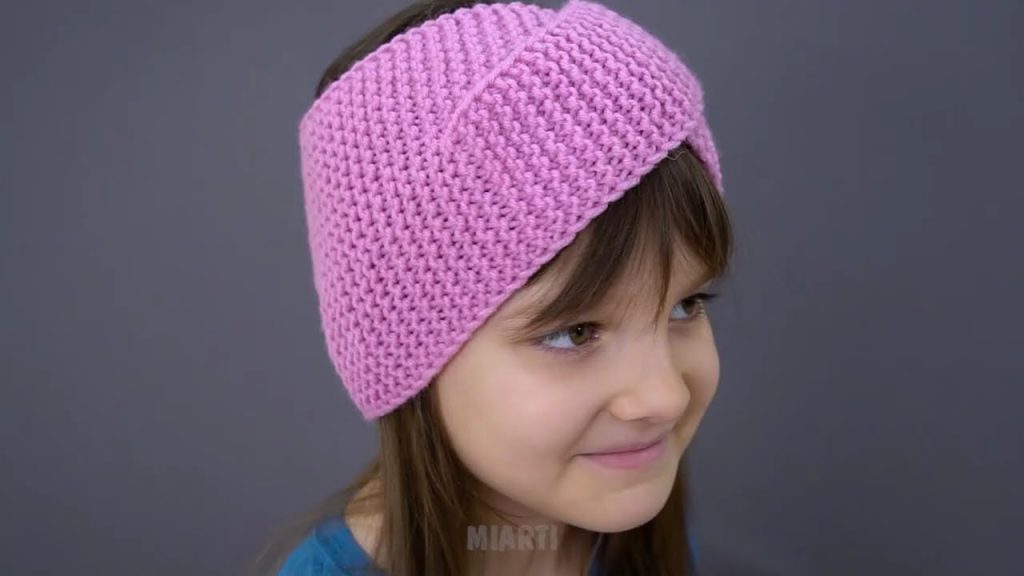
✅ Result: A soft, stretchy, simple headband that anyone can wear, perfect for cold days or as a handmade gift!
If you want, I can also draw a simple step-by-step diagram showing exactly how to make this headband, so it’s even easier to follow visually.
Watch tutorial: