 by
by Here’s a detailed, beginner-friendly guide for making an easy mosaic granny square crochet handbag. This tutorial combines the timeless charm of granny squares with mosaic-style colorwork to create a stylish, functional handbag.
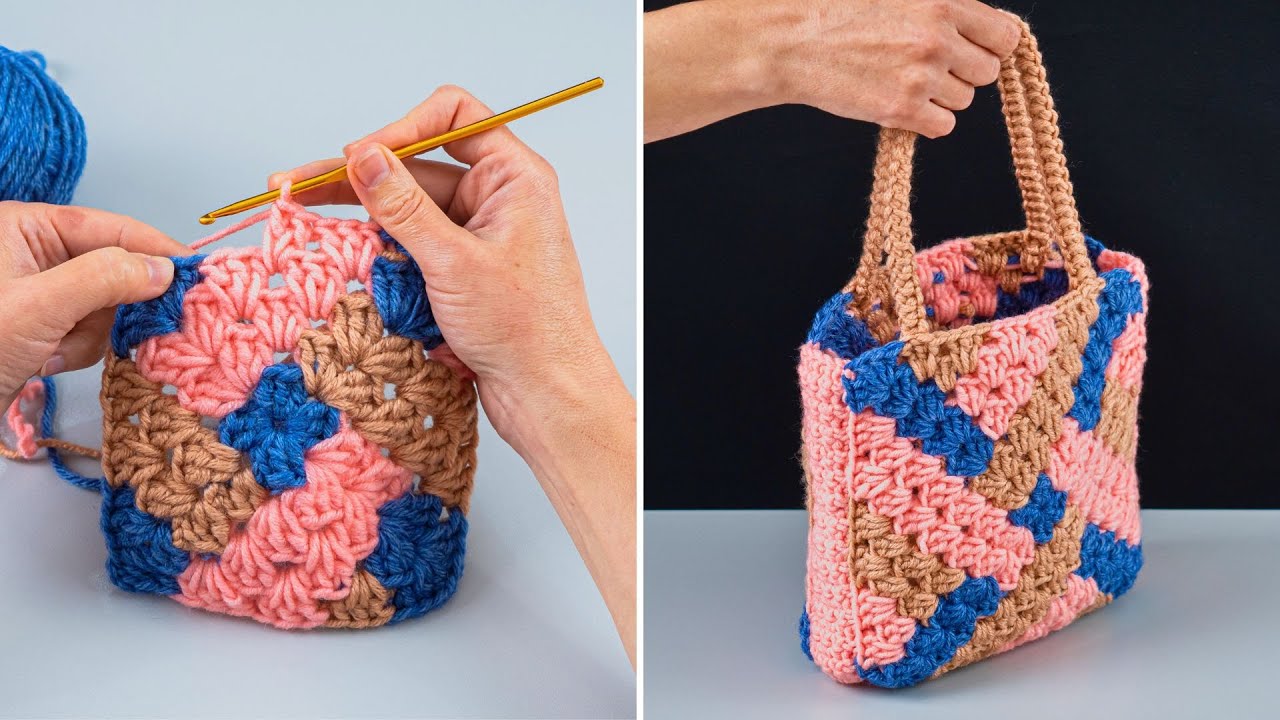
How to Make an Easy Mosaic Granny Square Crochet Handbag
Mosaic crochet adds a modern twist to classic granny squares, giving your handbag a unique geometric pattern without requiring complicated stitches. This project is beginner-friendly because it uses simple stitches, basic color changes, and modular construction.
Why This Handbag Is Beginner-Friendly
- Uses basic crochet stitches (single and double crochet)
- Uses granny squares, which are easy to make and join
- Mosaic effect achieved with simple color changes
- Bag is modular: you can adjust size by adding or removing squares
- Can be made with leftover yarn or in your favorite colors
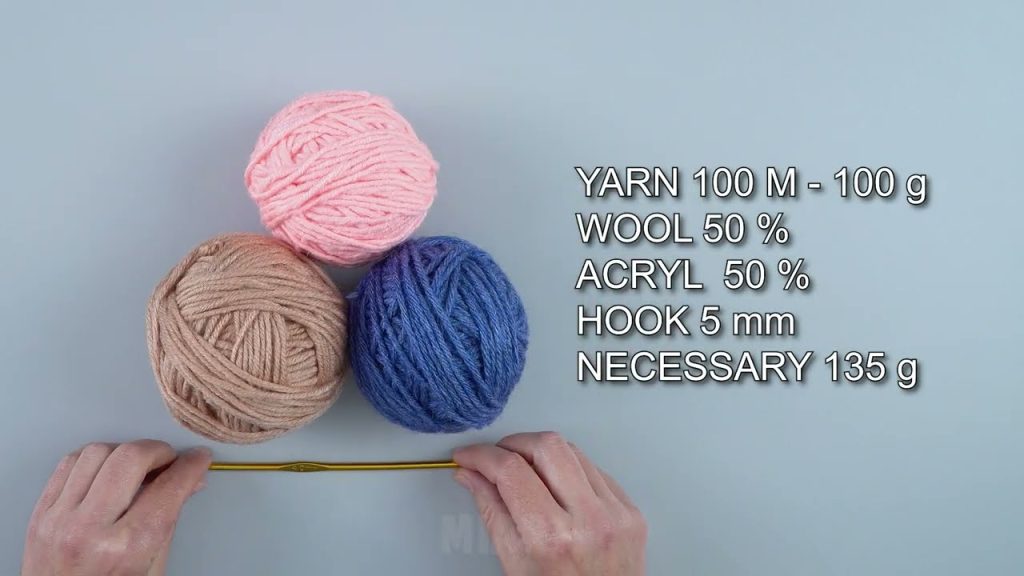
Materials You’ll Need
- Yarn: Medium-weight (worsted) yarn in 2–3 colors
– Cotton or acrylic for durability - Crochet Hook: 4–5 mm
- Scissors
- Yarn Needle for weaving in ends
- Optional: Fabric lining for small items
- Optional: Buttons, tassels, or embellishments
Stitches and Techniques Used
- Chain stitch (ch)
- Single crochet (sc)
- Double crochet (dc)
- Slip stitch (sl st)
- Color changes (switching yarns for mosaic effect)
- Joining granny squares (sl st or sc)
Even beginners can manage this project with some patience and attention to color changes.
Step-by-Step Instructions
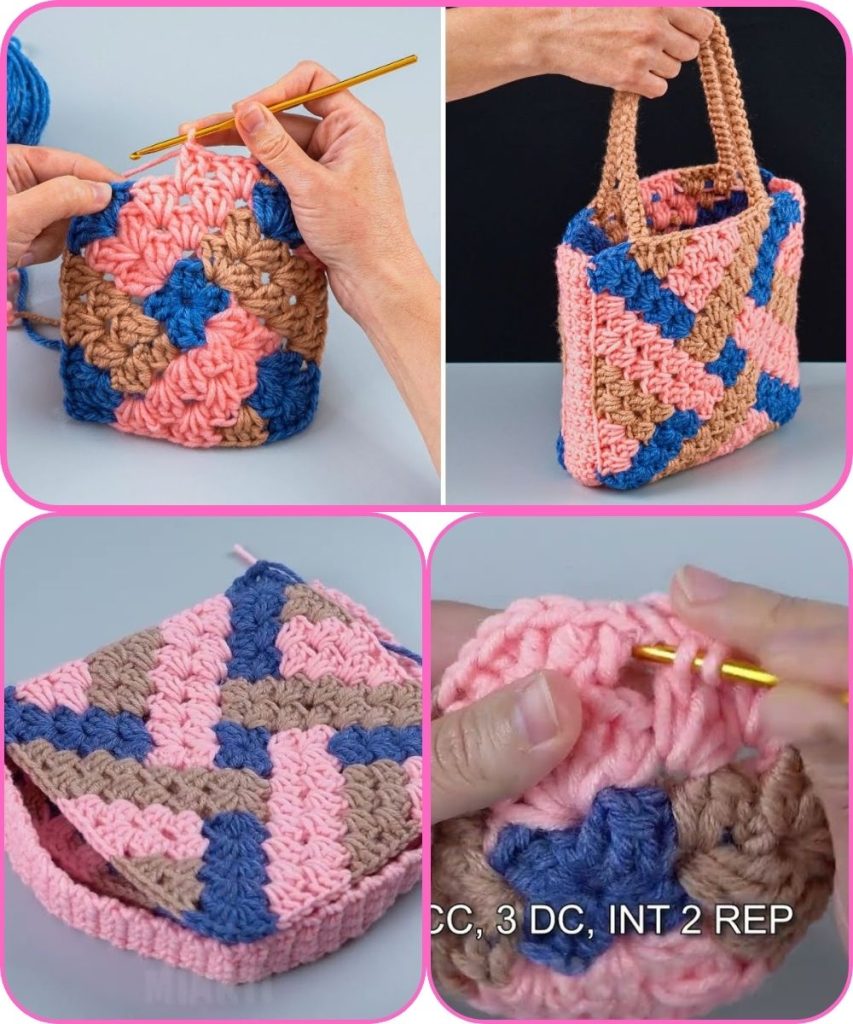
Step 1: Make Mosaic Granny Squares
- Start with a magic ring or chain 4 and join.
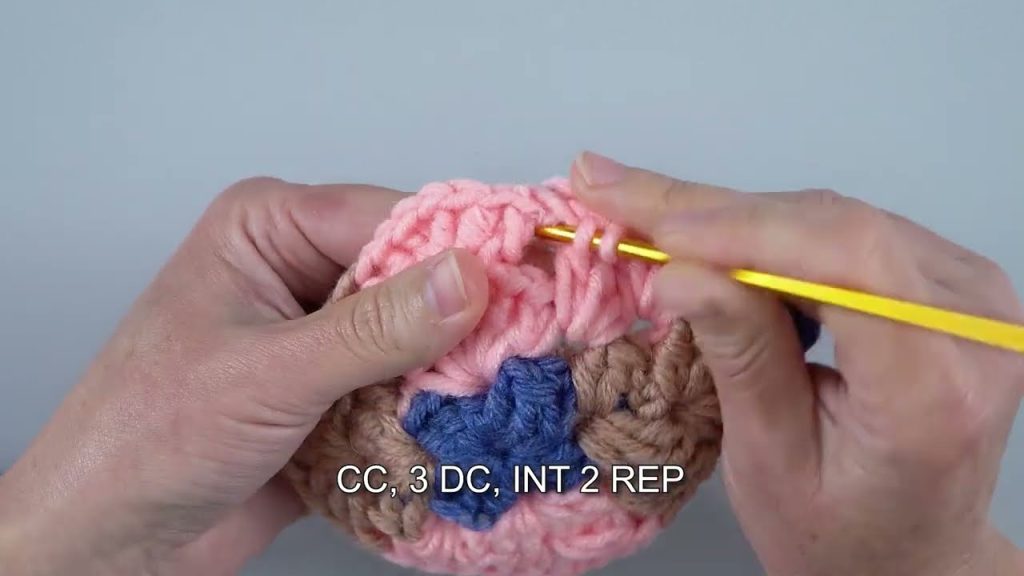
- Round 1: Ch 3 (counts as first dc), 2 dc into ring, ch 1, 3 dc three times, ch 1, sl st to join.
- Round 2: Change color for mosaic effect (optional). In each corner: 3 dc, ch 1, repeat around.
- Round 3: Continue alternating colors each round for a mosaic pattern.
- Make 6–8 squares for a medium handbag (adjust for larger or smaller bag).
Tip: You can follow a two-color mosaic pattern, alternating rows with two different colors for geometric effect.
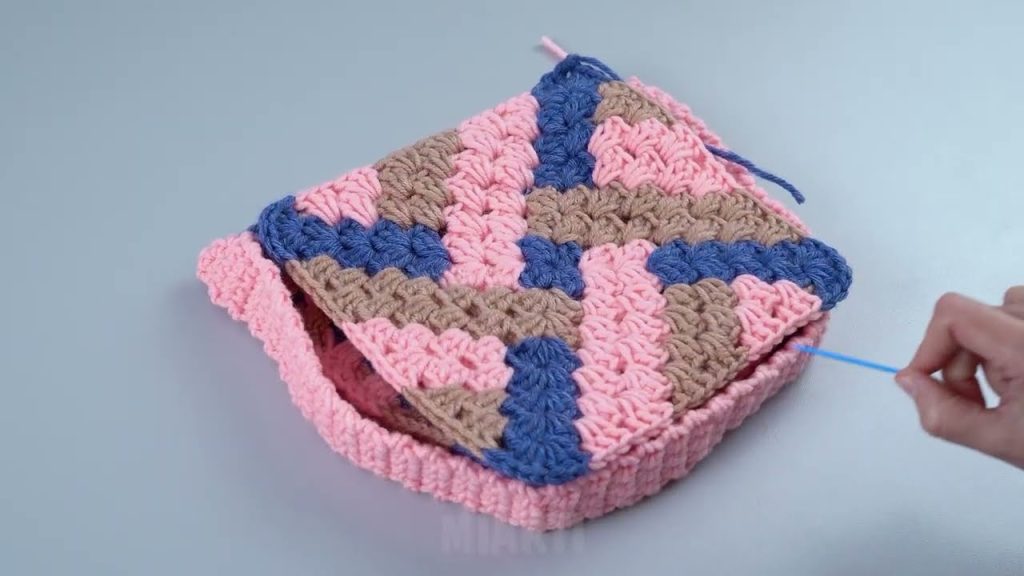
Step 2: Join Granny Squares
- Arrange squares into two panels: front and back of the bag.
- Join squares with slip stitch or single crochet along edges.
- Join panels along sides and bottom to form the handbag shape.
Optional: Leave top edges open for adding lining later.
Step 3: Add Handles
Simple Crochet Handles:
- Decide handle length (e.g., 50–60 cm for shoulder strap).
- Chain desired length, then single crochet back along the chain for sturdiness.
- Attach ends to top edges of the bag, reinforcing with extra stitches.
Optional: Make two shorter handles for a hand-held bag.
Step 4: Optional Fabric Lining
- Cut a piece of fabric slightly smaller than bag dimensions.
- Sew inside for added structure and to hold small items.
- Optional: Sew lining to handles for extra reinforcement.
Step 5: Finishing Touches
- Weave in all loose ends.
- Check seams for durability.
- Optional: Add button, tassel, or decorative element to the top edge.
Tips for Beginners
- Use medium-weight cotton yarn for sturdiness
- Keep stitches even and consistent
- Use stitch markers to align corners when joining squares
- Don’t worry about minor gaps—they add handmade charm
- Work one square at a time before joining to simplify color management
Customization Ideas
- Make a color-blocked mosaic bag with multiple colors
- Add pockets inside or outside for organization
- Try chunky yarn for a bold, modern look
- Add fringe, tassels, or beads for extra flair
- Make larger or smaller bags by adding or reducing squares
Final Thoughts
A mosaic granny square crochet handbag is a perfect project for beginners who want to create something stylish and practical. Using simple stitches, modular squares, and basic colorwork, you can make a bag that looks advanced but is very approachable.
Once you complete your first bag, you can experiment with different mosaic patterns, sizes, and embellishments to create a unique handmade collection!
If you want, I can also create a full one-page printable pattern with exact stitch counts, square sizes, and handle placement so beginners can follow it step by step.
Watch tutorial: