 by
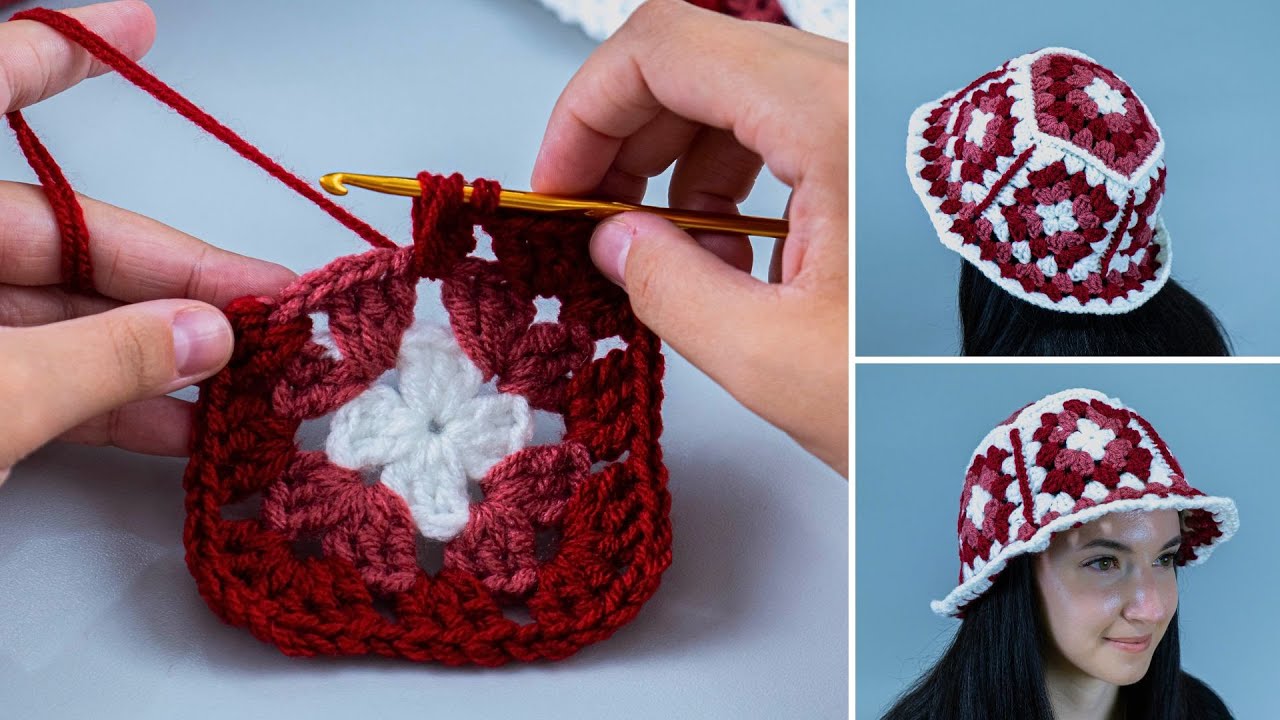
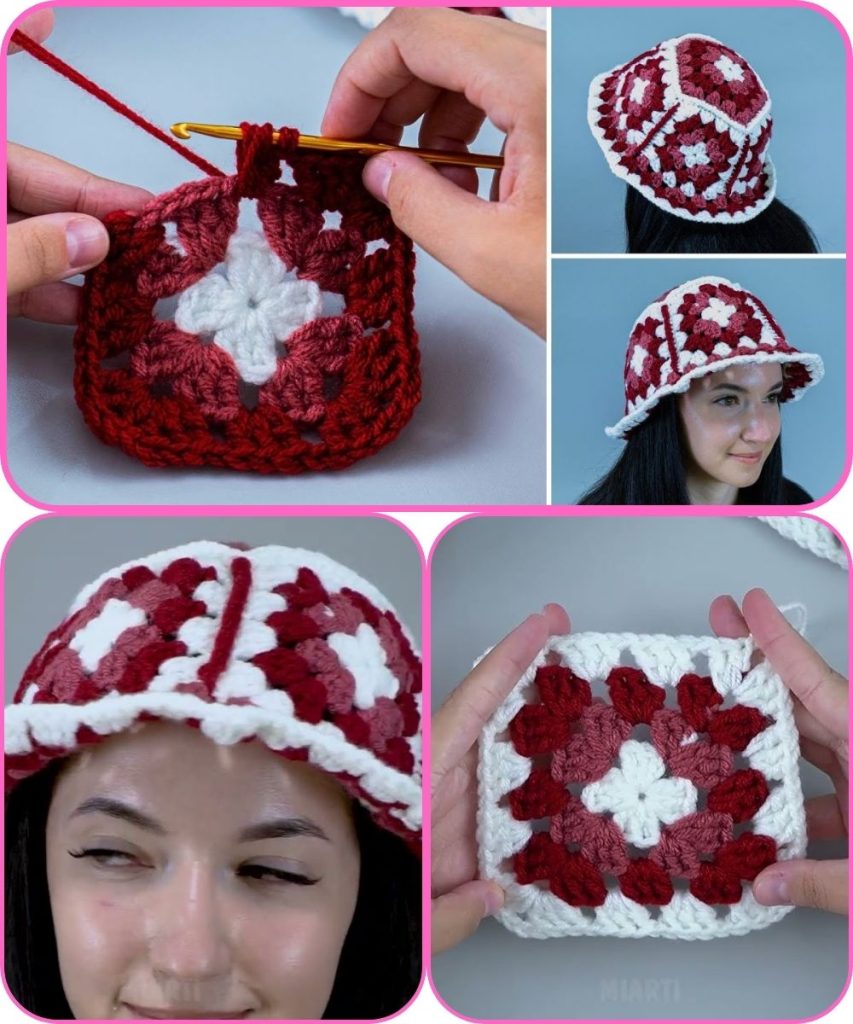
by Absolutely! Let’s go step by step. I’ll break it down clearly so even a beginner can follow. A granny square bucket hat is essentially a series of crocheted granny squares joined together, shaped into a bucket hat. Here’s a detailed guide:
Materials Needed
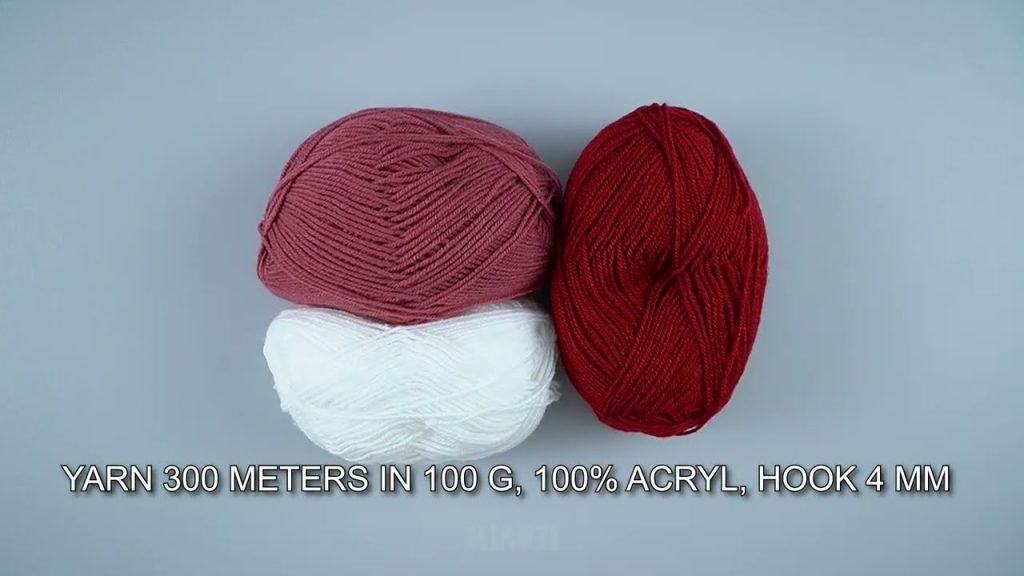
- Yarn – Medium weight (worsted) yarn works well. You can use one color or multiple colors for a fun, patchwork look.
- Crochet Hook – Usually a 5 mm (H-8) hook for worsted weight yarn.
- Scissors – For cutting yarn.
- Yarn Needle – For weaving in ends and joining squares.
- Stitch Markers (optional) – Helpful for marking rounds.
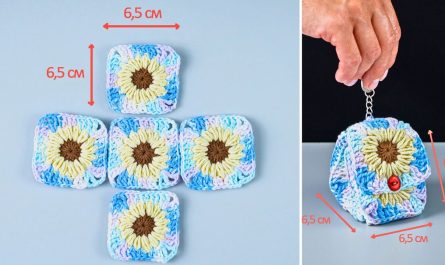
Step 1: Make a Granny Square
Granny squares are the basic unit of the hat.
Instructions:
- Start with a magic ring (or chain 4 and join with slip stitch to form a ring).
- Round 1: Chain 3 (counts as first double crochet), work 2 double crochets into ring, chain 2, 3 double crochets, chain 2 three more times. Join with slip stitch to top of starting chain-3. You now have a square with 4 chain-2 corners.
- Round 2: Slip stitch into the first chain-2 corner, chain 3, 2 double crochets, chain 2, 3 double crochets into the same corner. 3 double crochets, chain 2, 3 double crochets in next corner around. Join with slip stitch.
- Round 3: Repeat Round 2 if you want a bigger square. Typically for a hat, each granny square can be around 3–4 inches.
Tip: Make as many granny squares as needed to form the hat. For an adult bucket hat, usually 8–12 squares are enough (depending on size and brim).
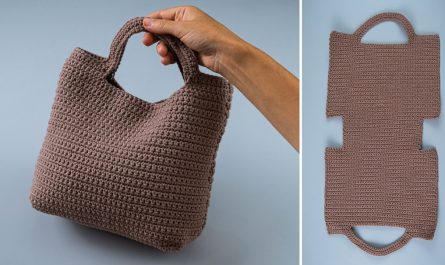
Step 2: Join Granny Squares
You can join them using either:
- Slip stitch method: Place two squares together, right sides facing, and slip stitch through both loops along the edge.
- Whip stitch method: Use a yarn needle to sew edges together with single crochet or whip stitch.
Arrange your squares in a circle to form the crown of the hat. For a bucket hat:
- Top circle: Use 4 squares joined to form the crown (or more if your squares are small).
- Side panels: Join squares around the top circle to create the sides of the bucket.
Step 3: Shape the Bucket Hat
- Crown: After joining squares, you should have a circle for the top of the head.
- Sides: Continue adding rows of squares (or single/double crochet rounds) around the crown until the hat reaches the desired height.
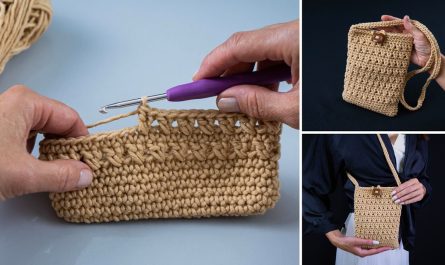
- Brim:
- Pick up stitches around the bottom edge of the hat.
- Crochet in rounds using double crochet (dc) stitches.
- To make it flare slightly, you can increase a few stitches evenly in each round (for example, add 6–8 stitches per round).
- Usually, 2–4 rounds for a short brim, or 5–6 rounds for a wider brim.

Step 4: Finish
- Weave in all ends using a yarn needle.
- Block your hat lightly if needed to help it hold its shape.
Tips for Beginners
- Use bright contrasting colors for a classic granny square look.
- Don’t worry about perfect symmetry—the charm of granny squares is their handmade, slightly imperfect feel.
- Try a lighter yarn and smaller hook if you want a softer, more flexible hat.
- For sturdier brims, consider lining with interfacing or using a stiffer yarn.
If you want, I can make a simple diagram showing how the squares fit together to form the hat—it really helps visualize it before you start crocheting.
Watch tutorial: