by
by Sure! Below is a detailed, step-by-step guide on how to make a crocheted headband with a visor (also known as a brimmed headband or ear warmer with bill). This pattern is great for beginners to intermediate crocheters and can be customized to any size, yarn type, or color.
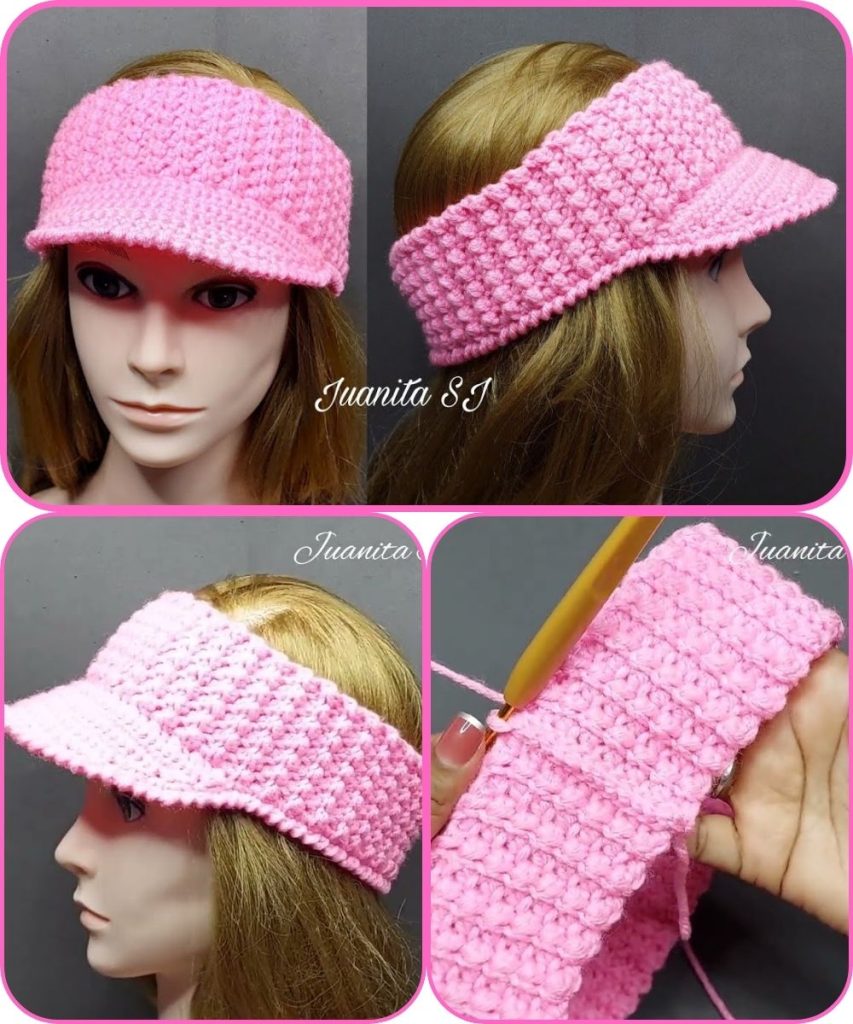
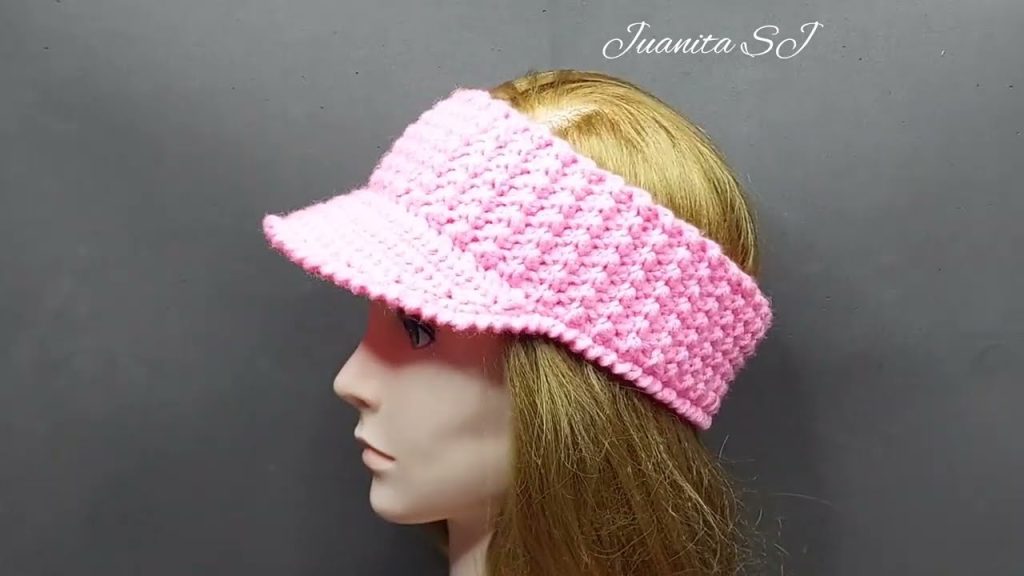
🧶 How to Make a Crocheted Headband with Visor (Step-by-Step Instructions)
Materials Needed:
- Yarn: Medium weight (Category 4) yarn, such as acrylic or cotton blend.
→ Example: Red Heart Soft or Caron Simply Soft. - Crochet Hook: Size H/8 (5 mm) or size suitable for your yarn.
- Tapestry Needle: For weaving in ends.
- Scissors
- Stitch Markers (optional)
- Measuring Tape
🧵 Step 1: Measure and Plan
- Measure around your head where the headband will sit (usually just above the ears).
→ Average adult head circumference: 21–23 inches (53–58 cm). - Subtract about 1 inch (2.5 cm) to ensure a snug fit since crochet stretches.
🪡 Step 2: Make the Foundation Chain
- Using your chosen yarn and hook, chain (ch) enough stitches to reach your desired length.
- Example: For an adult headband, ch 60–65 (depending on your tension).
- Join with a slip stitch (sl st) to the first chain to form a ring.
- Be careful not to twist the chain before joining.
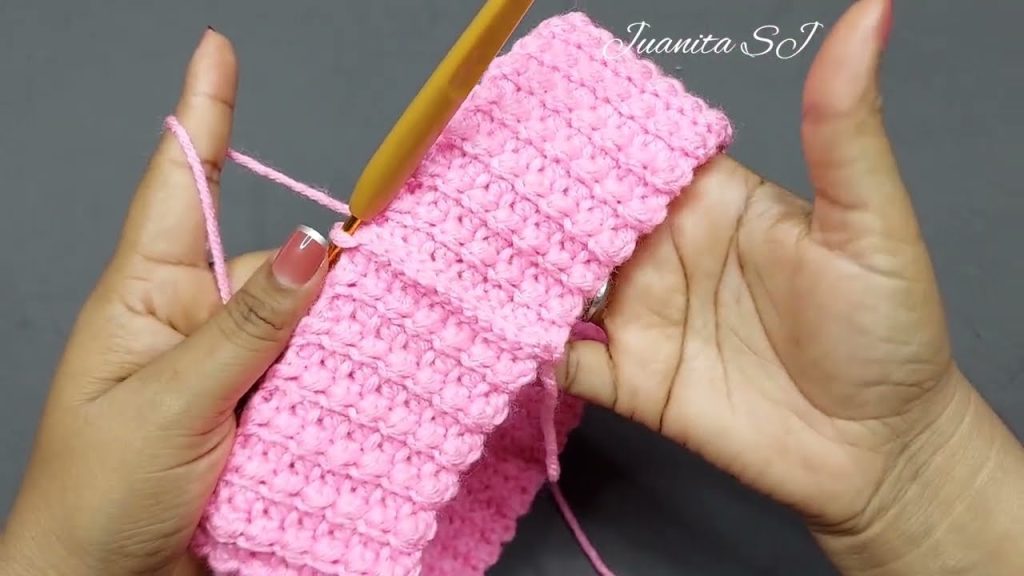
🧤 Step 3: Crochet the Band (Body of Headband)
- Round 1:
- Ch 1, single crochet (sc) in each chain around.
- Join with a sl st to the first sc.
- Round 2–8 (or until desired width):
- Ch 2, half double crochet (hdc) in each stitch around.
- Join with a sl st at the end of each round.
👉 You can make your band wider or narrower by adding or subtracting rounds.
Average width: 3–4 inches (7–10 cm).
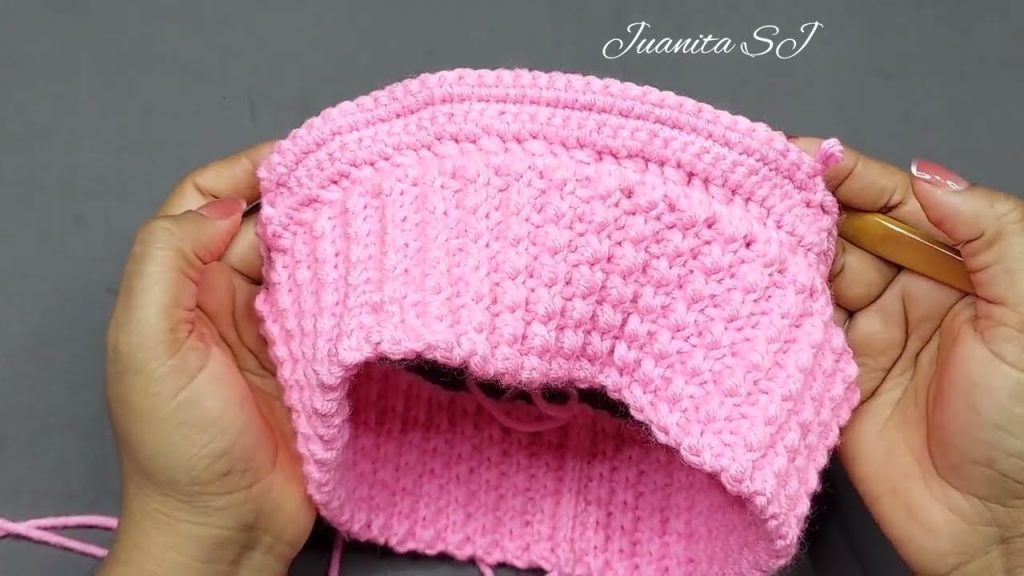
🧢 Step 4: Make the Visor (Bill)
- Mark the front center of the headband (use stitch markers).
- The visor will cover about ⅓ of the front (e.g., 20–24 stitches).
- Row 1:
- Attach yarn to one marked stitch.
- Ch 1, hdc across 20–24 stitches (depending on how wide you want the visor).
- Turn your work.
- Row 2:
- Ch 1, hdc in next 18–22 stitches (2 less than previous row).
- Turn.
- Row 3:
- Ch 1, hdc in next 16–20 stitches (decrease again).
- Turn.
👉 Continue this way, decreasing 1 stitch at each end of each row, until you have about 8–10 stitches left.
- Last Row:
- Ch 1, sc across.
- Fasten off and weave in ends.
This creates a slightly curved visor shape.
🧵 Step 5: Optional: Stiffen or Edge the Visor
To give the visor more structure:
- Crochet a round of sc evenly around the outer edge of the visor and the headband front.
- For extra firmness, insert a piece of plastic canvas or flexible craft mesh inside the visor before edging it closed.
🌸 Step 6: Finishing Touches
- Weave in all loose ends using a tapestry needle.
- You can add decorations, such as:
- Buttons or flowers on the side.
- A small logo tag or pom-pom.
🎨 Optional Variations
- Ribbed Look: Instead of hdc, use front post and back post double crochets (fpdc/bpdc) for a ribbed texture.
- Color Blocking: Change colors every few rows for stripes.
- Ear Cover: Make the band extra wide to cover your ears completely.
🧼 Care Instructions
- Hand wash gently in cold water.
- Lay flat to dry to prevent stretching.
✅ Example Size Reference
| Size | Circumference | Width | Chain Count (Approx.) |
|---|---|---|---|
| Child | 18–20 in (46–51 cm) | 2.5–3 in | 50–55 ch |
| Adult Small | 21 in (53 cm) | 3.5 in | 60 ch |
| Adult Medium | 22 in (56 cm) | 3.5–4 in | 65 ch |
| Adult Large | 23 in (58 cm) | 4 in | 70 ch |
Would you like me to include illustrated stitch diagrams or photos (step-by-step visuals) for this headband pattern? I can generate those for you, too.
Watch tutorial: