 by
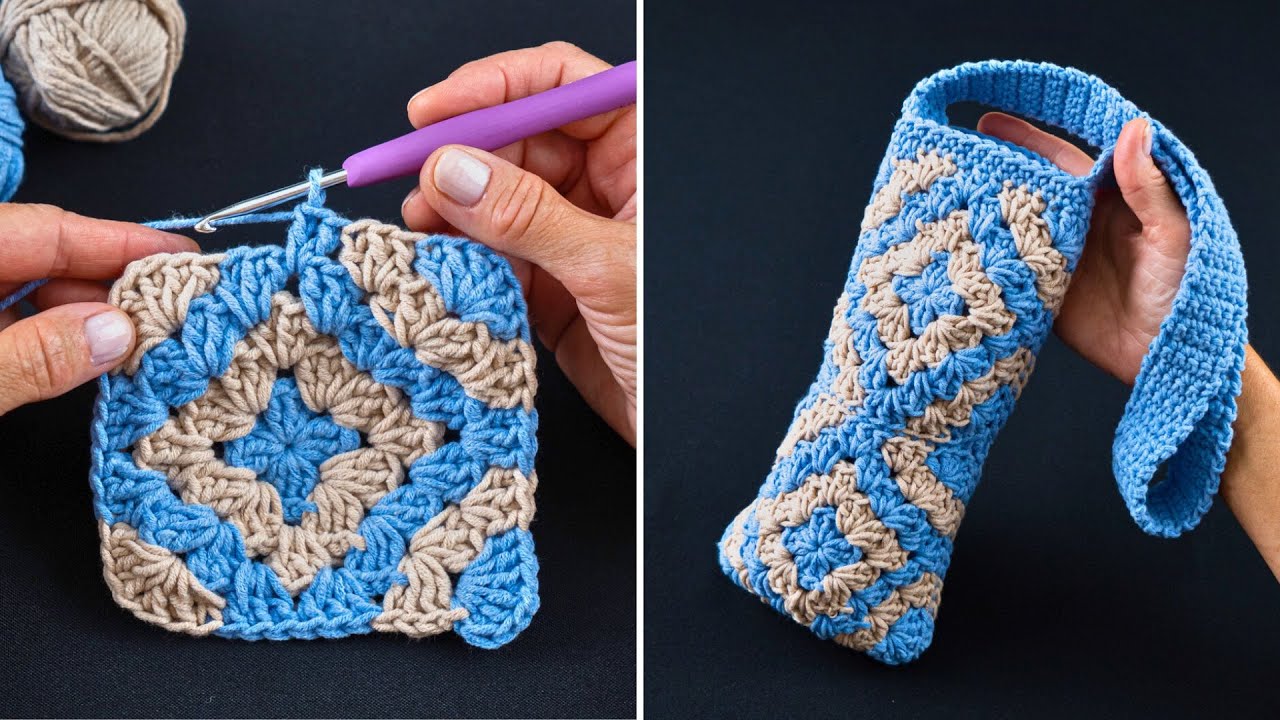
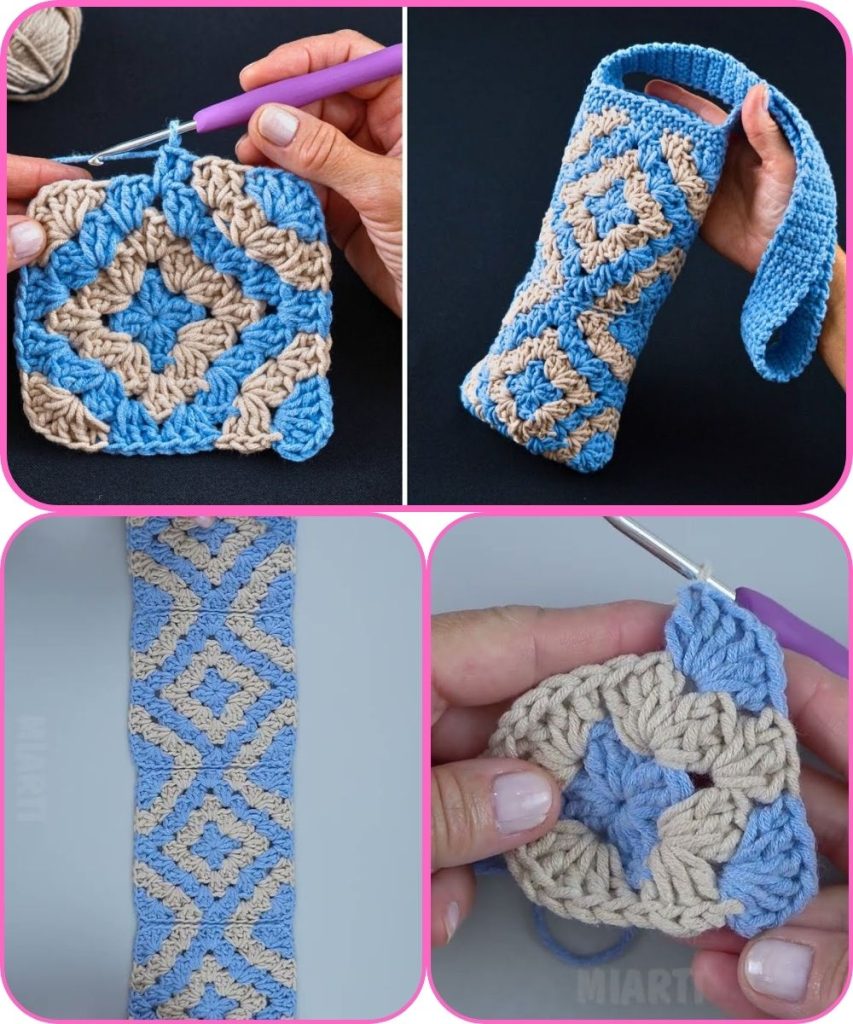
by Absolutely! I can give you a detailed, step-by-step guide on how to crochet a Granny Squares Bottle Bag. I’ll break it down so it’s beginner-friendly but still detailed enough for someone with intermediate skills to follow.
Materials You’ll Need
- Yarn:
- Worsted weight cotton or acrylic yarn (you can use multiple colors for the granny squares).
- Colors: 3–4 different shades work nicely.
- Crochet Hook:
- Usually 4.0 mm (G) or 4.5 mm (7) works for worsted weight yarn.
- Other Tools:
- Scissors
- Yarn needle (for weaving in ends)
- Stitch markers (optional)
- Optional:
- Lining fabric and a sewing needle for a more durable bag.
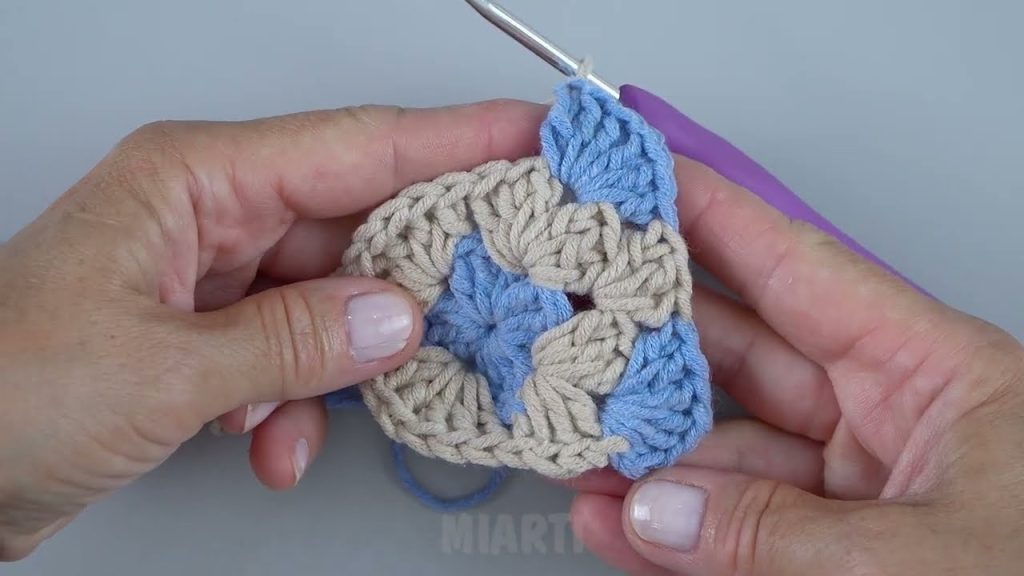
Step 1: Make the Granny Squares
A typical granny square is made in rounds. Here’s a standard pattern for a small square suitable for a bottle bag:
- Start with a magic ring (or chain 4 and join with a slip stitch to form a ring).
- Round 1:
- Chain 3 (counts as the first double crochet),
- Make 2 double crochets into the ring,
- Chain 2 (corner),
- 3 double crochets, chain 2 repeat 2 more times.
- Slip stitch to join the round.
- You should now have 4 clusters of 3 double crochets separated by chain-2 corners.
- Round 2:
- Slip stitch into the next 2 stitches to reach the corner space.
- In the chain-2 corner: (3 double crochets, chain 2, 3 double crochets)
- In each chain-2 corner space around: repeat (3 dc, ch 2, 3 dc)
- Slip stitch to join.
- Round 3 (optional for larger squares):
- In each corner: (3 dc, ch 2, 3 dc)
- On the sides (between corners): 3 dc clusters separated by chain-1 spaces.
- Finish off and weave in ends.
Tip: For a bottle bag, make about 8–12 squares depending on the size of your bottle and the size of your squares.
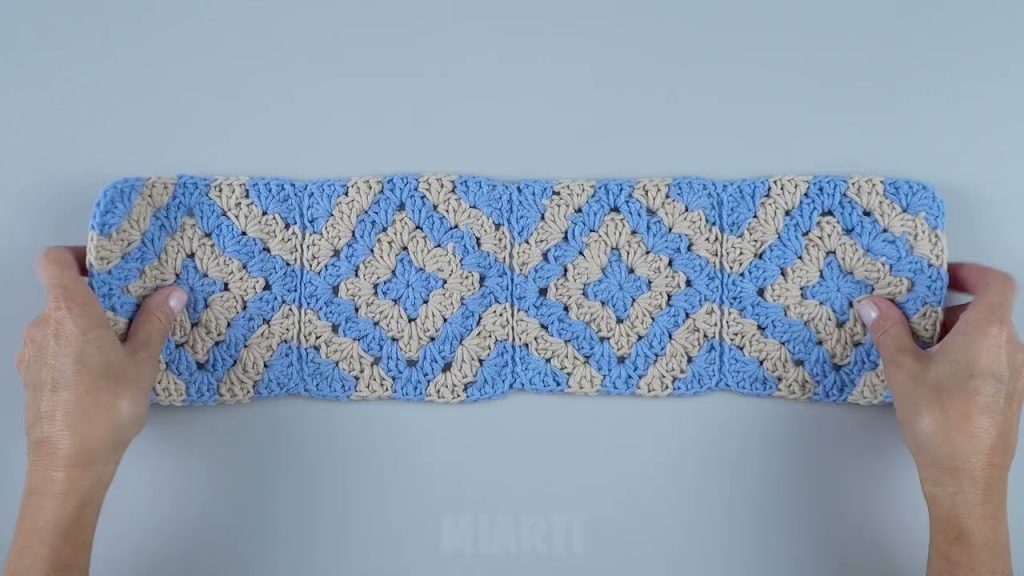
Step 2: Join the Granny Squares
There are multiple joining methods, but here’s a simple one:
- Lay out your squares in the pattern you want.
- Use slip stitch or single crochet to join them edge-to-edge.
- If your bag is for a round bottle, you can make 2 vertical panels and join them at the sides.
- Leave the top open for the bottle.
Step 3: Create the Bottom
- You can either:
- Use a solid circle base crocheted in rounds to match the width of your bottle.
- Or, make squares and join them into a flat base.
- Attach the base to the granny square body using slip stitches or single crochet.
Step 4: Make the Handle/Strap
- Simple Strap:
- Chain to the desired length (long enough to wear over your shoulder or carry by hand).
- Single crochet back along the chain to make it sturdy.
- Attach the strap securely to the top edges of your granny square panels.
Step 5: Optional Lining
- Cut a fabric lining to fit the inside of your bag.
- Sew it in with a needle and thread for extra stability and to prevent stretching.

Step 6: Finishing Touches
- Weave in all loose ends.
- Adjust the strap if necessary.
- Block the bag gently if needed to straighten edges.
Tips & Variations
- Use a tight tension so the bag holds its shape better.
- Try using eco-friendly cotton yarn for a washable, durable bag.
- Add a button or drawstring at the top to secure the bottle.
- Experiment with color patterns for a vibrant granny square look.
If you want, I can make a full diagram with measurements and color placement for a Granny Squares Bottle Bag, so you could follow it visually like a pattern. It’ll make it much easier to crochet it without guessing.
Watch tutorial: