by
by Here’s a detailed guide you could use as a video tutorial script or description for a project titled:
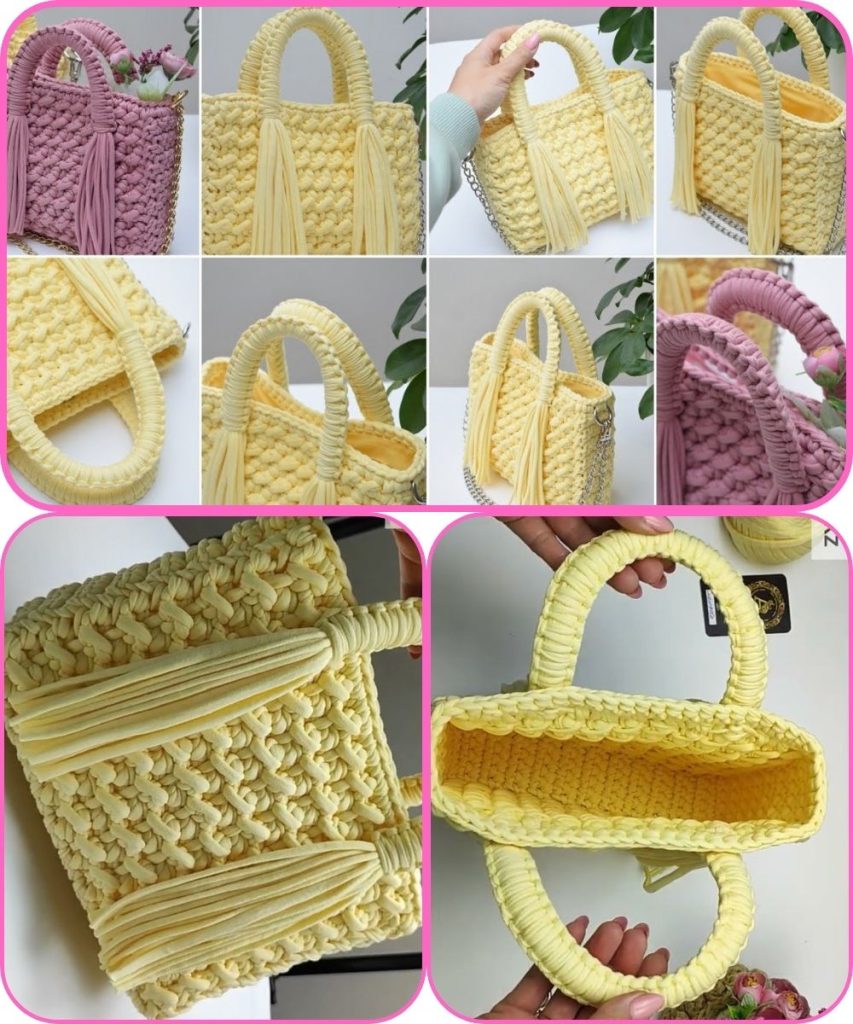
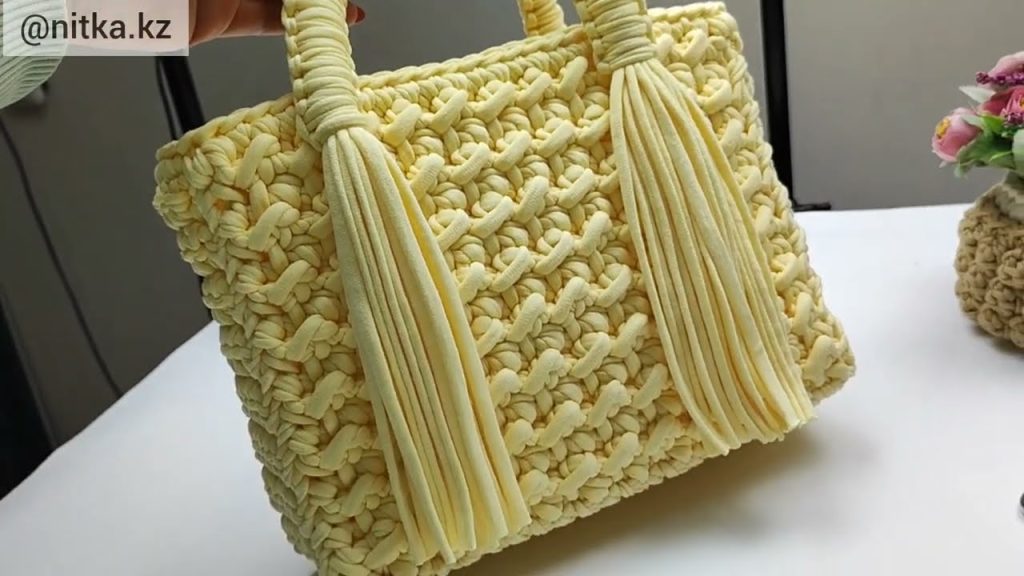
🎥 “How to Make Handmade Bag Handles with Tassels – Crochet Pattern Tutorial”
🧶 Introduction
Video opening:
Welcome back to my channel! In today’s tutorial, I’ll show you how to make beautiful handmade crochet bag handles with tassel accents. These handles are perfect for upgrading any handmade bag — whether you’re making a tote, shoulder bag, or clutch. They’re sturdy, stylish, and easy to personalize with your favorite yarn colors!
🌸 Materials Needed
List these visually on-screen with footage or images:
- Medium weight cotton or nylon yarn (choose a sturdy type for strength)
- Crochet hook (size appropriate for your yarn, typically 3.5mm–5mm)
- Scissors
- Yarn needle for weaving in ends
- Measuring tape
- Stitch markers (optional)
- Wooden or metal rings (optional, if attaching handles to bag body)
Optional for tassels:
- Small piece of cardboard (for wrapping tassels)
- Beads or charms for decoration
✨ Step-by-Step Tutorial
Step 1: Measure and Plan Handle Length
- Decide how long you want your handles (common lengths: 16–22 inches for shoulder straps, 12–14 inches for hand-carry).
- Remember that crochet handles can stretch slightly when loaded.
Step 2: Crochet the Handle Base
- Foundation chain:
Chain the number of stitches to reach your desired handle length. - First row:
Single crochet (SC) in the second chain from the hook, then continue across. - Next rows:
Work additional rows in single crochet or half double crochet (HDC) to make a thick, sturdy strap.
→ Usually 3–5 rows wide for a good grip. - Reinforce (optional):
You can crochet around a cord or rope inside to make the handle firmer.
Step 3: Create Decorative Edging (optional)
- To give a finished look, work a round of slip stitches or crab stitches (reverse single crochet) along the edges.
- Alternate colors or use variegated yarn for a designer touch.

Step 4: Make and Attach Tassels
- Wrap yarn:
Wrap your yarn around a piece of cardboard about 30–40 times (depending on thickness). - Tie and cut:
Tie the top with a small piece of yarn, then cut the bottom loops. - Secure top:
Wrap a short piece of yarn around the upper section several times to form the “neck” of the tassel, and tie securely. - Trim ends evenly.
- Attach:
Use a yarn needle or small ring to attach tassels to the handle ends.
(Show slow close-ups of tassel making for clarity.)
Step 5: Attach Handles to the Bag
- Sew or crochet the ends of the handles securely to your bag body.
- If using rings, loop the ends through and sew tightly.
🎀 Optional Customizations
- Add beads, charms, or shells to the tassels for a boho look.
- Use leather cord or macramé yarn for a mixed-material effect.
- Crochet two-toned handles by changing colors halfway.
- For a stronger grip, line the inside with cotton tape or fabric strips.

🧵 Finishing Touches
- Weave in all yarn ends neatly.
- Block your handles gently with steam or by laying them flat overnight to prevent twisting.
🪄 Video Closing
And that’s it! You’ve just made your own handmade crochet bag handles with tassels.
If you liked this tutorial, don’t forget to give it a thumbs up, subscribe, and let me know in the comments what color combination you’d like to try next!
📋 Description Text (for YouTube or blog)
Title: How to Make Handmade Bag Handles with Tassels | Crochet Pattern Tutorial
Tags: #CrochetBag #CrochetTutorial #DIYBagHandles #TasselCraft #HandmadeAccessories
Description:
Learn step-by-step how to crochet beautiful, durable bag handles with tassel accents. This beginner-friendly tutorial covers everything from measuring, crocheting the strap, making tassels, and attaching them to your handmade bag. Perfect for adding a personal touch to any project!
Would you like me to write this as a full video script (with spoken narration lines and camera directions) or as a written crochet pattern (like you’d post on Etsy or Ravelry)?
Watch tutorial: