 by
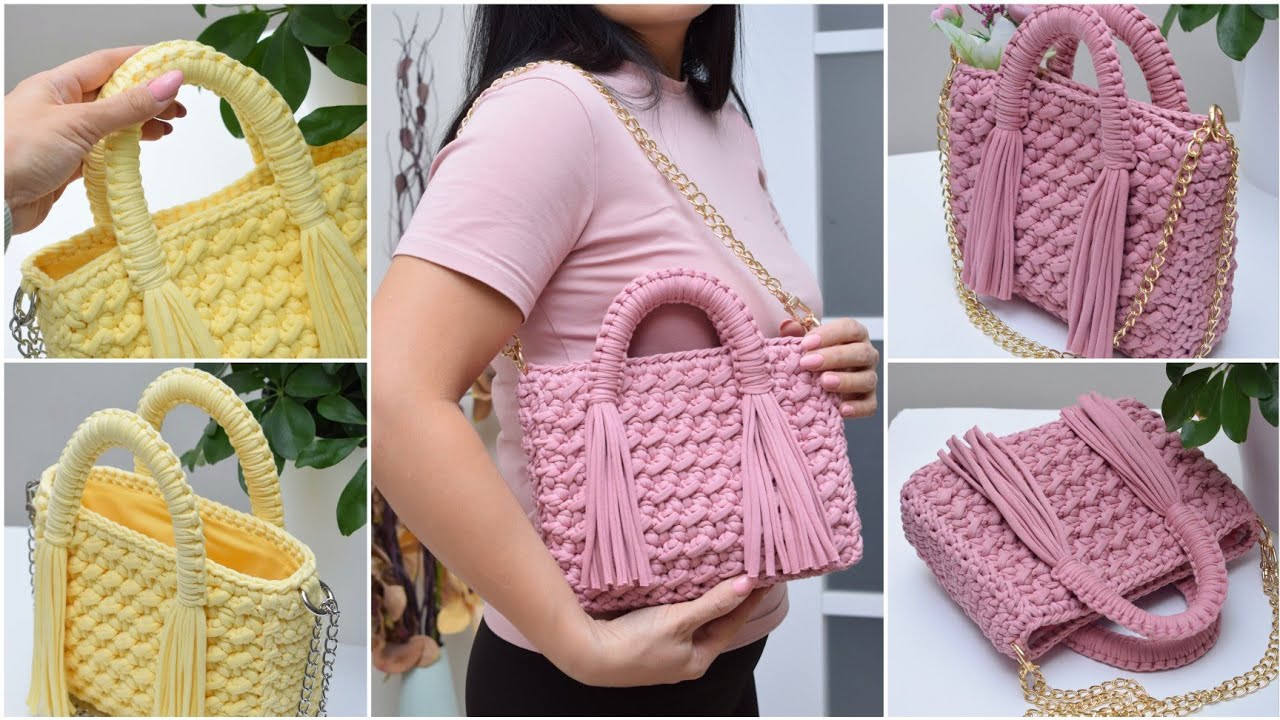
by Sure! Here’s a detailed write-up for a “Crochet Cute Handbag with Tassels” Video Tutorial and Crochet Pattern — perfect for a YouTube video description, blog post, or pattern page:
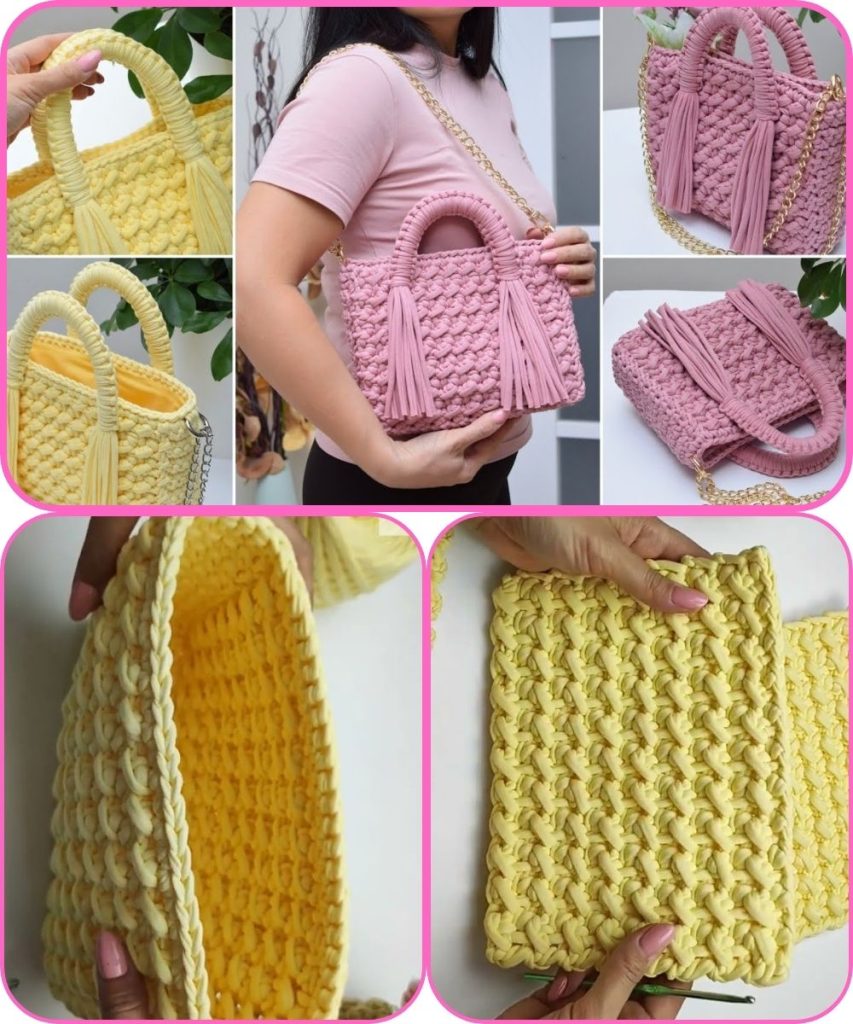
🌸 Crochet Cute Handbag with Tassels – Free Video Tutorial & Pattern
✨ Overview
In this tutorial, you’ll learn how to crochet a cute and stylish handbag with tassels, perfect for everyday use or as a handmade gift. This project is beginner-friendly, works up quickly, and can be customized in size and color. We’ll go step-by-step through the pattern so you can create your own adorable crochet handbag!
🧶 Materials Needed
- Yarn: Medium weight (Category 4) cotton or acrylic yarn — approx. 200–250g
(You can choose two contrasting colors for the bag and tassels.) - Crochet Hook: 4.0 mm (G/6) or 4.5 mm hook
- Yarn Needle: For weaving in ends
- Scissors
- Bag Lining (optional): Cotton fabric, needle, and thread
- Magnetic Button or Zipper (optional): For closure
- Keychain Ring or D-ring (optional): For attaching tassels
🧵 Crochet Stitches Used
- CH – Chain
- SL ST – Slip Stitch
- SC – Single Crochet
- HDC – Half Double Crochet
- DC – Double Crochet
- INC – Increase (2 stitches in one stitch)
🪄 Pattern Instructions
1. Base of the Bag
- Start with a chain of 35 (or adjust for desired width).
- Round 1: Work 1 HDC in the 2nd chain from the hook, continue along the chain. At the last stitch, work 3 HDC to turn around and continue along the other side of the chain. Join with a SL ST.
- Rounds 2–5: Continue working in rounds, increasing 2 HDCs at both ends of the base to form an oval shape.
- Once you reach your desired base size, stop increasing.
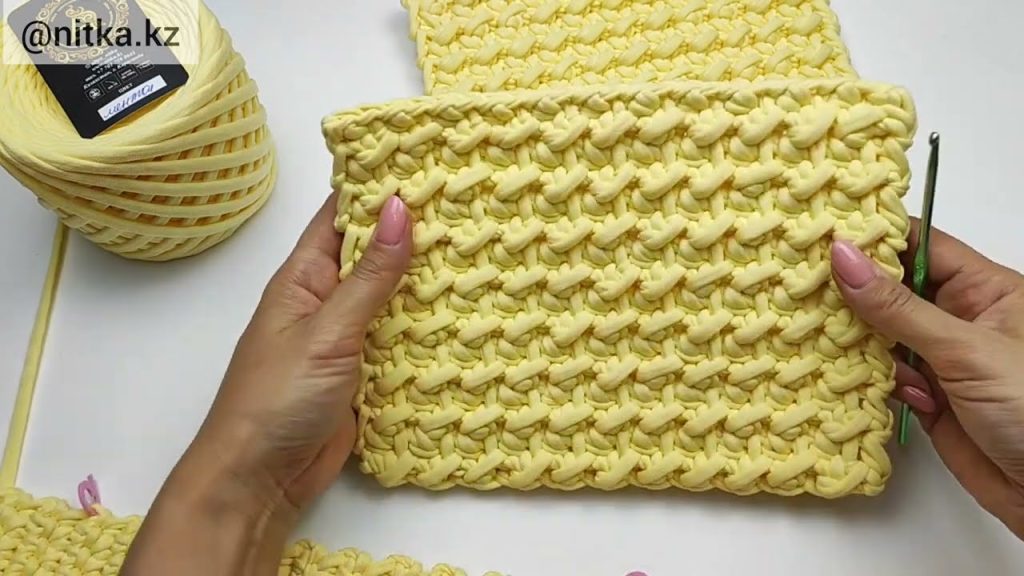
2. Body of the Bag
- Round 6–20 (or until desired height): Work 1 HDC in each stitch around, joining each round with a SL ST.
- You can change colors halfway through for a striped effect.
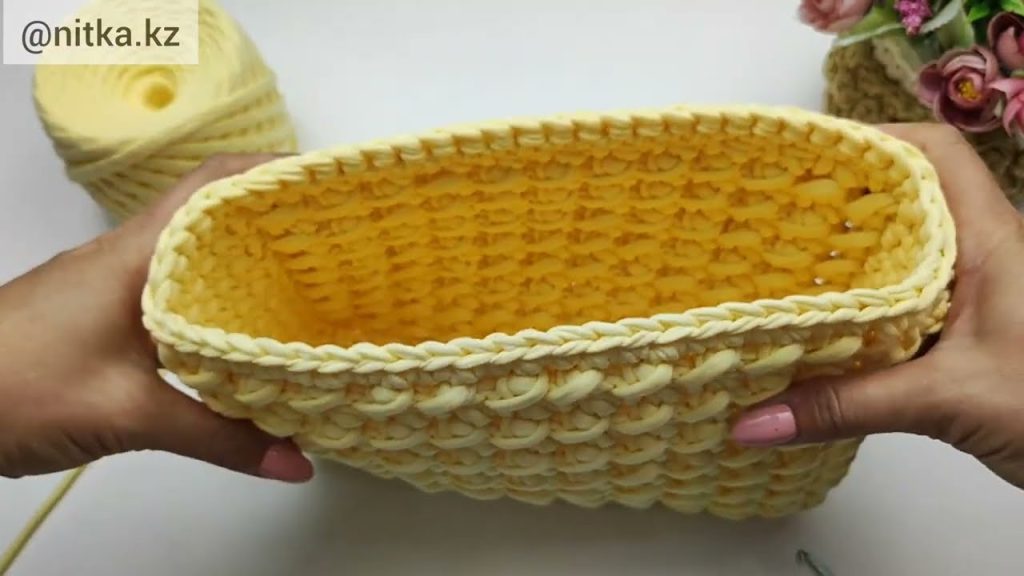
3. Top Edge
- Switch to a smaller hook if you want a tighter edge.
- Work 1 round of SC in each stitch.
- Finish off and weave in all ends.
4. Handles
- Chain 60 (or as long as you want your handles).
- Attach each handle evenly spaced on the sides using slip stitches or sew them securely.
- Reinforce the handle base with extra stitches for strength.
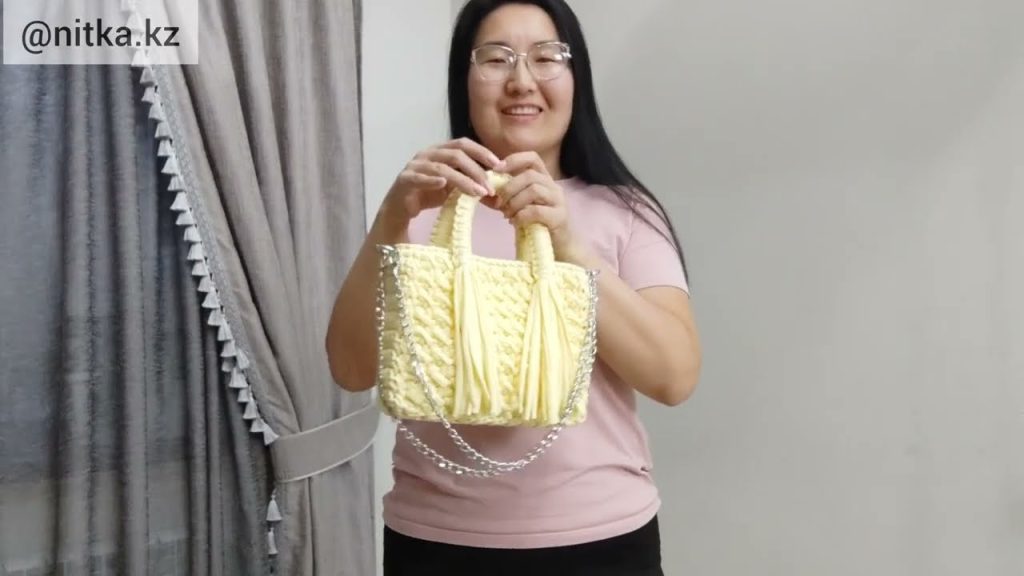
5. Tassels (Optional but Adorable!)
- Wrap yarn around your hand about 20–30 times.
- Cut the loops at one end, tie them together at the top, and wrap yarn around the top to form a “head.”
- Trim the ends evenly.
- Attach tassels to the sides of your bag or handle using yarn or keychain rings.
🎀 Customization Ideas
- Add a lining for a professional finish.
- Sew on a magnetic button or zipper closure.
- Decorate with wooden beads, pom-poms, or leather labels.
- Experiment with gradient yarns or chunky yarn for a boho style.
🎥 Video Tutorial
👉 [Insert your YouTube video link here]
The video includes a full step-by-step demonstration, from the foundation chain to finishing touches and tassel making. Perfect for visual learners!
📏 Finished Size
Approx. 25 cm (10”) wide x 20 cm (8”) tall (without handles)
(Size may vary slightly depending on yarn and tension.)
💖 Skill Level
🧩 Beginner to Intermediate
If you know basic crochet stitches, you’ll find this project fun and easy to follow!
📸 Share Your Work
If you make this cute crochet handbag, don’t forget to share your creations!
Tag @YourNameCrochet and use #CrochetHandbagTassels on social media — I’d love to see your versions!
Watch tutorial: