 by
by Sure! Here’s a detailed, step-by-step guide on how to crochet a headband or turban-style headband, perfect for beginners and intermediate crocheters. I’ll walk you through everything — from materials to finishing touches. 🧶
🧵 How to Crochet a Headband / Turban Headband (Step-by-Step Guide)
✨ What You’ll Learn
- How to make a simple crochet headband
- How to create a turban-style twist (optional)
- How to adjust the size for adults or children
🪡 Materials Needed
- Yarn: Medium-weight (Category 4) yarn — cotton or acrylic works great.
(Example: 100g skein is usually enough for one headband.) - Crochet hook: 5 mm (H/8) or size recommended for your yarn.
- Scissors
- Yarn needle for weaving in ends
- Measuring tape
📏 Step 1: Measure Your Head
Use a measuring tape to measure around your head — just above the ears and across the forehead.
| Head Size | Measurement | Chain Length |
|---|---|---|
| Child | 18–20 inches | 17–19 inches |
| Teen / Small Adult | 20–22 inches | 19–21 inches |
| Adult | 22–24 inches | 21–23 inches |
(Crochet stretches, so make your headband about 1 inch smaller than your actual measurement.)
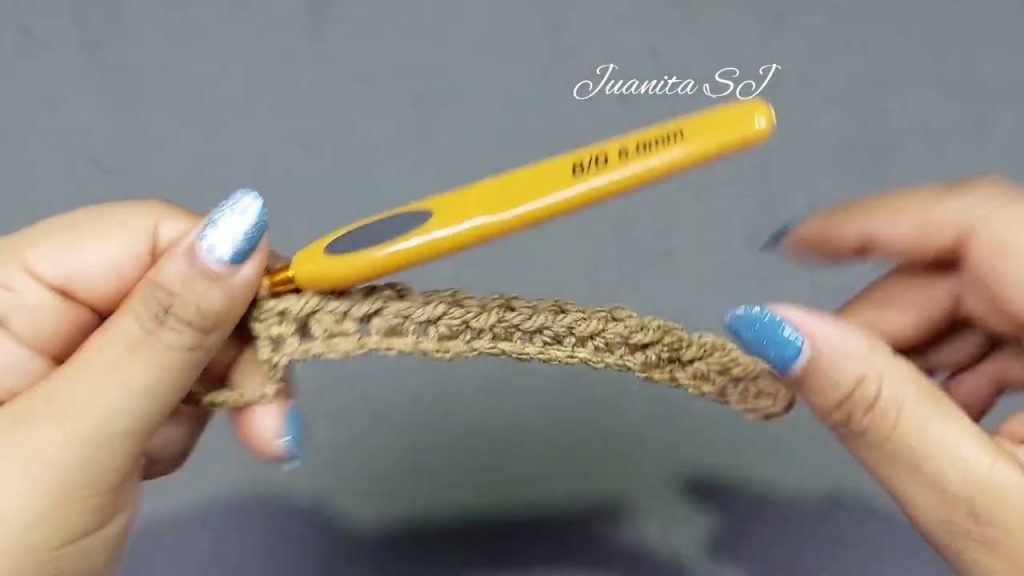
🪄 Step 2: Make a Foundation Chain
- Make a slip knot on your hook.
- Chain (ch) until your foundation chain measures your desired headband length (e.g., 20 inches for an adult).
- Add 1 extra chain for turning.
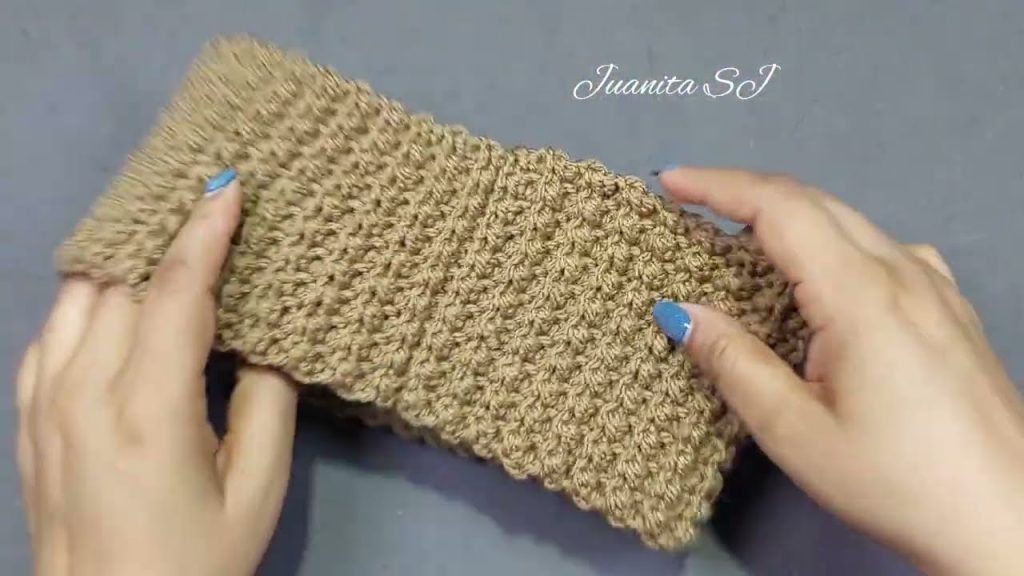
🧶 Step 3: Crochet the Band
You can use different stitches depending on your desired texture:
Option 1 – Single Crochet (SC) (Dense & Warm)
- Insert hook into the 2nd chain from the hook.
- Yarn over, pull through, yarn over again, and pull through both loops.
- Continue across the row.
- Chain 1 and turn.
- Repeat until your band reaches about 3–4 inches wide.
Option 2 – Half Double Crochet (HDC) (Soft & Stretchy)
- Yarn over, insert hook into 2nd chain from hook.
- Yarn over again, pull through (3 loops on hook).
- Yarn over and pull through all 3 loops.
- Continue across the row.
- Chain 1 and turn.
- Repeat until the band is the width you like (2–4 inches).
(HDC gives a great texture for headbands and stretches nicely.)
🧩 Step 4: Join the Ends
When your band is the desired width:
For a Simple Headband:
- Fold the two short edges together.
- Slip stitch or whip stitch across to join them.
- Fasten off and weave in ends.
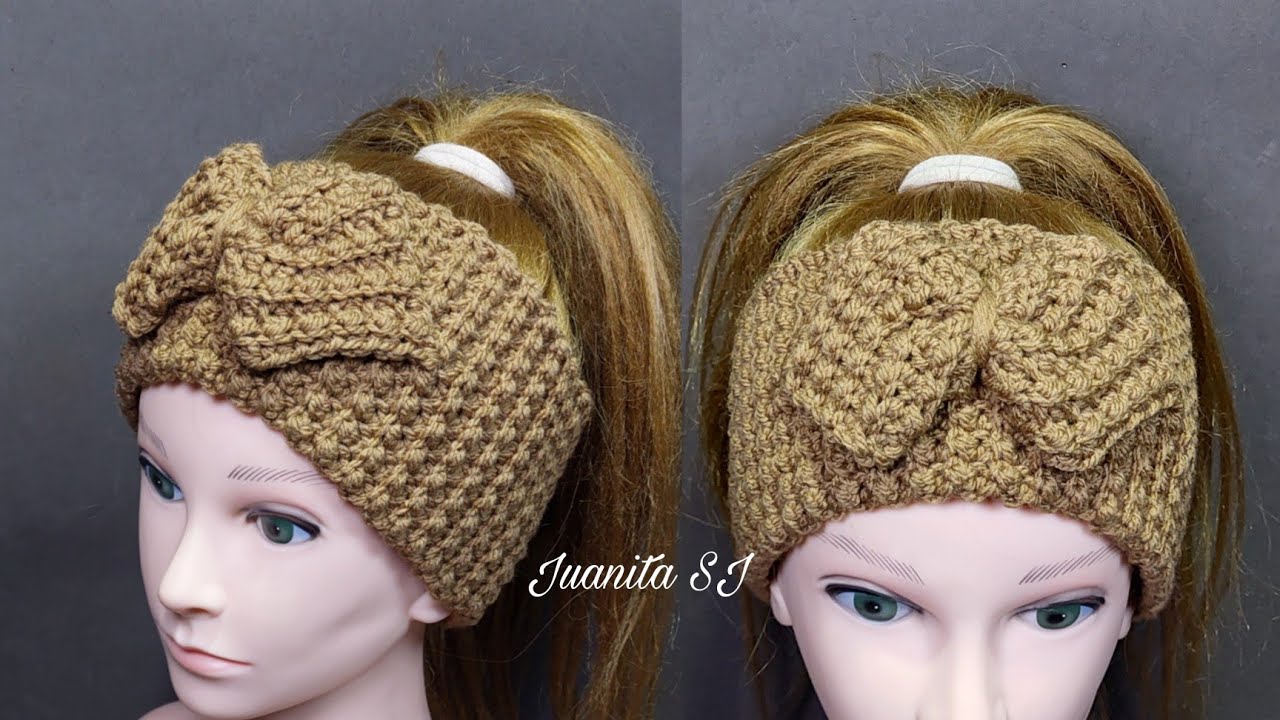
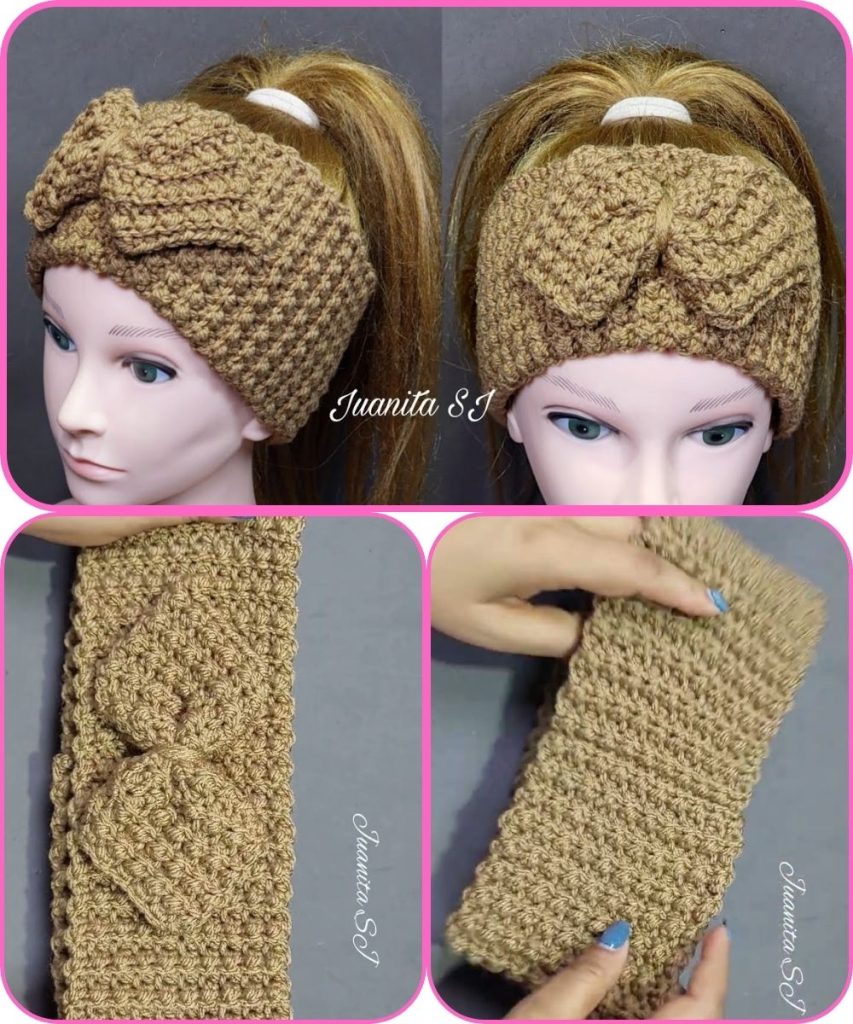
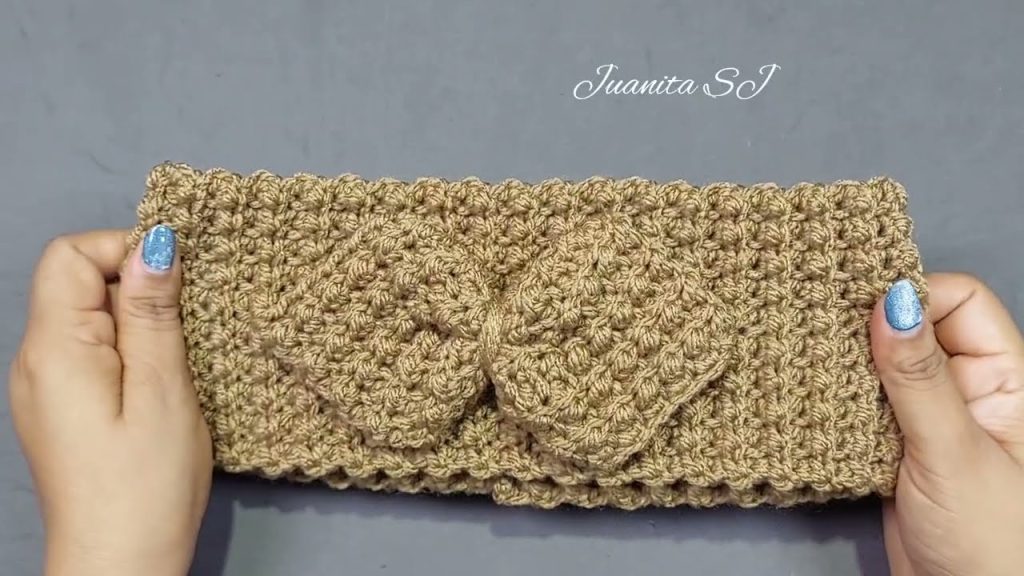
For a Turban Style:
- Fold each short end in half lengthwise (so you have two “C” shapes).
- Interlock them — like two folded ends hugging each other.
- Sew through all four layers together (use yarn needle).
- Pull tightly to secure and fasten off.
- When you turn it right side out, you’ll see a beautiful twisted knot in the center!
🧵 Step 5: Finishing Touches
- Weave in any remaining yarn ends using the yarn needle.
- Optional: Add embellishments like buttons, flowers, or bows.
- Gently stretch your headband to shape it evenly.
🌸 Optional Variations
- Textured band: Use front and back post double crochets for a ribbed look.
- Color blocks: Change yarn colors every few rows.
- Thinner or thicker bands: Adjust your width easily by adding or removing rows.
🎁 Tips for Success
- Check your tension — consistent stitches make your headband even.
- If your yarn is too stretchy, make the headband slightly smaller.
- To make it extra cozy, use a soft wool or velvet yarn.
💡 Example Pattern (HDC Turban Headband)
Row 1: Chain 65 (for 21″ band).
Row 2: HDC in 2nd chain from hook, and across (64 HDC).
Row 3–12: Ch 1, turn, HDC in each stitch across.
Finish: Sew ends in turban twist style, weave in ends.
Would you like me to include illustrated diagrams or photos of each step (e.g., the turban twist join, stitch examples)? I can generate clear images to visually guide you through the process.
Watch tutorial: