 by
by Sure! 🧶🐰 Here’s a detailed, easy-to-follow guide on how to make cute knitted bunny slippers — perfect for beginners or anyone looking for a cozy, adorable project!
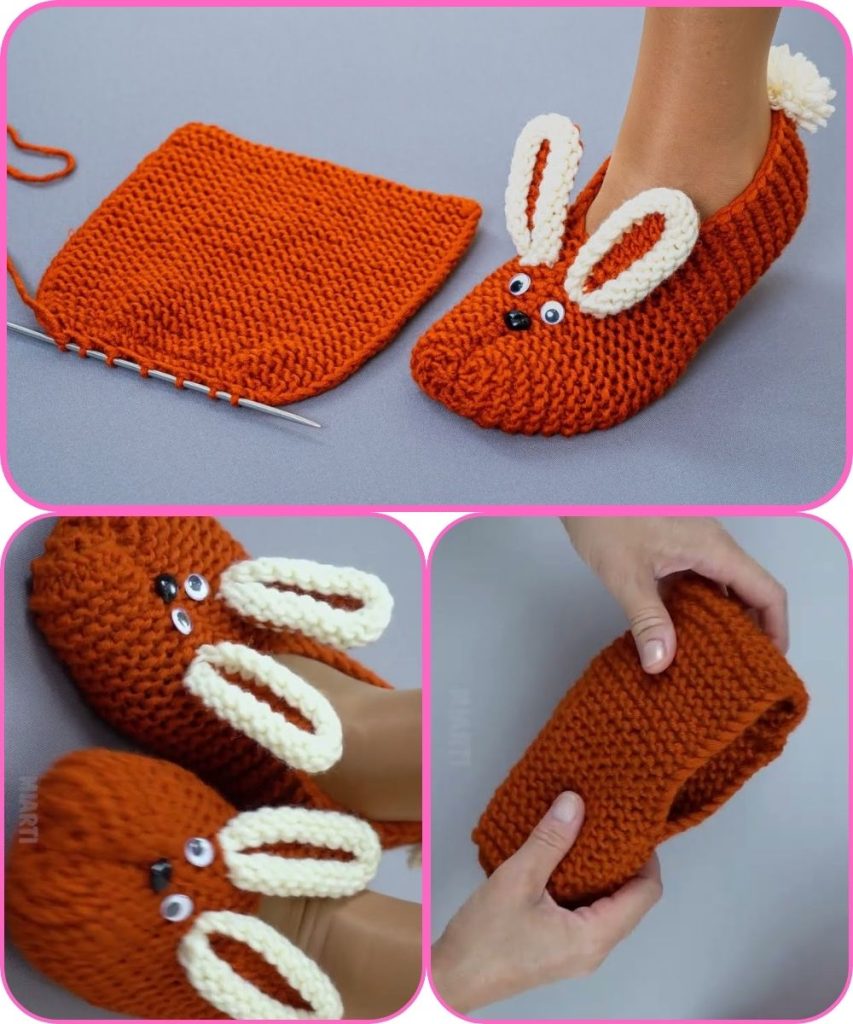
🧵 How to Make Cute Knitted Bunny Slippers (Easy & Simple)
✨ What You’ll Need
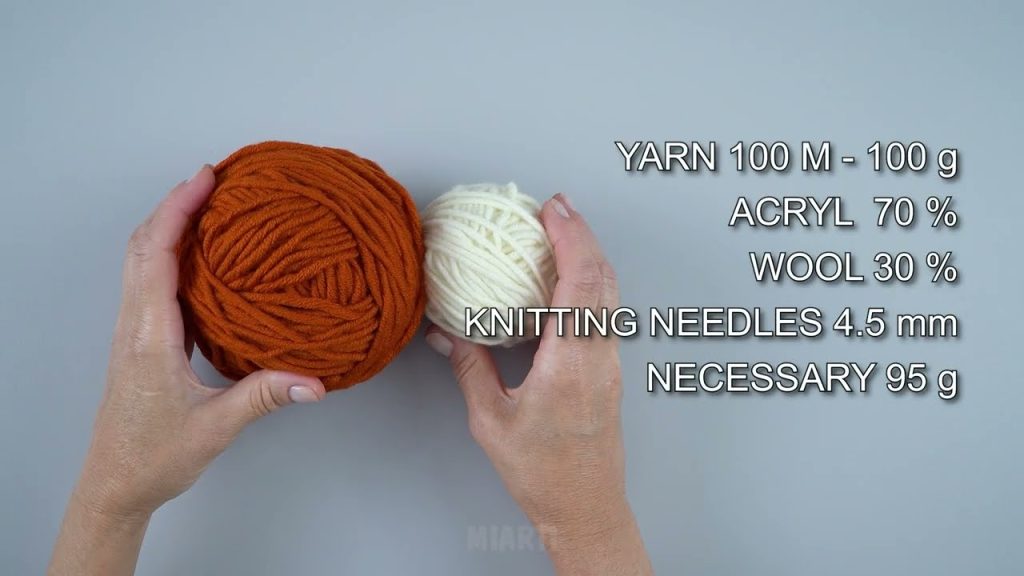
Materials:
- Worsted-weight yarn (in your desired color for the bunny – white, pink, grey, or brown)
- Small amount of pink yarn (for the nose and inner ears)
- Knitting needles (size 4mm / US 6)
- Yarn needle (for sewing)
- Scissors
- Stitch markers (optional)
- Black embroidery thread or small safety eyes (for eyes)
- Pom-poms (for tails)
- Soft sole padding (optional, for comfort)
👣 Step 1: Measure and Prepare
Before you start, measure the foot length of the person who’ll wear the slippers.
You’ll knit a rectangle that will be folded and sewn into the slipper shape.
Here’s a rough size guide (can adjust as needed):
| Size | Foot Length | Cast On Stitches | Knit Rows |
|---|---|---|---|
| Child | ~7 in / 18 cm | 28 sts | 38 rows |
| Woman | ~9 in / 23 cm | 36 sts | 48 rows |
| Man | ~10 in / 25 cm | 40 sts | 52 rows |
🧶 Step 2: Knit the Base Rectangle
- Cast on the number of stitches for your size.
- Knit every row (garter stitch) until the piece measures the desired foot length.
- Garter stitch is perfect because it’s stretchy and cozy.
- Bind off all stitches loosely.
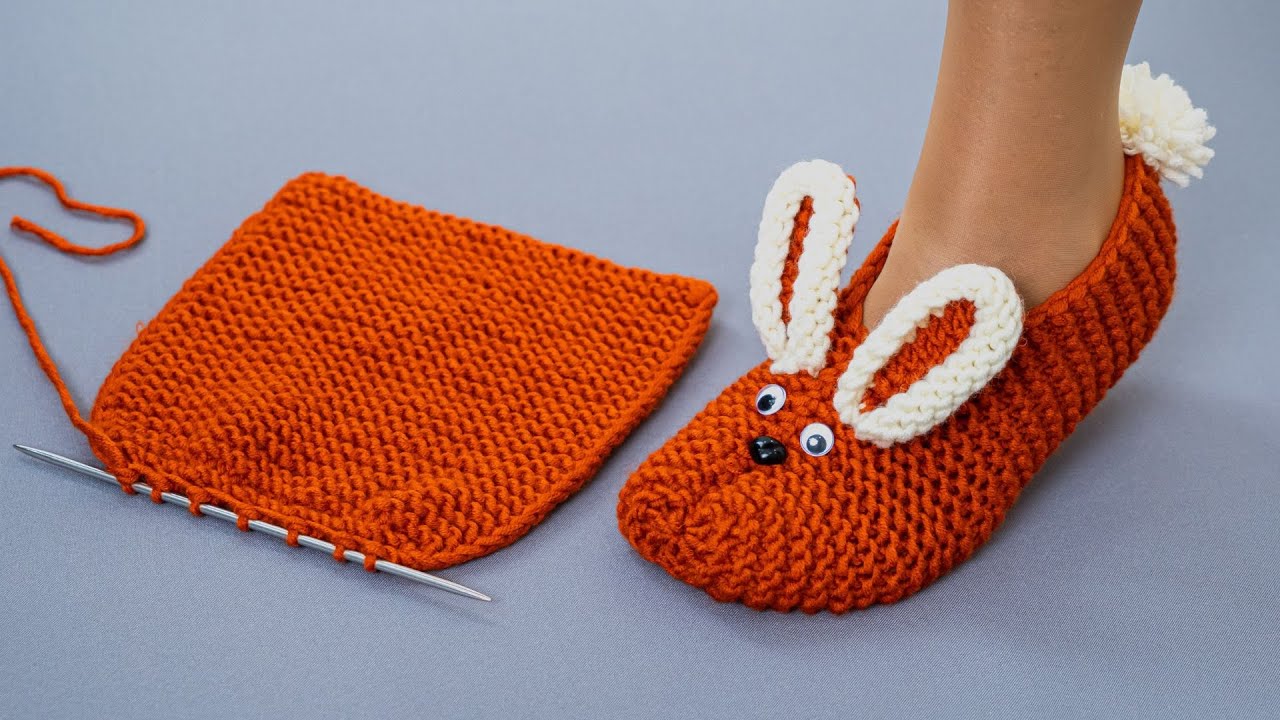
You’ll now have a simple knitted rectangle — this becomes the slipper body.
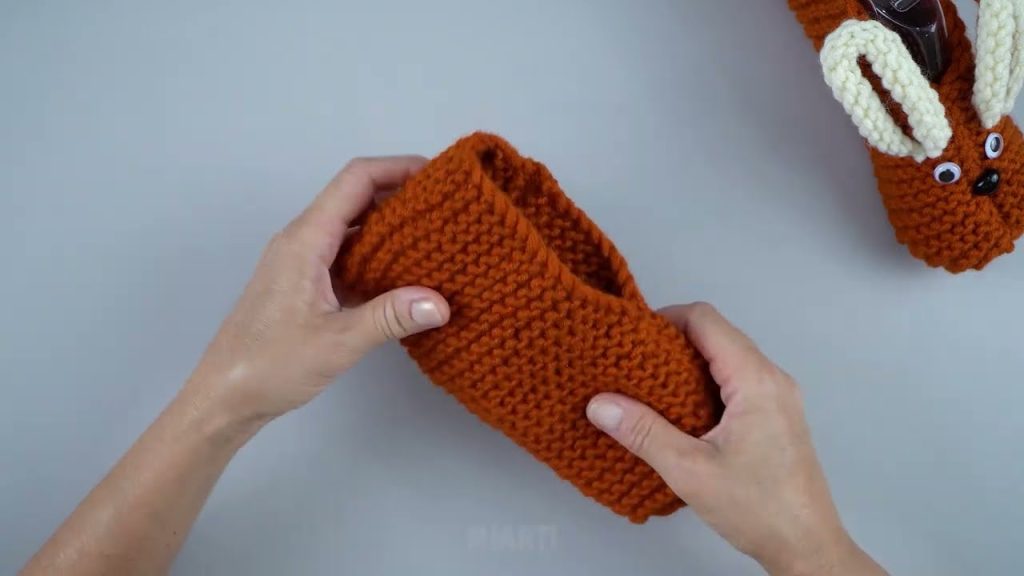
🧷 Step 3: Shape the Slipper
Now we turn the rectangle into a slipper:
- Fold the rectangle in half (short edges together).
- With the yarn needle, sew along one short edge (this becomes the heel).
- On the other end, thread a long piece of yarn through the edge stitches, gather and pull tight to form the toe.
- Sew a short distance (about 1–2 inches) from the toe to secure the foot opening.
- Try it on — it should now look like a cozy slipper sock.
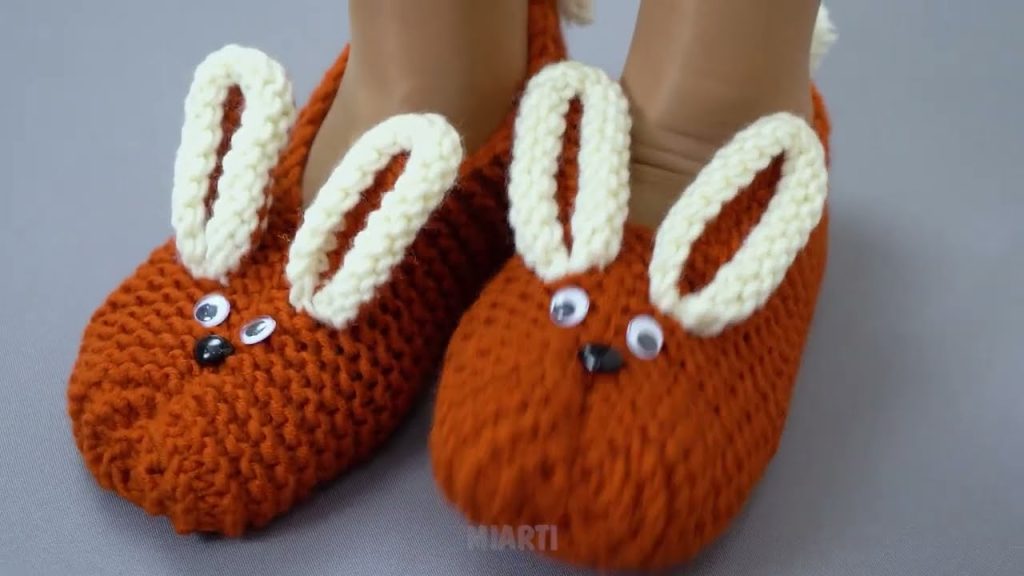
🐰 Step 4: Add Bunny Ears
- Knit two ears per slipper:
- Cast on 8 stitches.
- Knit 2 rows in garter stitch.
- Then, decrease 1 stitch at each end every other row until 2 stitches remain.
- Bind off.
- Use a small amount of pink yarn to embroider the inner ear.
- Sew the ears onto the top front of the slipper (just above the toe).
🪡 Step 5: Add Bunny Face Details
- Eyes: Sew on small black beads or embroider eyes using black yarn.
- Nose: Use pink yarn to stitch a small triangle shape nose in the center.
- Whiskers (optional): Use thin black yarn or embroidery thread to make 2–3 whisker stitches on each side of the nose.
🧶 Step 6: Add Pom-Pom Tail
- Make a small pom-pom (white or matching color).
- Sew it securely to the back seam (the heel area).
Now your slippers have cute bunny tails! 🐇
🌸 Optional Finishing Touches
- Line the inside with fleece or felt for extra warmth.
- Sew a non-slip fabric or puffy paint dots on the sole for safety.
- Add a ribbon bow around one ear for a girly touch.
💖 Tips for Beginners
- Use chunky yarn if you want to finish faster and make them extra cozy.
- If you’re making for kids, choose machine-washable yarn.
- Always try one slipper on before finishing the second to make sure it fits right!
🧸 Summary
In short:
- Knit a garter stitch rectangle.
- Fold, sew heel & gather toe.
- Knit and attach ears.
- Add embroidered face & pom-pom tail.
And there you have it — adorable, easy knitted bunny slippers! 🐰💕
Would you like me to include step-by-step pictures or diagrams for this tutorial (so you can see how to fold and sew the slipper shape)? I can generate some simple illustrated visuals for each stage.
Watch tutorial: