 by
by Here is a clear, detailed, step-by-step crochet tutorial explaining how to make a crochet bag that holds its shape perfectly without any additional frame. You can use this as a blog post, video script, or written pattern explanation.
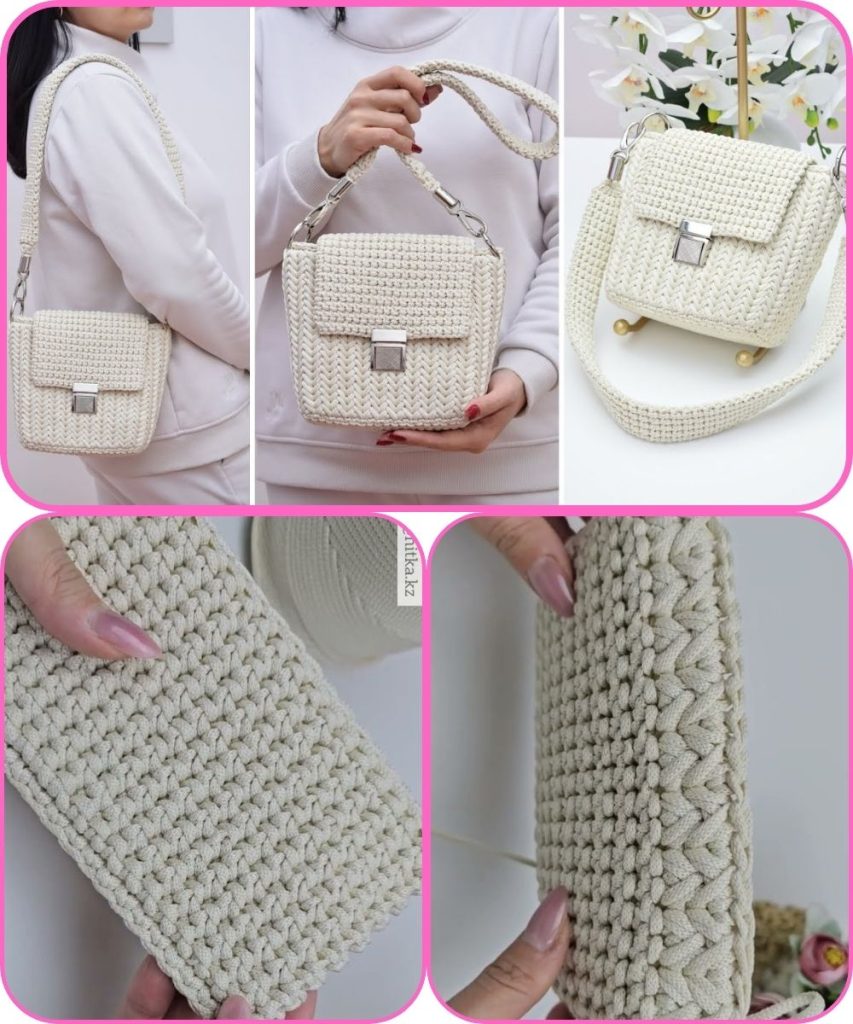
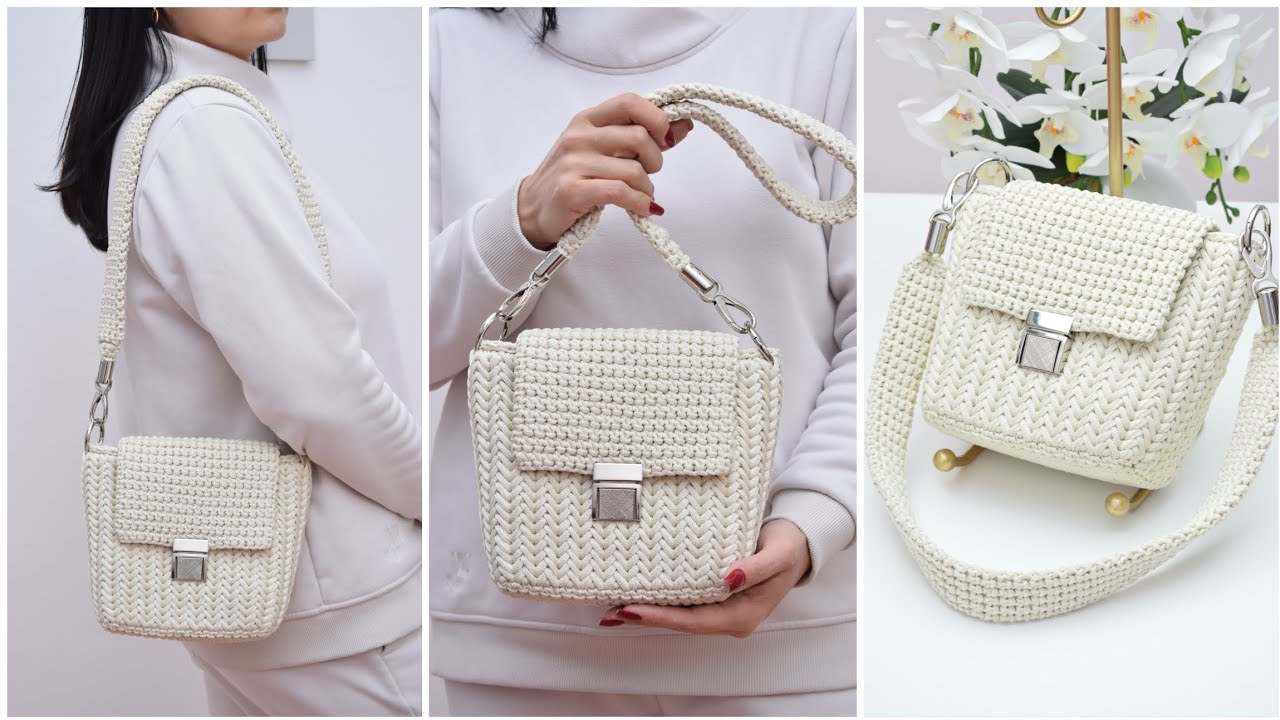
How to Make a Crochet Bag That Holds Its Shape (No Frame Needed)
Creating a crochet bag that keeps its shape without using plastic canvas, wire, or metal frames is completely possible. The key lies in yarn choice, stitch selection, tension, and construction technique. Follow these steps carefully to achieve a firm, structured bag.
Step 1: Choose the Right Yarn (Most Important Step)
The yarn you use determines how sturdy your bag will be.
Best Yarn Types:
- Cotton yarn (worsted, DK, or bulky)
- Cotton rope or cord yarn
- Macramé cord
- T-shirt yarn
Avoid:
- Acrylic yarn (too stretchy)
- Soft wool blends
- Lightweight yarns without structure
👉 Why cotton?
Cotton has very little stretch and provides natural stiffness, helping the bag hold its shape over time.
Step 2: Use a Smaller Hook Than Recommended
To make tight, firm stitches:
- Use a hook 1–2 sizes smaller than what the yarn label suggests
Example:
- Yarn suggests 5 mm hook → Use 3.5–4 mm hook
👉 Tighter stitches = stronger structure.
Step 3: Start with a Solid Base
A strong base prevents sagging.
Best Base Options:
- Oval base (great for tote bags)
- Round base (good for bucket bags)
- Rectangle base (for box-style bags)
Tip:
- Work the base in single crochet (SC) only
- Increase evenly so it lays flat
- Do not rush this step
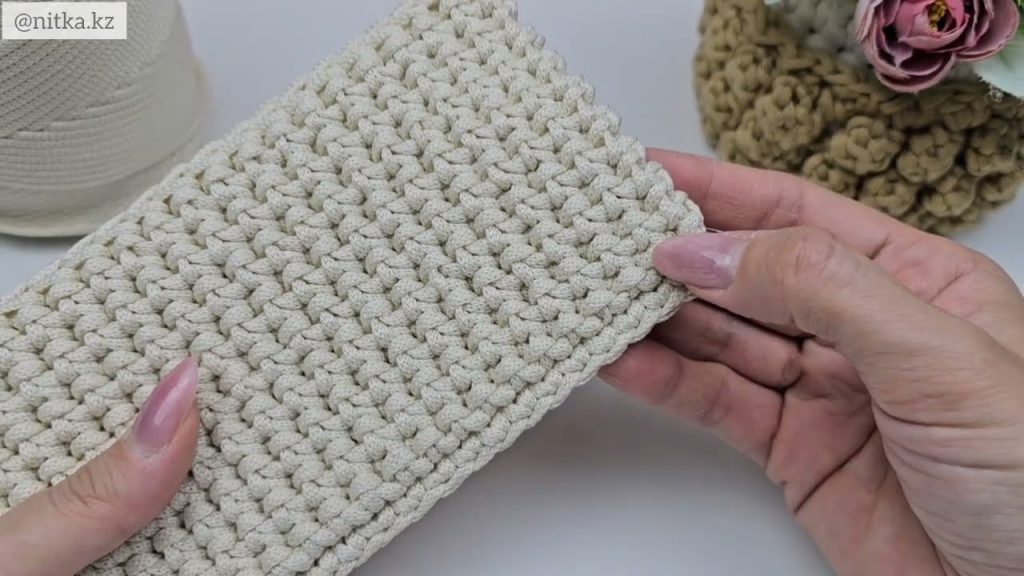
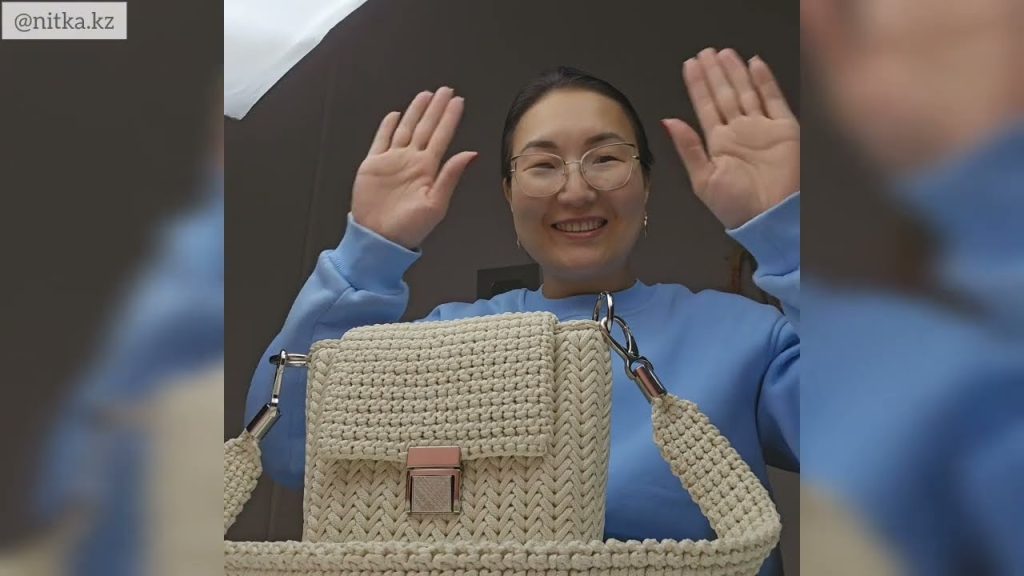
Step 4: Crochet the Body Using Stiff Stitches
Best Stitches for Structure:
- Single Crochet (SC)
- Half Double Crochet (HDC) worked tightly
- Slip stitch crochet
- Waistcoat stitch
- Thermal stitch (very strong)
Avoid:
- Double crochet
- Lace or open stitches
👉 Single crochet is the best choice for beginners.
Step 5: Crochet Through the Back Loop or Both Loops Tightly
- Crocheting through both loops gives maximum strength
- Back-loop-only can add subtle texture but still stays firm if tension is tight
👉 Keep your stitches consistent and snug.
Step 6: Do Not Increase After the Base
Once your base is finished:
- Stop increasing completely
- Crochet straight up to form the bag walls
This creates clean, sharp edges and prevents the bag from flaring outward.
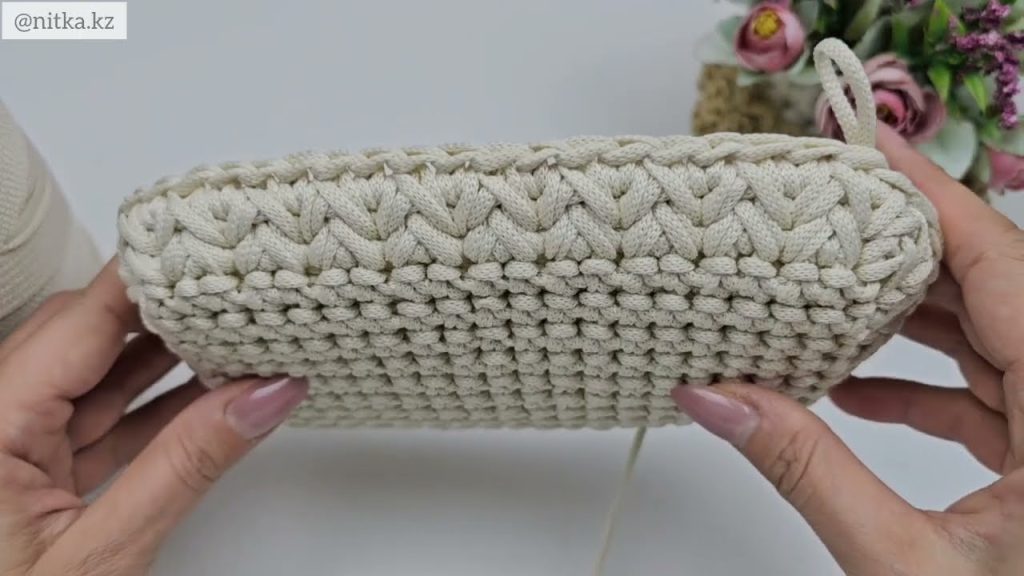
Step 7: Reinforce the Bag Opening
The top edge needs extra support.
Options:
- Crochet 2–3 extra rounds of single crochet
- Add a slip stitch round
- Use reverse single crochet (crab stitch) for a firm edge
This keeps the opening from stretching or collapsing.
Step 8: Make Strong Handles (No Stretch)
Best Handle Techniques:
- Single crochet handles worked directly onto the bag
- Thermal stitch handles
- Short, thick handles
Tips:
- Avoid long chain handles (they stretch)
- Work handles back and forth in rows for strength
- Attach securely with tight stitches
Step 9: Optional Fabric Lining (Not a Frame)
Although not a frame, a lining helps:
- Maintain shape
- Prevent stretching
- Improve durability
Use cotton fabric and hand-sew it neatly inside the bag.
Step 10: Blocking (Optional but Helpful)
Light blocking can refine the shape:
- Stuff the bag with towels
- Lightly spray with water
- Let it dry completely
Do not over-soak cotton yarn.
Final Tips for a Perfect Shape
✔ Use cotton or cord yarn
✔ Tight stitches with a smaller hook
✔ Single crochet or thermal stitch
✔ No increases after the base
✔ Reinforced opening and handles
Result:
You’ll have a sturdy, professional-looking crochet bag that stands on its own—no plastic canvas, no wire, no frame needed.
If you want, I can also:
- Simplify this for beginners
- Turn it into a YouTube video script
- Create a printable PDF pattern
- Adapt it for tote bags, handbags, or backpacks
Watch tutorial: