 by
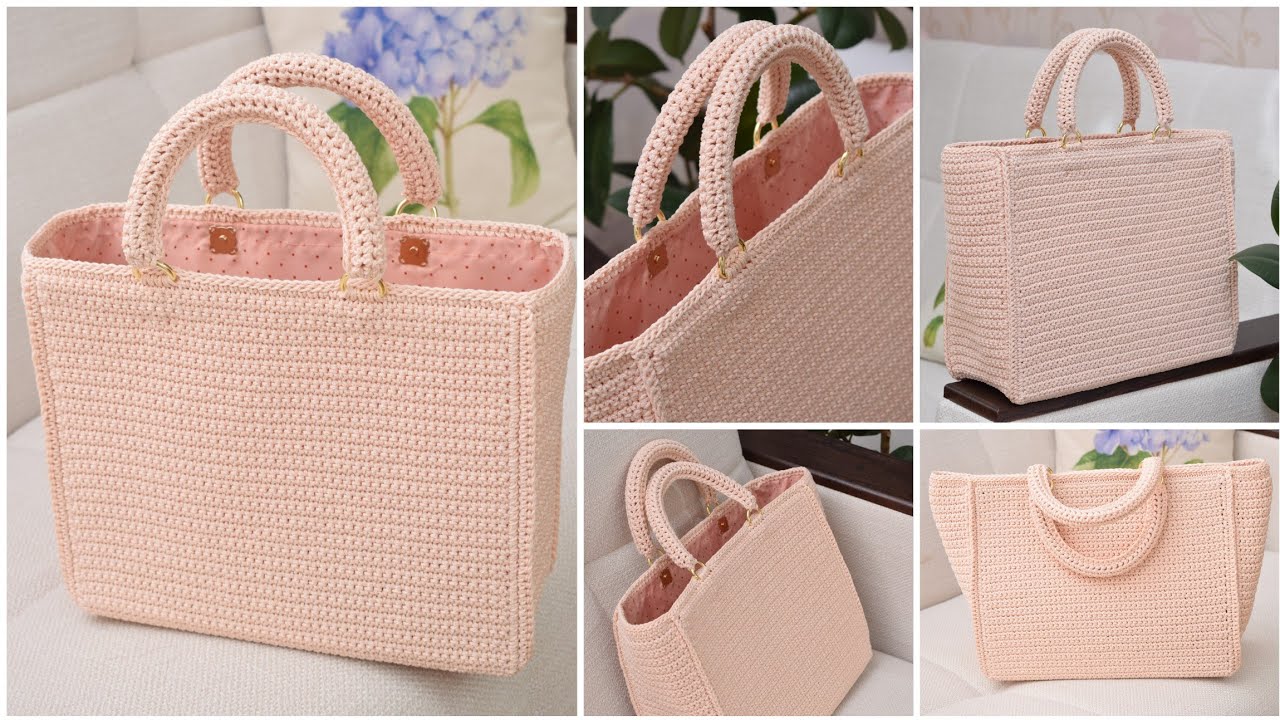
by Here’s a detailed, beginner-friendly guide on How to Crochet a Large Classic Tote Bag. You can adjust sizes and colors to match your style.
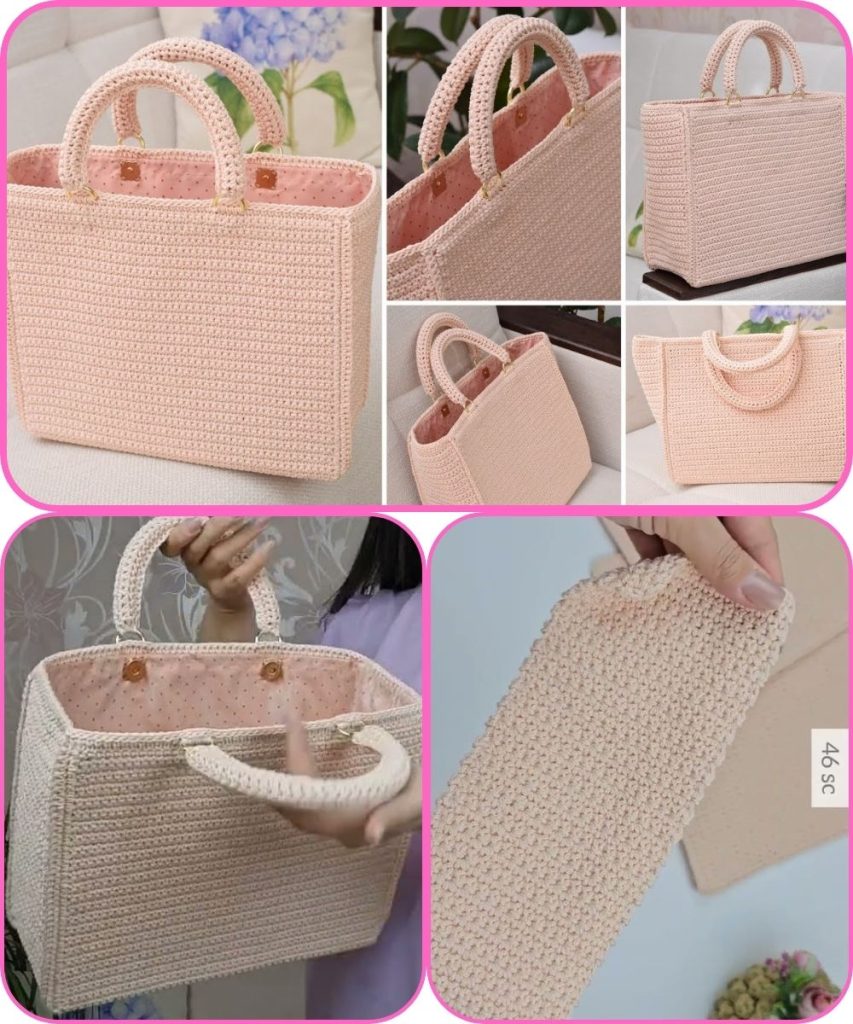
How to Crochet a Large Classic Tote Bag
A crocheted large classic tote bag is sturdy, reusable, and perfect for everyday use—shopping, school, or travel. This project uses basic crochet stitches, making it suitable for beginners who are comfortable with the fundamentals.
Materials Needed
- Yarn: Medium weight (worsted weight / category 4) cotton yarn
(Cotton is best because it’s strong and doesn’t stretch too much)
– About 400–600 yards depending on bag size - Crochet hook: 5.0 mm (H/8) or size recommended on your yarn label
- Scissors
- Yarn needle (for weaving in ends)
- Stitch marker (optional)
- Fabric lining (optional, for extra strength)
Crochet Stitches Used
- Chain (ch)
- Slip stitch (sl st)
- Single crochet (sc)
- Half double crochet (hdc) or Double crochet (dc)
- Increase (2 stitches in one stitch)
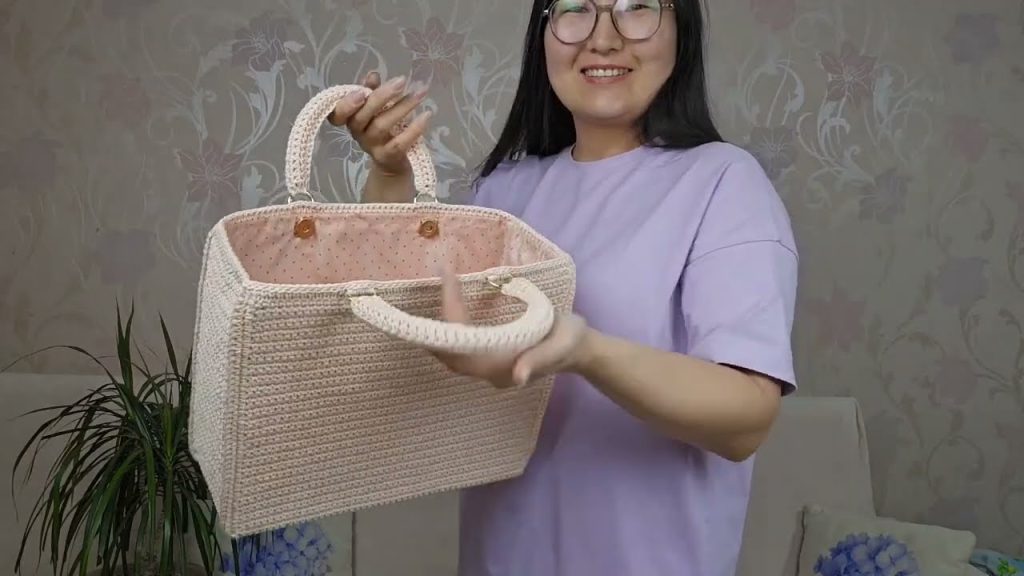
Finished Size (Approximate)
- Width: 14–16 inches
- Height: 13–15 inches (not including handles)
- Handle drop: 10–12 inches
You can easily adjust the size by adding or removing rounds.
Step 1: Crochet the Base of the Tote
- Chain 31 (or any even number for desired width).
- Round 1:
- Sc in the 2nd chain from hook.
- Sc across until the last chain.
- 3 sc in the last chain (to turn the corner).
- Continue sc on the opposite side of the chain.
- 2 sc in the last stitch.
- Join with sl st to first sc.
- Round 2:
- Ch 1, sc around.
- Increase (2 sc) in each corner stitch.
- Join with sl st.
Repeat rounds until the base is about 4–5 inches wide.
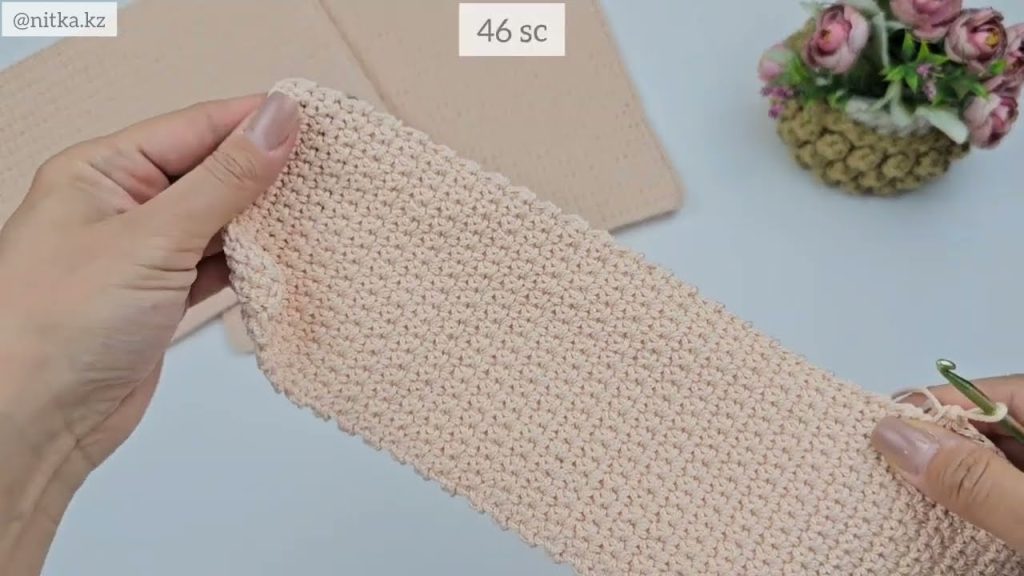
Step 2: Crochet the Body of the Bag
- Ch 1, crochet in the back loop only (optional) for the first round—this creates a neat edge.
- Continue working sc, hdc, or dc evenly around.
- Join each round with a sl st and ch 1.
- Crochet until the bag reaches your desired height (about 12–14 inches).
💡 Tip: Single crochet creates a firmer bag, while double crochet works faster but is slightly stretchier.
Step 3: Shape the Top Edge (Optional)
For a clean and sturdy finish:
- Crochet 1–2 rounds of single crochet
- You may also use slip stitches for a tighter edge
Step 4: Crochet the Handles
Method 1: Built-In Handles
- Sc across until you reach where you want the handle to start.
- Chain 30–40 (depending on desired handle length).
- Skip the same number of stitches and sc into the next stitch.
- Continue sc around to the second handle.
- Repeat for the other side.
- On the next round, sc into each chain stitch to strengthen the handles.
Method 2: Separate Handles
- Crochet two long straps (sc rows about 3–4 inches wide).
- Sew securely to the inside of the bag.
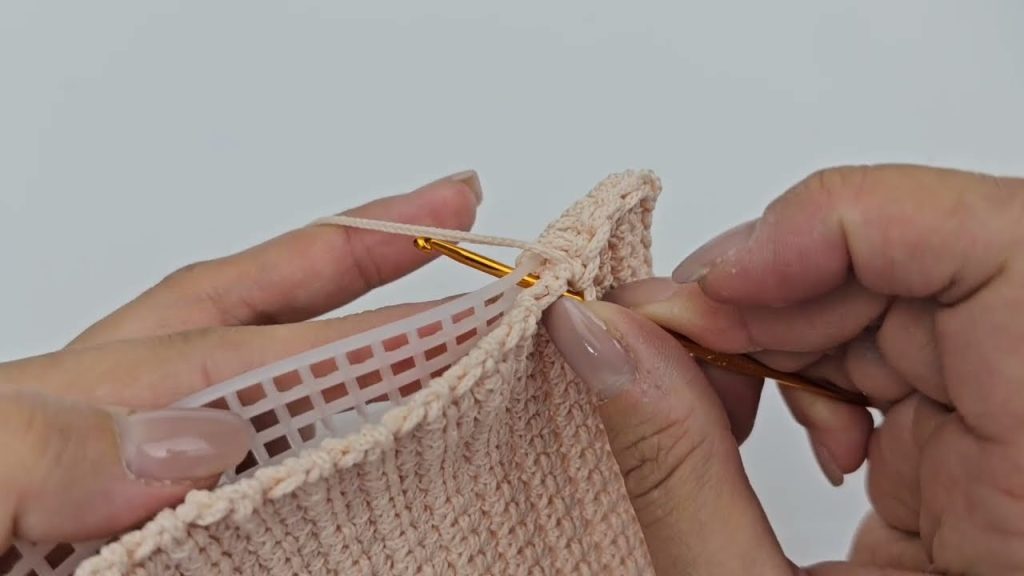
Step 5: Finishing Touches
- Fasten off and weave in all loose ends.
- Optional:
- Add a fabric lining to prevent stretching
- Attach a button, zipper, or magnetic snap
- Decorate with tassels, pockets, or color stripes
Care Tips
- Hand wash or gentle machine wash
- Lay flat to dry to keep the shape
Final Notes
This large classic crochet tote bag is durable, stylish, and eco-friendly. Once you master the basic pattern, you can customize it with different stitches, colors, or sizes.
If you want, I can also:
- Simplify this for absolute beginners
- Turn it into a short pattern
- Add pictures or stitch diagrams
- Write it for a school project or blog
Watch tutorial: