 by
by Sure! To help you make a crochet dress named “Elisa” in a specific size, I’ll provide a detailed guide based on typical crochet dress construction. Since “Elisa” may be a pattern name from a specific designer or brand (and not a universally recognized pattern), I’ll walk you through creating a crochet dress in the “Elisa” style — think elegant, lacy, and feminine — and how to size it appropriately.
If you already have a pattern called “Elisa” and just need help with sizing, please upload or share a description. Otherwise, here’s a full how-to guide for a custom-sized crochet dress in the “Elisa” style.
🧶 Crochet Dress “Elisa” – DIY Guide (Custom Size)
🌸 Style Description
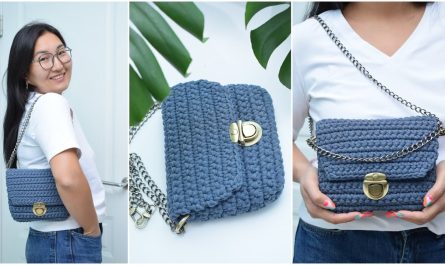
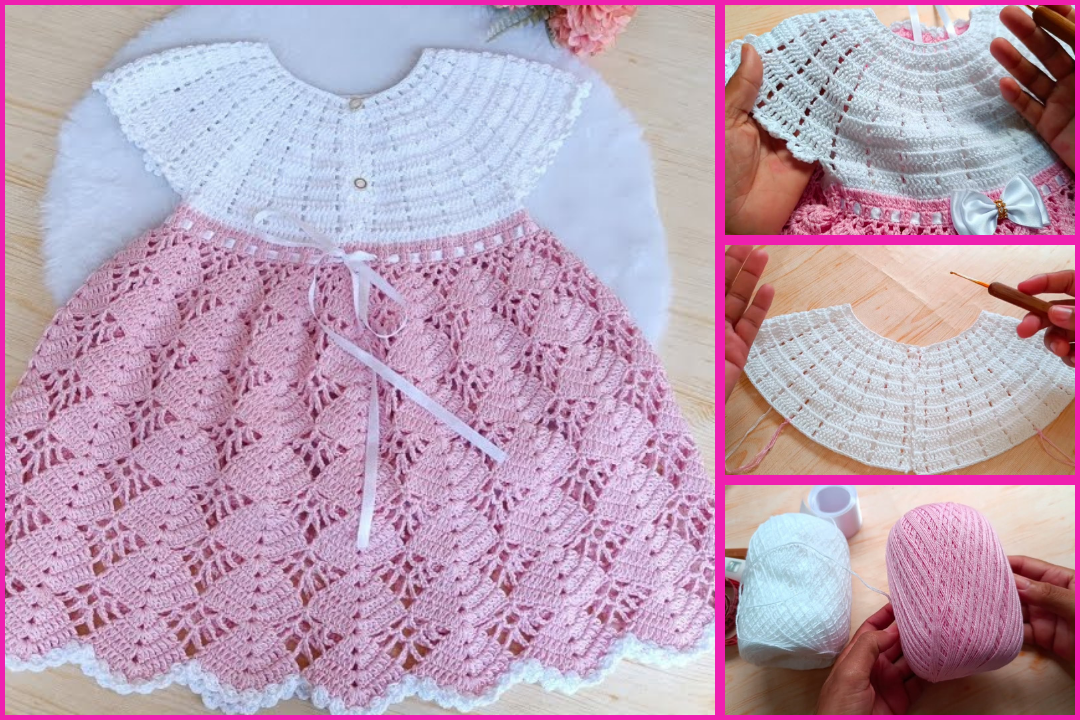
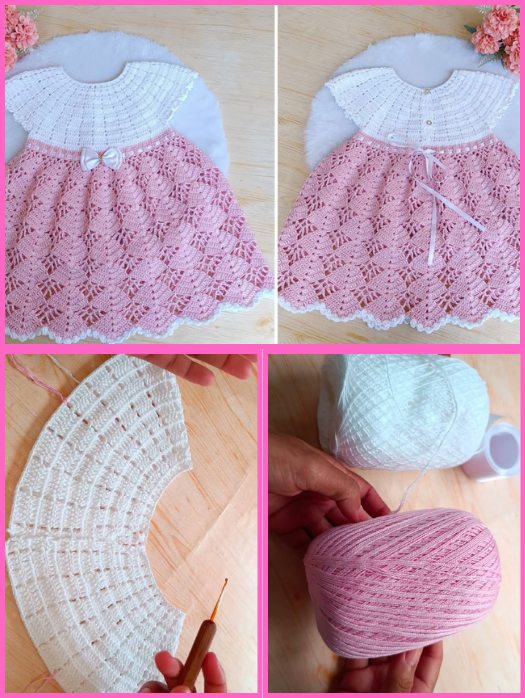
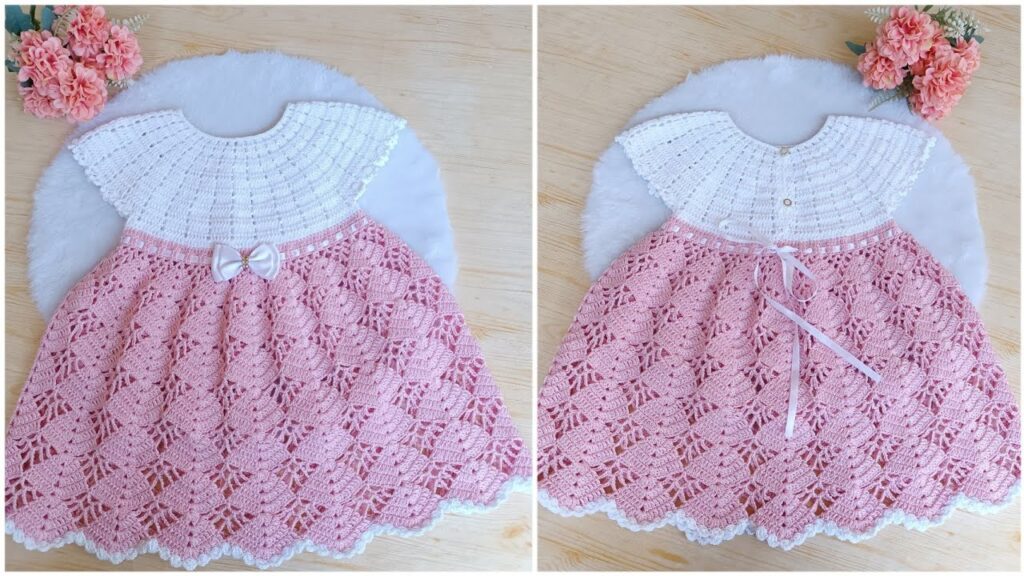
The “Elisa” dress is:
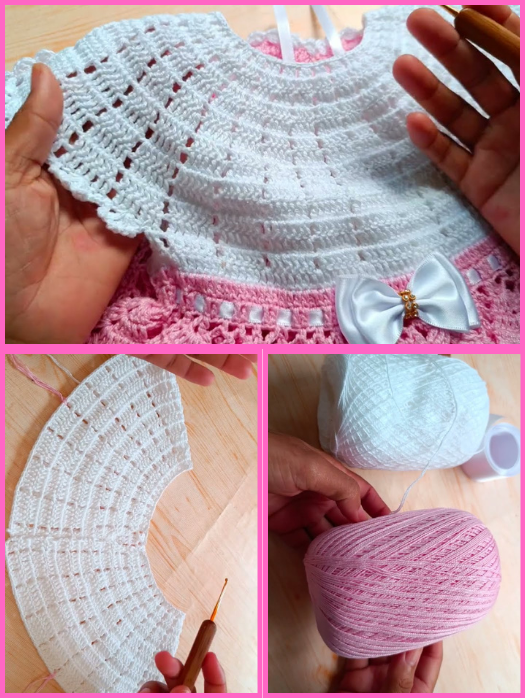
- Fitted at the bodice
- Flared at the skirt
- Made with a lacy, breathable stitch
- Ideal for summer wear or layering
✂️ Materials Needed
- Yarn: 100% cotton or cotton-blend yarn (DK or sport weight recommended)
- Approx. 1200–2000 yards depending on size and length
- Hook: Size H/8 (5.0 mm) or appropriate for your yarn
- Stitch markers
- Measuring tape
- Tapestry needle
- Scissors
- Optional: Lining fabric or slip dress
📏 Measurements Required
Take the following body measurements:
- Bust
- Waist
- Hips
- Shoulder to waist (torso length)
- Waist to desired skirt length
- Armhole depth
🧵 Basic Stitch Pattern (Lacy Shell)
Use this as your base if you don’t have a preset stitch:
textCopyEditMultiple of 6 + 1

Row 1: Ch desired length, sc in 2nd ch from hook, *skip 2 ch, 5 dc in next ch, skip 2 ch, sc in next ch* repeat across.

Row 2: Ch 3 (counts as dc), turn, 2 dc in first sc, *sc in 3rd dc of shell, 5 dc in next sc* repeat across, end with 3 dc in last sc.

Repeat Row 2 for pattern.
👗 Construction Overview
The dress is made in 3 sections:
- Top (Bodice)
- Skirt
- Straps/Sleeves (optional)
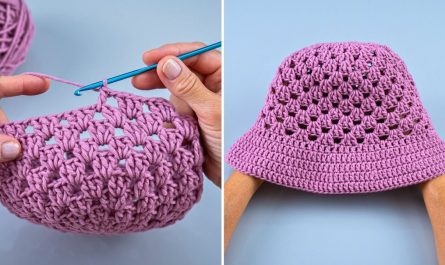
1. Top/Bodice (worked in the round or flat)
- Step 1: Make a gauge swatch in your chosen stitch pattern (4″x4″)
- Step 2: Based on your bust measurement + 2” ease, calculate how many stitches you need.
- E.g., bust = 36″, gauge = 5 stitches/inch → 36 × 5 = 180 stitches
- Step 3: Chain your base row accordingly and join in the round (or work flat and seam later)
- Step 4: Work in your lacy stitch pattern until you reach waist length.
- Step 5 (Optional Shaping): For a more fitted look, decrease a few stitches every 2–3 rows as you approach the waist.
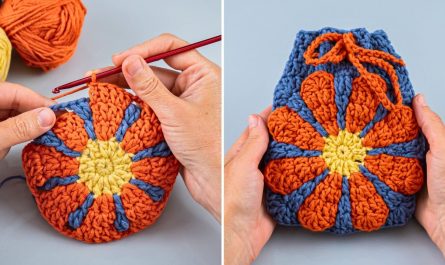
2. Skirt (worked down from bodice)
- Step 1: Begin increasing after the waist.
- E.g., Increase 1 shell every 6 shells across the first row
- Step 2: Continue working in pattern, increasing evenly every 4–6 rows for flare.
- Step 3: Work until you reach the desired length (mini, midi, or maxi)
3. Straps or Sleeves
- For a sleeveless sundress: Add simple straps by chaining from the front to back and securing.
- For cap sleeves: Work short rows of shells across the armhole openings.
🔄 Size Adjustments
Here’s a rough estimate of stitch counts by size (based on DK yarn and lacy shell pattern):
| Size | Bust (in) | Starting Chains |
|---|---|---|
| XS | 30–32 | 150 |
| S | 34–36 | 165 |
| M | 38–40 | 180 |
| L | 42–44 | 195 |
| XL | 46–48 | 210 |
Use your swatch to determine actual stitch count.
🧼 Finishing Touches
- Block the dress to open up the lace.
- Weave in all ends neatly.
- Add lining if desired (especially for see-through stitches).
- Try it on and adjust straps or side seams as needed.
📚 Tips
- Always try the dress on as you go (if possible).
- Use stitch markers to keep track of increases and decreases.
- Lightweight cotton yarn gives the best drape for summer styles.
Watch video: