 by
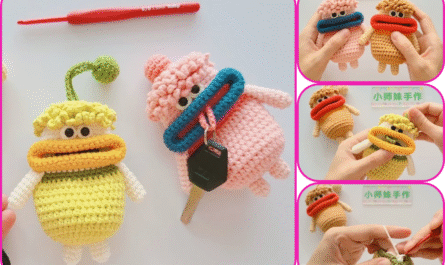
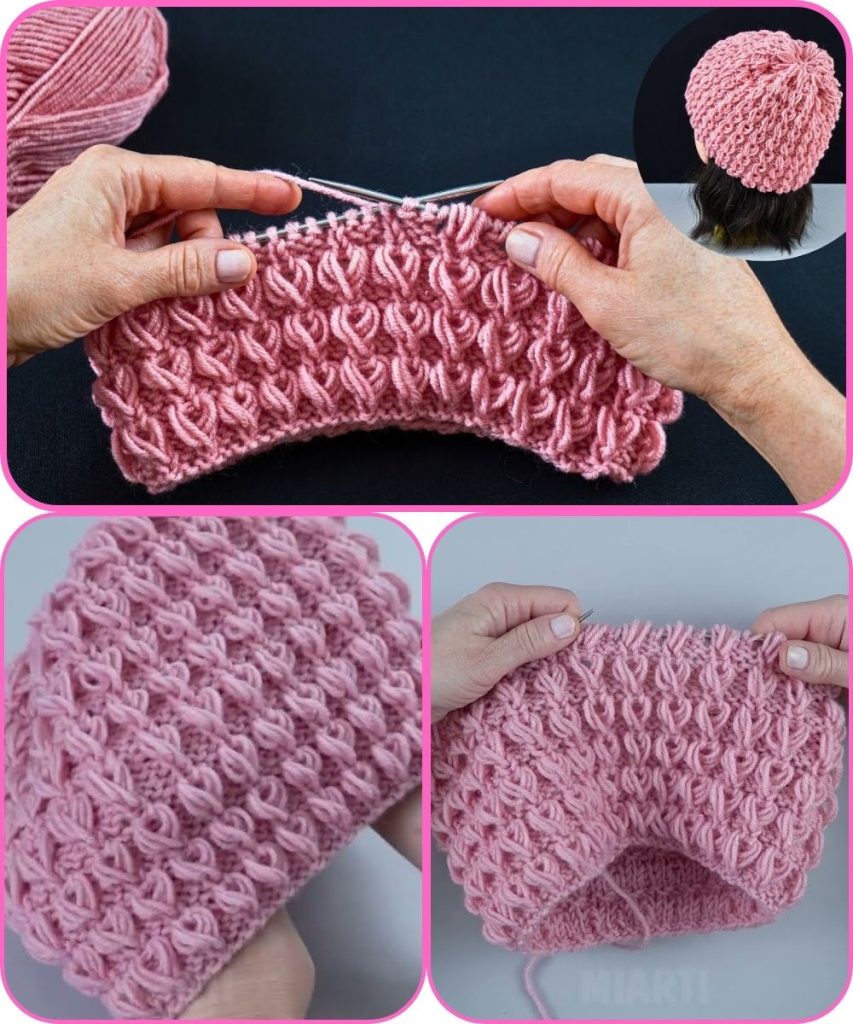
by Absolutely! Here’s a detailed, step-by-step guide on how to make a quick and easy knitted hat with a beautiful stitch pattern. I’ll include materials, stitches, and instructions suitable for beginners to intermediate knitters.
Materials Needed
- Yarn: Medium-weight (worsted) yarn, 1-2 skeins depending on size. Soft acrylic or wool blends work well.
- Knitting Needles: Circular needles, size 8 US (5 mm) or size recommended on your yarn label. If using double-pointed needles (DPNs), size 8 US works too.
- Stitch Markers to mark the beginning of the round.
- Tapestry Needle for weaving in ends.
- Optional: Pom-pom maker if you want to add a pom-pom.
Knitting Stitches Used
- Knit (K) – standard knit stitch.
- Purl (P) – standard purl stitch.
- Ribbing – combination of knit and purl stitches (e.g., K2, P2).
- Seed Stitch / Moss Stitch – creates a textured, beautiful pattern:
- Round 1: K1, P1 repeat to the end.
- Round 2: P1, K1 repeat to the end.
- Repeat these 2 rounds for the desired length.
Seed stitch is perfect because it looks intricate but is very easy to memorize.
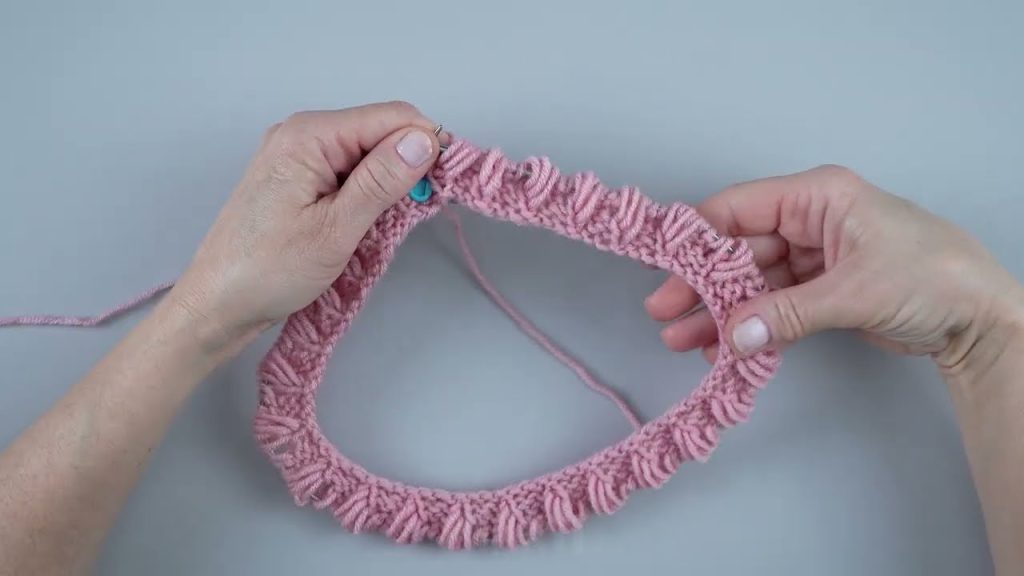
Step 1: Measure and Cast On
- Measure the circumference of the head for a snug fit. Most adult hats: 20-22 inches (51-56 cm).
- Cast on the number of stitches that fits your gauge. For worsted yarn with size 8 needles, this is usually 80-100 stitches.
- Join in the round carefully, ensuring the stitches are not twisted. Place a stitch marker at the beginning of the round.
Step 2: Knit the Brim
- Work in ribbing (K2, P2) for 1.5-2 inches (4-5 cm) for a stretchy, snug edge.
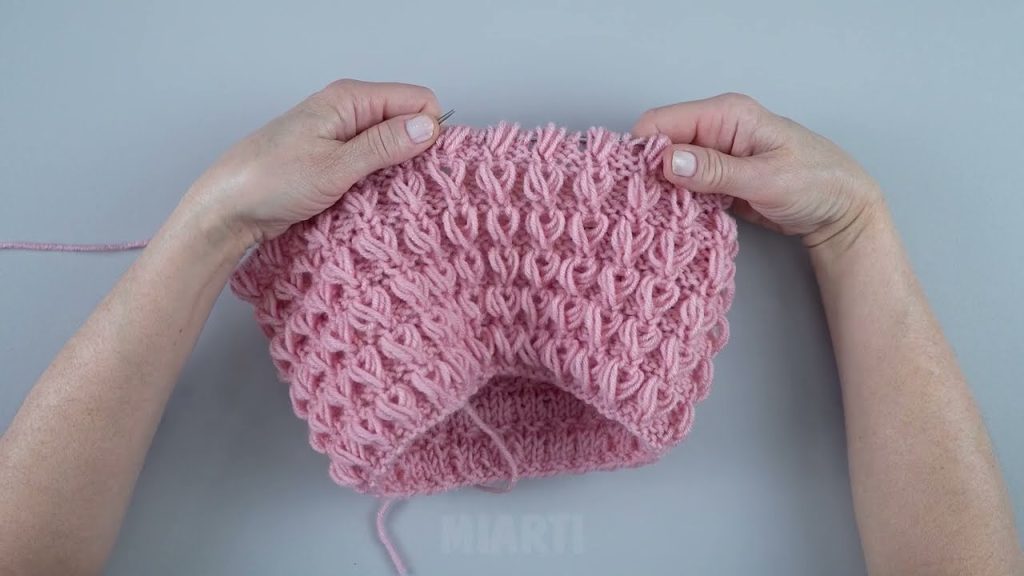
Step 3: Knit the Body with Beautiful Stitch Pattern
- Switch to seed stitch for the main body:
- Round 1: K1, P1 repeat
- Round 2: P1, K1 repeat
- Continue until the hat measures 6-7 inches (15-18 cm) from the cast-on edge (or desired length before decreasing).
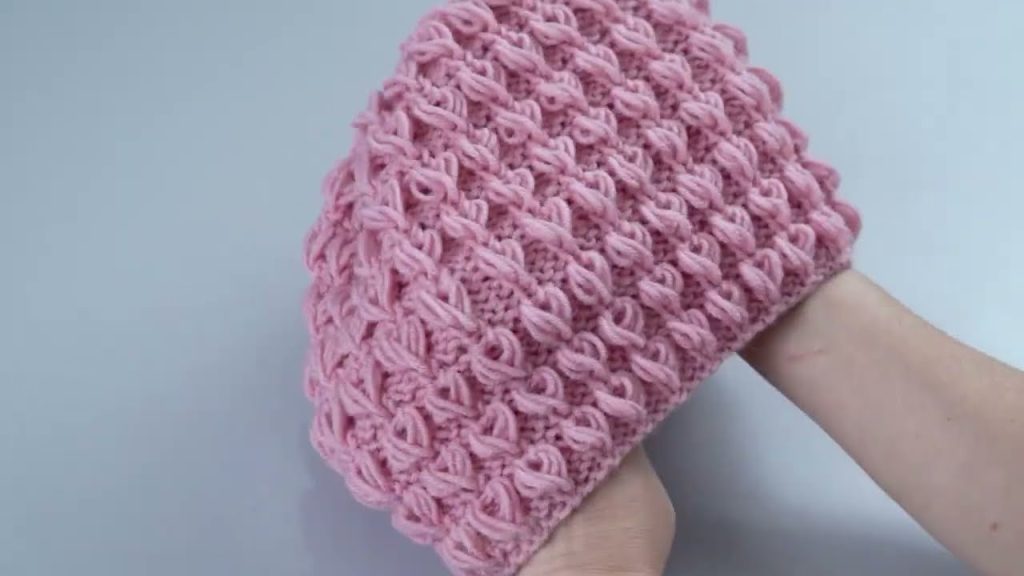
Seed stitch adds texture and makes the hat look elegant without extra effort.
Step 4: Decrease for the Crown
- Switch to decreasing rounds while maintaining the stitch pattern as much as possible:
- Round 1: K8, K2tog repeat around.
- Round 2: K7, K2tog repeat.
- Continue decreasing every other round, reducing the number of stitches between K2tog by 1 each time, until 10-12 stitches remain.
Step 5: Finish
- Cut yarn, leaving a long tail.
- Thread yarn through remaining stitches using a tapestry needle. Pull tight to close the top.
- Weave in all ends.
- Optional: Add a pom-pom for a cute finishing touch.
Tips for a Quick Hat
- Use chunky yarn and larger needles for faster knitting.
- Seed stitch is ideal because it looks fancy but doesn’t require complicated counting.
- Circular needles make knitting in the round faster than using DPNs.
This method produces a warm, stylish hat with a neat textured pattern that works for all ages.
If you want, I can draw a simple chart for the seed stitch hat pattern so you can visually follow it—it makes knitting even faster and easier.
Watch tutorial: