 by
by Here’s a clear, beginner-friendly, detailed tutorial you can use for a blog post, school project, or video description.

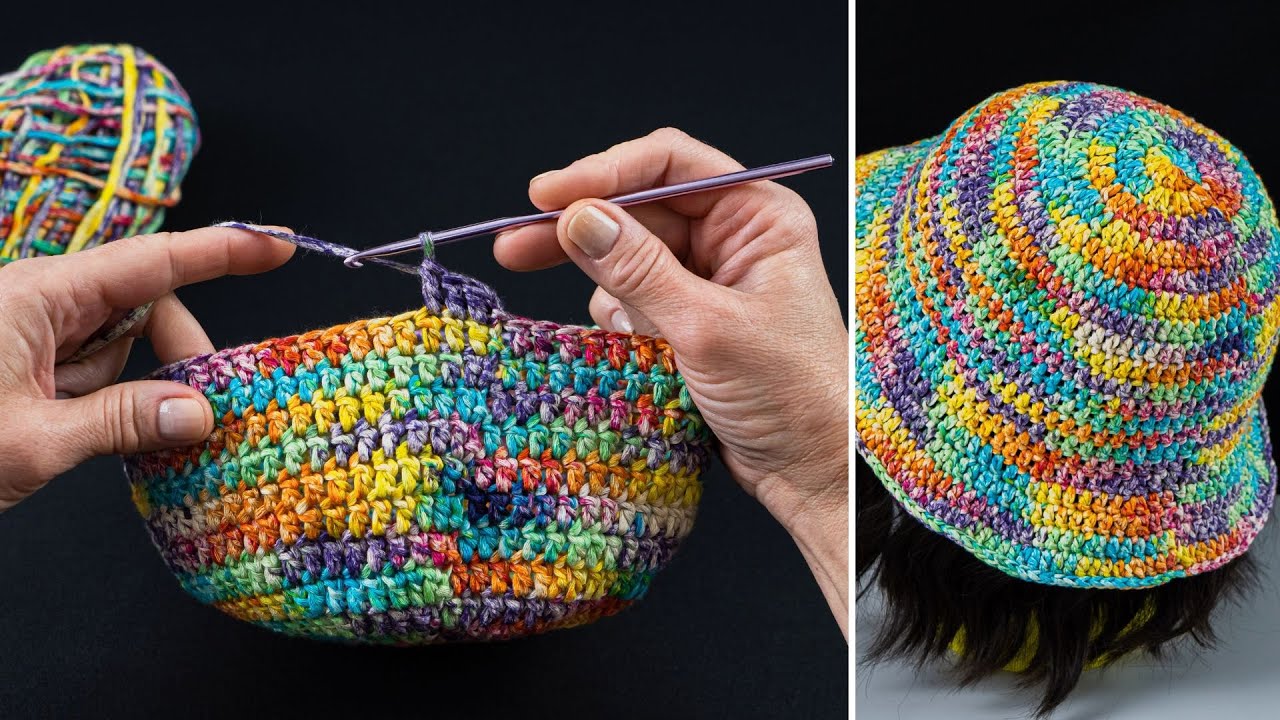
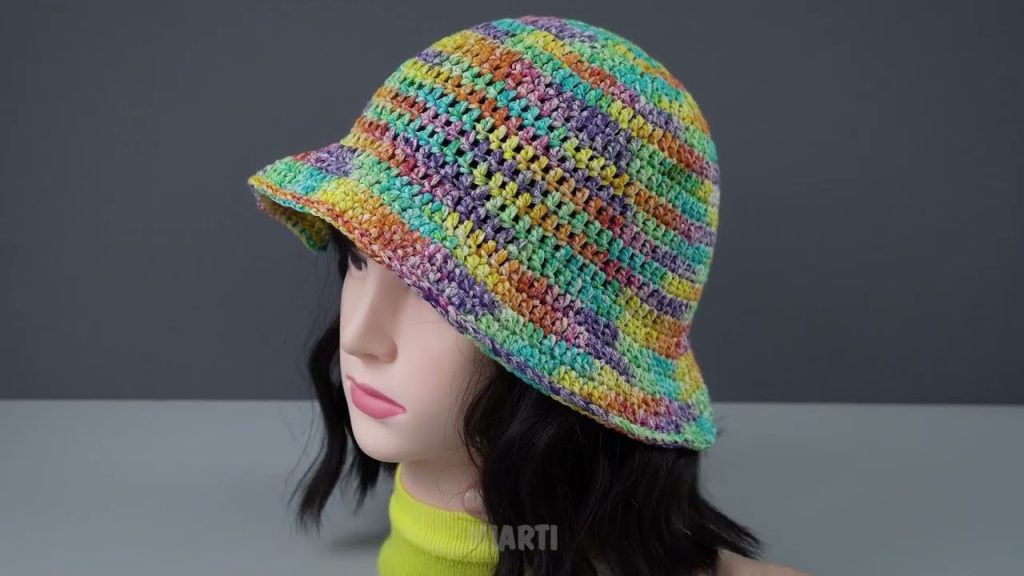
How to Make a Very Easy Beginner Crochet Summer Bucket Hat Tutorial
A crochet bucket hat is a perfect project for beginners. It uses simple stitches, works up quickly, and is great for summer because you can make it lightweight and breathable. This tutorial explains everything step by step, so even if you are new to crochet, you can follow along easily.
🧶 Materials You Will Need
- Yarn: Lightweight cotton yarn (DK or worsted weight). Cotton is best for summer because it is cool and breathable.
- Crochet Hook: Size 4.0 mm–5.0 mm (choose based on your yarn label)
- Scissors
- Yarn Needle (for weaving in ends)
- Stitch Marker (optional but helpful)

🪡 Basic Crochet Skills Needed
This bucket hat is beginner-friendly and only uses basic stitches:
- Slip knot
- Chain (ch)
- Single crochet (sc)
- Increase (2 sc in the same stitch)
- Slip stitch (sl st)
If you know these basics, you’re ready to start!
Step-by-Step Instructions
Step 1: Make the Magic Ring (Top of the Hat)
- Start with a magic ring.
- Crochet 6 single crochets into the ring.
- Pull the ring tight and place a stitch marker in the first stitch.
- Do not join—this hat is worked in continuous rounds.
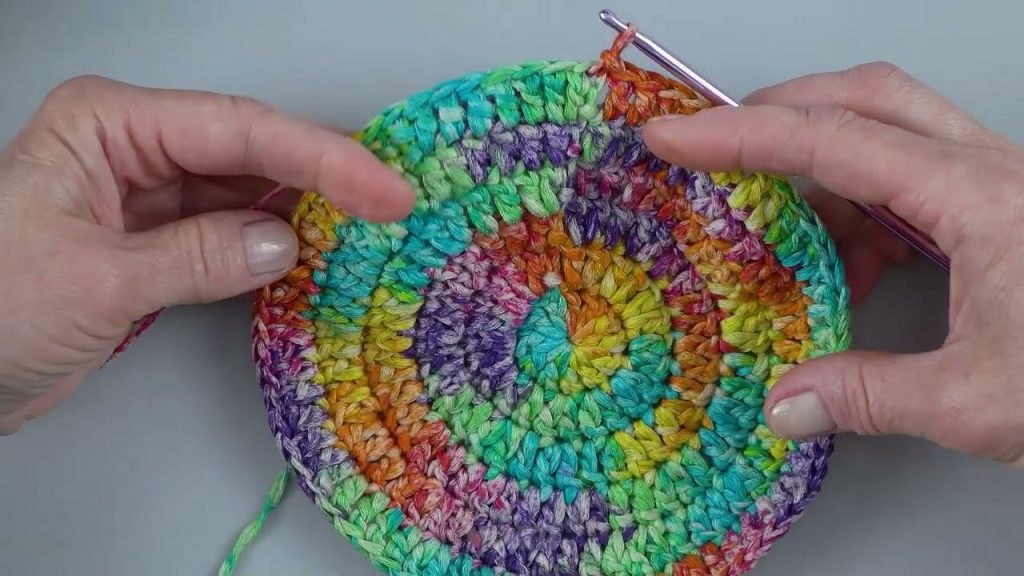
Step 2: Increase Rounds (Crown of the Hat)
You will slowly increase stitches to make the hat flat.
- Round 2: 2 sc in each stitch (12 stitches)
- Round 3: 1 sc, 2 sc in next stitch (repeat around – 18 stitches)
- Round 4: 2 sc, 2 sc in next stitch (24 stitches)
- Round 5: 3 sc, 2 sc in next stitch (30 stitches)
Continue increasing until the circle fits the top of your head.
👉 For most adults, 30–36 stitches is enough.
Step 3: Body of the Hat (No Increases)
- Crochet 1 single crochet in each stitch around.
- Continue for 6–8 rounds, depending on how deep you want the hat.
- Try it on as you go to check the fit.
This part forms the sides of the bucket hat.
Step 4: Create the Bucket Hat Brim
Now we gently increase again to create the brim.
- Brim Round 1: 4 sc, 2 sc in next stitch (repeat around)
- Brim Round 2: 5 sc, 2 sc in next stitch
- Brim Round 3: 6 sc, 2 sc in next stitch
Crochet 2–4 brim rounds, depending on how wide you want the brim.
Step 5: Finish the Hat
- Slip stitch into the next stitch.
- Cut yarn and pull through.
- Use a yarn needle to weave in all loose ends.
Your summer bucket hat is now complete! 🎉
🌞 Tips for Beginners
- Use light-colored yarn so stitches are easy to see.
- Cotton yarn helps the hat keep its shape.
- Go slow and count stitches each round.
- Don’t worry if it’s not perfect—practice makes progress!
✨ Customization Ideas
- Add stripes using different yarn colors
- Use half double crochet for a softer look
- Add a small crochet flower or label
- Make it shorter or longer to fit your style
✅ Final Thoughts
This very easy beginner crochet summer bucket hat is a fun and relaxing project. It’s stylish, practical, and a great way to practice crochet basics. Once you finish one, you’ll want to make more in different colors!
If you want, I can also:
- Simplify this into a short pattern
- Rewrite it for a YouTube video script
- Adjust it for kids or different sizes
Watch tutorial: