 by
by Here’s a clear, beginner-friendly, and detailed guide you can use as an article, blog post, or school project.
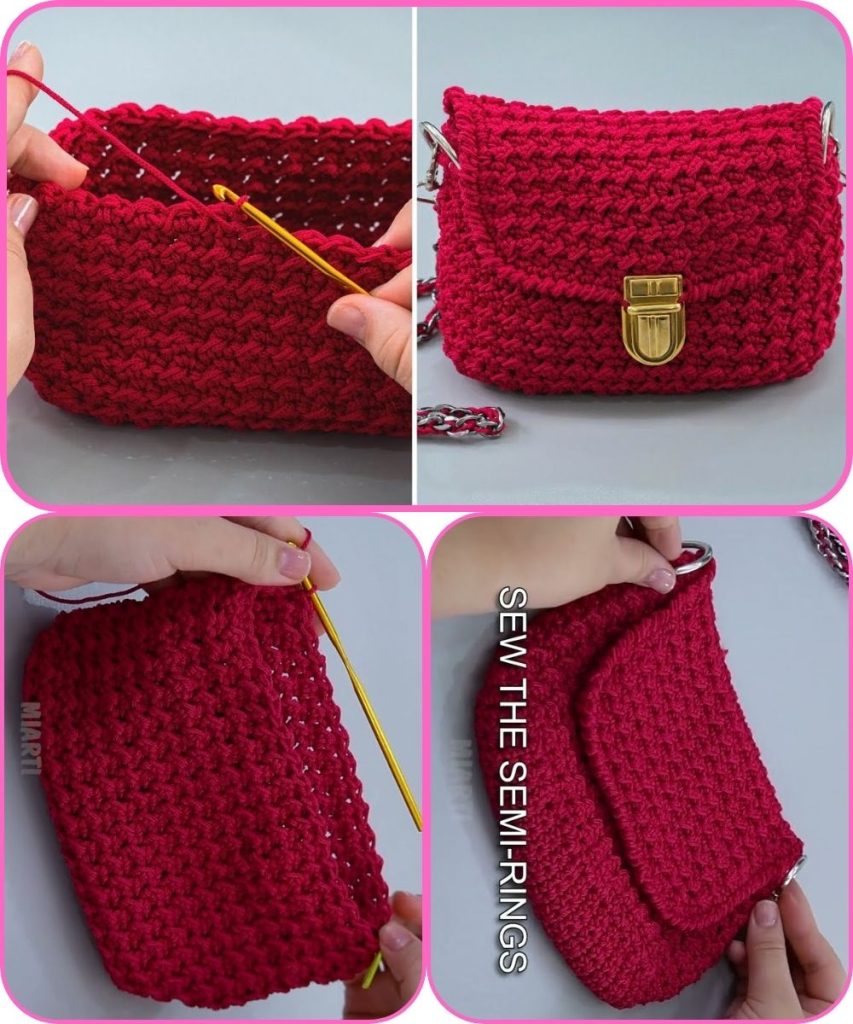
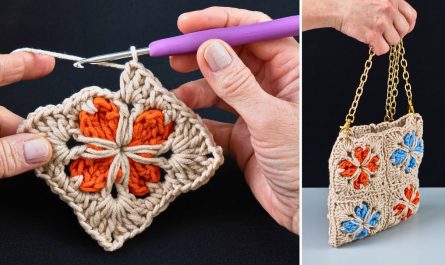
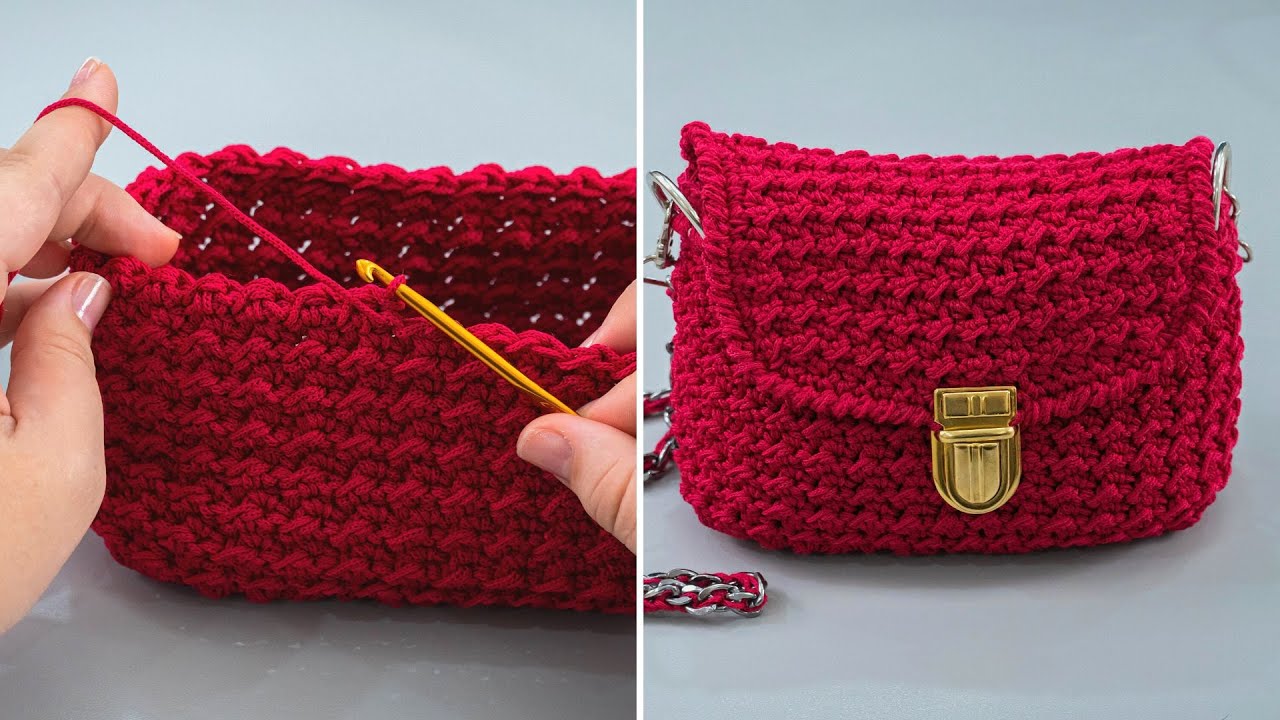
How to Make a Crochet Bag for Beginners – Simple and Elegant
Crocheting a bag is a perfect project for beginners because it is practical, stylish, and easy to customize. You don’t need advanced skills—just a few basic stitches and some patience. This guide will walk you through everything step by step, helping you create a simple and elegant crochet bag even if you’re new to crochet.
Materials You Will Need
Before you begin, gather these basic supplies:
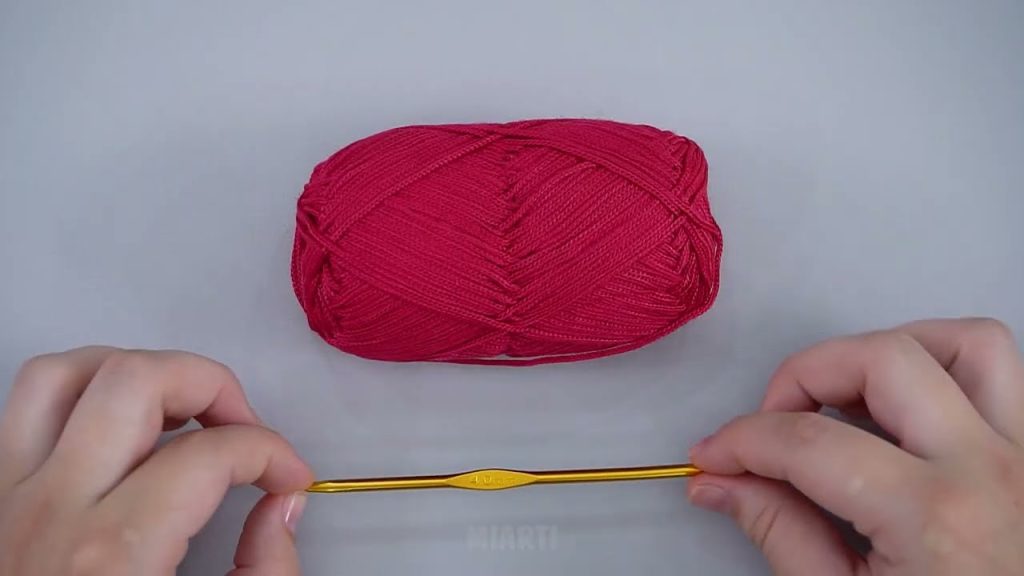
- Yarn: Medium-weight (worsted) yarn is best for beginners. Cotton yarn is ideal for bags because it is strong and keeps its shape well.
- Crochet Hook: Use the hook size recommended on your yarn label (usually 4–5 mm).
- Scissors: For cutting yarn.
- Yarn Needle: To weave in loose ends.
- Stitch Marker (optional): Helpful for keeping track of rounds.
Basic Crochet Stitches You Should Know
You only need a few simple stitches to make this bag:
- Slip Knot: Used to start your project.
- Chain Stitch (ch): Forms the foundation of your bag.
- Single Crochet (sc): Creates a tight and sturdy fabric.
- Slip Stitch (sl st): Used to join rounds neatly.
These stitches are beginner-friendly and easy to learn with a little practice.
Step 1: Make the Foundation
Start by making a slip knot and chaining a number of stitches depending on how wide you want your bag to be. For a small to medium bag, chain about 25–30 stitches.
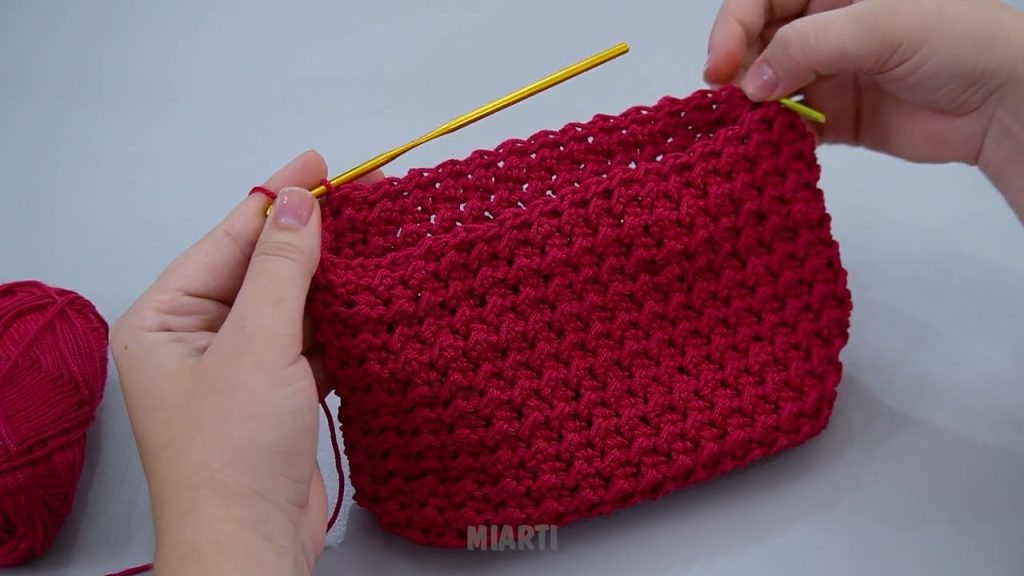
Once you have your chain, single crochet into the second chain from the hook and continue single crocheting across. This row forms the base of your bag.
Step 2: Build the Bag Body
After finishing the first row, chain one and turn your work. Continue working single crochet stitches into each stitch across the row.
Repeat this process row by row. As you continue, you’ll see the bag growing taller. Keep crocheting until the bag reaches your desired height—usually 20–25 cm for a simple everyday bag.
To keep the bag elegant and neat, maintain even tension and count your stitches regularly.
Step 3: Shape and Finish the Bag
Once the body is tall enough, stop adding rows. Fold the piece in half so the sides meet evenly. Single crochet or slip stitch along both sides to close the bag, leaving the top open.
Fasten off your yarn and use a yarn needle to weave in any loose ends.
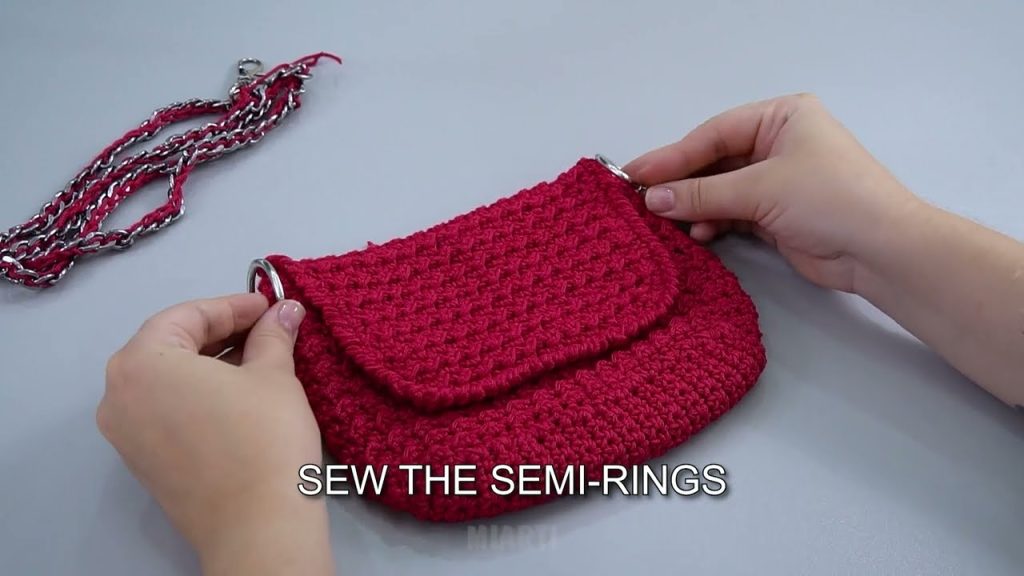
Step 4: Add Handles
For simple handles, attach yarn to one side of the bag’s opening and chain about 30–40 stitches, depending on how long you want the handle. Attach it to the opposite side with a slip stitch.
Repeat on the other side for a second handle, or make one long strap if you prefer a shoulder bag.
Step 5: Optional Decoration
To keep the bag elegant yet simple, you can:
- Add a small crochet flower
- Use a different color for the handles
- Attach a button or tassel
These details are optional but can make your bag more stylish.
Tips for Beginners
- Practice your stitches before starting the bag.
- Choose light-colored yarn so you can see stitches clearly.
- Don’t worry if it’s not perfect—handmade items are unique.
- Take breaks to avoid hand strain.
Final Thoughts
Making a crochet bag is a rewarding project for beginners. It helps you practice basic stitches while creating something useful and beautiful. With simple techniques and a clean design, you can make an elegant crochet bag that you’ll be proud to use or gift.
Happy crocheting! 🧶✨
If you want, I can also:
- Simplify this for a school assignment
- Turn it into a step-by-step pattern
- Add pictures descriptions or captions
Watch tutorial: