 by
by Absolutely! Let’s go step by step. I’ll give you a detailed guide on how to crochet a Granny Squares shoulder bag, including materials, techniques, and assembly tips. I’ll make it clear enough for a beginner to intermediate crocheter to follow.
Materials You’ll Need
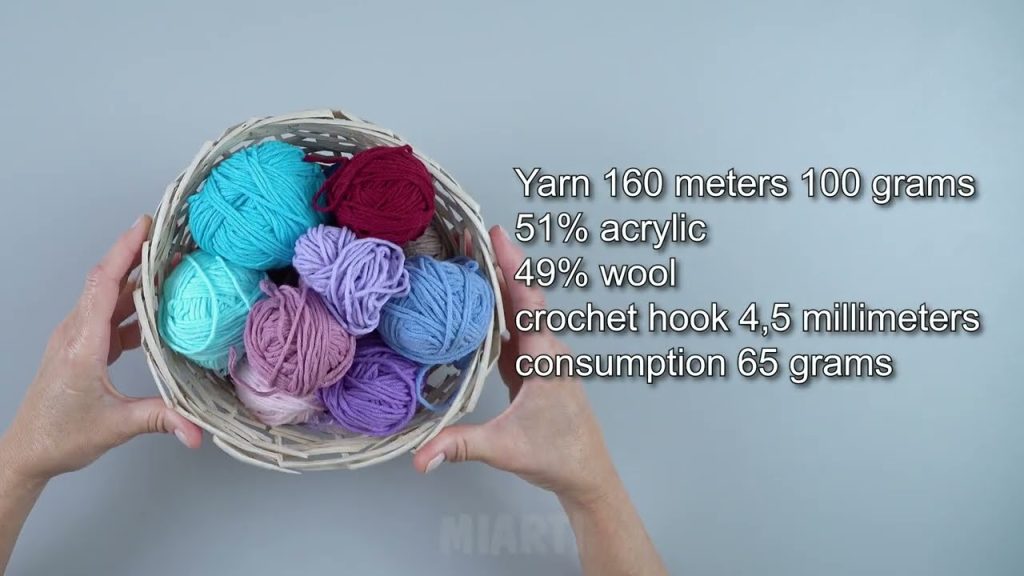
- Yarn: Medium weight (worsted) yarn in multiple colors (for granny squares) + one neutral color for joining (optional).
- Crochet hook: Size recommended for your yarn (usually 5.0 mm / H-8).
- Tapestry needle: For weaving in ends and sewing squares together.
- Scissors
- Optional: Fabric lining and sewing needle for lining the bag.
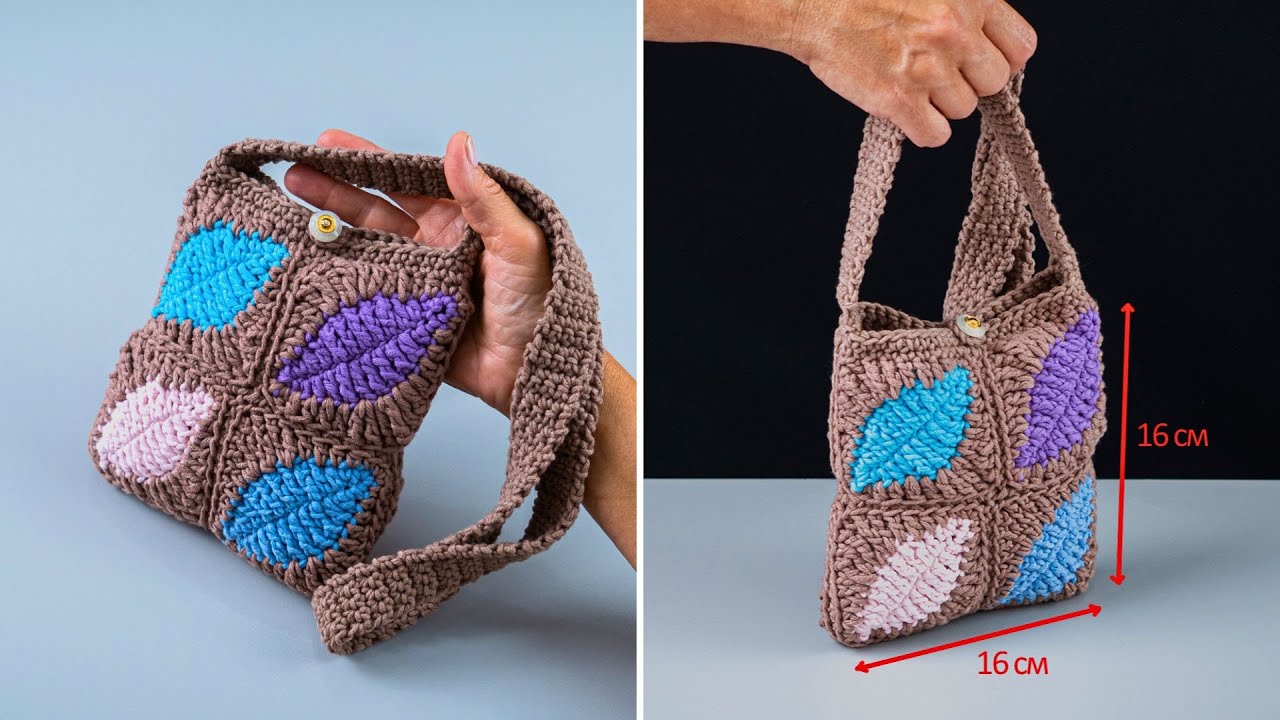
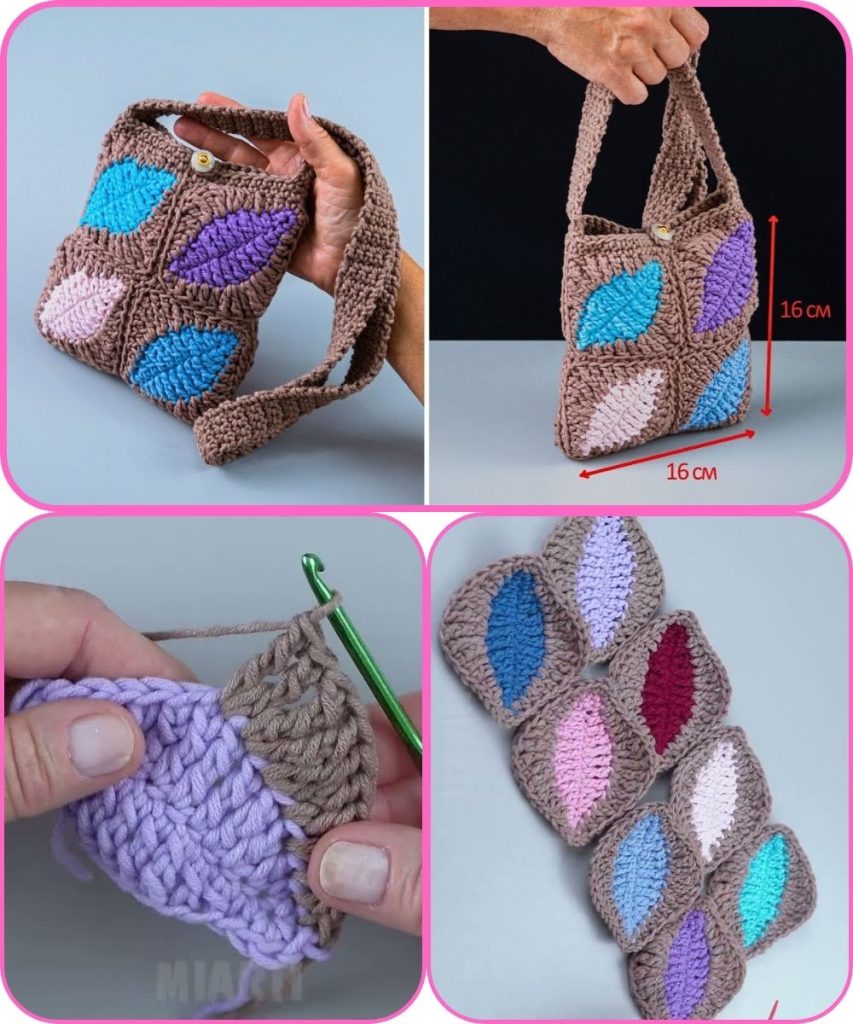
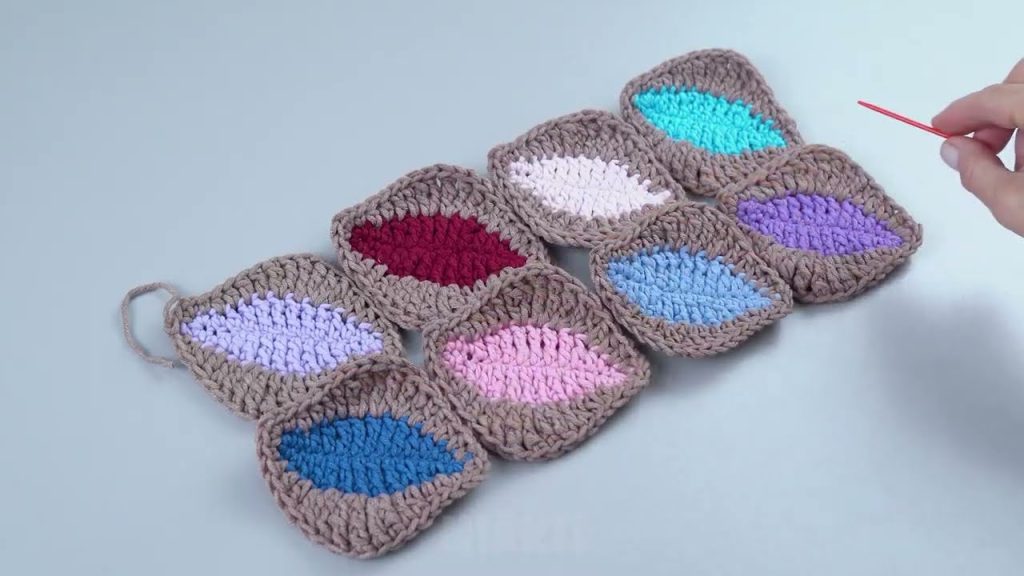
Step 1: Make Granny Squares
Granny squares are the building blocks of your bag.
Basic Granny Square Pattern:
- Start with a magic ring (or chain 4 and join to make a ring).
- Round 1: Chain 3 (counts as first double crochet), then 2 dc in ring, chain 2, 3 dc in ring, chain 2 repeat 2 more times, join with slip stitch to top of chain 3.
- Round 2: Slip stitch to first corner space, chain 3 (counts as dc), 2 dc in corner space, chain 2, 3 dc in corner space, in next corner space: 3 dc, chain 2, 3 dc repeat around, join.
- Round 3 and beyond: Repeat corner pattern, increasing the sides by putting 3 dc clusters between corners. Continue until your square is the desired size (around 4–5 inches is common for a bag).
Make as many squares as you need. For a small shoulder bag, you might need 12–16 squares depending on size and layout.
Step 2: Arrange Your Squares
- Lay your squares out in the pattern you like.
- Decide the front, back, and sides of your bag.
- Common layouts: 3×3 squares for the front/back, and 1×3 or 2×2 for sides.
Step 3: Join Squares
You can join squares in two main ways:
Method 1: Whip Stitch (sewn together)
- Place two squares right sides together.
- Use a tapestry needle and yarn, whip stitch through the edges.
- Join all squares to make the front and back panels and then the sides.
Method 2: Crochet Join
- Lay squares flat, edges touching.
- Using a slip stitch or single crochet, join edges by working through both loops along the edges.
- This gives a seamless look.
Step 4: Make the Bag Shape
- After joining, you’ll have two panels (front/back) and side pieces if needed.
- Step 4a: Attach sides to bottom: Join side squares to the front/back bottom edges.
- Step 4b: Join top edges leaving the top open for the bag.
Step 5: Add the Strap
There are multiple ways to do this:
- Crocheted Strap: Chain to the desired length, then single crochet or double crochet back along the chain to make it sturdy. Sew each end to the inside top corners of the bag.
- Using a Ready-Made Strap: Sew the strap directly to the top corners of the bag.
Make sure the strap is strong enough to hold the weight of items you’ll carry.
Step 6: Optional Lining
- Cut fabric slightly smaller than the bag size.
- Sew the fabric inside the bag. This helps prevent small items from falling out and makes the bag sturdier.

Step 7: Finishing Touches
- Weave in all loose ends.
- Block the bag if needed (lightly steam or wet it to shape nicely).
- Add buttons, zippers, or decorative elements if desired.
Tips for a Beautiful Granny Square Bag
- Use contrasting colors for a bold look or shades of one color for a subtle style.
- Keep your tension even, so squares match in size.
- Reinforce strap connections, especially if using a light yarn.
- Mixing square sizes can create a unique pattern.
If you want, I can draw a full diagram showing the layout of squares and straps for a visual step-by-step guide, which makes it much easier to follow.
Watch tutorial: