 by
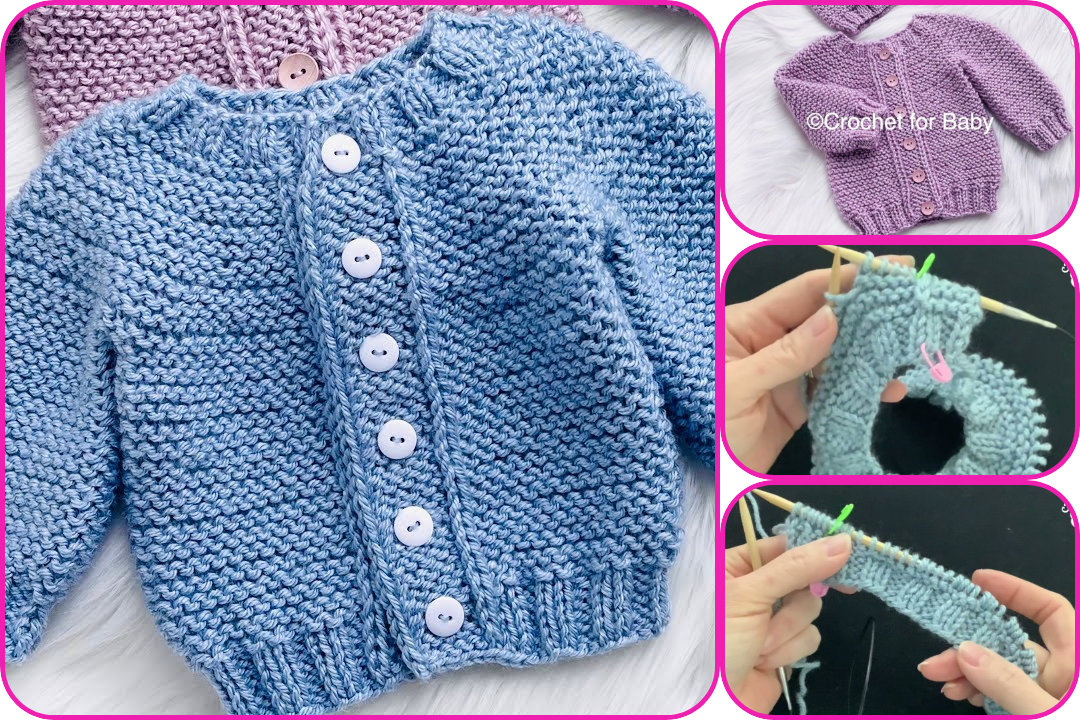
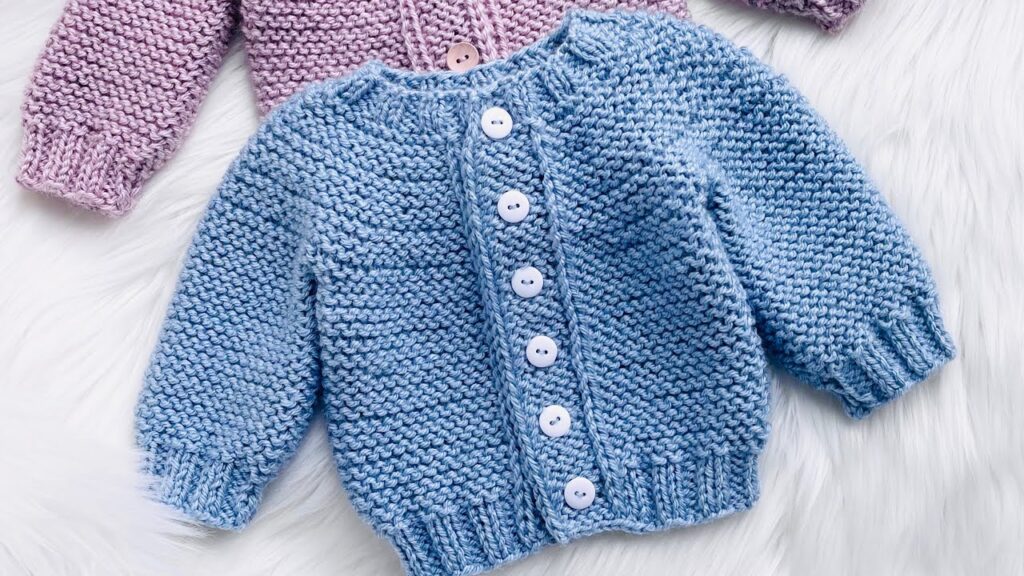
by Sure! Here’s a detailed, beginner-friendly guide on how to knit a cute top-down cardigan sweater using two needles. This method is great because it’s seamless, allows for easy size adjustments as you go, and it’s a rewarding project for anyone learning to knit garments.
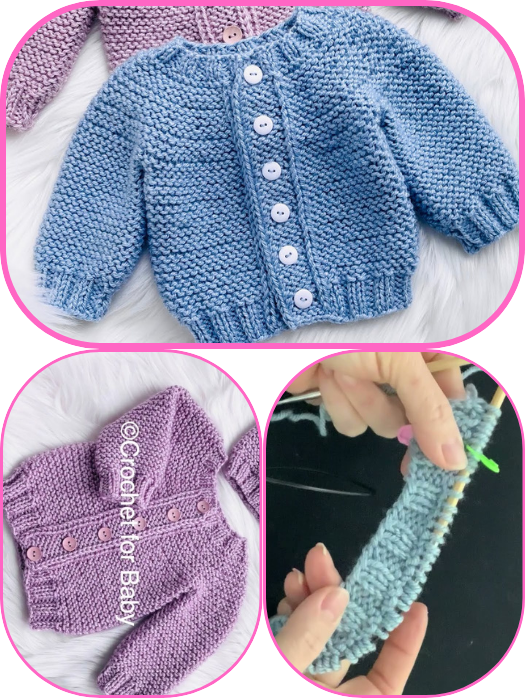
🧶 How to Knit a Cute Top-Down Cardigan Sweater (Using Two Needles)
Skill Level: Beginner to Confident Beginner
Tools & Materials Needed:
- Worsted or DK weight yarn (approx. 800–1200 yards depending on size)
- Pair of straight needles or circular needles (US size 6–8 / 4.0–5.0mm recommended)
- Stitch markers
- Tapestry needle for weaving in ends
- Scissors
- Measuring tape
- Buttons (optional, if you want a button-up cardigan)
📏 Step 1: Take Measurements & Choose Your Size
Before starting, measure:
- Chest circumference
- Arm length
- Length from neck to desired hem
Choose a pattern size that matches your chest measurement with a little positive ease (about 2–4 inches extra for comfort).
🧣 Step 2: Cast On the Neckline
Top-down sweaters begin at the neck. You’ll use the raglan increase method, which shapes the shoulders as you knit downward.
Cast-On:
- Use a stretchy cast-on like the long-tail cast-on.
- Cast on stitches for the neckline (e.g., 60 stitches for a child-size, 80–100 for adults).
Place markers for the raglan increase lines:
- Set up like this (example for 80 stitches):
10 (left front) – 1 (marker) – 15 (sleeve) – 1 – 28 (back) – 1 – 15 (sleeve) – 1 – 10 (right front)
➕ Step 3: Begin Raglan Increases
On every right-side (RS) row, increase 1 stitch on either side of the raglan markers using make-one-left (M1L) and make-one-right (M1R).
Knit rows as follows:
- RS rows: Knit and increase.
- WS rows: Purl (no increases).
Continue increasing every RS row until the sleeves and body sections are the right width. For an adult size, this usually takes 20–30 rows.
🧵 Step 4: Divide for Sleeves and Body
Once your yoke is deep enough:
- Place sleeve stitches on a stitch holder or scrap yarn.
- Cast on 4–8 underarm stitches (bridge the gap between the body and sleeves).
- Continue knitting the body back and forth in stockinette stitch or add a textured pattern.
Knit the body until it reaches the desired length. Add ribbing at the hem (e.g., K2, P2 for 1–2 inches).
Bind off loosely.
🧤 Step 5: Knit the Sleeves
Return to sleeve stitches:
- Pick them up on your needles.
- Join yarn and knit in stockinette stitch.
- Decrease every few rows for a tapered sleeve or keep straight for a relaxed fit.
- Add ribbing at the wrist and bind off.
Repeat for the other sleeve.
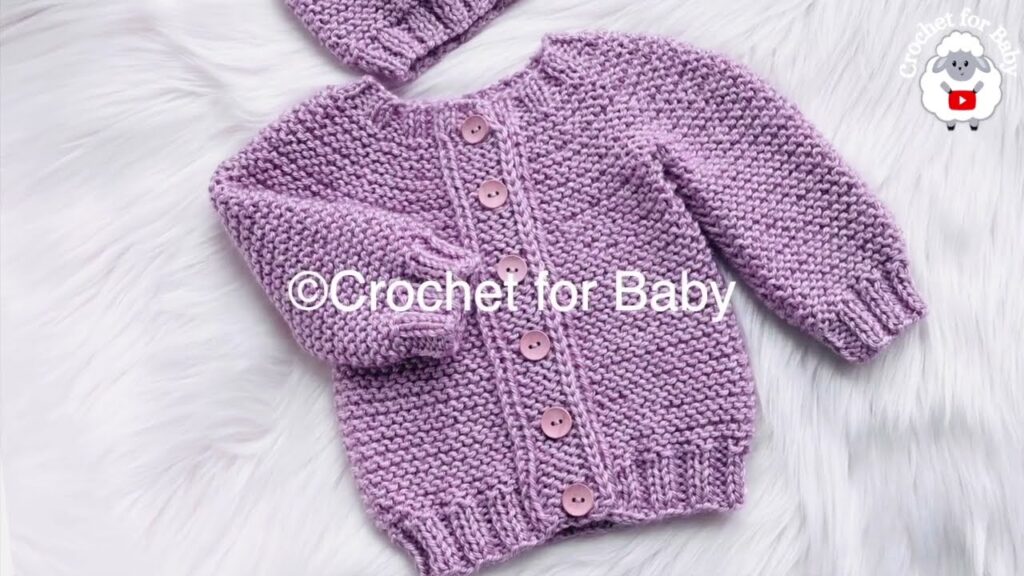
🎀 Step 6: Add Neckline and Button Bands
Pick up stitches around the neckline and knit 1–2 inches of ribbing for a collar or leave as-is for a casual rolled edge.
Button Bands (Optional):
- Pick up stitches along the front edges.
- Work in K2, P2 ribbing for 1–2 inches.
- On one side, make buttonholes every few inches.
🧼 Step 7: Finishing
- Weave in all ends using a tapestry needle.
- Block your cardigan (lightly wet it, shape it, and lay it flat to dry) to even out stitches and get the perfect fit.
- Sew on buttons if applicable.
✅ Tips for Beginners
- Use stitch markers generously—they help keep track of raglan lines and edges.
- Practice increases and decreases on a swatch first.
- Choose a light-colored yarn; it’s easier to see stitches.
- Use yarn that doesn’t split easily (like wool or acrylic blends).
- Watch YouTube tutorials on raglan shaping and button bands for visual help.
Watch video: