 by
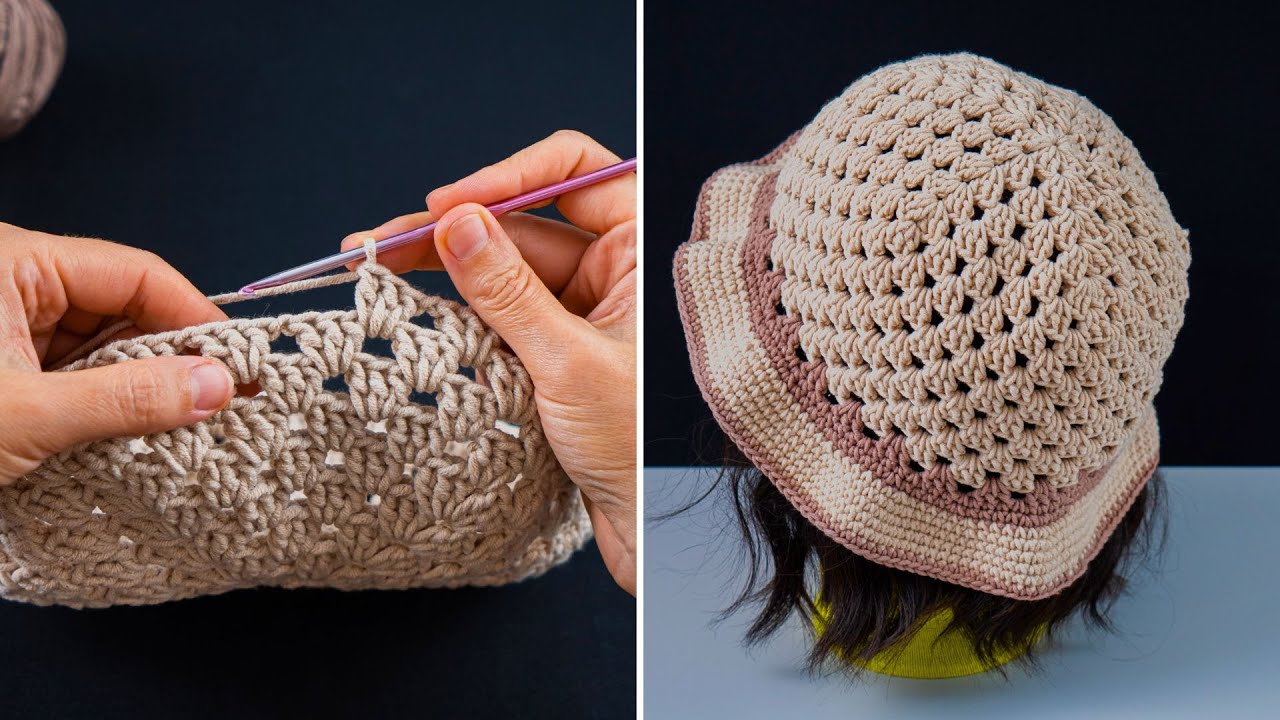
by Absolutely! I can give you a step-by-step detailed tutorial on how to make a crochet granny square bucket hat. I’ll break it down carefully so you can follow along easily, whether you’re a beginner or intermediate crocheter.
Materials Needed
- Yarn: Worsted weight yarn (or your preferred yarn). Multiple colors for granny squares look great!
- Crochet hook: Size appropriate for your yarn (usually H/5.0mm or G/4.0mm for worsted).
- Scissors
- Yarn needle (for weaving in ends)
- Measuring tape
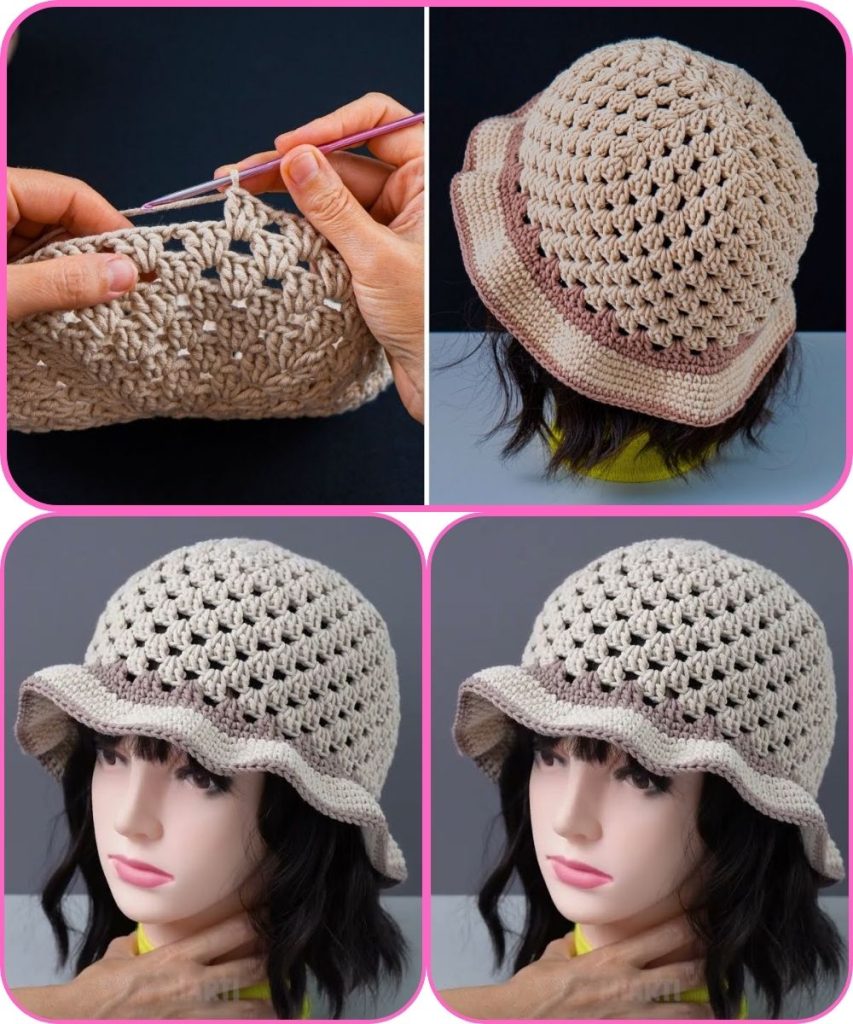
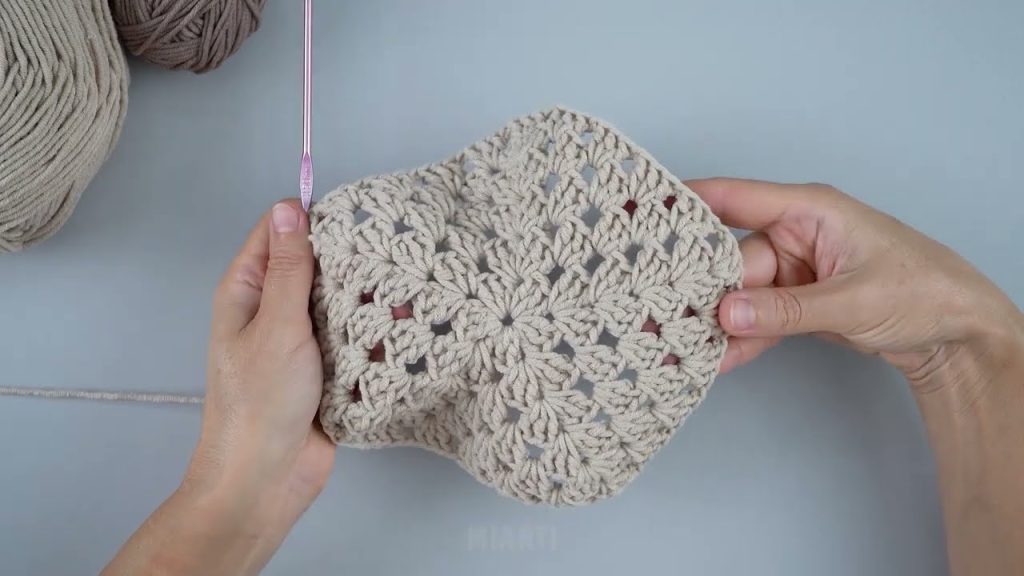
Step 1: Make the Granny Squares
Granny squares are the foundation of your bucket hat. Here’s a basic method:
Basic Granny Square (Classic 3-Round)
- Start with a magic ring (or chain 4 and slip stitch to form a ring).
- Round 1: Chain 3 (counts as first double crochet), then 2 double crochets, chain 2 in the ring, repeat 3 more times, slip stitch to top of chain 3 to join.
- Round 2: Slip stitch into the first chain-2 corner space, chain 3 (counts as first double crochet), 2 double crochet, chain 2, 3 double crochet in the same corner. In the next corner space, repeat (3 dc, ch 2, 3 dc). Repeat for all 4 corners, slip stitch to join.
- Round 3 (optional, for larger squares): Repeat the corner pattern: (3 dc, ch 2, 3 dc) in each corner, and 3 dc in each space between corners.
Make as many squares as you need. For a child’s hat, 6–8 squares; for adult, 9–12 squares (depends on size).
Tip: Keep your tension even so squares are uniform.
Step 2: Join Granny Squares
There are two main ways:
Option 1: Seamless Join (Slip Stitch/Single Crochet Method)
- Lay your squares out in a pattern.
- Place two squares with right sides together.
- Insert hook through both squares’ stitches, slip stitch through each stitch along the edge.
- Repeat until all squares are joined in a circle (for the top of the hat).
Option 2: Join As You Go
- When finishing the last round of a granny square, you can join it to the previous square using slip stitch instead of chains at the corner spaces. This creates a cleaner look and reduces sewing at the end.
Step 3: Form the Hat Crown
- Lay out your joined granny squares in a square or circle, depending on your pattern.
- If using a circle, you can join the squares to form the top of the hat.
- Ensure the crown is flat—measure across the top; it should match the head circumference (usually 6–8 squares in a ring).
Step 4: Crochet the Sides of the Hat
Once the top is done:
- Round 1 (side start): Chain 1, single crochet evenly around the edge of the joined squares.
- Round 2: Increase slightly if needed for a smooth slope down (usually 1–2 extra stitches evenly spaced).
- Continue: Work in rounds, either:
- Single crochet for a dense hat
- Double crochet for a looser, more flexible bucket shape
- Continue until the side reaches your desired height (usually 4–5 inches for bucket hats).
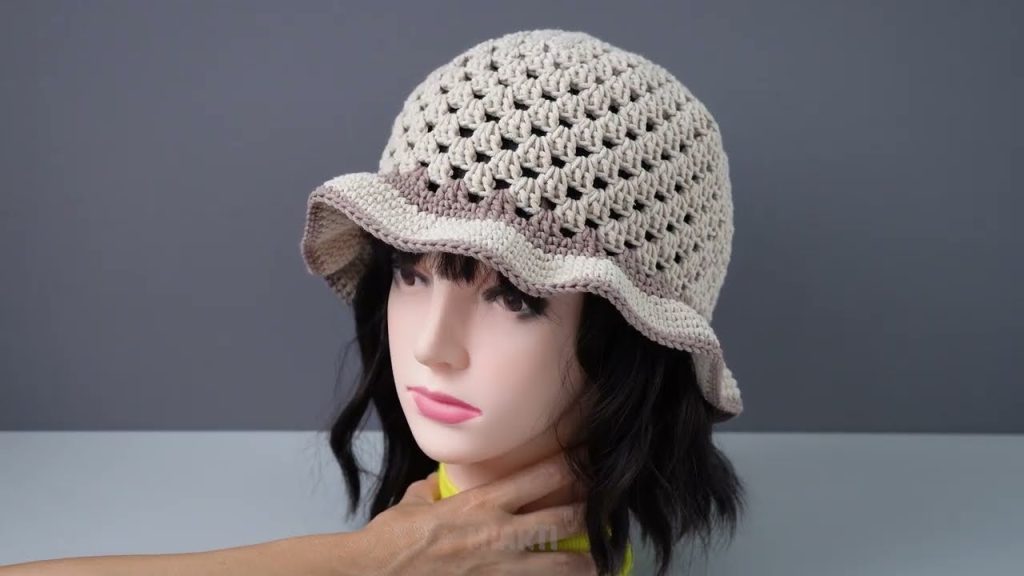
Step 5: Make the Brim
The brim gives the bucket hat its shape:
- Round 1 (attach brim): Chain 1, single crochet around the bottom edge of the hat.
- Round 2: Increase gradually to make the brim flare out. A common rule is 6 increases per round, spaced evenly.
- Continue: Repeat rounds until brim is 2–3 inches (or your preferred width).
- Optional: Alternate colors or granny square motifs for a fun look.

Step 6: Finishing Touches
- Weave in all ends using a yarn needle.
- Block the hat lightly if you want it more structured.
- Try it on and adjust the brim or sides if necessary.
Tips & Tricks
- Use different colors for each square for a playful, retro look.
- For sturdier brim, use a slightly smaller hook than your main body to keep it firm.
- If you want a soft, floppy look, use a lightweight yarn or skip increasing too much in the brim.
If you want, I can draw a simple diagram showing how the granny squares connect and form the hat—it makes visualizing so much easier, especially for beginners.
Watch tutorial: