 by
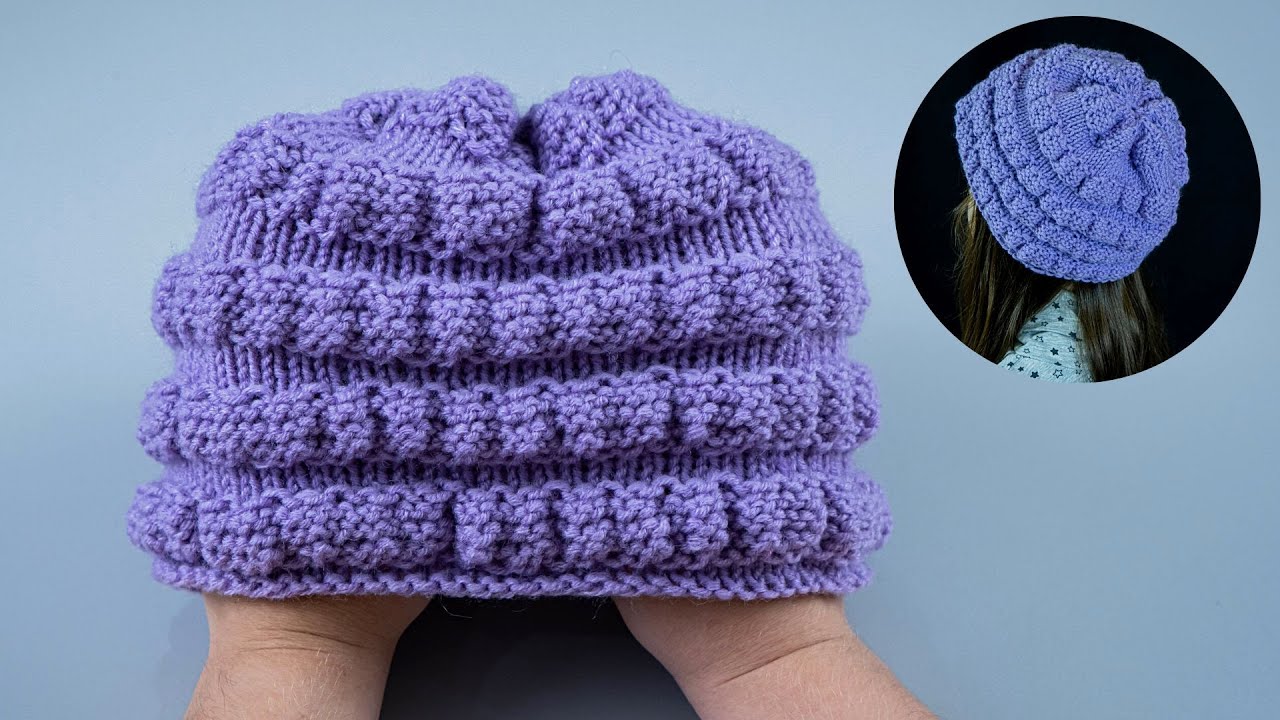
by Here’s a detailed, beginner-friendly guide for making a voluminous (puffy) knitted hat using just 2 knitting needles. It’s simple, quick, and works up easily even for beginners 🧶✨
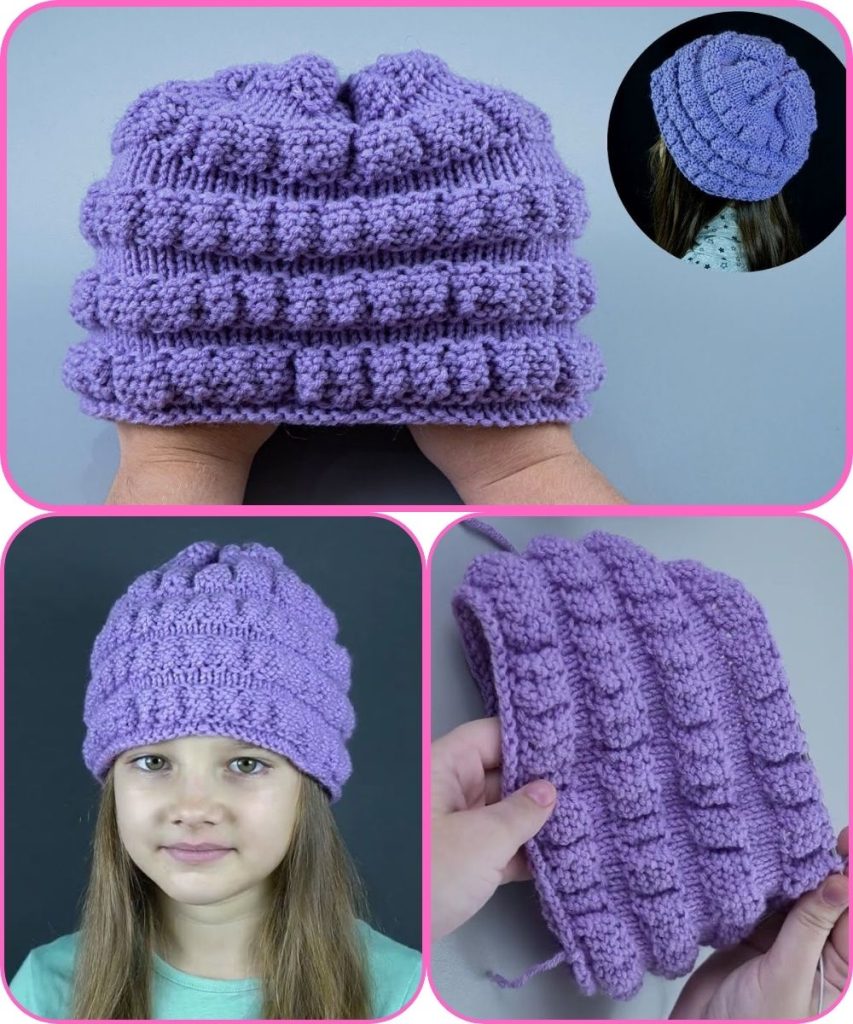
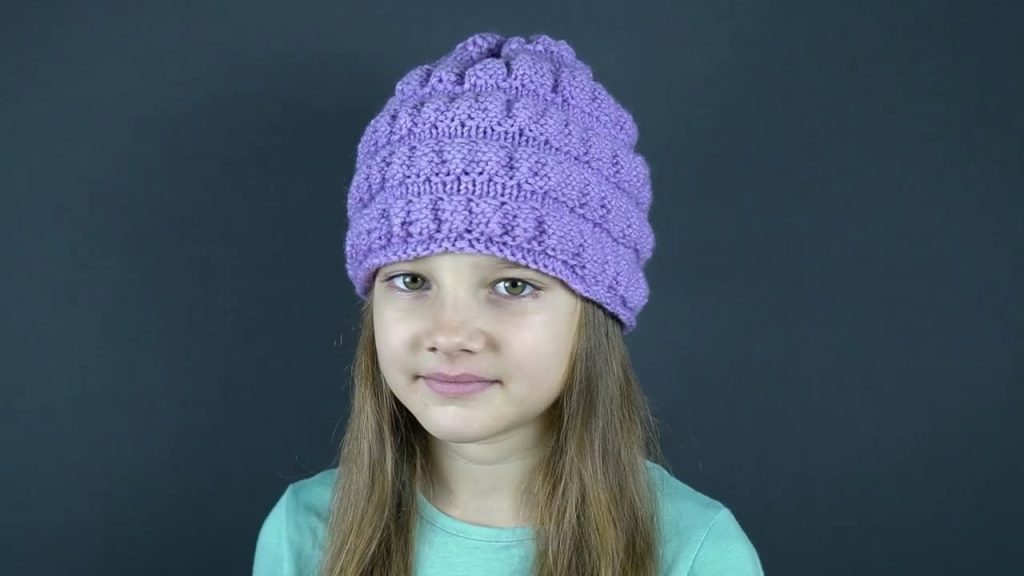
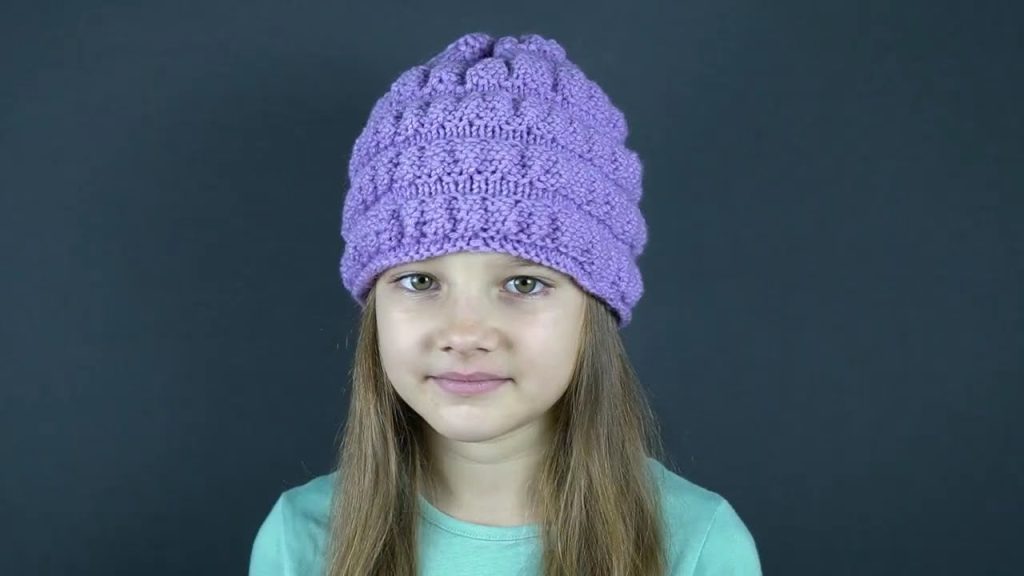
How to Make a Voluminous Knitted Hat on 2 Needles – Simple & Quick
Skill Level
Beginner (basic knitting stitches only)
Finished Size
- Adult medium: 20–22 inches (51–56 cm) circumference
- Adjustable for children or larger heads
Materials Needed
- Yarn: Bulky or medium-weight yarn (Category 4 or 5)
- Bulky yarn helps the hat knit up quickly and gives a voluminous look
- Knitting needles: 2 straight needles, size US 9–11 (5.5–8 mm)
- Yarn needle for weaving in ends
- Scissors
Knitting Stitches Used
- k – knit
- p – purl
- k2tog – knit two together (decrease)
- st(s) – stitch(es)
This hat uses stockinette stitch (alternating knit and purl rows) for the body and a slightly looser tension to create volume.
Step 1: Cast On
- Cast on 60–70 stitches (depending on yarn thickness and head size)
- Keep stitches relaxed, not too tight, for a voluminous effect
Step 2: Knit the Brim (Optional Ribbing)
- Row 1: K1, P1 across
- Repeat for 1–2 inches
- This makes a stretchy, snug brim
Skip ribbing if you want a simple straight edge.
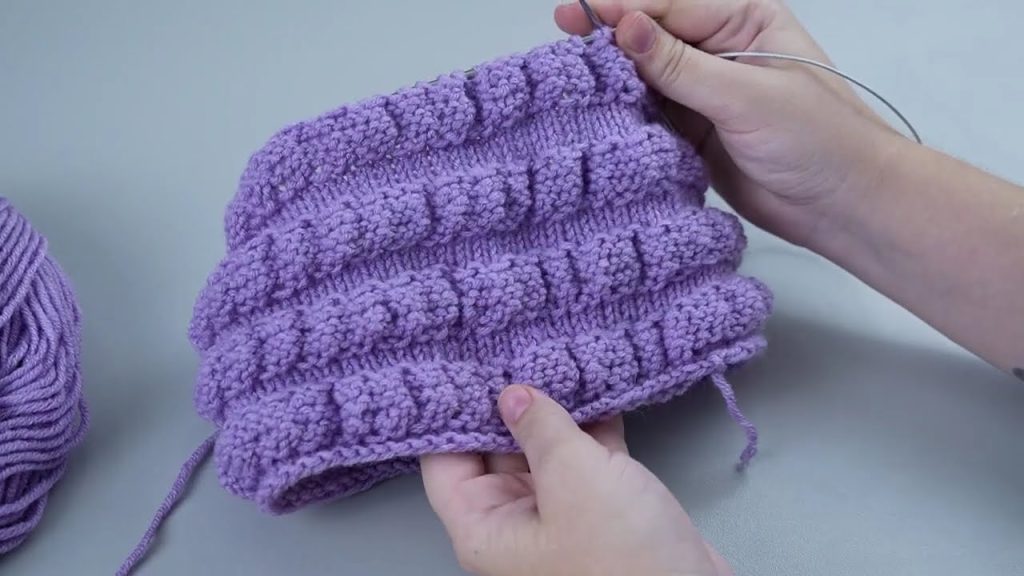
Step 3: Knit the Body
- Work in stockinette stitch:
- Row 1: Knit all stitches
- Row 2: Purl all stitches
- Repeat these two rows until the hat measures 6–7 inches from the cast-on edge
- For more volume, keep a slightly loose tension while knitting
Step 4: Decrease for the Crown
- Row 1: K8, k2tog repeat across the row
- Row 2: Purl all stitches
- Row 3: K7, k2tog repeat
- Row 4: Purl all stitches
- Continue decreasing in this manner (reduce one stitch between decreases each decrease row) until about 10–12 stitches remain
Step 5: Finish the Hat
- Cut yarn, leaving a 6–8 inch tail
- Thread yarn through a yarn needle and pull through remaining stitches
- Pull tight to close the top
- Weave in all loose ends
Step 6: Add Extra Volume (Optional)
- Gently stretch the hat or block it lightly
- Use bulky yarn for naturally puffier stitches
- Pair with a pom-pom on top for more playful volume
Beginner Tips
- Keep your tension relaxed for a soft, puffy look
- Bulky yarn knits faster and adds natural volume
- Count stitches carefully during decreases
- Try on the hat as you go if possible
Customization Ideas
- Use striped yarn or alternating colors
- Add a pom-pom or tassel on top
- Make a slouchy version by knitting longer before decreases
- Crochet or knit a matching scarf for a set
🎉 Congratulations! You now have a quick, simple, and voluminous knitted hat using only 2 needles. Perfect for cozy winter wear, gifting, or experimenting with colors and textures.
I can also make a super-easy one-page printable version with row-by-row counts and decrease rounds, so it’s even easier to follow step by step.
Watch tutorial: