 by
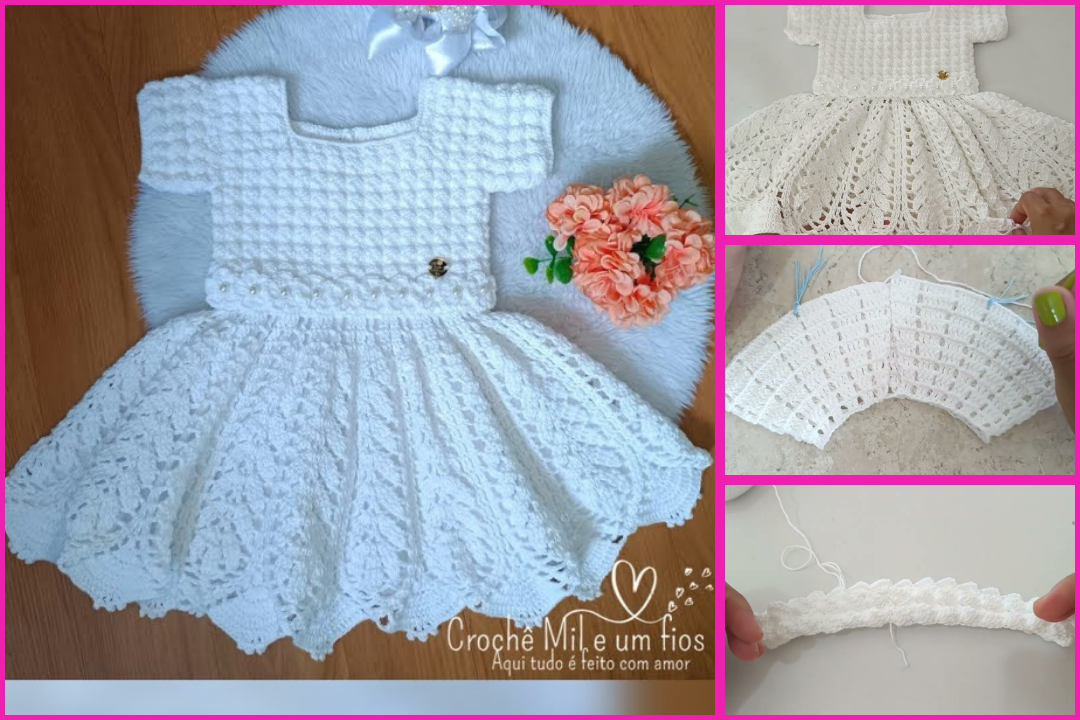
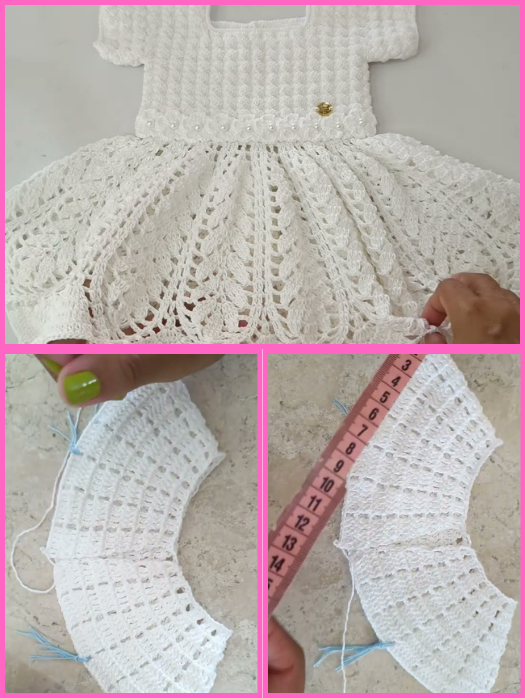
by Making a children’s crochet dress is a fun and creative project that allows you to design something personal and handmade for a child. Below is a detailed guide covering materials, pattern structure, sizing tips, and step-by-step instructions suitable for beginners to intermediate crocheters.
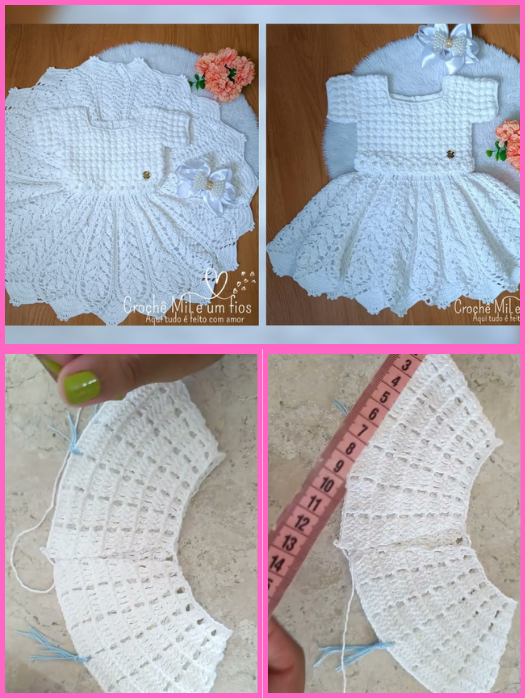
🧵 How to Make a Children’s Crochet Dress (Step-by-Step)
🧺 Materials Needed
| Item | Description |
|---|---|
| Yarn | Soft, lightweight yarn like cotton, bamboo, or baby acrylic yarn (DK/Light Worsted weight is ideal). |
| Crochet Hook | Size recommended on yarn label (usually 3.5 mm – 4.5 mm for DK). |
| Stitch Markers | To mark beginning of rounds or important points. |
| Tapestry Needle | For weaving in ends. |
| Buttons or Ribbon | Optional, for closures or decoration. |
| Measuring Tape | For sizing the child or following pattern dimensions. |
🧶 Understanding the Construction
A crochet children’s dress can be made in two main ways:
- Top-Down (Seamless Yoke) – starts at the neck and works downwards, often in the round.
- Bottom-Up – starts at the hem and works up, sometimes in panels sewn together.
For this tutorial, we’ll focus on the Top-Down method as it’s the most flexible and popular.
📏 Sizing Guide (Approximate)
| Age | Chest (inches) | Dress Length |
|---|---|---|
| 6–12 mo | 18″ | 14–16″ |
| 1–2 yrs | 20″ | 16–18″ |
| 2–3 yrs | 21″ | 18–20″ |
| 4–5 yrs | 23″ | 20–22″ |
🔹 Always measure the child if possible or refer to a standard size chart.
🧵 Basic Stitches Used
- Chain (ch)
- Single Crochet (sc)
- Half Double Crochet (hdc)
- Double Crochet (dc)
- Slip Stitch (sl st)
- Shell Stitch (for decorative skirts)
🪡 Pattern: Simple Toddler Crochet Dress (Top-Down)
Skill Level: Beginner to Intermediate
Fits: 1–2 years old (20″ chest)
🔹 Yoke (Top Part)
- Foundation Chain: Ch 56. Join to form a ring. (Optional: Work back and forth to add buttons later).
- Round 1: Ch 2 (counts as dc), dc in each ch around. Join with sl st. (56 dc)
- Round 2–6: Increase evenly every 7–8 stitches to form a circular yoke. Use stitch markers at corners if working raglan style (divide stitches into 4 sections – front, back, sleeves).
- Armholes:
- Ch 4–6 (for underarm), skip stitches for sleeve (e.g., 14 stitches), and continue working on the body in the round.
🔹 Bodice (Main Body)
- Rounds 7–20: Continue working in dc or hdc around to desired length.
- Optional: Add texture with a shell stitch pattern or puff stitches.
🔹 Skirt (Flared Bottom)
- Round 21: Begin increasing to flare skirt. (e.g., 2 dc in every 3rd stitch).
- Rounds 22–30: Work in shell stitch for a ruffled effect:
- Shell stitch: [2 dc, ch 1, 2 dc] in the same stitch, skip 2, repeat.
- Final Round: Work a decorative edge (picot, scallop, or simple sc).
🔹 Finishing
- Fasten off, weave in all ends.
- Attach buttons or ribbon if back opening is used.
- Lightly block to shape the dress (especially for cotton yarn).
🎨 Optional Add-Ons
- Sleeves: Add puff sleeves or cap sleeves with dc or shell stitch rounds.
- Bows or Flowers: Crochet small appliqués and sew them on.
- Ruffles: Add ruffles on the hem or neckline.
📌 Tips for Success
- Use soft, washable yarn—especially for babies and toddlers.
- Check gauge before starting to ensure the correct size.
- Keep trying the dress on (or measuring) during progress if possible.
- Keep patterns simple and comfortable—no scratchy seams or tight necklines.
Watch video: