 by
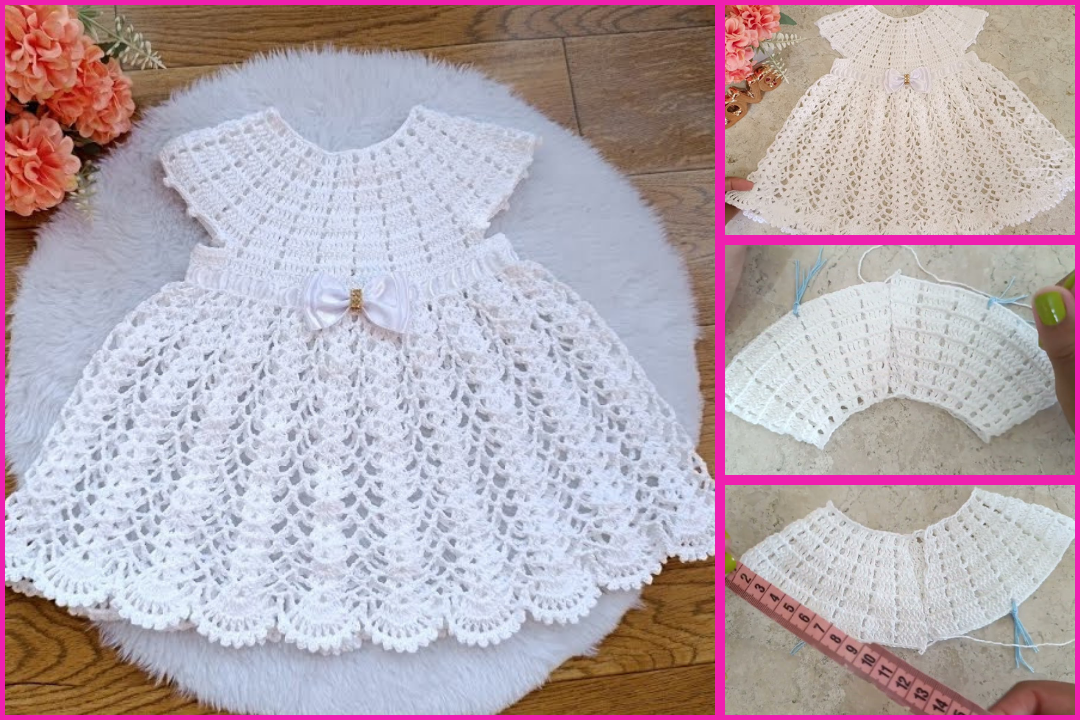
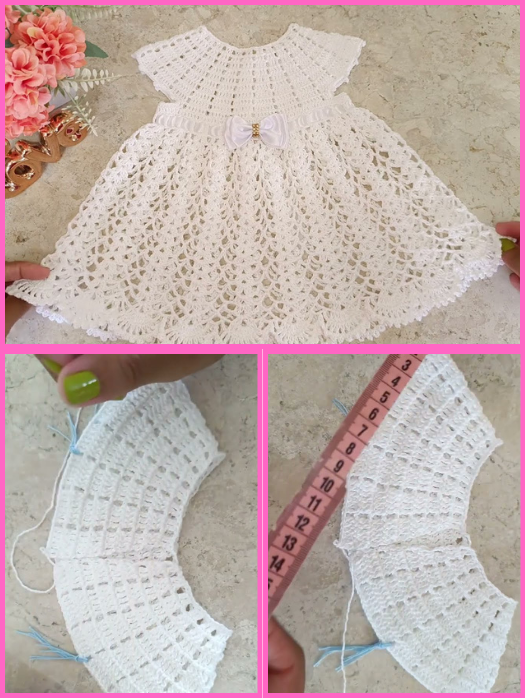
by Certainly! Here’s a detailed, step-by-step guide on How to Make the Luna Crochet Dress — a graceful and stylish dress perfect for girls or women, featuring a boho-chic and romantic look with lightweight yarn, flowing lines, and intricate stitches. This article is ideal for intermediate to advanced crocheters who want to make a timeless handmade garment.
🌙 How to Make the Luna Crochet Dress
A beautiful bohemian crochet dress for every season
The Luna Crochet Dress is a stunning, lightweight, and elegant dress inspired by moonlit romance and bohemian charm. Designed to be flattering and flowy, it can be worn as a summer dress, beach cover-up, or layered with a slip for formal events. With its mix of mesh, lace, and shaping details, it’s both comfortable and eye-catching.
In this tutorial, you’ll learn how to make your own Luna Dress from start to finish — including the materials, stitch techniques, sizing tips, and customization ideas.
🧵 Skill Level
Intermediate to Advanced
You should be comfortable with:
- Shaping (increases and decreases)
- Reading a stitch chart or following a pattern with repeats
- Working in the round and flat
📐 Construction Overview
The Luna Dress is worked top-down, beginning with a circular or square yoke. The body flows outward into a gentle A-line or flared skirt. The sleeves are optional and can be short, bell-shaped, or sleeveless. The dress can be customized in length — mini, midi, or maxi.
Two Common Styles:
- Boho Maxi Dress: Long and flowy with lace skirt panels
- Beach Mini Dress: Short, breezy, and open-mesh for layering over swimwear
🧶 Materials
Yarn:
- Type: Fingering weight (Category 1) or lightweight cotton/bamboo blend yarn
- Yardage:
- Mini (Size S): 800–1000 yards
- Midi (Size M): 1000–1300 yards
- Maxi (Size L–XL): 1300–1600+ yards
Suggested Yarns:
- Scheepjes Whirl
- Drops Cotton Light
- Hobbii Rainbow Cotton 8/4
Hook:
- 3.0 mm to 3.5 mm (US D or E) depending on gauge
Notions:
- Stitch markers
- Measuring tape
- Tapestry needle
- Optional: Ribbon or waist cord
💫 Stitches Used (US Terms)
- Ch – Chain
- Sl st – Slip stitch
- Sc – Single crochet
- Dc – Double crochet
- Tr – Treble crochet
- V-stitch – (dc, ch 1, dc) in the same stitch
- Shell – 5 dc in the same stitch
- Mesh Stitch – (dc, ch 1, skip 1)
📏 Size Guide
| Size | Bust (inches) | Waist (adjustable) | Length (custom) |
|---|---|---|---|
| S | 32–34 | Drawstring | 33–55+ inches |
| M | 36–38 | Drawstring | 33–55+ inches |
| L | 40–44 | Drawstring | 33–55+ inches |
Tip: Crochet is very stretchy. You can size slightly down for a tighter fit or up for a flowy look.
🧵 Instructions: Making the Luna Crochet Dress
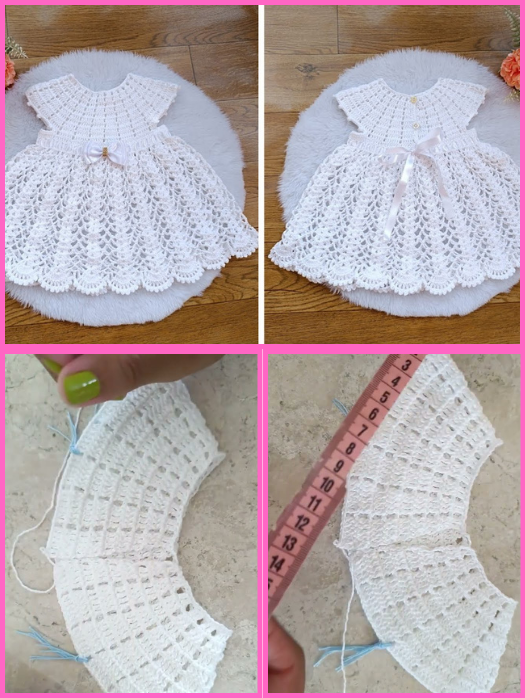
🌙 Step 1: Yoke (Top Down)
- Foundation Chain: Ch a multiple of 8 (e.g., 96 ch for Size M), join with sl st.
- Round 1–5: Work in dc rounds with increases at 8 points to form the circular or square yoke.
- Use V-stitch or Shell Stitch in alternating rounds to create a lace pattern.
Example Yoke Repeat:
vbnetCopyEditRound 1: Ch 3 (counts as dc), dc in each ch around, join.
Round 2: *dc in 10 sts, 2 dc in next st* around.
Round 3: V-st in each st around.
Round 4: Dc in each dc and ch space.
Repeat until the yoke measures from collar to underarm (~6–8 inches).
🌙 Step 2: Split for Sleeves
- Mark your sleeve openings with stitch markers.
- Continue crocheting across the front, skipping stitches for the sleeve (place on stitch holders or skip them).
- Join with a chain across the underarm (~5–10 ch depending on size).
🌙 Step 3: Body of the Dress
Switch to your lace pattern (e.g., mesh stitch or alternating shells and v-stitches).
Mesh Stitch Pattern:
vbnetCopyEditRound 1: Ch 3 (counts as dc), *ch 1, skip 1, dc in next* around.
Round 2: Repeat pattern to desired length.
Optional: Shell-Lace Panel Pattern:
luaCopyEditRound A: *Sc in next st, skip 2, 5 dc in next st (shell), skip 2* repeat.
Round B: *Sc in center dc of shell, shell in previous sc* repeat.
Shape: To flare the skirt, increase gradually by adding extra chains in mesh rounds or extra shells between stitch groups.
🌙 Step 4: Sleeves (Optional)
- Join yarn at the underarm.
- Work in rounds of lace or dc to desired sleeve length:
- Short cap sleeve
- Flared bell sleeve
- Long sleeve (add wrist decrease)
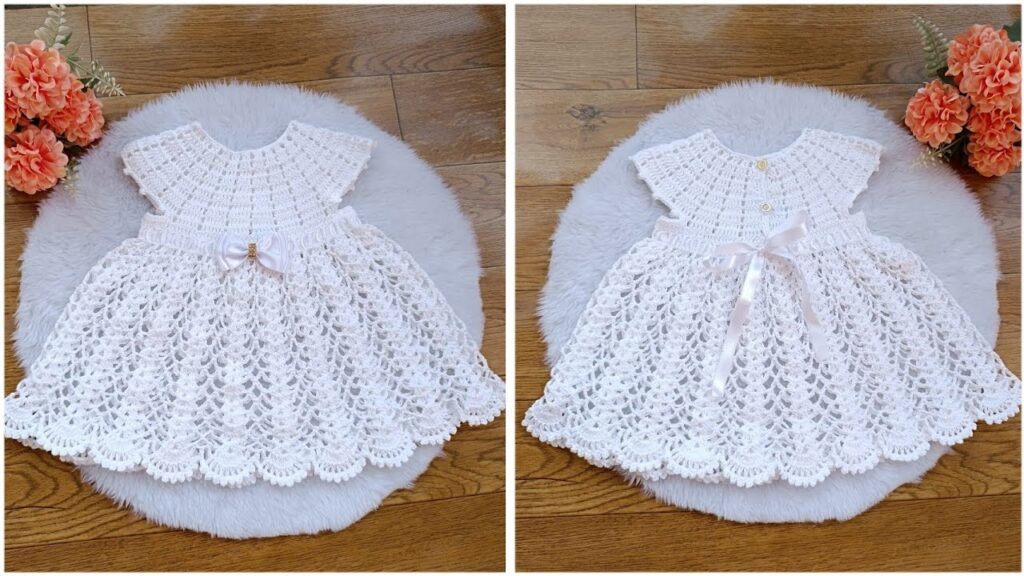
🌙 Step 5: Edging & Finishing
- Neckline: Work 1 round of sc or picot edging.
- Sleeves: Optional shell or scallop edging.
- Hemline: Add a decorative border like:
- Shell stitch
- Picot edge
- Fringe
- Waist Tie (Optional): Crochet a long chain and weave through eyelets or waistline to cinch.
🧼 Blocking & Care
- Soak in lukewarm water with mild detergent.
- Lay flat to dry on a towel or blocking mat.
- Pin out lace sections if needed.
🎨 Customization Ideas
| Feature | Ideas |
|---|---|
| Color | Ombre yarn, solid, stripes |
| Sleeves | Sleeveless, flared, lacework |
| Length | Mini, midi, or floor-length |
| Layering | Add a sewn cotton slip |
| Accessories | Belt, ribbon, boho jewelry |
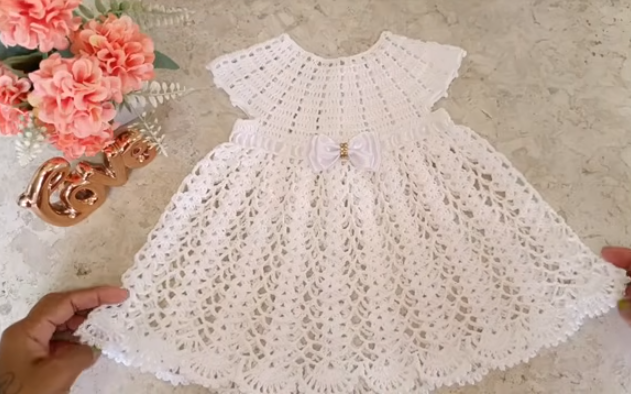
🌟 Final Thoughts
The Luna Crochet Dress is more than just a dress — it’s a wearable piece of art that showcases your skills and style. With its breezy lace texture, flattering silhouette, and celestial charm, it’s ideal for festivals, beach days, summer evenings, or even handmade weddings.
This project is relaxing yet rewarding, especially when you see it come together stitch by stitch. Don’t be afraid to customize and add your own signature touches — after all, your Luna Dress should shine as uniquely as you do.
Watch video: