 by
by Sure! Here’s a clear, beginner-friendly detailed guide you can use as a blog post, tutorial, or caption.
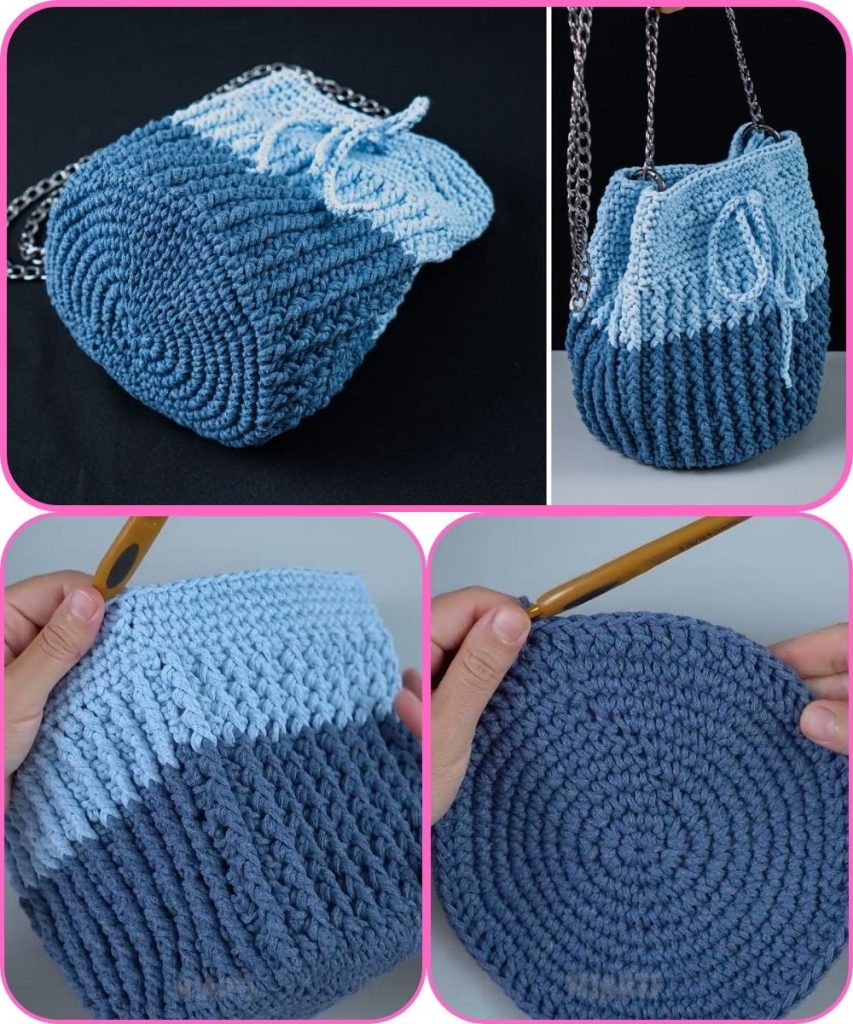
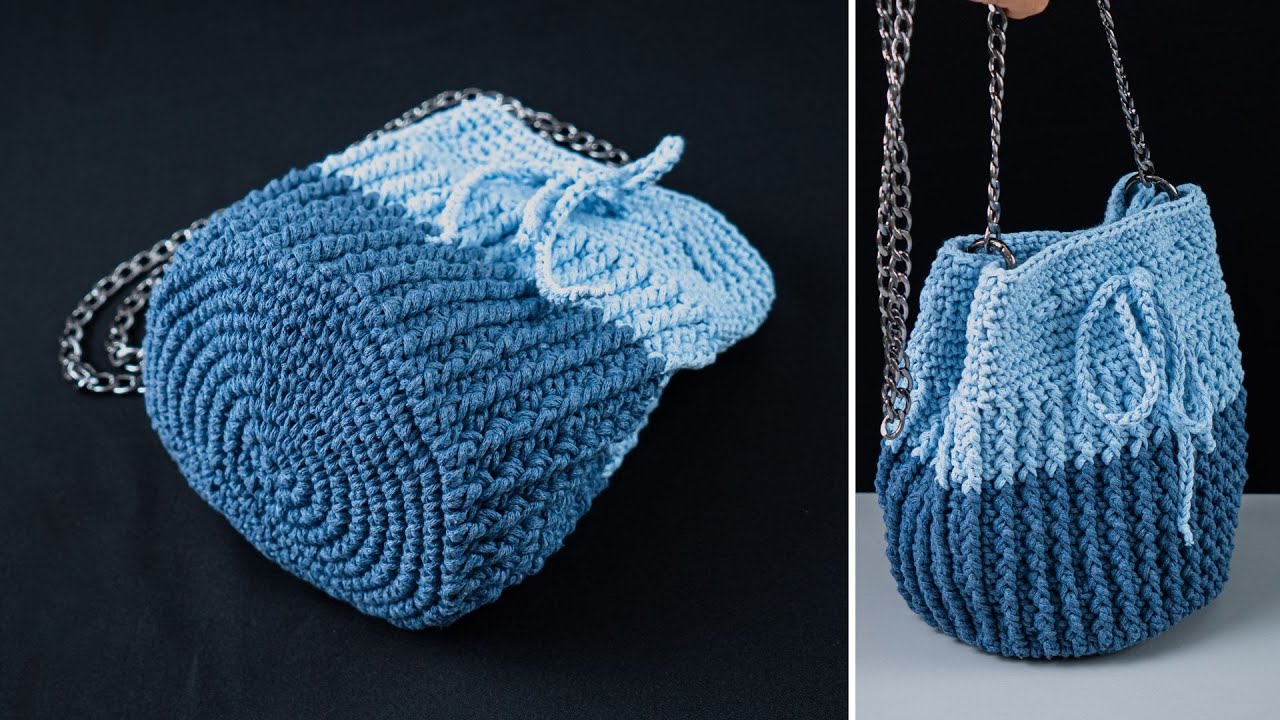
How to Crochet a Cute Mini Bag Easily 🧶✨
Crocheting a mini bag is a fun and beginner-friendly project that’s both stylish and practical. With just a few basic stitches, you can create a cute handmade accessory perfect for daily use or gifting. Follow this simple step-by-step guide to make your own mini crochet bag!
🧵 Materials You’ll Need
- Medium-weight yarn (cotton yarn works best for bags)
- Crochet hook (usually 4–5 mm, depending on yarn)
- Scissors
- Yarn needle
- Stitch marker (optional)
- Button, zipper, or magnetic snap (optional)
- Lining fabric (optional)
📘 Basic Crochet Stitches Used
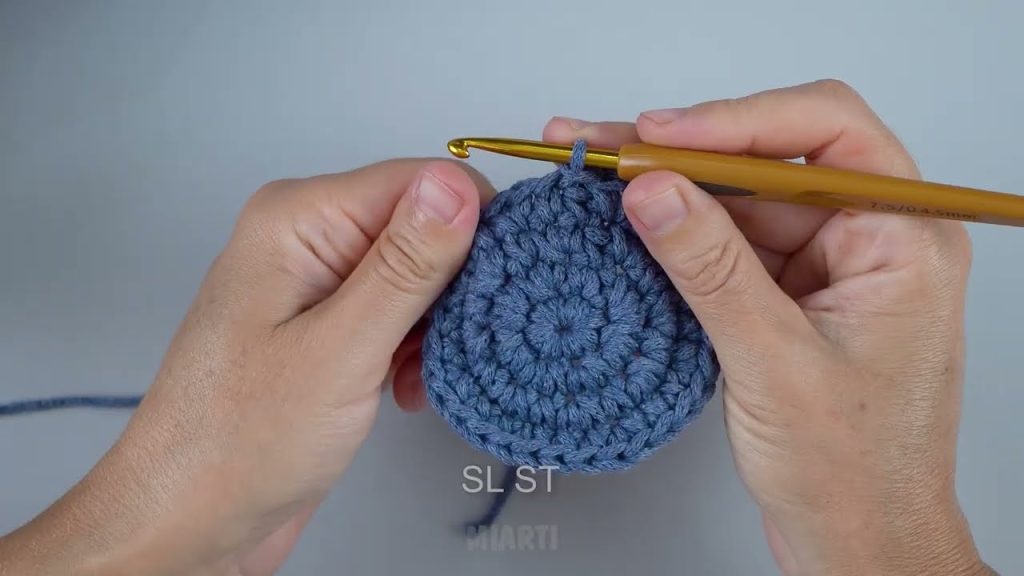
- Chain (ch)
- Slip stitch (sl st)
- Single crochet (sc)
- Half double crochet (hdc) or Double crochet (dc)
💡 If you’re a beginner, don’t worry! These stitches are easy to learn and widely used in simple crochet projects.
🪄 Step-by-Step Instructions
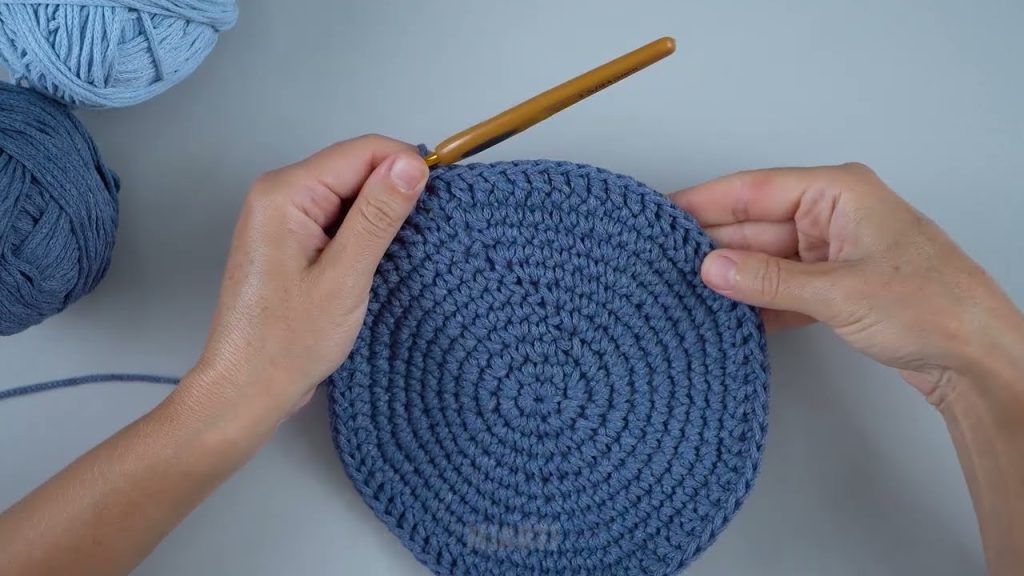
Step 1: Make the Base
- Start by making a foundation chain (about 15–20 chains, depending on how wide you want your bag).
- Crochet single crochet (sc) into the second chain from the hook.
- Continue sc across.
- At the last chain, add 3 sc to turn the corner.
- Crochet along the other side of the chain.
- Join with a slip stitch to form an oval base.
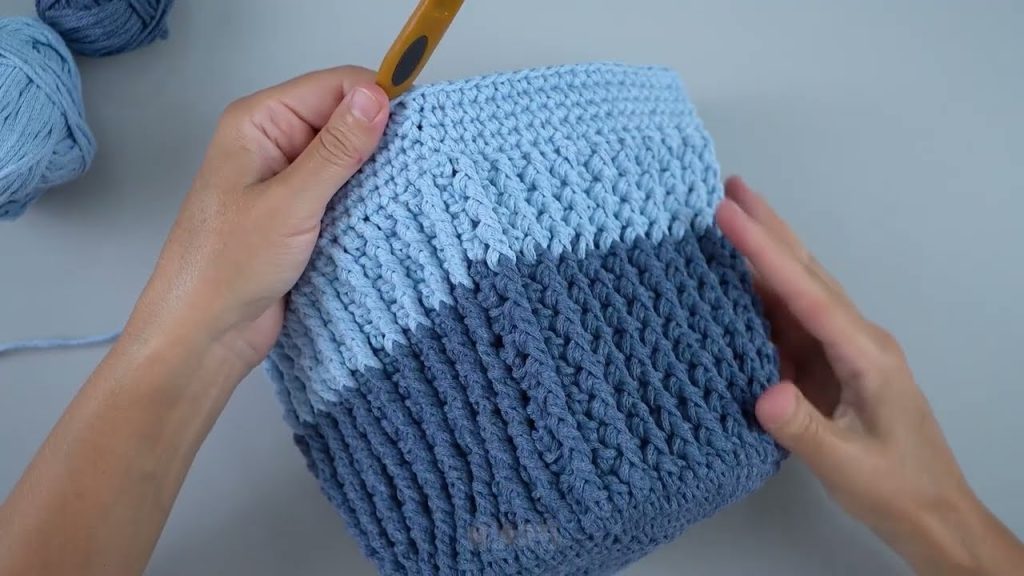
Step 2: Crochet the Bag Body
- Chain 1, then crochet single crochet in each stitch around.
- Do not increase—this helps the sides go up.
- Continue crocheting in rounds until the bag reaches your desired height.
- Usually 10–15 rounds is perfect for a mini bag.
Step 3: Create the Strap
Option 1: Built-in Strap
- Chain 40–60 stitches.
- Attach to the opposite side of the bag.
- Single crochet back along the chain for strength.
Option 2: Separate Strap
- Crochet a long strip separately.
- Sew it onto the bag using a yarn needle.
Step 4: Add a Closure (Optional)
- Sew on a button and create a small loop.
- Attach a zipper or magnetic snap for a polished look.
Step 5: Finish & Decorate
- Weave in all loose ends.
- Add fun details like:
- Tassels
- Crochet flowers
- Beads or charms
🌸 Tips for Beginners
- Use light-colored yarn so stitches are easier to see.
- Keep your tension relaxed.
- Count your stitches to keep the shape neat.
- Practice stitches before starting the bag.
🎉 Final Thoughts
Crocheting a cute mini bag is quick, relaxing, and super rewarding. You can customize colors, sizes, and decorations to match your style. With a little practice, you’ll have a beautiful handmade bag in no time!
If you want, I can also:
- Simplify this into a short pattern
- Turn it into a YouTube script
- Adjust it for kids or absolute beginners
Watch tutorial: