 by
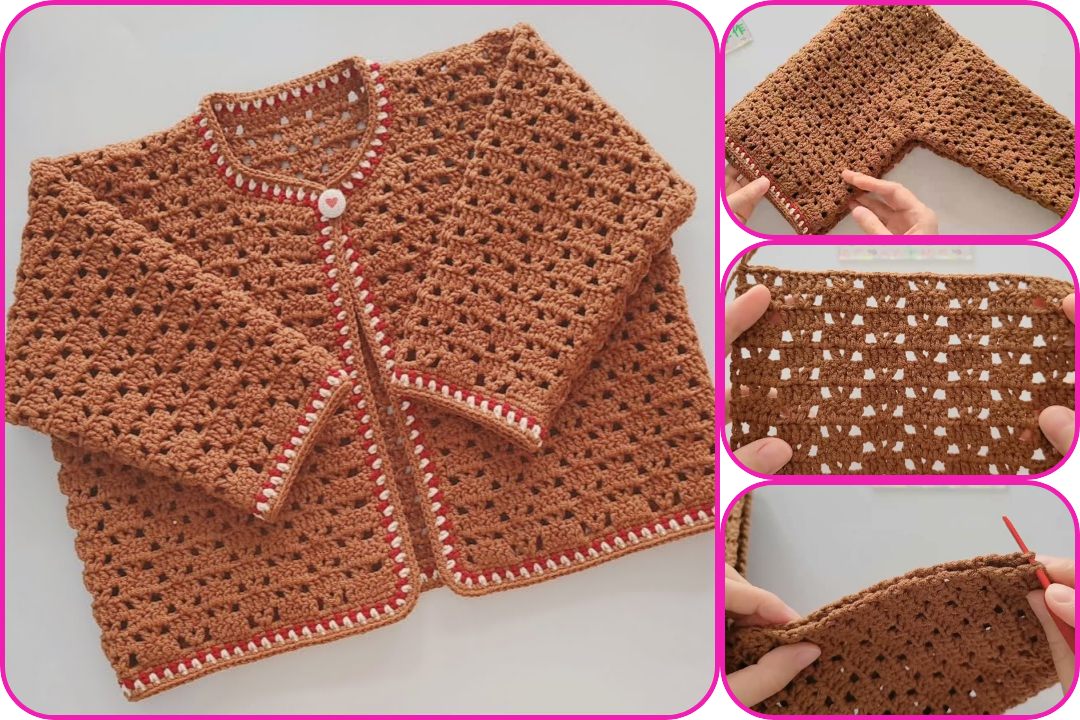
by Sure! Here’s a detailed guide on how to make a crochet Chanel-style single-button cardigan, designed to be gender-neutral so it can be worn by both boys and girls.
🧶 How to Make a Crochet Chanel-Style Single-Button Cardigan (Unisex)
✨ Features:
- Chanel-inspired: Clean lines, elegant edging, and structured fit.
- Unisex Design: Simplified silhouette, neutral colors, and versatile styling.
- Single-button Closure: Minimalistic yet stylish.
- Customizable: Can be made in various sizes and colors.
🧵 Materials Needed:
- Yarn: Medium weight (category 4) yarn, such as cotton blend or acrylic (approximately 800–1200 yards depending on size).
- Choose a neutral or classic color: ivory, navy, grey, black, or beige.
- Hook: 4.5 mm or 5.0 mm crochet hook (adjust to fit gauge)
- Yarn needle (for weaving ends)
- Stitch markers
- Scissors
- 1 Large decorative button (classic or minimalist design)
- Measuring tape
🧷 Stitches & Techniques Used:
- Chain (ch)
- Slip Stitch (sl st)
- Single Crochet (sc)
- Half Double Crochet (hdc)
- Double Crochet (dc)
- Back Loop Only (BLO) (for ribbing)
- Seaming (whip stitch or mattress stitch)
- Optional: Surface slip stitch for decorative trim
📏 Sizing (Adjustable)
You can adjust for:
- Chest width
- Body length
- Sleeve length
Start by measuring the wearer or using a standard sizing chart. This pattern will outline a child’s size 4-6 (approx.), but adjustments are easy with measurements.
🪡 Pattern Outline (Basic Construction):
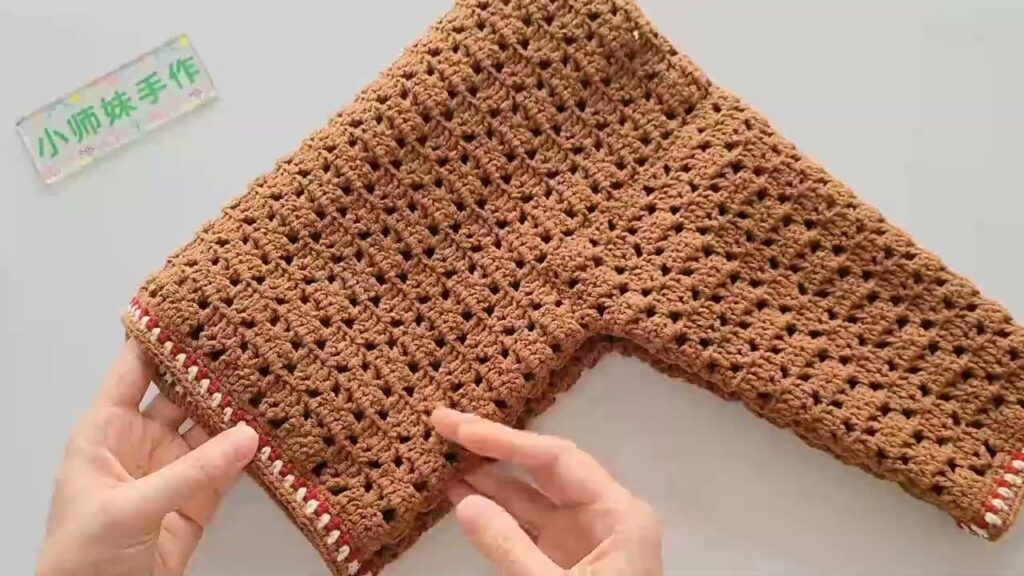
1. Back Panel
- Foundation Row: Chain the width of the back panel (e.g., 60 ch = ~15”)
- Body: Work in hdc rows until you reach desired length from shoulder to hem (e.g., 40 rows = ~12”)
- Fasten off and weave in ends.
2. Front Panels (Make 2)
- Chain half the back panel width + 4 stitches (to overlap at button point)
- Work in hdc rows to same length as back panel
- Leave neckline shaping for last 4 rows by decreasing 1-2 stitches each row on the inner edge
3. Sleeves (Make 2)
- Chain to desired wrist width (e.g., 28 ch)
- Work in hdc rows, increasing 1 stitch every 4 rows on both sides until desired sleeve width is reached (usually 30–36 rows)
- Optional: Use BLO hdc at the cuff for ribbed texture
4. Shoulder Seams
- Align front and back panels
- Seam shoulders using whip stitch or preferred method
5. Attach Sleeves
- Pin sleeve center to shoulder seam
- Seam around armhole
6. Side Seams & Underarms
- Seam from bottom hem up to underarm
- Then seam sleeve underside
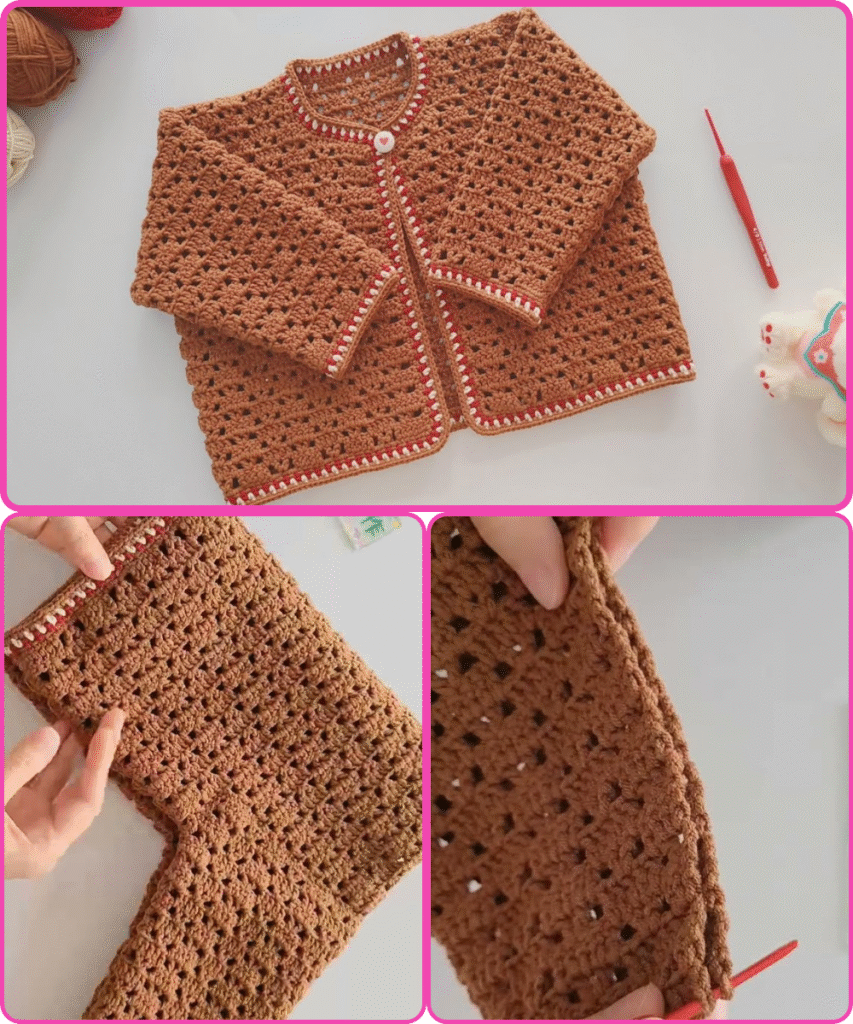
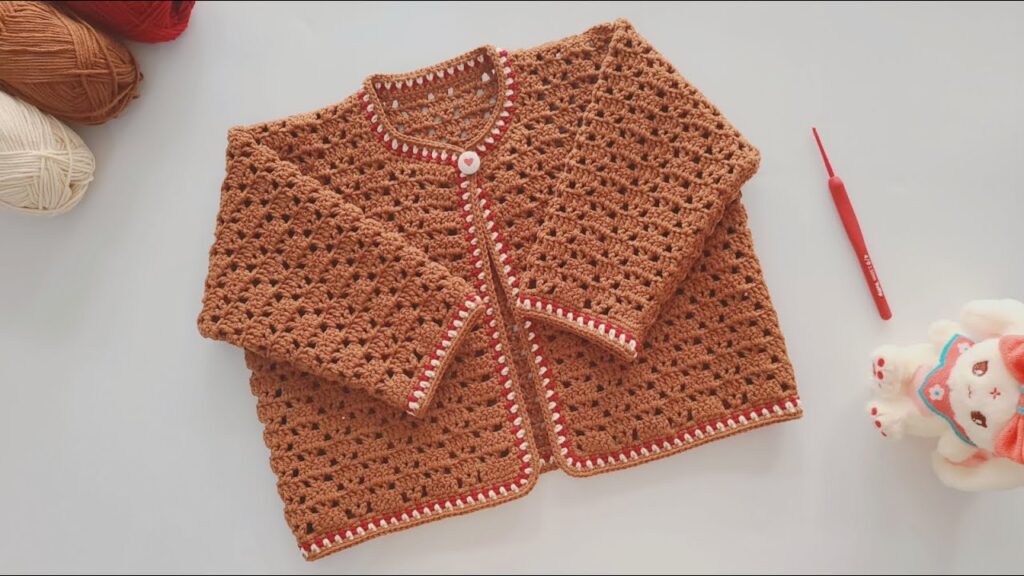
🎀 Edging (Chanel-Style Look)
- Use contrasting or same-color yarn
- Work 1–2 rounds of sc or surface slip stitch along:
- Hem
- Sleeve cuffs
- Front openings
- Neckline
- For a more “Chanel” look, add a simple braided chain trim or tweed-style flecks by using multi-colored yarn or surface crochet.
🔘 Button Loop & Button
- Button Loop:
- At neckline on right panel (or left, depending on buttoning preference)
- Ch 8–12 and sl st to the same stitch to form a loop
- Sew Button:
- On opposite panel
- Align with loop
🪶 Optional Finishing Touches
- Shoulder Pads: Add soft padding if a more structured silhouette is desired
- Lining: For a luxe look, hand-sew soft cotton fabric lining
- Pockets: Create small patch pockets using the same stitch and sew to the front
🧼 Care Instructions
- Hand wash or gentle machine wash
- Lay flat to dry
- Store folded, not hung (to avoid stretching)
🧩 Tips for Unisex Appeal
- Stick to neutral tones or classic patterns (no floral or overly lacy designs)
- Keep trim minimal and simple
- Use flat buttons or toggles instead of decorative ones
- Avoid cinched waists or frills
Watch video: