 by
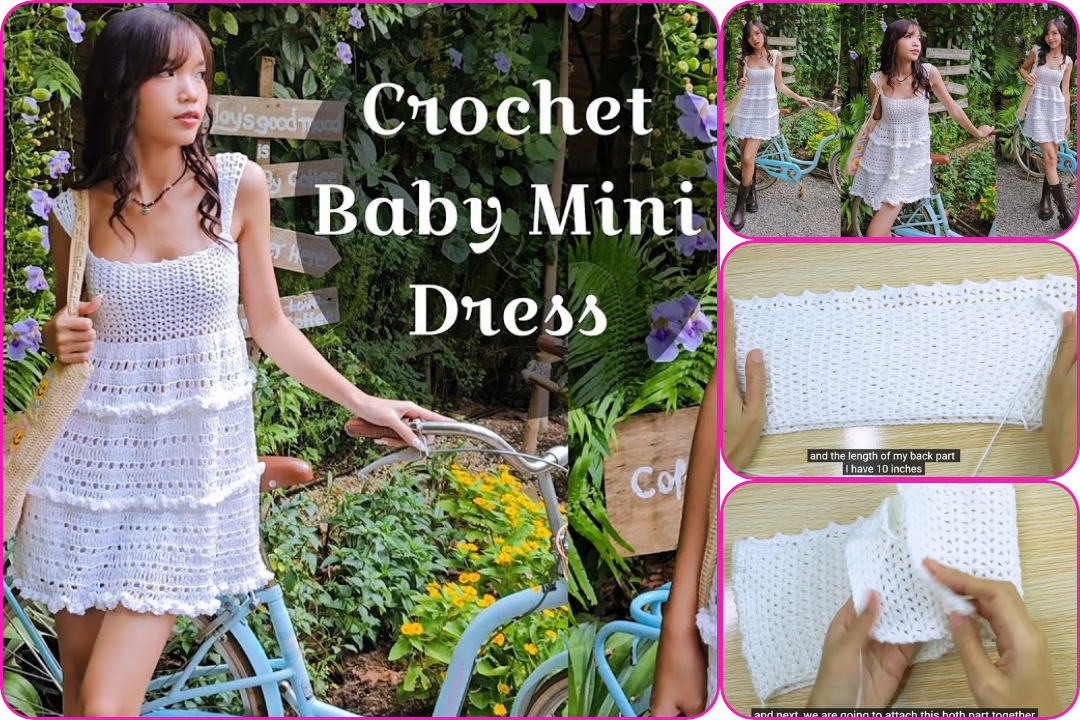
by Absolutely! Here’s a detailed step-by-step tutorial on how to make a crochet baby mini dress, perfect for beginners and intermediate crocheters. This guide will walk you through a simple top-down yoke-style baby dress, customizable for newborn to toddler sizes.
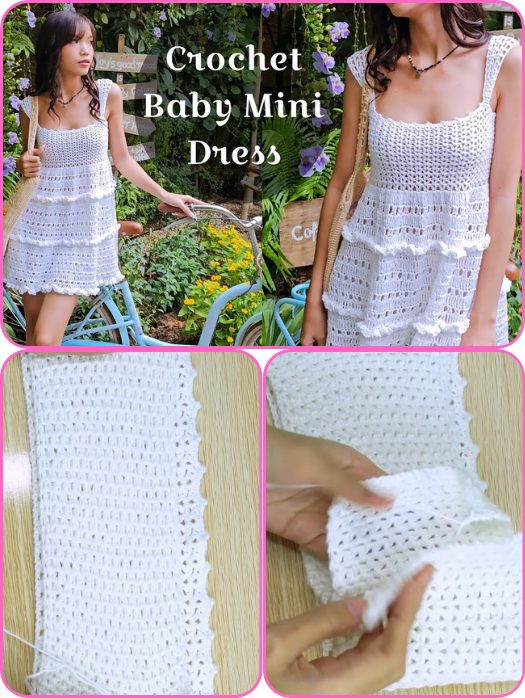
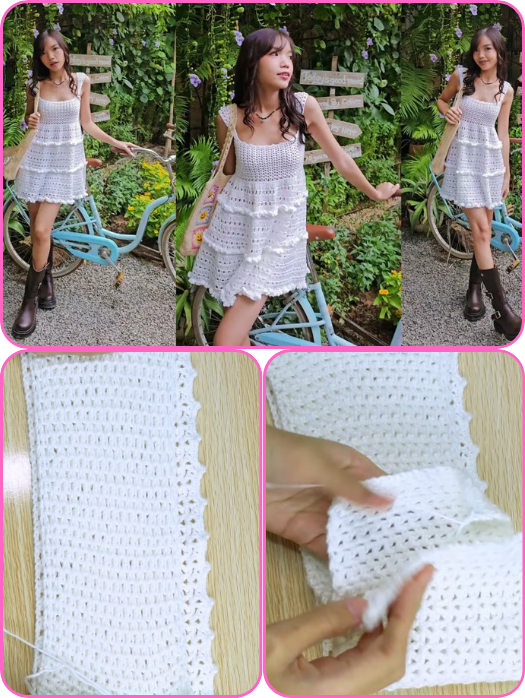
🧶 Crochet Baby Mini Dress Tutorial (Easy Pattern)
👶 Size:
This pattern is written for 0–6 months. You can adjust the size by using larger hooks or increasing your starting chain (I’ll include a sizing guide below).
🧵 Materials Needed:
- Yarn: Light worsted or DK weight cotton or cotton blend yarn (approx. 200–250g for 0–6 months)
- Crochet hook: 4.0 mm (G-6) or size needed to meet gauge
- Stitch markers
- Scissors
- Tapestry needle
- Buttons (optional, for back closure)
🪡 Stitches Used (US Terms):
- ch – chain
- sl st – slip stitch
- sc – single crochet
- dc – double crochet
- inc – increase (2 dc in same stitch)
✨ Pattern Structure:
This is a top-down raglan style dress, worked in one piece from neckline down. You’ll start at the yoke, create armholes, then continue working in rounds for the skirt.
🧶 Step-by-Step Instructions:
🟣 Step 1: Yoke (Neck to Underarms)
Foundation Chain:
Ch 54. (This fits 0–6 months. For larger sizes, see adjustments below.)
Row 1:
- Dc in 4th ch from hook and across. (You’ll have 52 dc)
- Ch 2, turn.
Row 2 (Create Raglan Lines):
Use stitch markers to separate the yoke as follows:
- 8 sts (front)
- 1 st (raglan)
- 8 sts (sleeve)
- 1 st (raglan)
- 16 sts (back)
- 1 st (raglan)
- 8 sts (sleeve)
- 1 st (raglan)
- 8 sts (front)
➡️ Increase (2 dc) in every raglan stitch.
Repeat for 5–7 rows, increasing at the raglan points each row, until the yoke comfortably wraps around baby’s chest and underarms.
🟣 Step 2: Split for Body and Sleeves
Once yoke is big enough:
- Work across the front
- Skip sleeve stitches
- Ch 5–7 (creates underarm space)
- Work across back
- Skip second sleeve
- Ch 5–7 again
- Continue to end of row
This forms the armholes and starts the body.
🟣 Step 3: Skirt Section
Now work in rounds:
Round 1:
- Join to first dc after chain space with sl st
- Ch 2 (counts as dc), dc in each stitch and each chain around
- Sl st to join
Round 2+:
- Ch 2, dc in each stitch around
- Optional: Every few rounds, increase by doing 2 dc in 1 stitch every 8–10 stitches to make the skirt flare.
🧁 Continue until the skirt reaches your desired length (usually 7–10” from underarm for 0–6 months)

🟣 Step 4: Sleeves (Optional)
You can leave it sleeveless or add tiny cap sleeves:
- Attach yarn at armhole
- Work 1–3 rounds of sc or dc
- Fasten off and weave in ends
🟣 Step 5: Finishing Touches
- Back Closure: Leave 3–4 stitches unjoined at the top back. Add a small button loop and sew on a button.
- Edging: You can add a scalloped edge (e.g., 5 dc in one st, skip 1, sl st in next) around hem and sleeves.
- Weave in ends with tapestry needle
📏 Size Adjustments (Estimates)
| Size | Starting Chain | Yoke Rows | Skirt Length |
|---|---|---|---|
| 0–3 months | 48–52 | 5 | 6–7″ |
| 3–6 months | 54–58 | 6 | 7–8″ |
| 6–12 months | 60–64 | 7 | 8–9″ |
| 1–2 years | 66–70 | 8 | 9–10″ |
🧺 Optional Embellishments:
- Add ribbon or a bow at the waist
- Change colors at the skirt for a striped or ombré look
- Use lace or shell stitch on the skirt for texture
🎥 Want a Video Version?
Let me know and I’ll find a few high-quality YouTube tutorials for this exact style.
Watch video: