 by
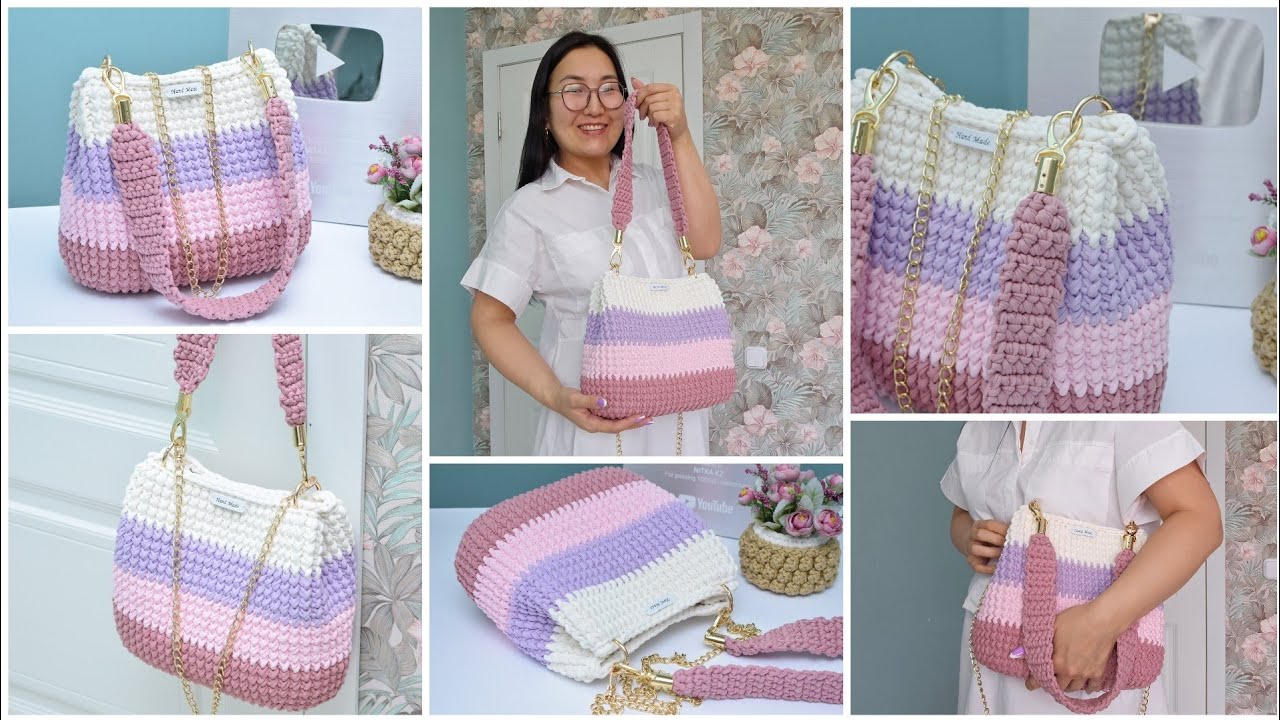
by Absolutely! Let’s go step-by-step through how to make a large crochet bag out of T-shirt yarn — a durable, stylish, and eco-friendly project perfect for beginners and experienced crocheters alike.
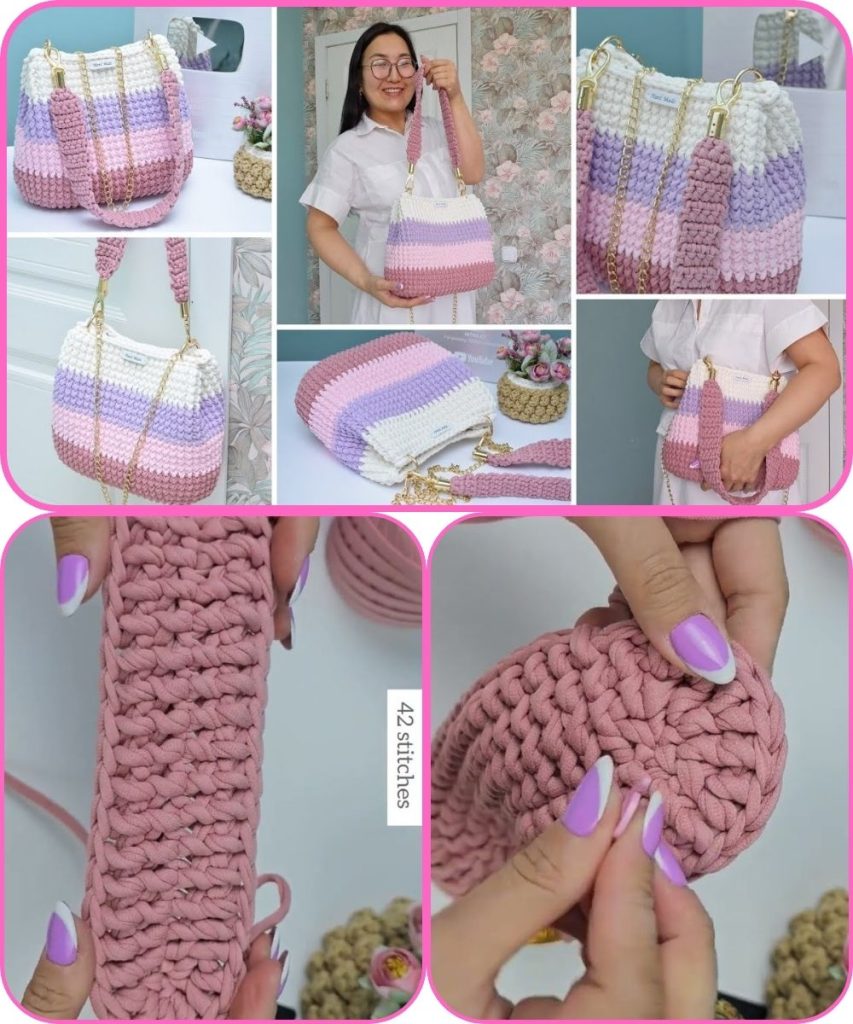
🧶 DIY Crochet Large Bag from T-Shirt Yarn
✨ Why T-shirt yarn?
T-shirt yarn (also known as “trapillo” or “Zpagetti”) is made from recycled fabric, often cotton jersey. It’s thick, stretchy, and soft — ideal for sturdy projects like bags, baskets, or rugs. It also works up quickly, which makes it great for a weekend project.
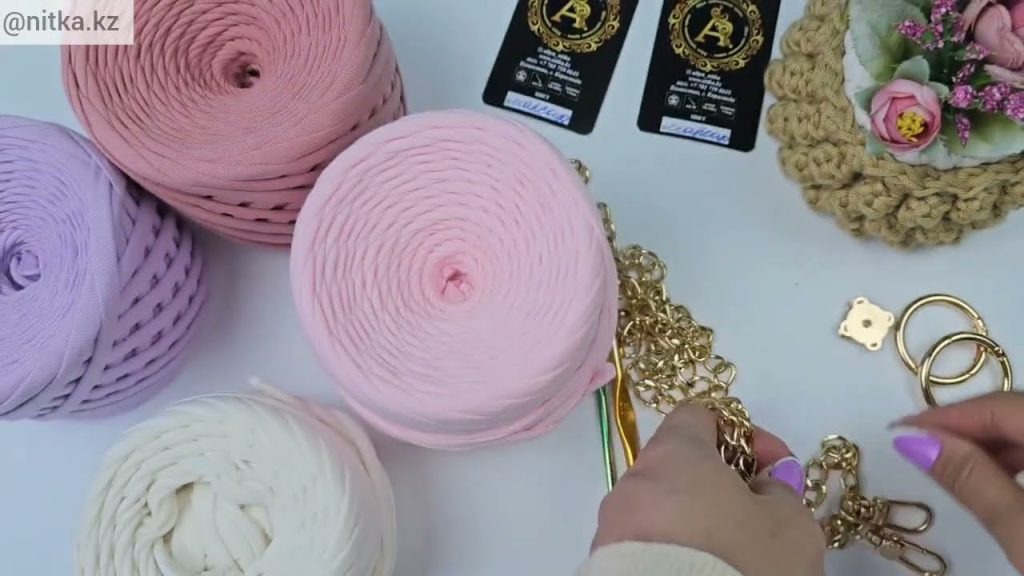
🪡 Materials You’ll Need
| Item | Details |
|---|---|
| 🧵 T-shirt yarn | 2–3 skeins (depends on size — about 600–800g total) |
| 🧶 Crochet hook | 8–10 mm (check yarn thickness) |
| ✂️ Scissors | For trimming ends |
| 🪡 Large yarn needle | For sewing and weaving in ends |
| 🧲 (Optional) Bag handles or strap rings | For a professional look |
| ✴️ (Optional) Lining fabric and sewing kit | To add lining inside the bag |
🧩 Pattern Overview
We’ll make:
- A flat oval base
- Body of the bag (worked in the round)
- Handles integrated or attached separately
🧵 Step-by-Step Instructions
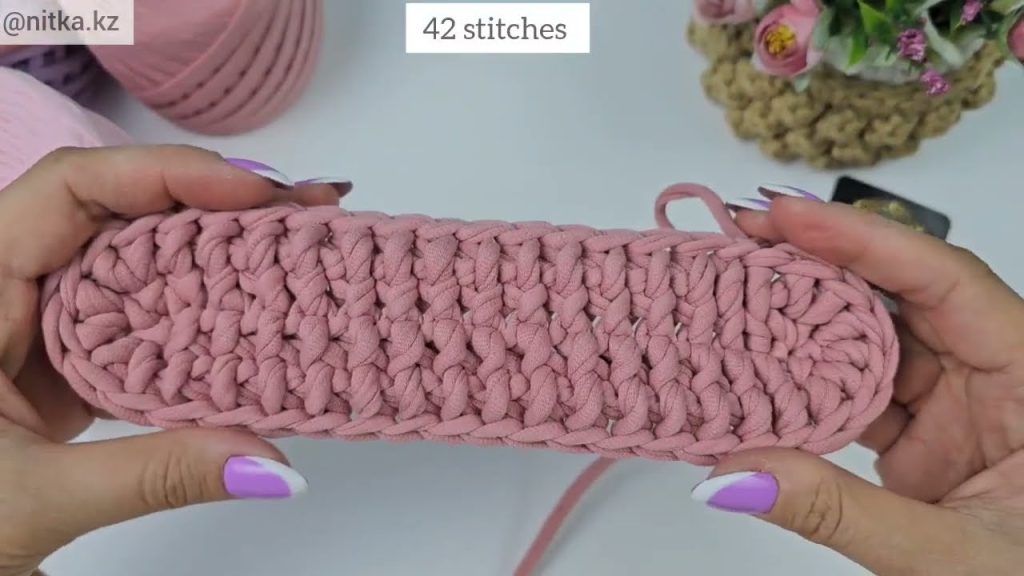
1. Make the Base (Oval Shape)
This gives your bag structure and stability.
- Start with a foundation chain:
Chain 16 (or adjust for desired bag width). - Round 1:
- Work 1 single crochet (SC) in the 2nd chain from hook and in each chain across.
- At the last stitch, work 3 SC into the same chain to curve around to the other side.
- Work SCs along the opposite side of the chain.
- At the last stitch, add 3 SC into the same chain.
- Join with a slip stitch to the first SC.
- Round 2–4:
- Continue working in the round, increasing at the 3 corner points (the ends of the oval) to keep it flat.
- Example: 2 SC in each of the 3 stitches at each end.
- Stop when the base is the size you want (usually 30–40 cm long for a large tote).
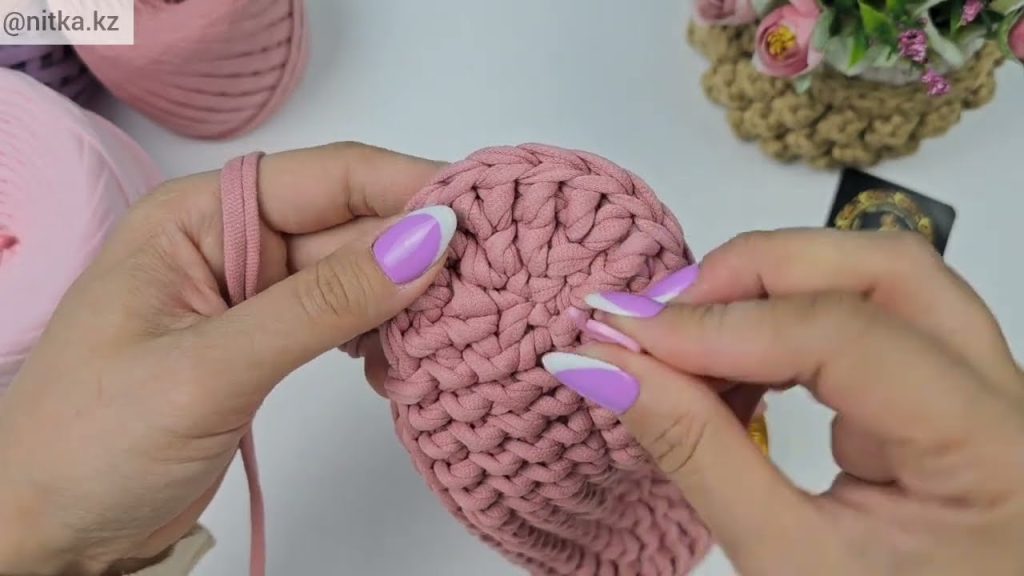
2. Crochet the Body of the Bag
- Round 1:
- Work 1 SC into the back loops only around the edge (this creates a clean base line).
- Slip stitch to join.
- Round 2–12 (or desired height):
- Work 1 SC in each stitch around.
- Continue without increasing — this will make the sides rise up.
- Keep your tension consistent for an even texture.
💡 Optional: For a different look, you can use half double crochet (HDC) or double crochet (DC) stitches for a more open texture.
3. Create Handles
There are two easy ways:
Option A: Built-in Handles
- When you reach the desired height, mark handle placements (about 10–12 stitches apart on both sides).
- Crochet SCs up to the first marker, chain 8–10 (for handle hole), skip the same number of stitches, and continue SCs.
- Repeat on the opposite side.
- On the next round, work SCs into the chains and all stitches to reinforce the handles.
Option B: Add Separate Handles
- You can sew or crochet on leather or wooden handles.
- Use strong thread or the same yarn for attachment.
4. Finishing Touches
- Weave in all yarn ends securely using a yarn needle.
- Shape the bag gently with your hands.
- (Optional) Sew a fabric lining inside for structure and to keep smaller items from poking through.
- (Optional) Add decorations like tassels, buttons, or patches.
🎨 Style Variations
| Look | How to Achieve It |
|---|---|
| Striped Bag | Use two or more colors of T-shirt yarn. Change color every few rows. |
| Beach Tote | Make the base wider and add rope handles. |
| Market Bag | Use DC stitches for a more open, airy pattern. |
| Crossbody Bag | Crochet a long strap separately and attach with metal rings. |
🧼 Care Instructions
- Hand wash gently with cool water.
- Do not wring — squeeze out excess water with a towel.
- Reshape and lay flat to dry.
💡 Tips for Success
- If the bag starts curling up at the base, you may need more increases.
- If it’s wavy, reduce the increases.
- Keep your tension loose — T-shirt yarn is stretchy and can become tight quickly.
- Use a hook size that slides smoothly through thick yarn (8–10 mm is ideal).
Watch tutorial: