 by
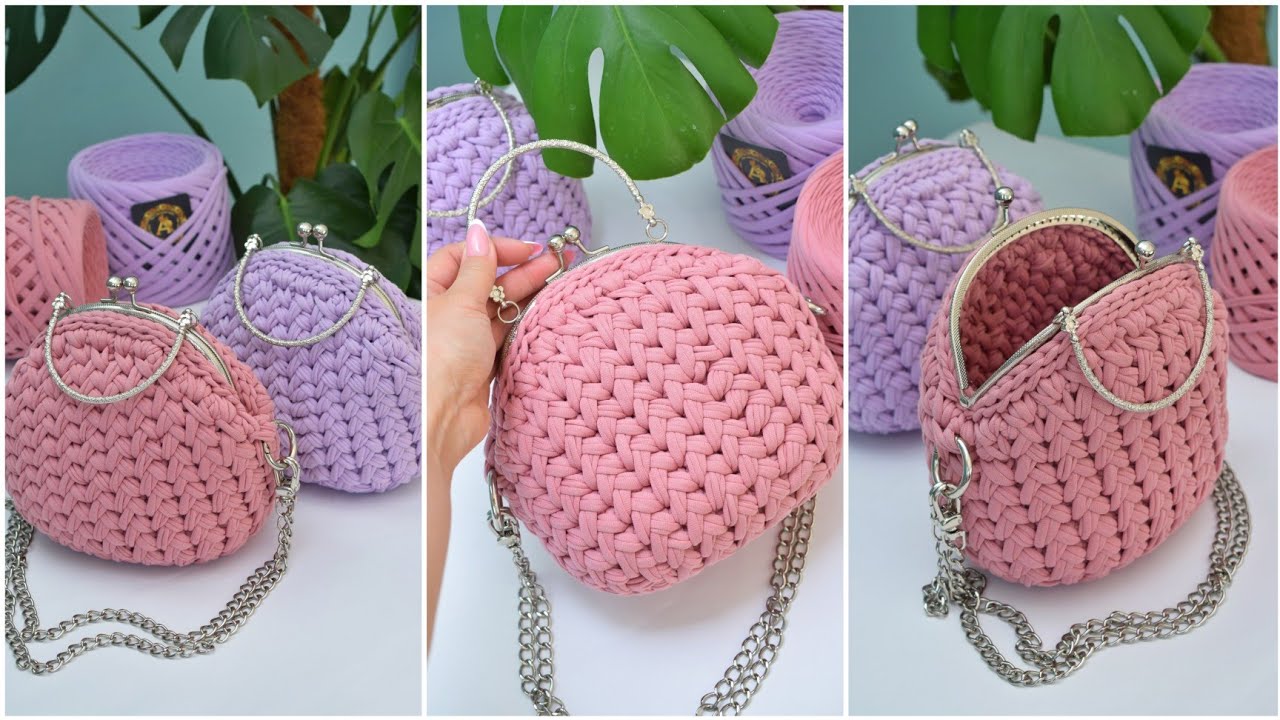
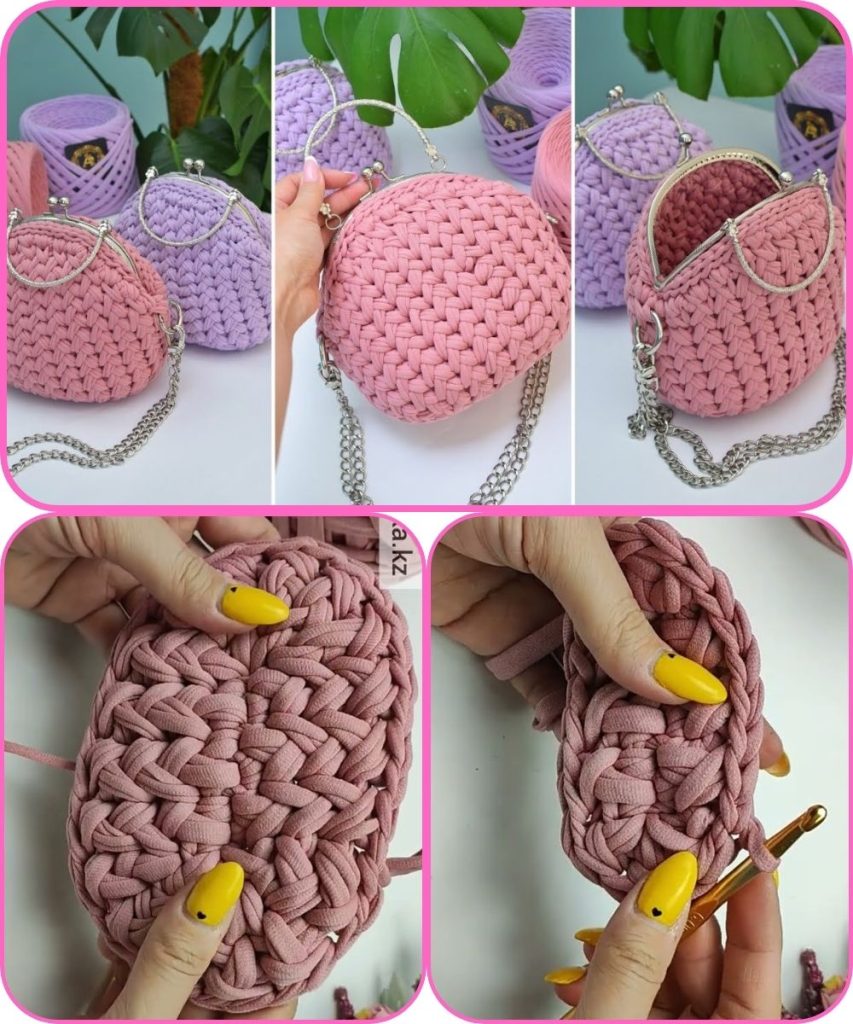
by Absolutely! Let’s go step by step and in detail on how to make a vintage crocheted handbag with a clasp featuring a beautiful pattern. I’ll break it down into materials, techniques, pattern ideas, and assembly so you have a clear, comprehensive guide.
Materials Needed
- Yarn
- Cotton yarn is ideal for structure and durability.
- You can also use mercerized cotton for a slightly glossy finish or a wool blend for a softer look.
- Weight: Sport (2) or DK (3) is common for vintage bags.
- Crochet Hook
- Usually, a size compatible with your yarn (e.g., 3.5mm–4.5mm for DK cotton).
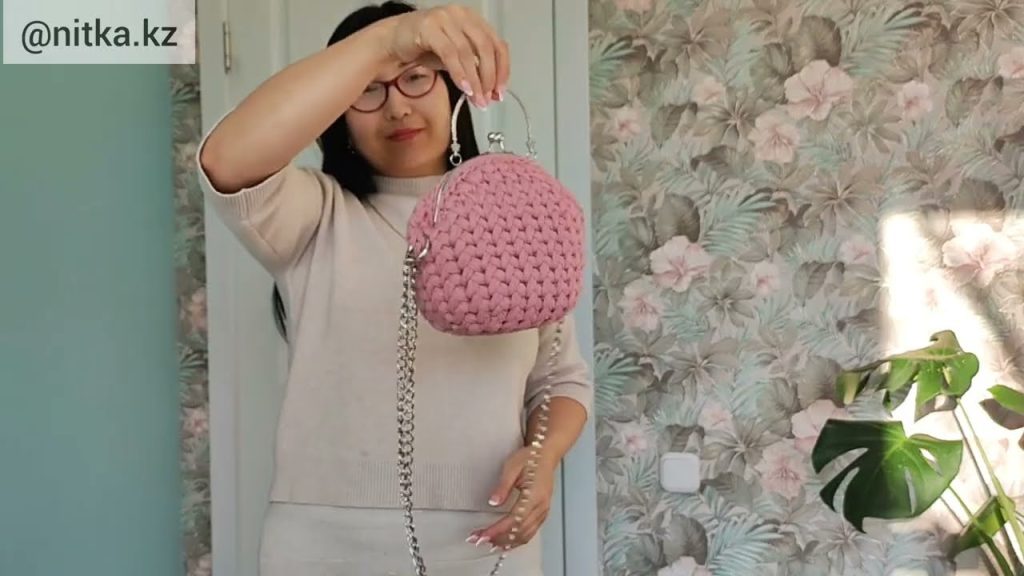
- Bag Frame / Clasp
- Metal clasp frames are common for vintage style.
- Choose a frame size that matches your bag width (e.g., 6–8 inches).
- Other Tools
- Yarn needle for sewing.
- Scissors.
- Stitch markers (optional).
- Lining fabric (optional for durability and neat finish).
Step 1: Choosing a Crochet Pattern
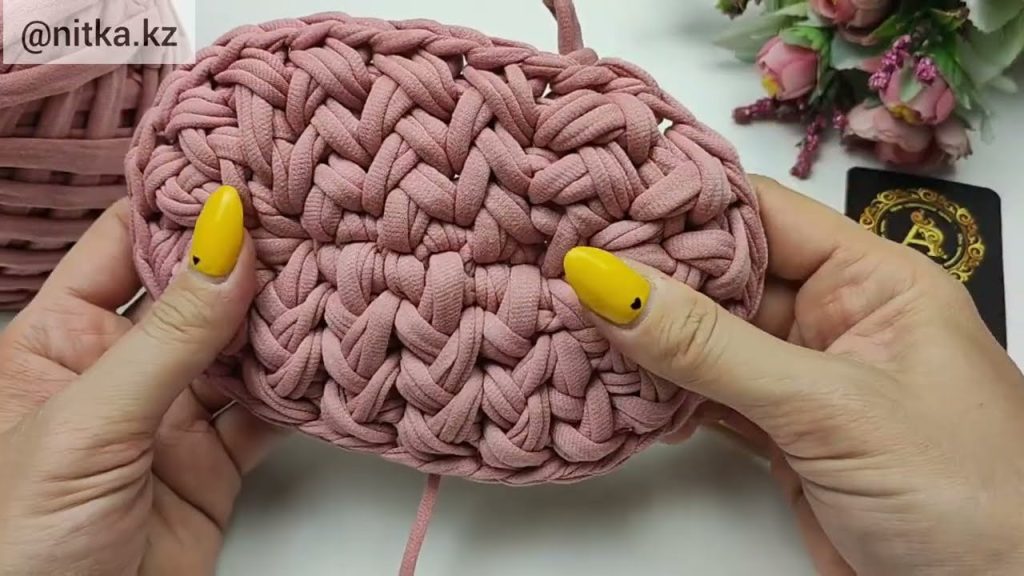
Vintage bags often feature these types of stitches:
- Granny Squares: Classic retro look; can join multiple squares.
- Shell Stitch: Beautiful scalloped patterns, perfect for a feminine touch.
- Pineapple Motif: Intricate, elegant and very vintage.
- Cluster or Popcorn Stitch: Adds texture and a “handmade” feel.
Tip: Decide whether you want a solid texture or a lacy/openwork design. Lacy patterns are beautiful but may need a lining.
Step 2: Crochet the Main Body
Here’s a general guide using a shell stitch pattern:
- Bottom of Bag
- Start with a foundation chain (length = desired width of bottom).
- Work in rows: Use half-double crochet (hdc) or single crochet (sc) for sturdiness.
- Example: Row 1: Sc across, Row 2: Increase at each end to widen slightly, Row 3: Repeat.
- Sides and Pattern
- Once the base is long enough, start the main pattern:
- Shell stitch: 5 dc in same stitch, skip 2 stitches, sc in next stitch, repeat across.
- Work in rounds or rows until you reach the desired height (usually 7–9 inches for a small to medium bag).
- Once the base is long enough, start the main pattern:
- Optional Shaping
- Slight taper at the top gives a classic vintage look.
- Reduce stitches gradually if you want the top narrower than the base.
Step 3: Adding the Lining (Optional but Recommended)
- Cut a fabric piece to the bag size with a little extra seam allowance.
- Sew the lining inside the bag.
- This prevents stretching, protects items inside, and gives a professional finish.
Step 4: Attaching the Clasp
- Position the bag
- Fold the top edge over the clasp, making sure the bag is evenly aligned.
- Sewing
- Use a strong thread (cotton or nylon) and a needle.
- Stitch through both bag and clasp holes, all the way around.
- Finishing
- Ensure the clasp opens and closes smoothly without catching the crochet fabric.
Step 5: Adding Straps (Optional)
- Short metal chain handles give a 1950s look.
- Long crocheted straps can also be attached to the sides.
- Use reinforced stitching for durability.

Tips for a Beautiful Finish
- Block the bag pieces before attaching to shape and even out stitches.
- Use contrasting or matching thread for sewing the clasp for subtle elegance.
- Decorative embellishments like beads, buttons, or crochet flowers can enhance the vintage style.
Summary
- Materials: Yarn, hook, clasp, needle, optional lining.
- Pattern: Shell, granny, pineapple, or cluster stitches.
- Crochet Base: Rectangle or oval bottom, then build sides with the pattern.
- Lining: Optional but gives structure.
- Clasp: Sew carefully, make sure it opens/locks smoothly.
- Straps & Decoration: Optional for vintage charm.
If you want, I can draft a full written-out pattern for a small vintage clasp handbag, including exact stitch counts and row-by-row instructions—basically ready to crochet from start to finish.
Watch tutorial: