 by
by Absolutely! Here’s a detailed, medium-level guide for making a diamond-pattern tote bag from T-shirt yarn using crochet. I’ll break it down step by step, including materials, techniques, and tips.
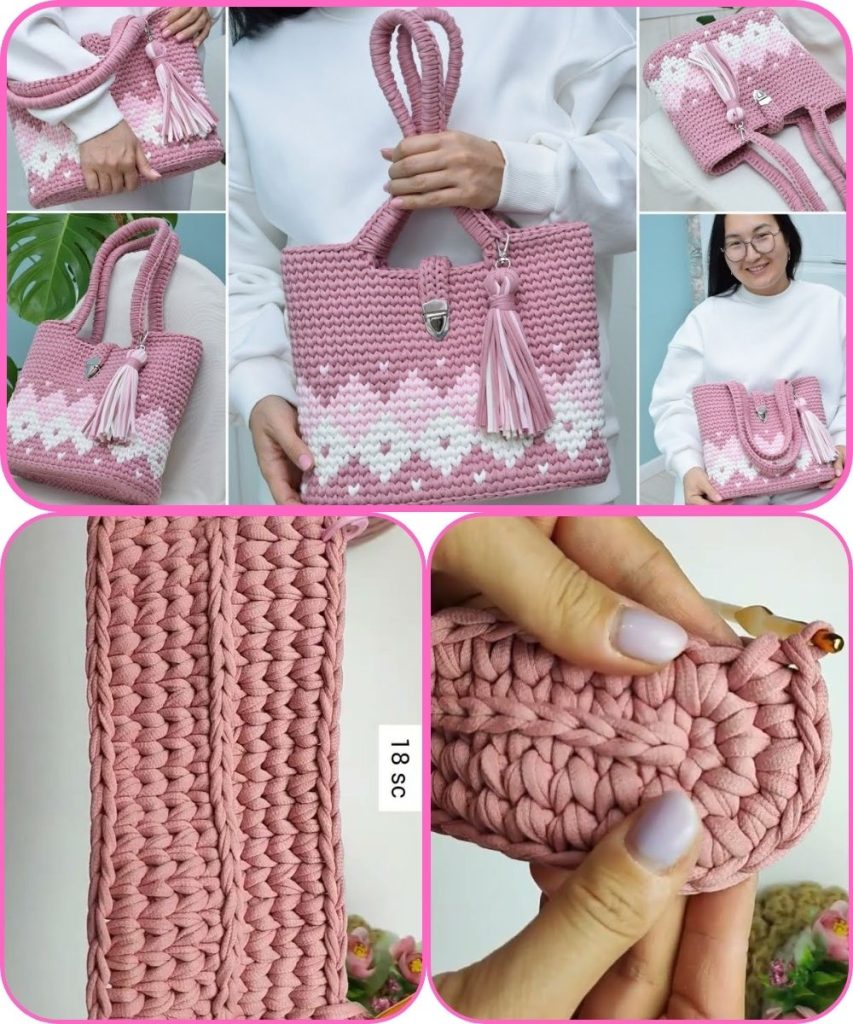
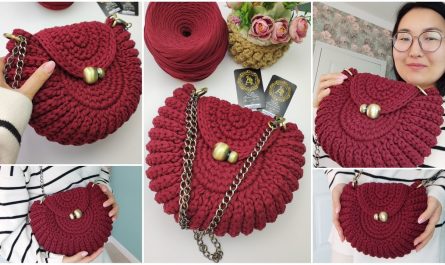
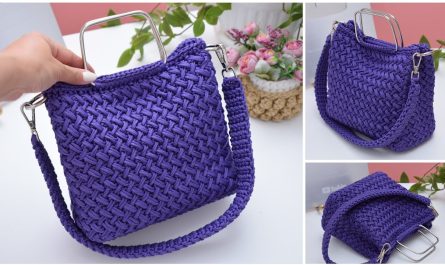
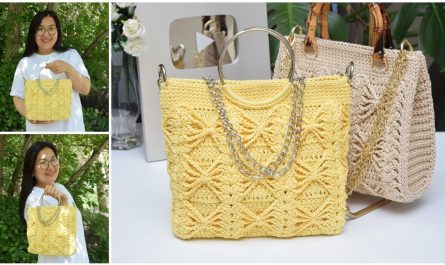
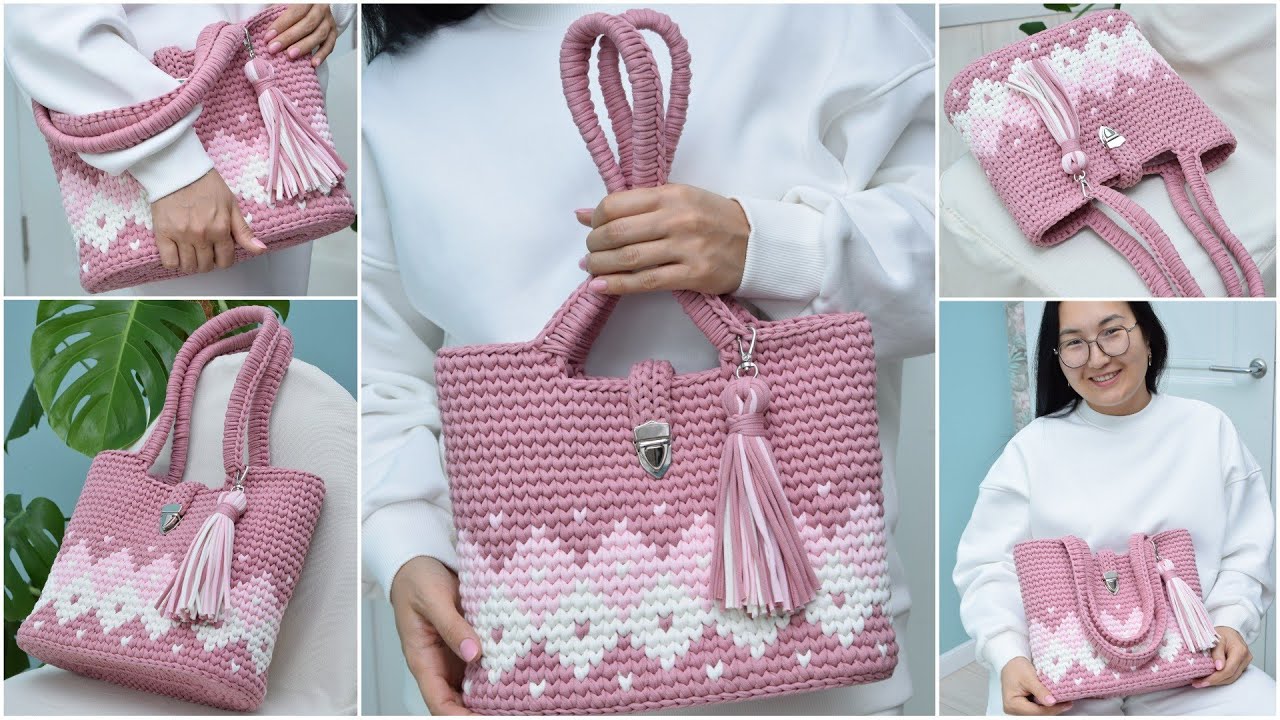
Diamond Tote Bag Using T-Shirt Yarn (Crochet)
Materials Needed
- T-shirt yarn: Approximately 500–700 g (depending on bag size; recycled T-shirts can also be used)
- Crochet hook: Size 8–12 mm (large enough for thick yarn)
- Scissors
- Measuring tape
- Stitch markers (optional)
- Tapestry needle (for weaving in ends)
Skill Level
Medium – This project requires familiarity with:
- Chain stitch (ch)
- Single crochet (sc)
- Double crochet (dc)
- Decreasing (sc2tog)
- Working in rounds and rows
- Creating a diamond pattern through increases/decreases or a filet-style technique

Step 1: Plan Your Bag
- Decide your bag size (example: 12 inches wide × 14 inches tall).
- For a diamond pattern, you can use increase/decrease technique or mesh filet style.
- A medium-level pattern: work a central diamond in filet-style double crochet (dc) surrounded by solid single crochet sides.
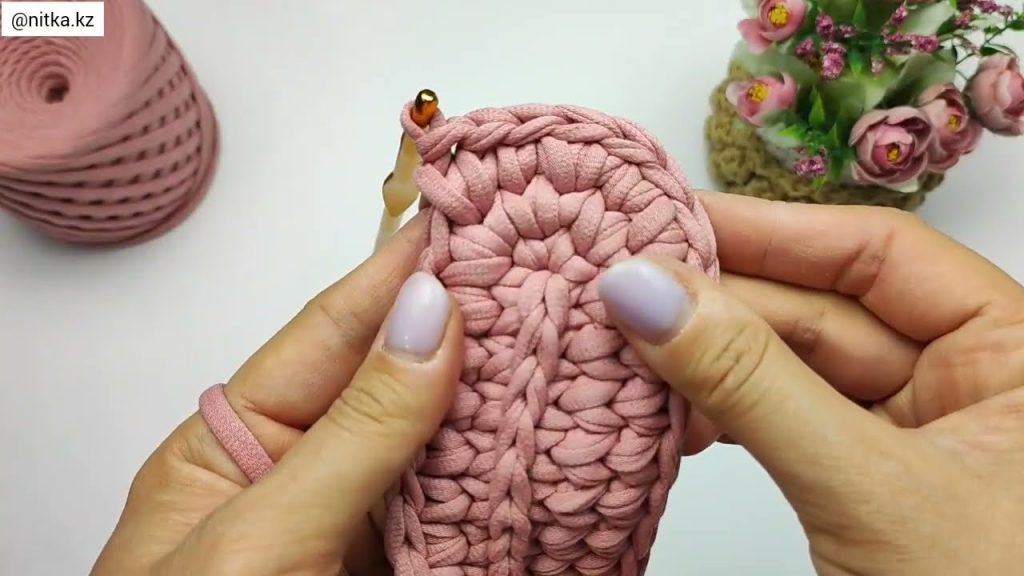
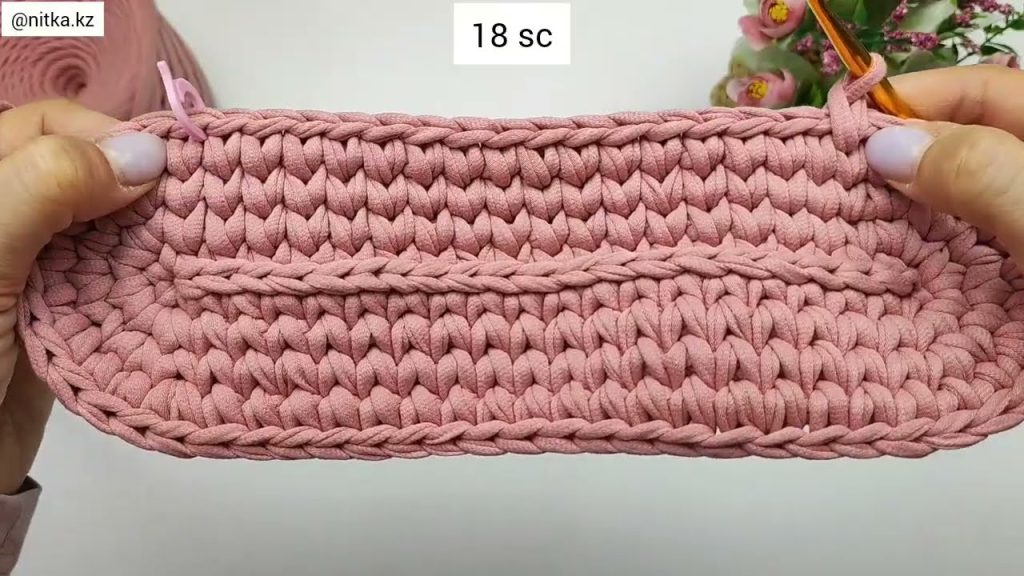
Step 2: Create the Base
- Make a foundation chain: 30–40 chains (depending on desired width).
- Row 1: Single crochet (sc) in the second chain from hook and across.
- Row 2–4: Continue sc to create a sturdy, dense base for the bottom of the tote.
- Optional: Round the corners slightly by adding extra stitches at ends or working in a rectangle shape.
Step 3: Work the Diamond Pattern
There are two main approaches for diamond designs:
Option A: Solid Diamond with Increase/Decrease
- Determine the center point of your bag.
- Start shaping a diamond by increasing at edges each row until the desired width.
- Decrease symmetrically after reaching maximum width.
- Continue until diamond reaches top or desired height.
Option B: Filet Crochet Diamond
- Use double crochet (dc) blocks for solid areas and chain spaces for empty areas.
- A simple diamond chart:
Row 1: 1 dc in center Row 2: 1 dc each side of chain space Row 3: Increase to 3 dc blocks - Work until the diamond is fully formed.
Tip: Filet crochet is easier to visualize with a chart. Each “block” is usually 1 dc + 1 ch.
Step 4: Construct the Sides
- After the diamond is complete, continue single crochet (sc) around sides to make the bag walls.
- Work even rows until the bag reaches your desired height (12–14 inches recommended).
- You can also add additional small diamond motifs along the sides for aesthetic continuity.
Step 5: Shape the Top Edge
- Finish with a row of sc to strengthen the top edge.
- Optional: Work a row of slip stitches (sl st) for a neater finish.
- If you want a fold-over cuff, work 2–3 more rows of sc.
Step 6: Make Handles
- For sturdy handles: chain 50–60 stitches (or adjust for length).
- Attach ends to the top edges of the bag with slip stitches or sc.
- Reinforce by working another row over the base of the handles.
- Optionally, make wide straps by working multiple sc rows to avoid stretching.
Step 7: Finishing Touches
- Weave in all yarn ends using a tapestry needle.
- Block the bag lightly if needed to shape the diamond pattern.
- Add lining if desired (optional for T-shirt yarn bags).
Tips for Medium Difficulty
- T-shirt yarn stretches, so use tight tension for structure.
- Mark the center of the diamond to keep symmetry.
- Check width/height frequently to ensure your bag is balanced.
- Filet crochet is forgiving: mistakes can be corrected without unraveling the whole project.
- Experiment with color changes for a more striking diamond design.
This bag will have a sturdy bottom, a decorative diamond centerpiece, and durable handles, perfect for shopping, beach trips, or casual use.
If you want, I can draw a step-by-step visual chart showing the diamond pattern and where increases/decreases should go—it’ll make this much easier to follow.
Do you want me to create that chart?
Watch tutorial: