 by
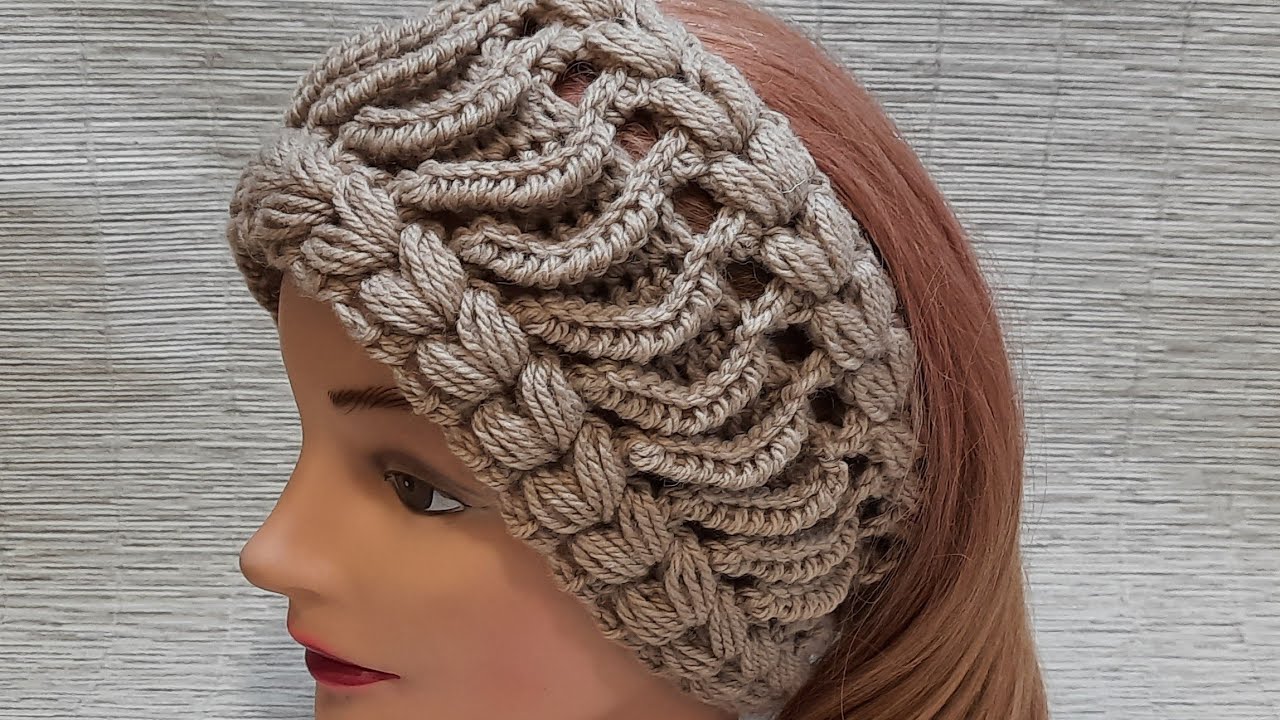
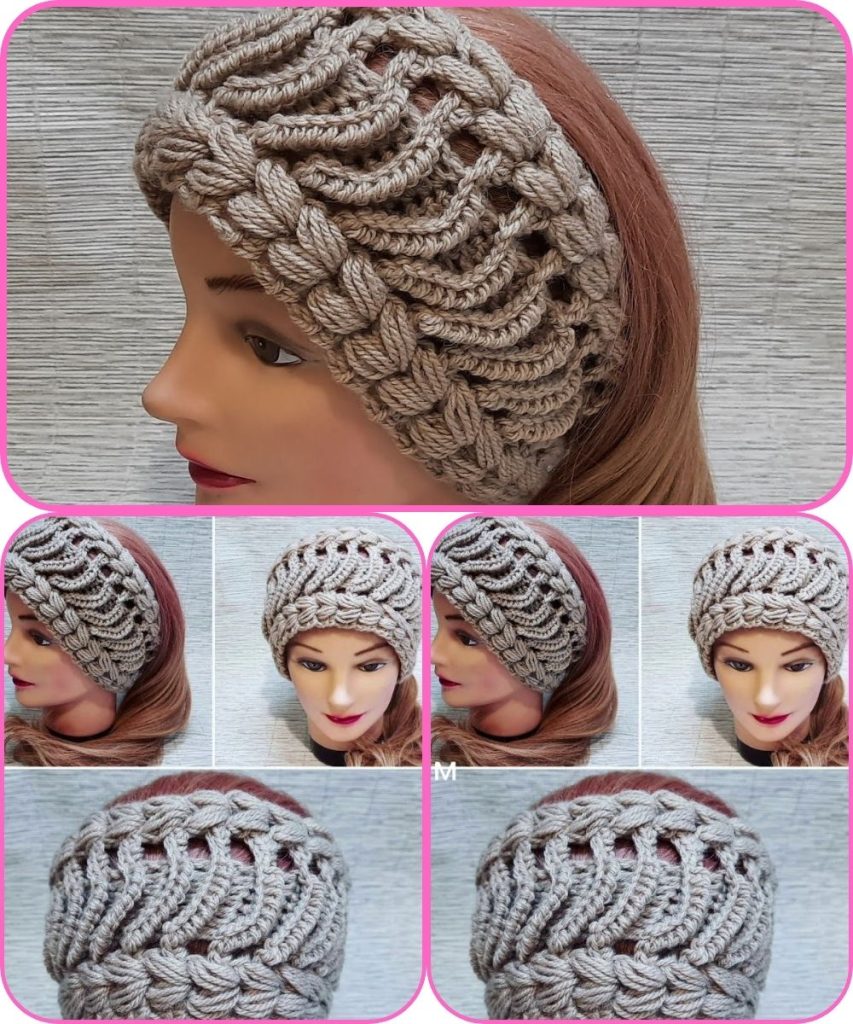
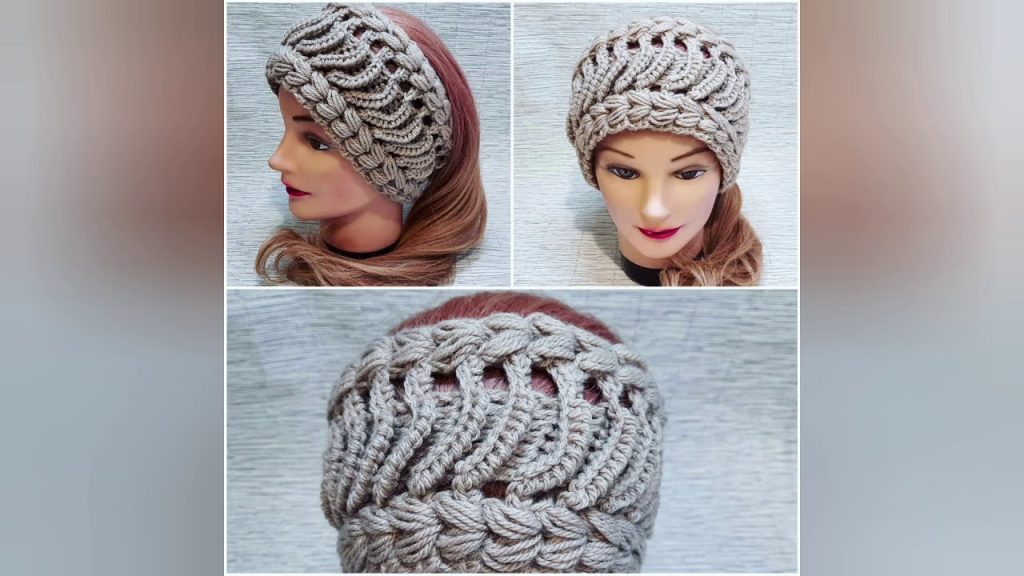
by Absolutely! Let’s make a super simple, original crochet headband that’s stylish and easy—just 2 rows! I’ll give you step-by-step instructions, including materials, stitches, and tips. ❤
🌸 Materials You’ll Need
- Yarn: Medium-weight yarn (worsted, acrylic, or cotton)
- Hook: Size recommended for your yarn (usually 5–6 mm)
- Scissors
- Tapestry needle for weaving in ends
🌸 Stitches Used
- Chain (ch) – foundation stitch
- Single Crochet (sc) – basic tight stitch
- Slip Stitch (sl st) – for joining and finishing
🌸 Instructions
Row 1: Foundation
- Chain the desired length to fit around your head snugly but comfortably.
- Example: For an adult, chain about 60–70 stitches depending on your yarn thickness.
- Single crochet in the 2nd chain from hook and across the row.
- You now have a straight, dense strip that will be the width of your headband.
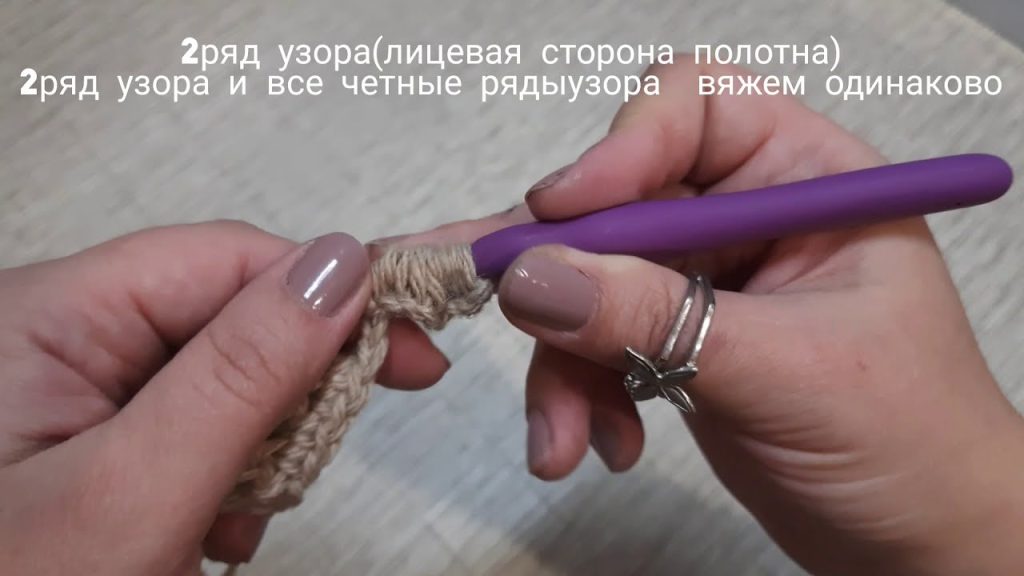
Row 2: Decorative & Stretchy Top Row
- Chain 1 and turn your work.
- Pattern:
- Skip the first stitch, 1 sc in the next stitch, ch 1, skip 1 stitch, sc in next stitch…
- Repeat this sc, ch, skip across the row.
- This creates a subtle, airy pattern that gives stretch and a delicate look.

Finishing
- Fasten off and leave a long tail for sewing.
- Join ends of the band with a whip stitch or mattress stitch using the yarn tail.
- Weave in all ends using a tapestry needle.
🌸 Optional Embellishments
- Add a small crochet flower or bow on one side.
- Use variegated yarn for color interest without extra effort.
- Stretch slightly after finishing to give a soft curve.
✅ Notes
- This pattern works in any width: make it wider for a turban-style band, or narrower for a sleek, minimalist look.
- Only 2 rows makes it quick to make and beginner-friendly.
- The second row creates a unique lacy effect without complicating the stitches.
If you want, I can draw a simple diagram showing the 2-row pattern visually—it makes it super easy to follow even if you’ve never crocheted before.
Do you want me to do that?
Watch tutorial: