 by
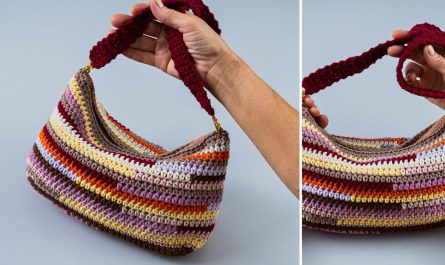
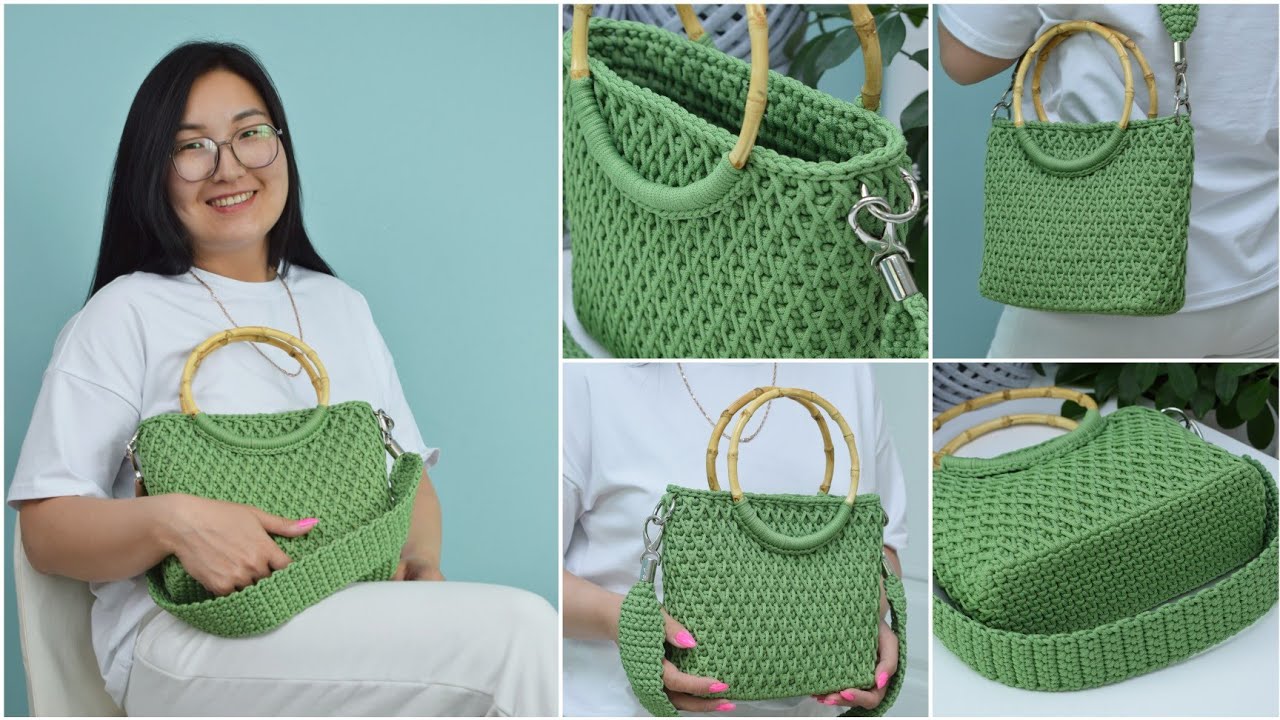
by Here’s a detailed, step-by-step guide for making a crochet honeycomb pattern in a circle — perfect for creating a beautiful round handbag. This pattern combines textured stitches and structured shaping to form a durable, eye-catching bag.
🧶 Materials You’ll Need
- Yarn: Worsted weight cotton or a sturdy acrylic blend (choose 2 colors — one for the honeycomb and one for the background).
- Hook: 4.0 mm or 4.5 mm crochet hook (adjust to match your yarn).
- Stitch markers
- Yarn needle
- Scissors
- Bag lining (optional)
- Handles (optional — leather straps or crochet straps)
🍯 Overview
We’ll make two round honeycomb panels and then join them together to form a handbag body. The honeycomb pattern uses front post double crochet (FPdc) and back post double crochet (BPdc) to create the 3D hexagonal texture.
🧩 Abbreviations
| Symbol | Meaning |
|---|---|
| ch | chain |
| sl st | slip stitch |
| sc | single crochet |
| dc | double crochet |
| FPdc | front post double crochet |
| BPdc | back post double crochet |
| st(s) | stitch(es) |
| R | round |
🌸 Part 1: Creating the Circular Base
- Magic Ring: Start with a magic ring (or ch 4 and join with sl st).
- R1: Ch 2 (counts as dc), 11 dc into ring. Join with sl st to top of ch-2. (12 sts)
- R2: Ch 2, 2 dc in each st around. Join. (24 sts)
- R3: Ch 2, 1 dc in next st, 2 dc in next. Repeat around. Join. (36 sts)
- R4: Ch 2, 1 dc in next 2 sts, 2 dc in next. Repeat. Join. (48 sts)
- Continue increasing evenly until your circle reaches the desired diameter (e.g., 10–12 inches for a handbag panel).
👉 This forms the flat circle base — now we add texture.
🍯 Part 2: Creating the Honeycomb Texture
The honeycomb texture alternates front post and back post stitches in staggered rows.
- R1 (setup round): Ch 2, FPdc around next dc, BPdc around next dc — repeat around. Join.
- R2: Ch 2, FPdc around FPdc from previous row, BPdc around BPdc. Join.
- R3: To make the honeycomb shift — Ch 2, BPdc around FPdc from previous row, FPdc around BPdc. Join.
- R4–R8: Repeat rounds 1–3 alternately. This creates raised hexagonal cells like a honeycomb.
🔸 Tip: Change colors every 2–3 rounds to highlight the “cells.”
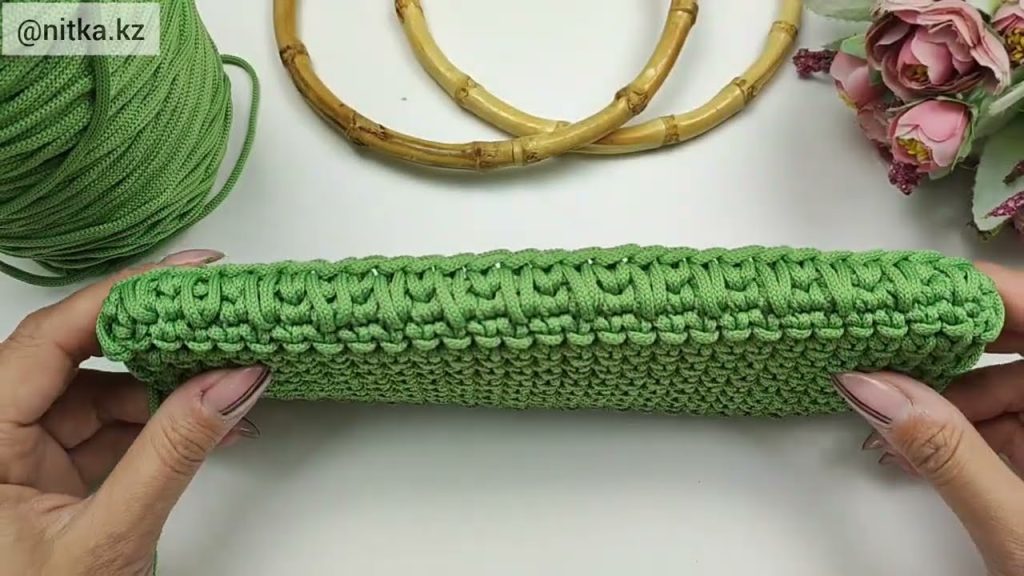
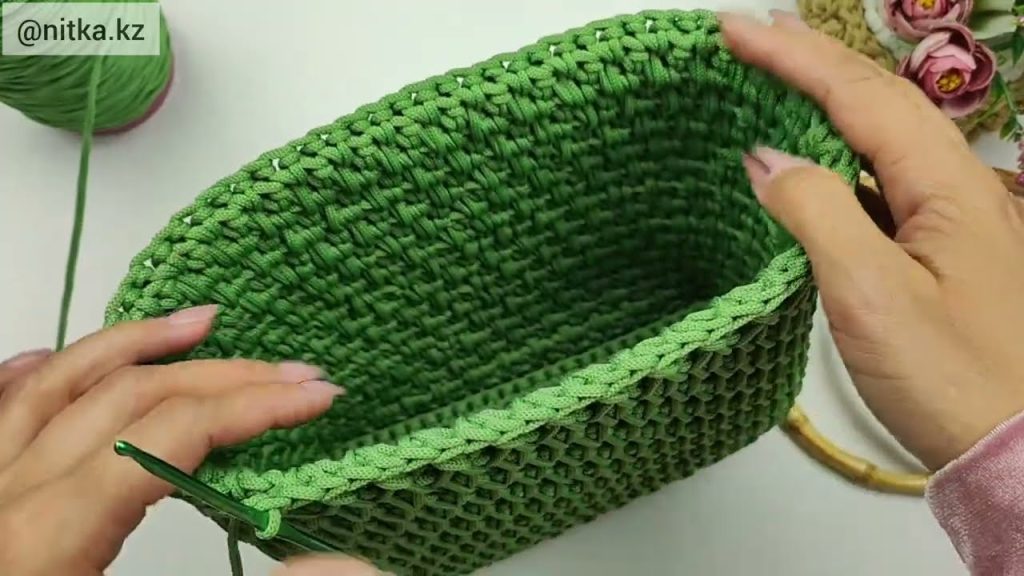
🧵 Part 3: Shaping the Handbag
- Make two identical honeycomb circles.
- Place them wrong sides together.
- Join with sc or sl st around the edges, leaving a 6–8 inch opening at the top for the bag opening.
- To add depth, you can crochet a side strip (2–3 inches wide, same honeycomb stitch) and sew or crochet it between the two panels.
👜 Part 4: Finishing Touches
- Handles: Crochet chains wrapped in sc stitches, or attach ready-made leather straps.
- Lining (optional): Sew a fabric lining to fit inside for strength.
- Closure: Add a zipper, button flap, or magnetic snap.
🌼 Optional Embellishments
- Crochet small bees or flowers to sew on the honeycomb for a whimsical touch.
- Use metallic gold thread with the main yarn to make the honeycomb sparkle.
💡 Tips for Success
- Keep your tension even — textured stitches can tighten the circle.
- If the circle starts to ripple or curl, adjust your increase count slightly.
- Use stitch markers every round to keep track of joins.
Would you like me to include a written chart (stitch diagram) or photo-based tutorial layout for this pattern next? I can format it like a professional pattern PDF with rounds labeled clearly.
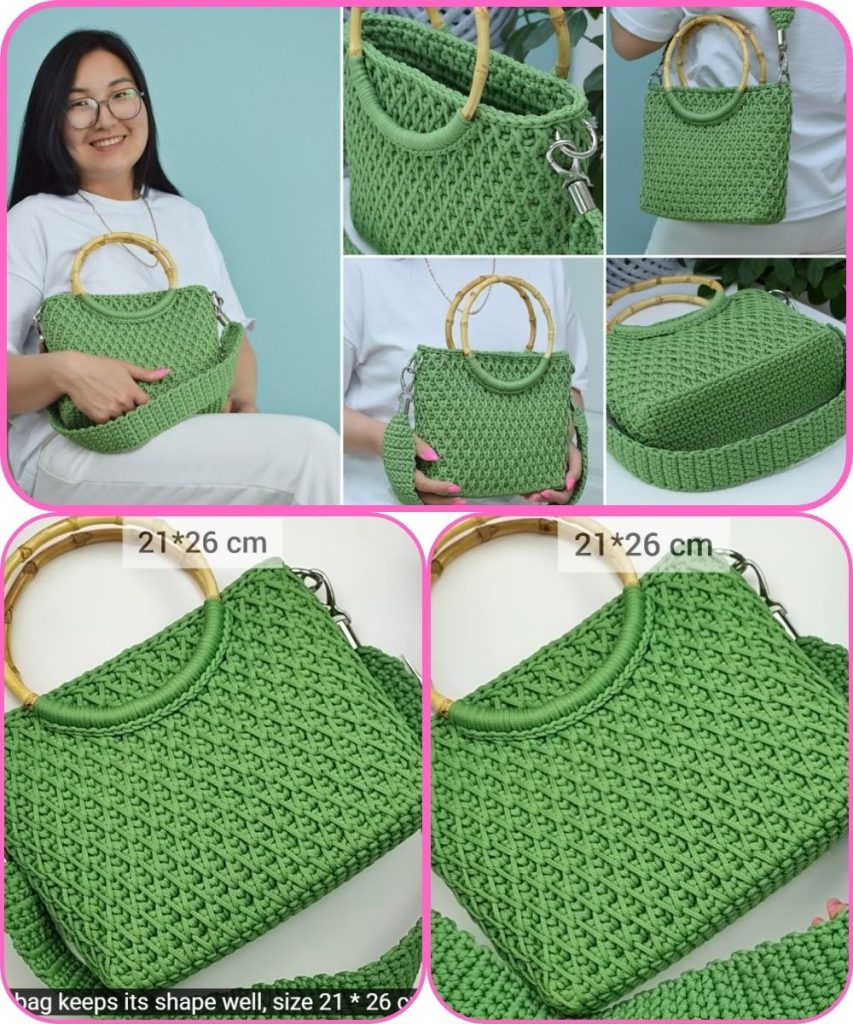
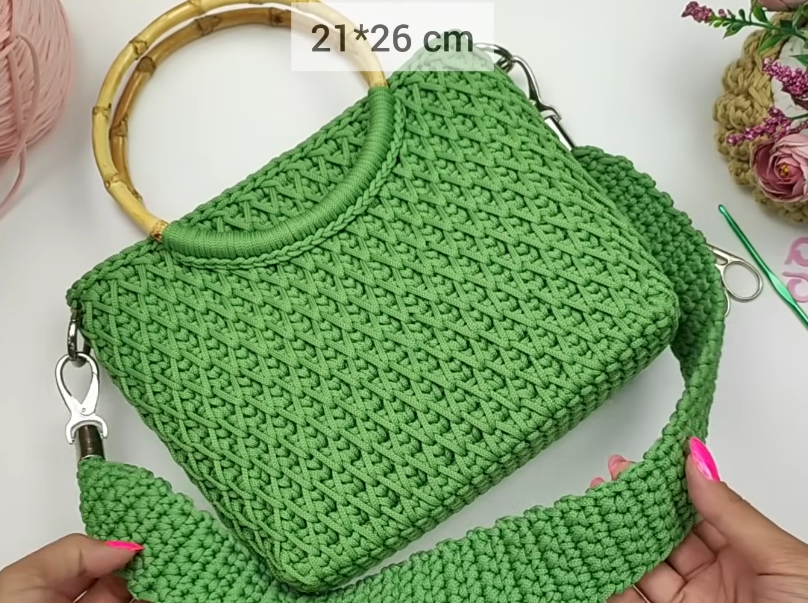
Watch tutorial: