 by
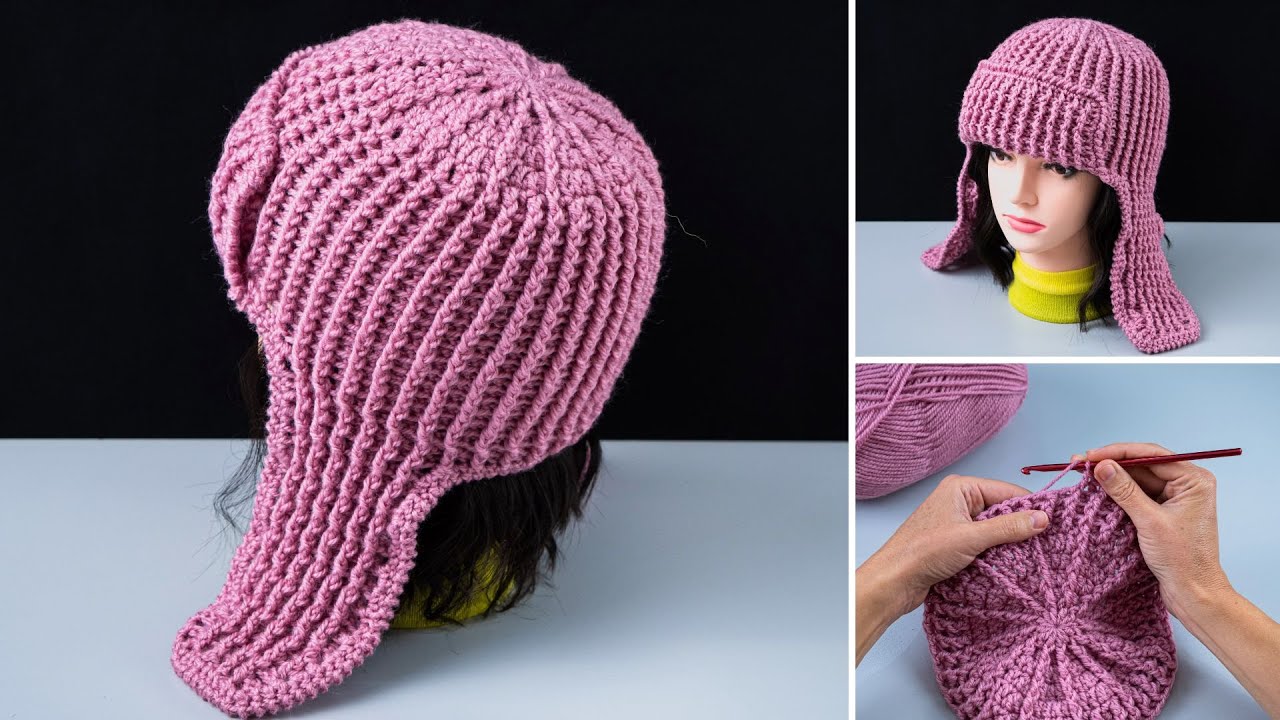
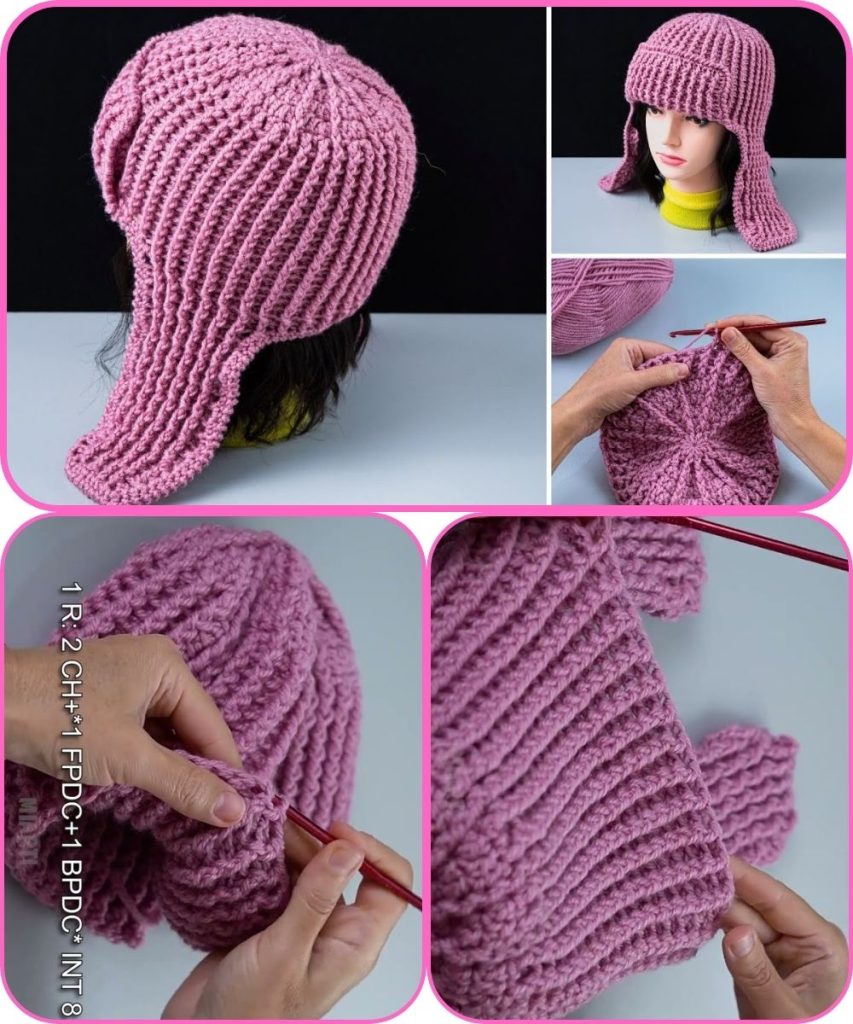
by Absolutely! Let’s go step by step. I’ll give you a detailed guide on how to crochet an earflap hat using a simple stitch pattern. We’ll keep it beginner-friendly, using basic stitches like single crochet (sc) or half double crochet (hdc).
Materials Needed
- Yarn: Medium weight (worsted, #4) yarn. Choose any color you like.
- Crochet hook: Usually H/8 (5 mm) works well for worsted yarn.
- Scissors
- Yarn needle (for weaving in ends)
- Measuring tape (optional, to check head size)
Basic Stitches Used
- Chain (ch): The foundation of crochet.
- Single crochet (sc): Simple and tight stitch, good for hats.
- Half double crochet (hdc): A little taller than sc, gives a bit more drape.
- Slip stitch (sl st): To join rounds.
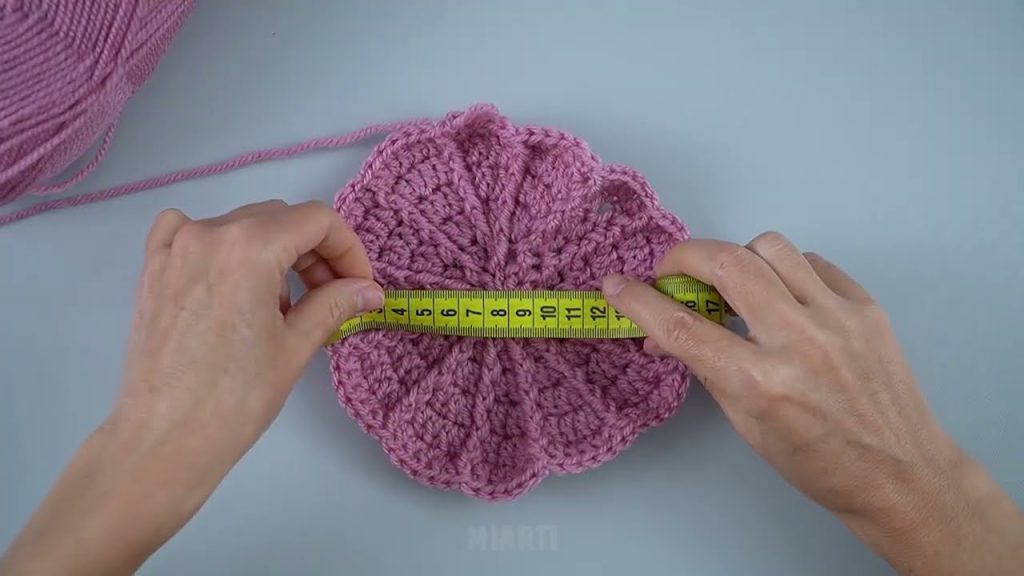
Step 1: Measure and Plan
- Adult hat size: ~20–22 inches (head circumference).
- Kids: ~18–20 inches.
- The hat height (without earflaps) is usually 7–8 inches for adults.
- Earflaps: ~4 inches long.

Step 2: Start with the Crown
- Make a magic ring (or chain 4 and join with a slip stitch to form a ring).
- Round 1: Crochet 8–10 hdc into the ring. Join with a sl st.
- Round 2: Increase in each stitch around (2 hdc in each stitch).
- Round 3: Hdc in next stitch, 2 hdc in next stitch repeat around.
- Round 4: Hdc in next 2 stitches, 2 hdc in next stitch repeat around.
Keep increasing in this pattern, spacing out the increases evenly. This will make the hat gradually widen to fit the head.
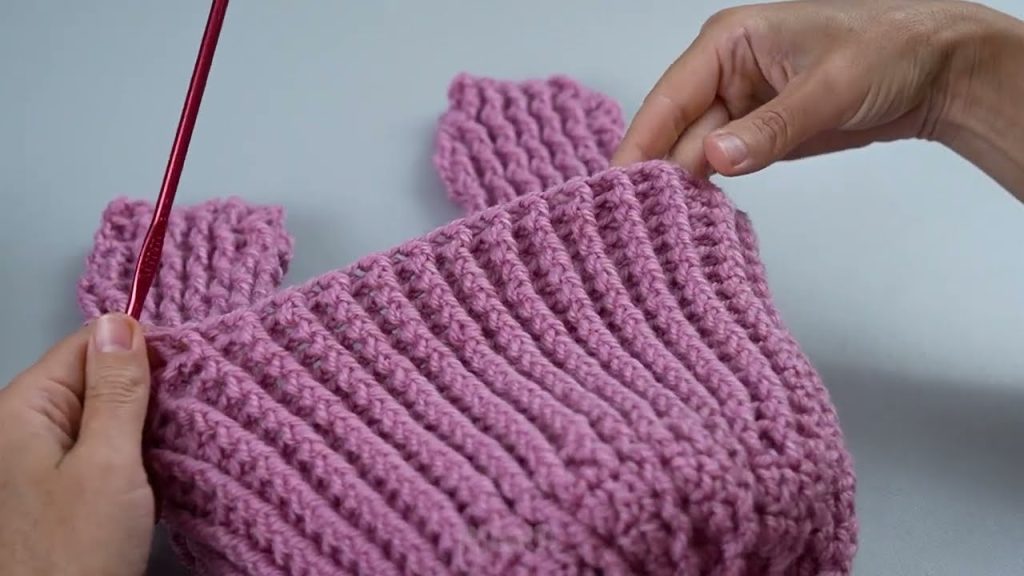
Step 3: Crochet the Body
- Once the crown reaches the desired width (~6–7 inches for adults), stop increasing.
- Continue crocheting in rounds without increasing until the hat reaches the desired height (~7–8 inches).
- This is where you can use a simple stitch pattern:
- Single crochet in each stitch around, or
- Half double crochet in each stitch around for a softer look.
Step 4: Add the Earflaps
You’ll make two earflaps, one on each side.
- Find the positions:
- Count stitches across the base of the hat and mark where the earflaps will go (usually opposite sides).
- First row: Attach yarn at the marked stitch and ch 1, sc across a set number of stitches (usually 6–8).
- Decrease for shaping:
- Next row: Sc2tog at the beginning and end of the row to taper the earflap.
- Continue until the flap is ~4 inches long.
- Second earflap: Repeat on the other side.
Step 5: Add Finishing Touches
- Weave in all yarn ends with a yarn needle.
- Optional: Add braided ties at the bottom of the earflaps:
- Cut 3 strands of yarn about 18 inches each.
- Braid and tie a knot at the end.
- Optional: Add a pom-pom to the top for a fun look.
Tips
- Keep your tension even; too tight can make the hat stiff, too loose can make it floppy.
- Use stitch markers to mark the beginning of each round.
- You can make a striped pattern by changing colors every few rows.
If you want, I can also draw a simple stitch diagram for this earflap hat so it’s visually easier to follow—it’s super helpful for beginners.
Watch tutorial: